Leaderboard
.thumb.jpg.2f0f241a63381e5644f287abacd76760.jpg)


Popular Content
Showing content with the highest reputation since 23/02/25 in all areas
-
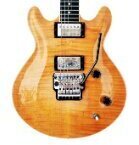
Put it all back together, polished it up and it plays just fine. What a bargain

 5 points
 -
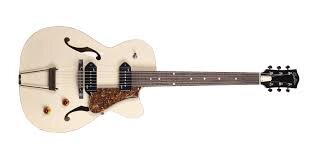
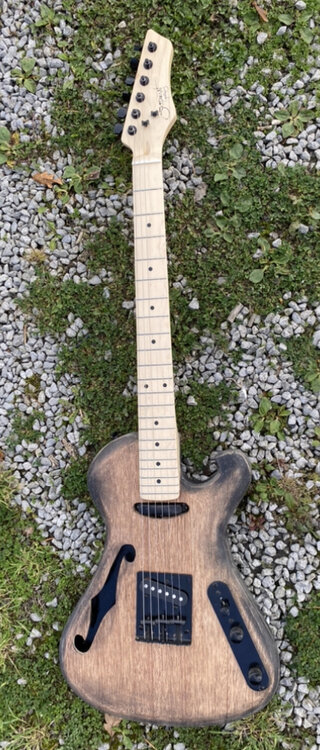
Quick update to say I pulled the trigger on the Thinline Godin. It's new, coming from the States and even with delivery and taxes will be £300 cheaper than the best price I could find in the UK!
 3 points
 -
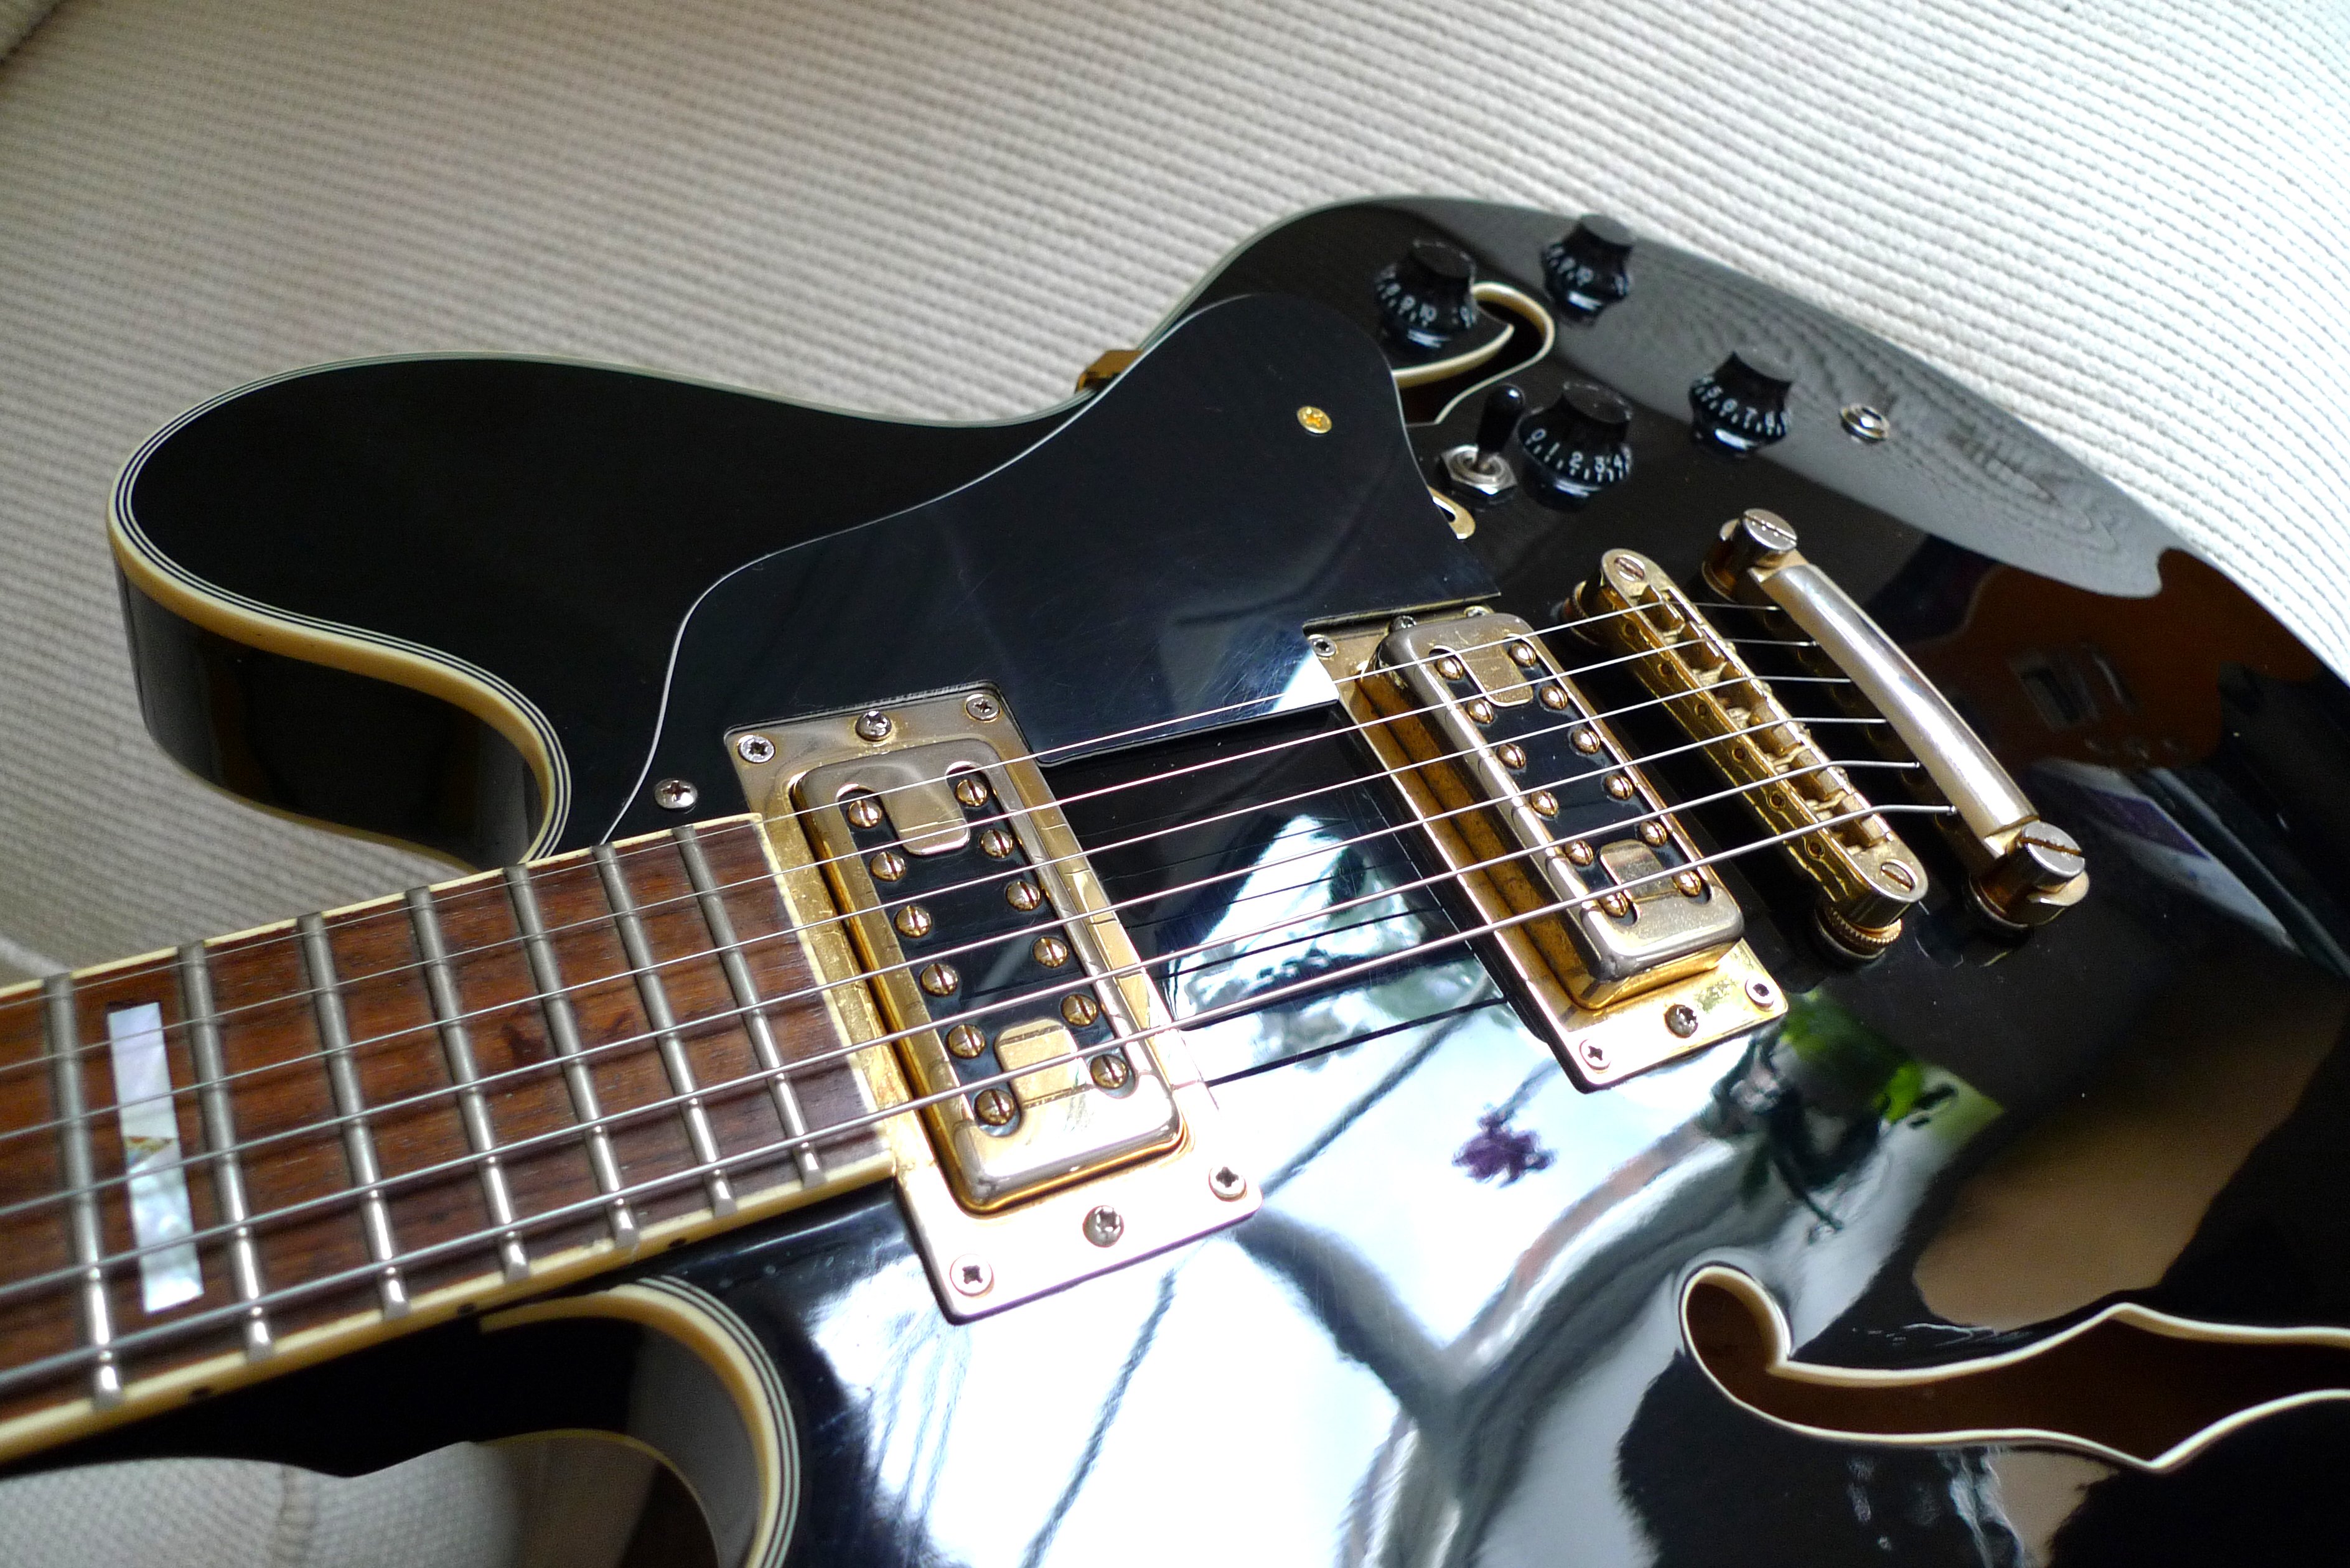
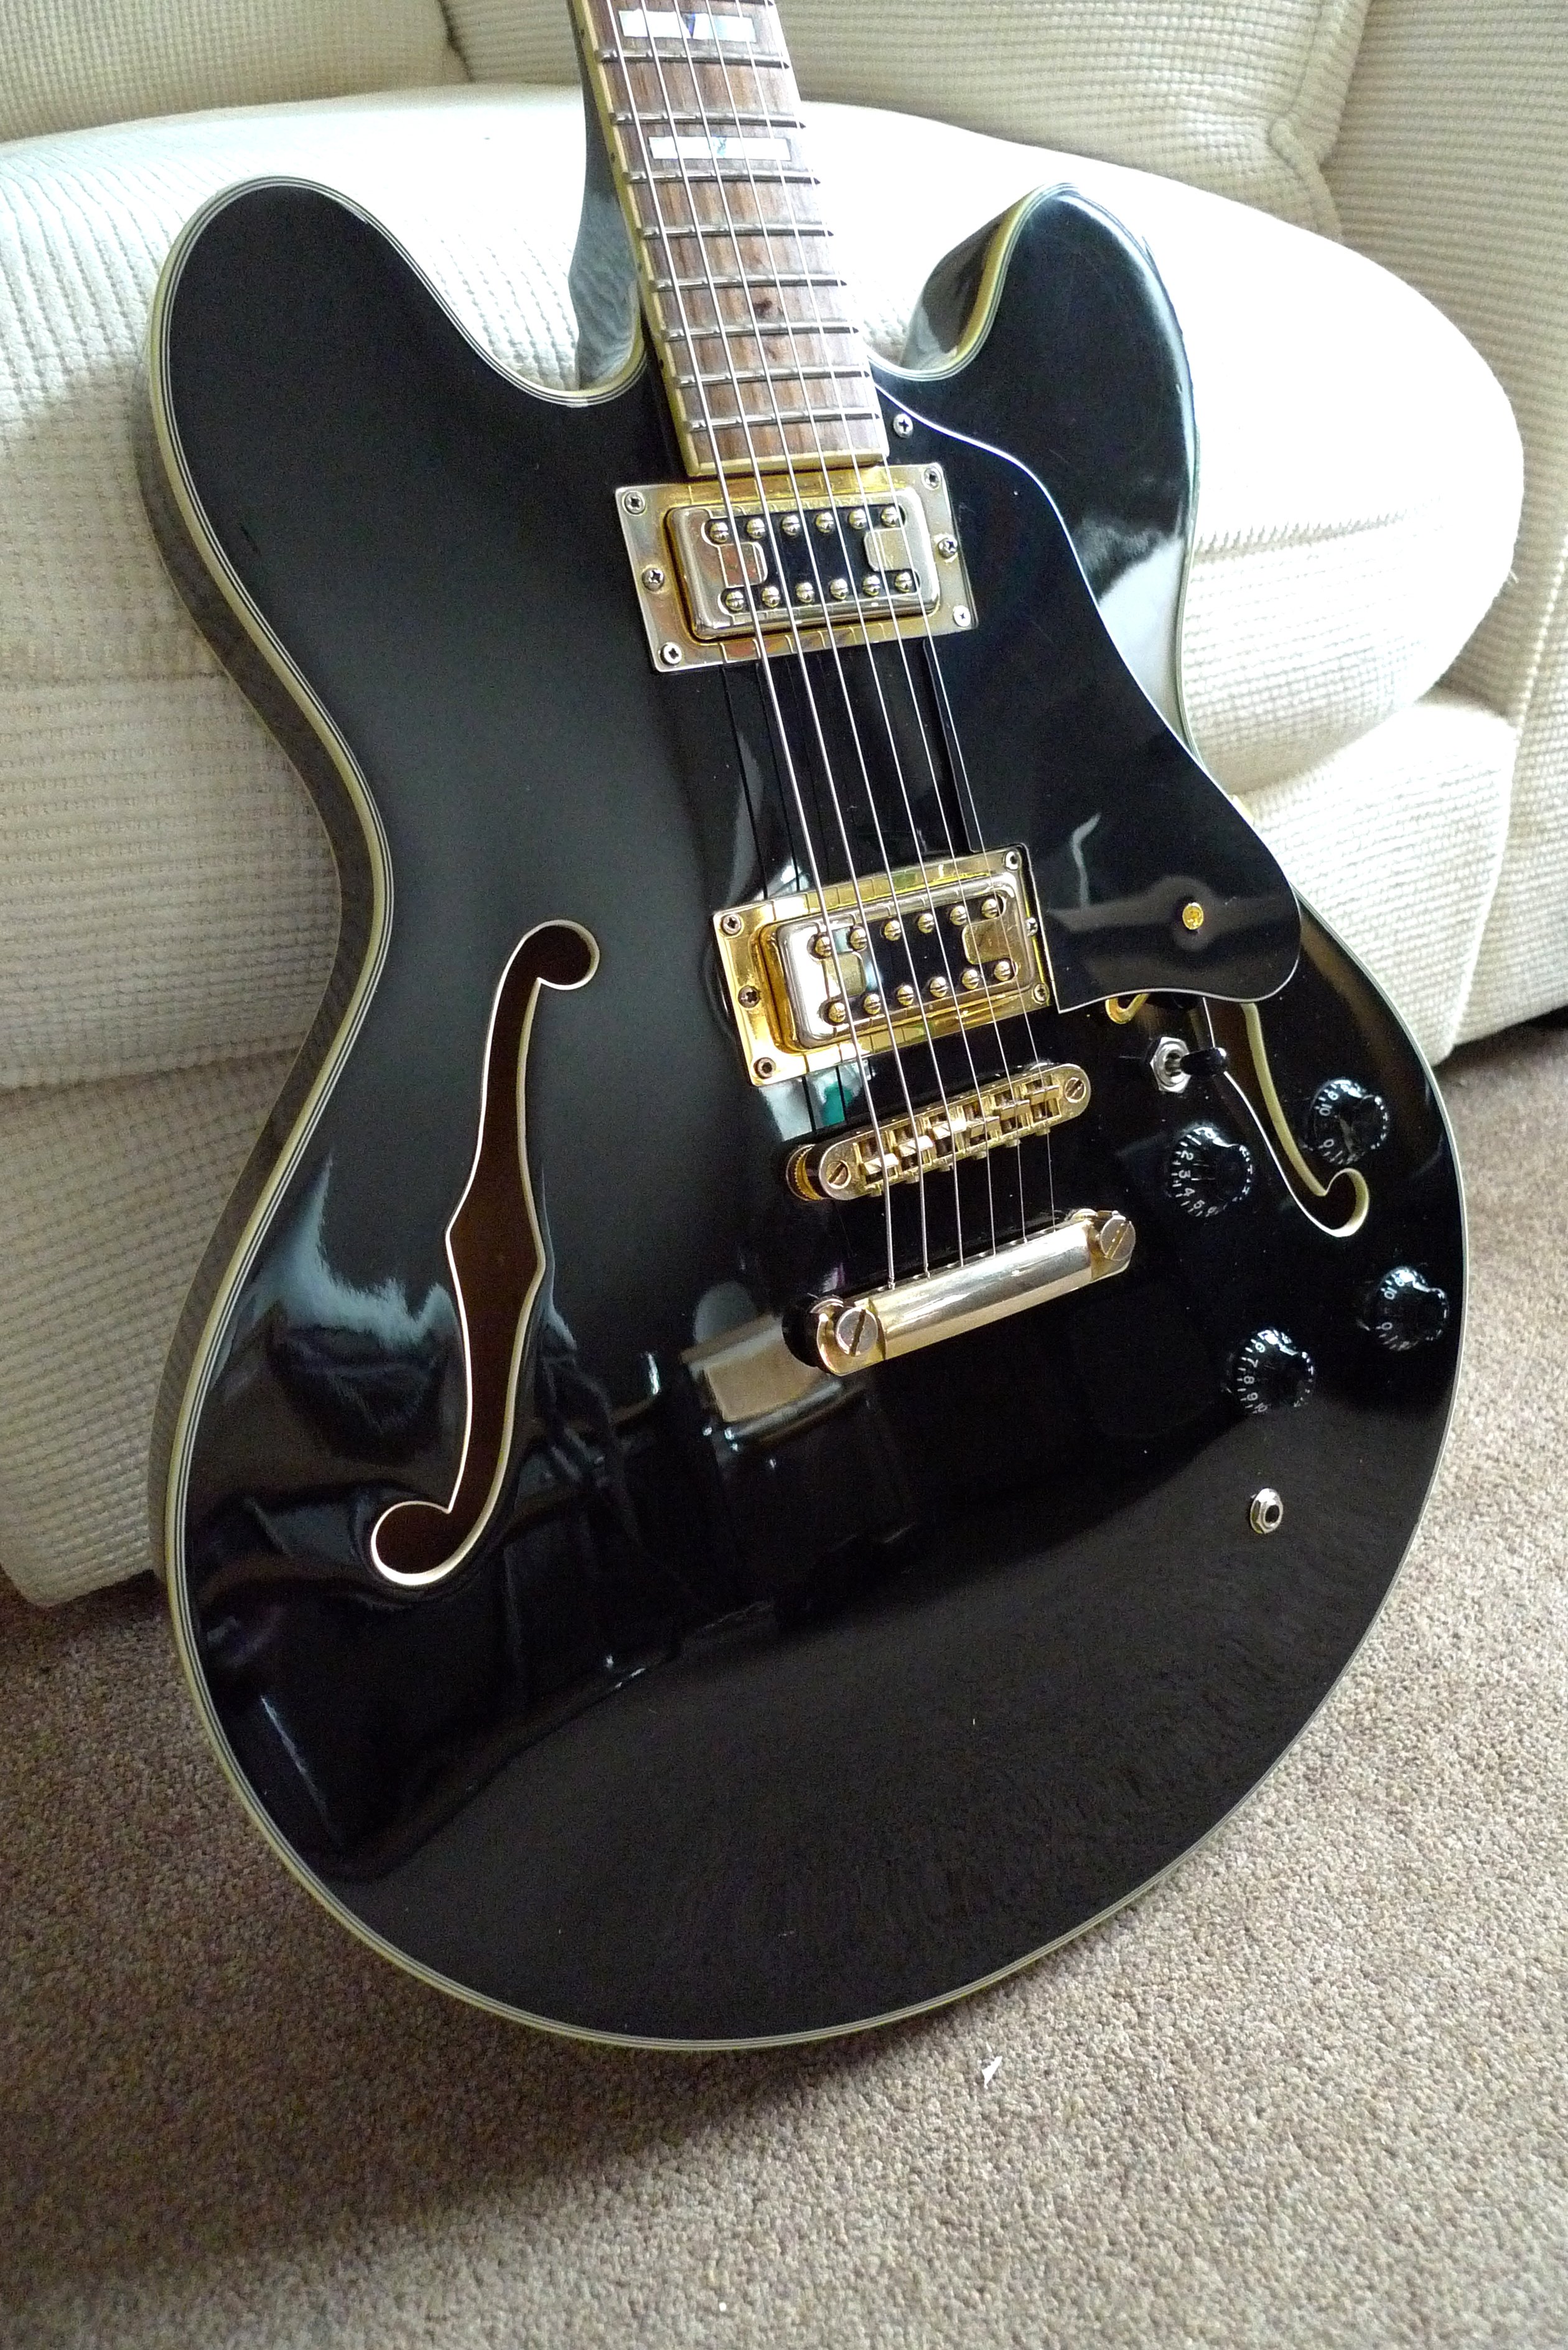
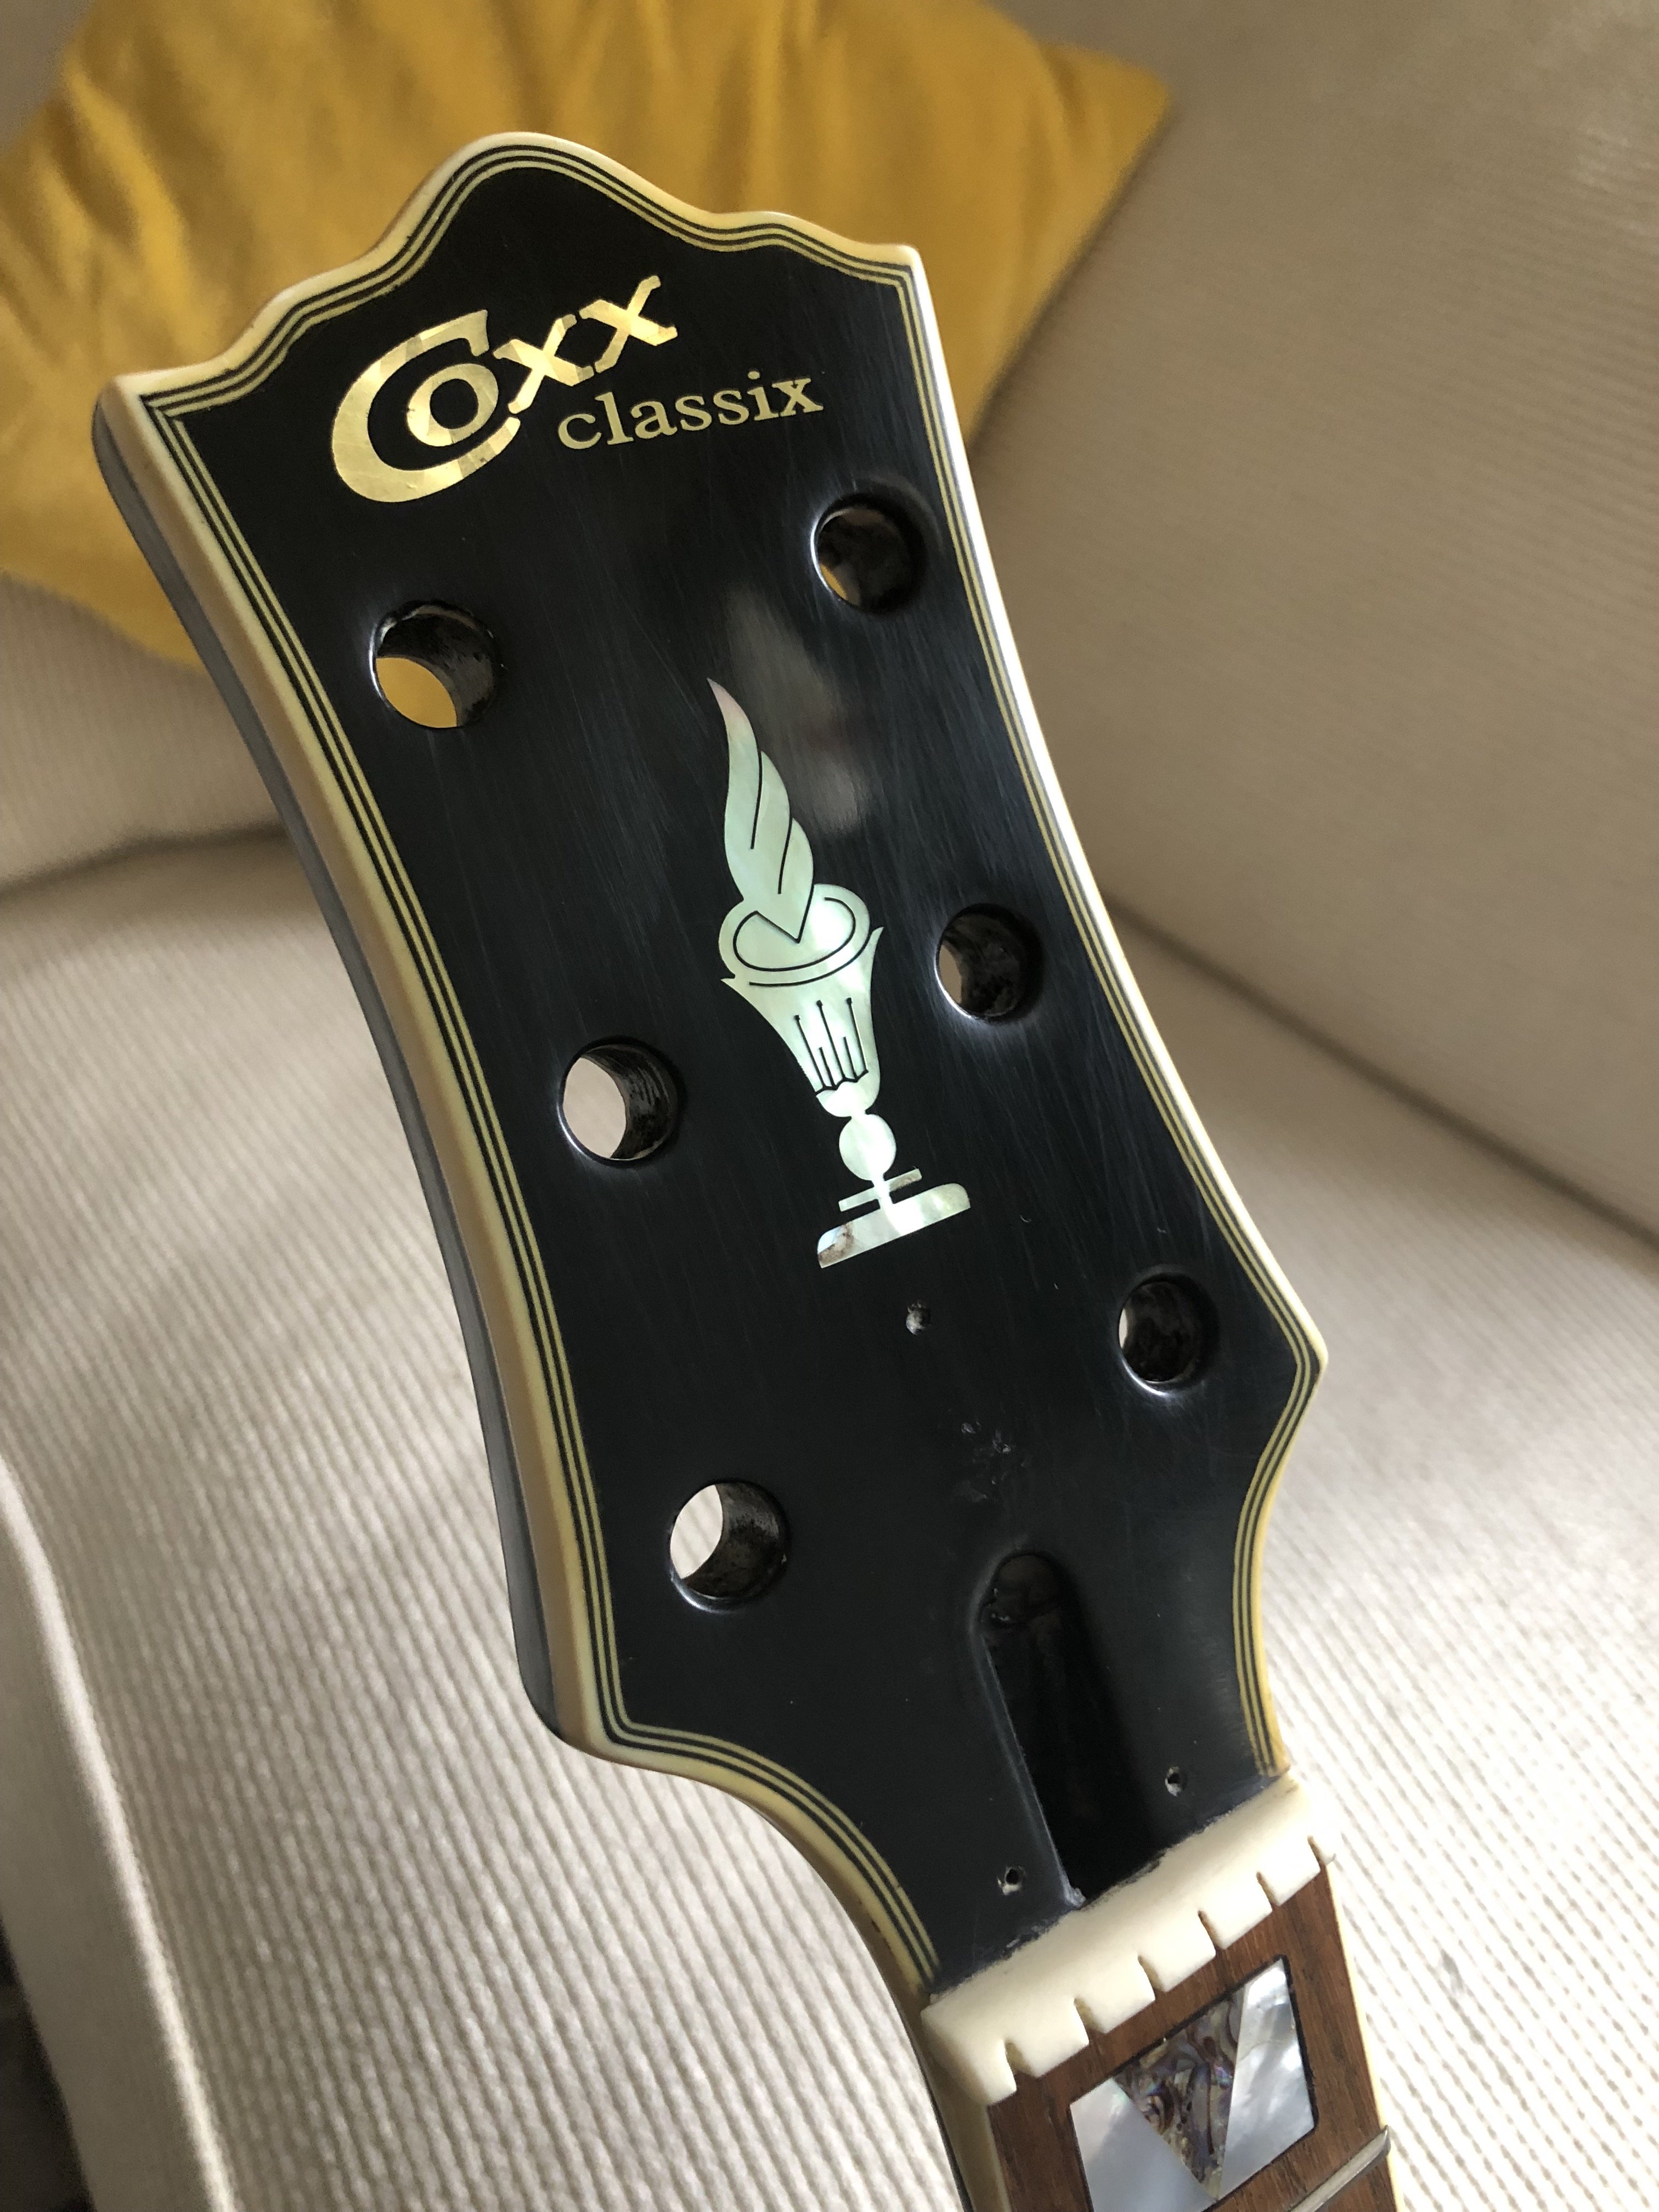
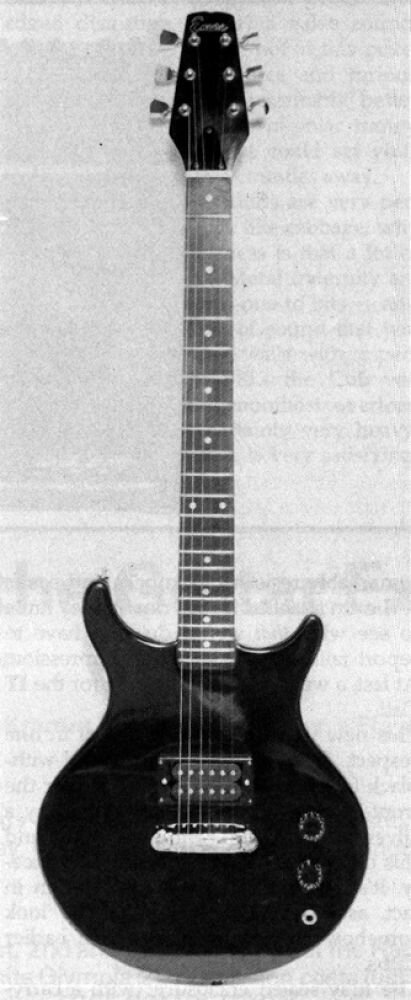
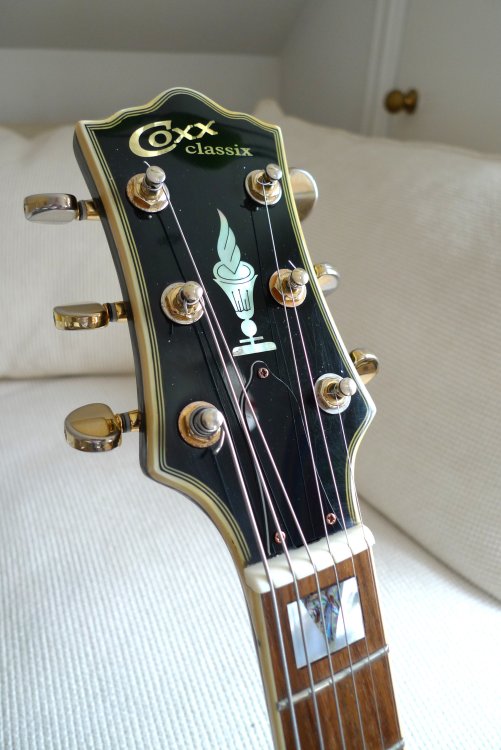
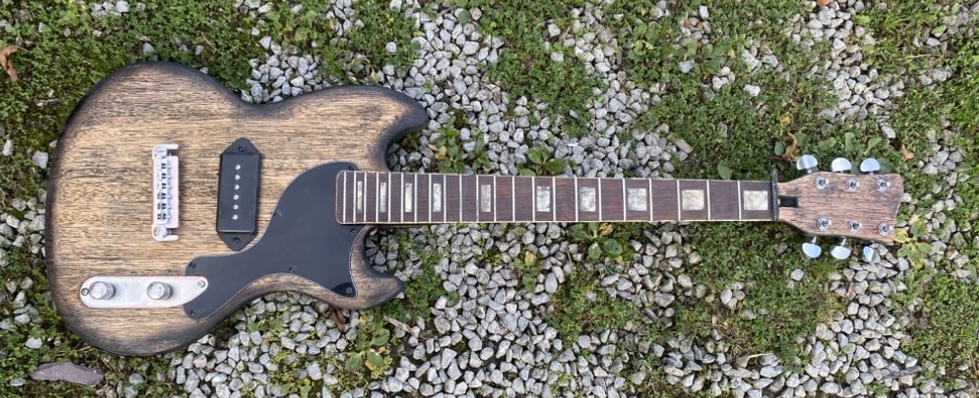
After a bit of work with fine wet and dry and a polish up with brasso, it transpires it's a Coxx Classix.
 3 points
 -
What a palava. OK so GC has been offline for a few days due to a mix-up in transfer of content from the old server (which was upgraded due to email notification issues on BC) to the new server. The old server subscription cancelled last week taking GC down with it. Then we had issues trying to get things set up on the new server. As you can see, we have managed to restore GC but the only back up on the old server was from January. Sorry sorry sorry sorry sorry to any of you who had made the effort to post detailed or lengthy replies during that time, I've personally lost at least one lengthy post as well. If you need to flame, go ahead. We had to unravel a whole load of secondary issues to do with databases not working quite right, upgrades not installing quite correctly, DNS and nameservers not being what they should be. However, thankfully, we have made it through the other side and GC is faster and more stable than ever. I don't expect this perfect storm to happen again and thanks in advance for your patience and understanding.3 points
-
Yeah, I think that came in with the change of image, when he grew the beard and went all cosplay-biker. The one I always remember him with was the LP custom with the Confederate Battle Flag on it - back in the 80s when nobody in the UK really realised what it signified, and thought it was just sort of a cowboy flag (don't even get me started on the closet-racist idiots in the rockabilly scene who turn up waving it at weekenders, wearing their Golly badges and claiming it's just their "rock and roll rebel flag, nothing to do with racism" (not even the racism spewed on their own facebook pages - honest, guv!). Most of the surface of the guitar was sanded to the bare wood by this point. He used to claim in interviews that shortly after he'd had it painted, he saw the guy from Warrant with a flag guitar just like it, didn't want to be associated with him, and went straight to the garage with coarse sandpaper and the guitar in hand. I have a dim memory I read somewhere that Rory called that his "number 3" (or was it 2?) - number one being a vintage Tele that I think was mostly used in the studio. Great section on his instruments here: https://rorygallagher.com/instruments/ In early 2025, a statue of Rory was unveiled outside the Ulster Hall in Belfast: Some got funny about him being sculpted with the Tele at the time and not the Strat, but it was based on a famous photo of him playing live, with the Tele, at the Ulster Hall back in the day. Rory was much respected in Belfast for insisting on still playing there annually right through the peak of the Troubles when a lot of big names (including, notably, Belfast's own and one of the biggest pricks in the music industry, Van Morrison) just refused to go near the place. Big influence on the next generation of Irish guitar players, not least Jake Burns (who imo has never gotten the full credit he deserves as either a songwriter or a guitar player). It's interesting how Hank was a huge figure for a whole generation of guitarists, but that has very much not carried over to another generation. (I'm sure the same could be said for many of my guitar heroes - or, hell, even guitar in general for the kids coming after us now.) In an odd way, while yes most of us who are aware of the Shadows might think of the Strat first, I think he now has somewhat of a bigger following among Burns enthusiasts, for the obvious reason. Buddy Holly.... maple board, two tone burst, early Stratocaster.... nobody else comes to mind as fast. Arguably the most important man in guitar-based rock and roll, next only to Leo Fender. It Was Buddy who popularised not only the solid body electric guitar in mainstream rock and roll, but also the bass guitar with the Crickets, and the "two guitars, bas and drums" set-up that is still the basis of so, so many bands today. He very much comes to mind when I see a 70s Strat with the black pickup covers and knobs on white plate, especially with a white body and rosewood board. I vaguely remember him playing a signature model some time back that dispensed with the middle pickup... did he have the middle pickup unwired in his original? I've heard of a surprising number of players having quite unconventional wiring for stage guitars that is often much more limited than you'd expect from the standard look to them. I guess that's partly for aesthetics, and maybe not to give away a secret? Possible... the one in the top photo above looks white to me. I think natural was an official finish from 69, though, that was at the peak of its popularity in the 70s and into the 80s, so he may well have had one. Possibly it got more studio use? I've heard it said that when Jimi had a bit more money later on, he preferred black or white solid finish Strats for stage, and kept the burst ones for the studio, as he figured the solid colours looked better in B&W photos. Who knows, though... there's a lot of glorious myths that take on a life of their own (TV Yellow, Jimi's parakeets, and all the rest).2 points
-
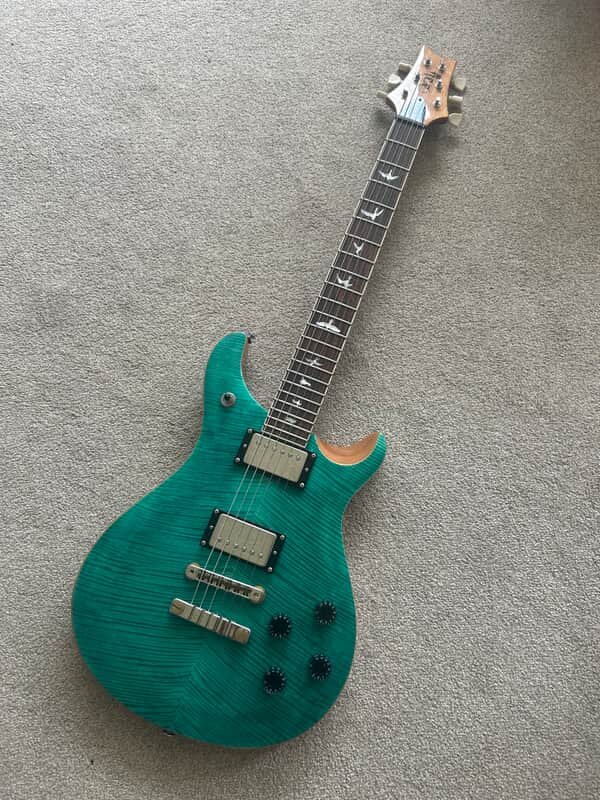
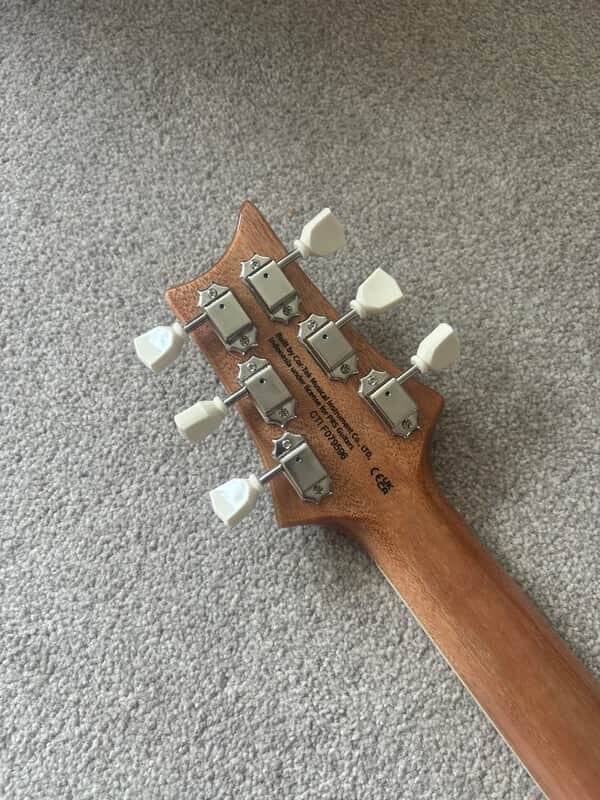
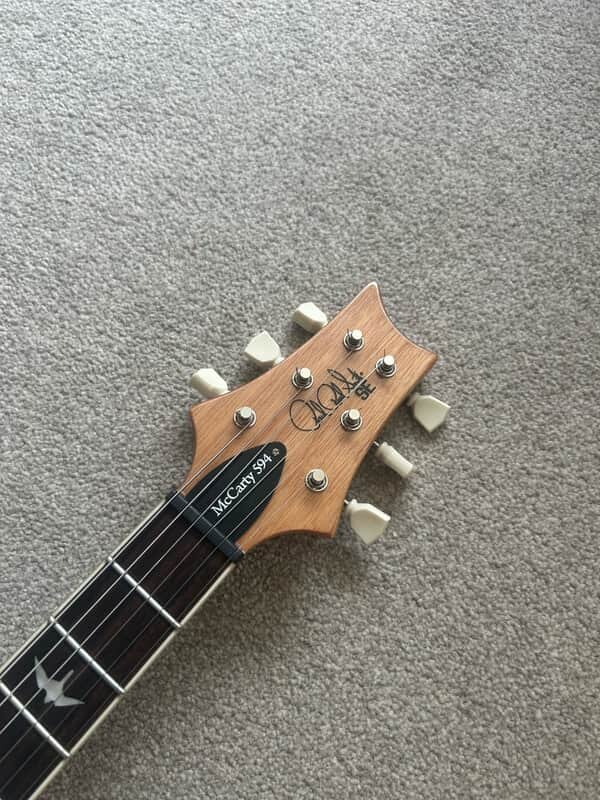
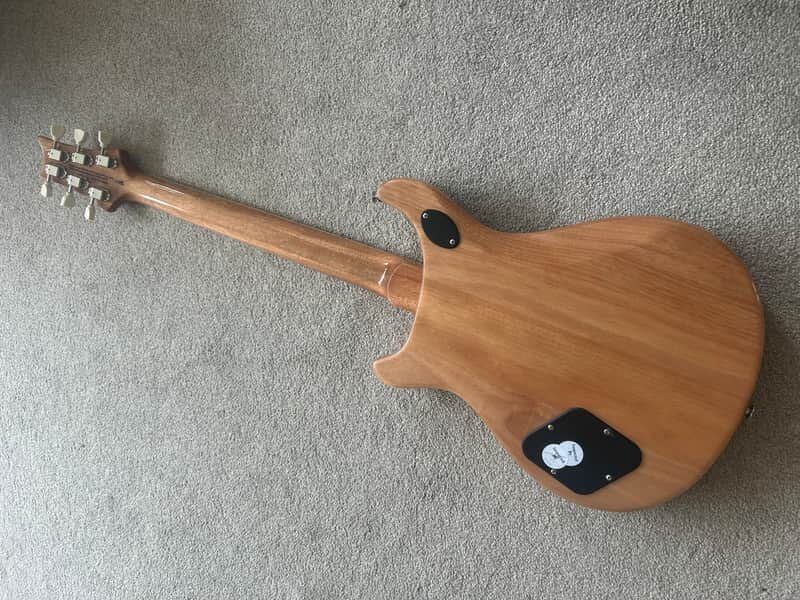
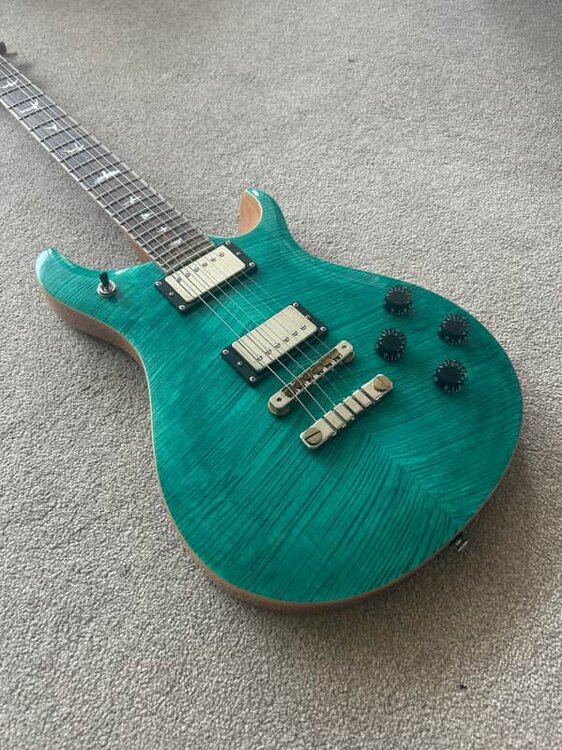
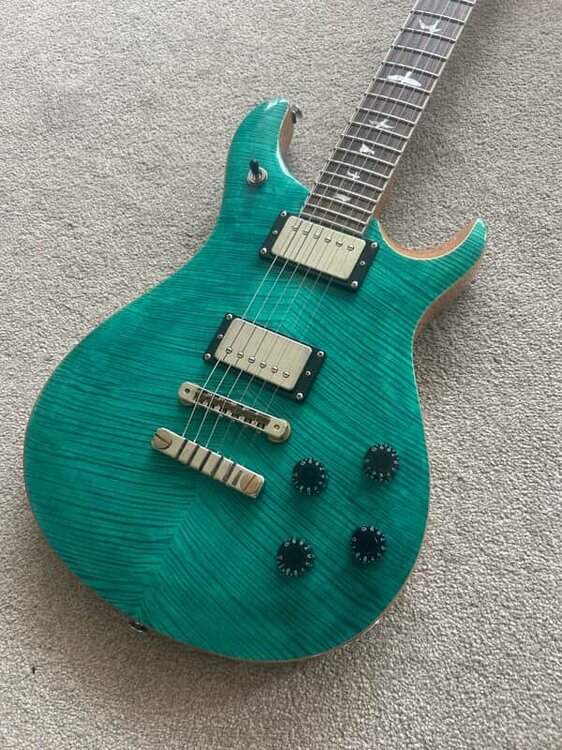
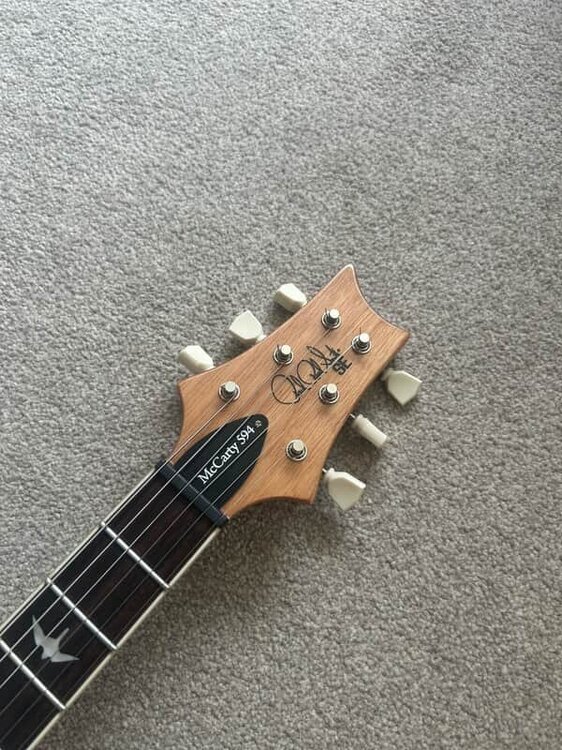
PRS SE 594 McCarty Doublecut Turquoise Electric Guitar. In excellent condition! Basically mint condition. Not a ding or mark. Has just had a new set of Daddario 10s fitted. Comes with PRS SE Gig Bag.


 2 points
 -
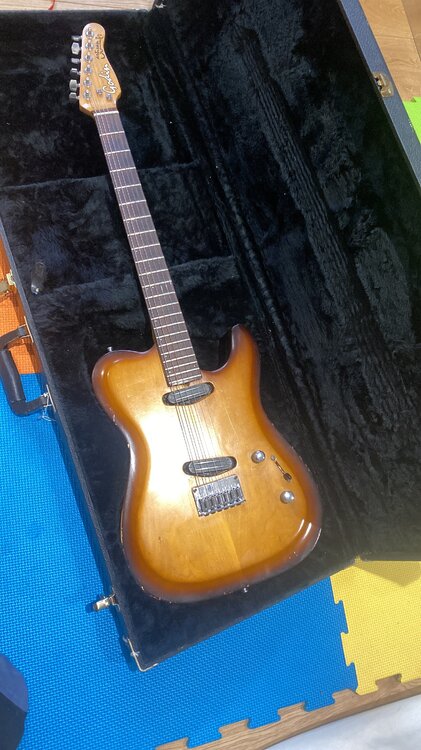
Coming from the light side (basschat) and after having a friend of a friend show me how to get the most from my hx stomp, the other week I picked up an electric to try and learn… it’s from 1990 weighs less than 3kg and has switches on both knobs that makes it sound different- learning needs to happen !
 2 points
 -
Hi! It seems I joined a while ago but forgot. I started playing guyitar when I was in my teens back in the early/mid 70s the moved to bass. Now bandless on bass, I am about to pick up a guitar again for the first time in many years and have a few questions. I have had a Mexican Fender Telecaster for some years, stashed away in its case, and just recently bought one of these for a few quid at a bootsale which now sports a Tonerider PAF pickup and some new tuners. Hope to find answers to questions!
 2 points
 -
J. Bright, The Law Suit, late 1700s: There truly is nothing new under the sun...2 points
-
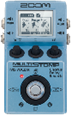
I missed the electro bit Yamaha Music London do the FX310A for £2352 points
-
Yes to both, not helped by intermittent focus in my eyesight and a reluctance to take my reading glasses everywhere in case it brings on mid life crisis.2 points
-
Or are your fingers too big?2 points
-
I blame the advent of GPS. ...2 points
-
We're stoked to announce that we've launched some new multipacks... https://www.rotosound.com/blog/product-news/new-rotosound-multipacks/ These offer our most popular sets in 3- and 10-set boxes for cost-saving and convenience. Starting from £21.95 for the triple pack and £69.95 for the ten-set multipack, they're available now from UK dealers!
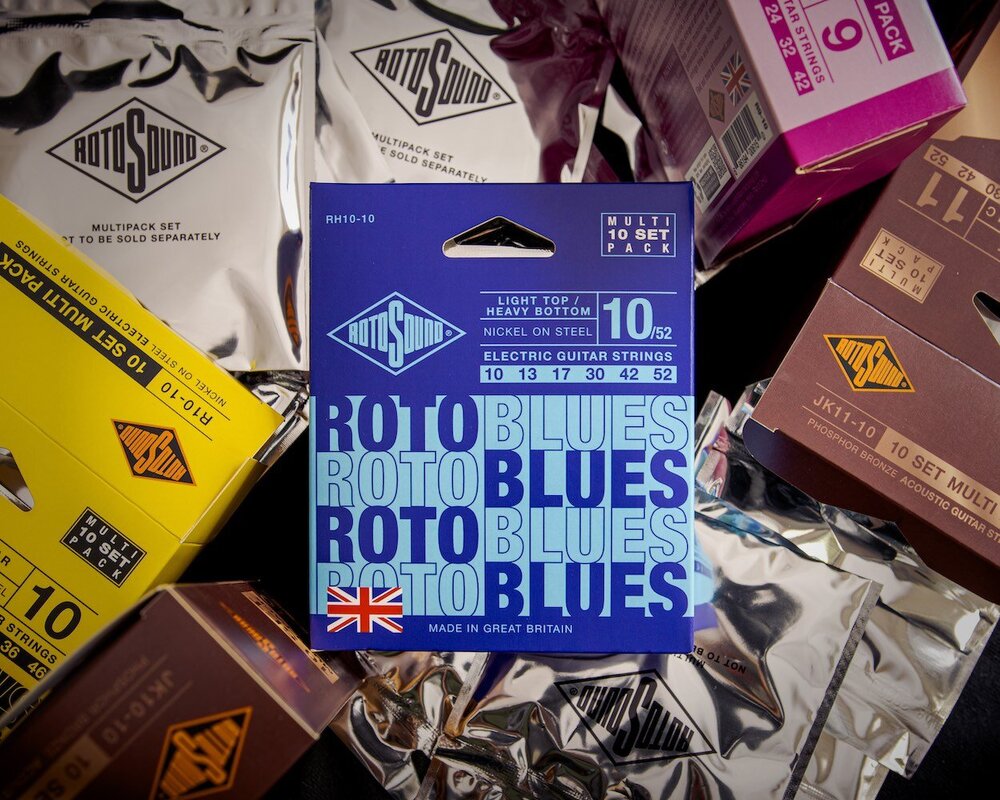 2 points
 -
Have you looked into... https://www.submarinepickup.com/collections/frontpage/products/the-submarine Haven't tried these myself, but I have seen fingerstyle guitarists with far more expensive versions of this solution! The idea is that you can position this to pick up your bottom two strings, and send that signal out to a bass amp or suitable effect/preamp/etc.2 points
-
Hah! Lucky I'd just swallowed my tea when I got to "Rickenwaffe" - not heard that one before! Yeah, they are more on the ball than anyone I've ever seen about their marks. Ric copies of any serious closeness only exist in Japan that I've ever seen... the very occasional one on ebay disappears almost immediately. I'd love a Ric solod body - a 4003 bass even moreso, but I'm resigned to the fact I'll never be able to afford one (and even then I'd struggle to justify the spend, tbh). Part of me wishes they'd do a diffusion line, A Rickensquierphone. They'd surely sell well, given their absolute nixing of the market for any other options if it's a Ric you want. (The Harely Benton options are about the only ones I've seen, and they're so deviated from the original - even if nice instruments in their own right.... you'll not see a Beatles tribute act playing them the way I've seen them use a Squier to recreate Rocky, let's put it that way...). Another part of me rather respects Ric for deciding they're happy as they are rather than just chasing the lifestyle brand market, or otherwise squeezing their property for every last penny. It was a remarkably late registration attempt by Fender - real stable door / bolted horse stuff. Trademarking a shape wasn't an issue for them in 1951 -or 1954 - as it wasn't until 1960 that you could trademark a shape in US law. The first registered US trademark shape was the Coca Cola bottle, a shape they'd been using since 1916, so I doubt Fender would have had any trouble registering The Tele, Strat, and other shapes then. As memory serves they had the foresight to at least trademark the shape of their headstocks, though.... Similarly, they were behind the curve in the UK as well, where shape-based trademarks became an option under the Trade Marks Act 1994. Gibson seem to have been more effective here, though from my casual awareness of their legal efforts (not least the PRS case), most of their real protection falls in the zone of lawfare.... i.e. Gibson can afford to spend a lot more than most of those they go after, and fighting a lawsuit will most of the time be far more expensive than just tweaking your design a little to make it go away. Smoke and mirrors to some extent once you see the eminently sensible decision by the Appeal court in Gibson v PRS.2 points
-
If anyone is interested there’s a massive guitar, amp and music memorabilia auction on 10th June in Corsham, Wiltshire spanning 5 days. Imagine owning 500 guitars!! https://www.easyliveauction.com/catalogue/5abe5b32c7710c2b409b15545ad1d718/0af8d24542e81eb9357e7ef448a6646f/the-guitar-sale-five-day-auction-including-the-gordon-gi/?currentPage=12 points
-
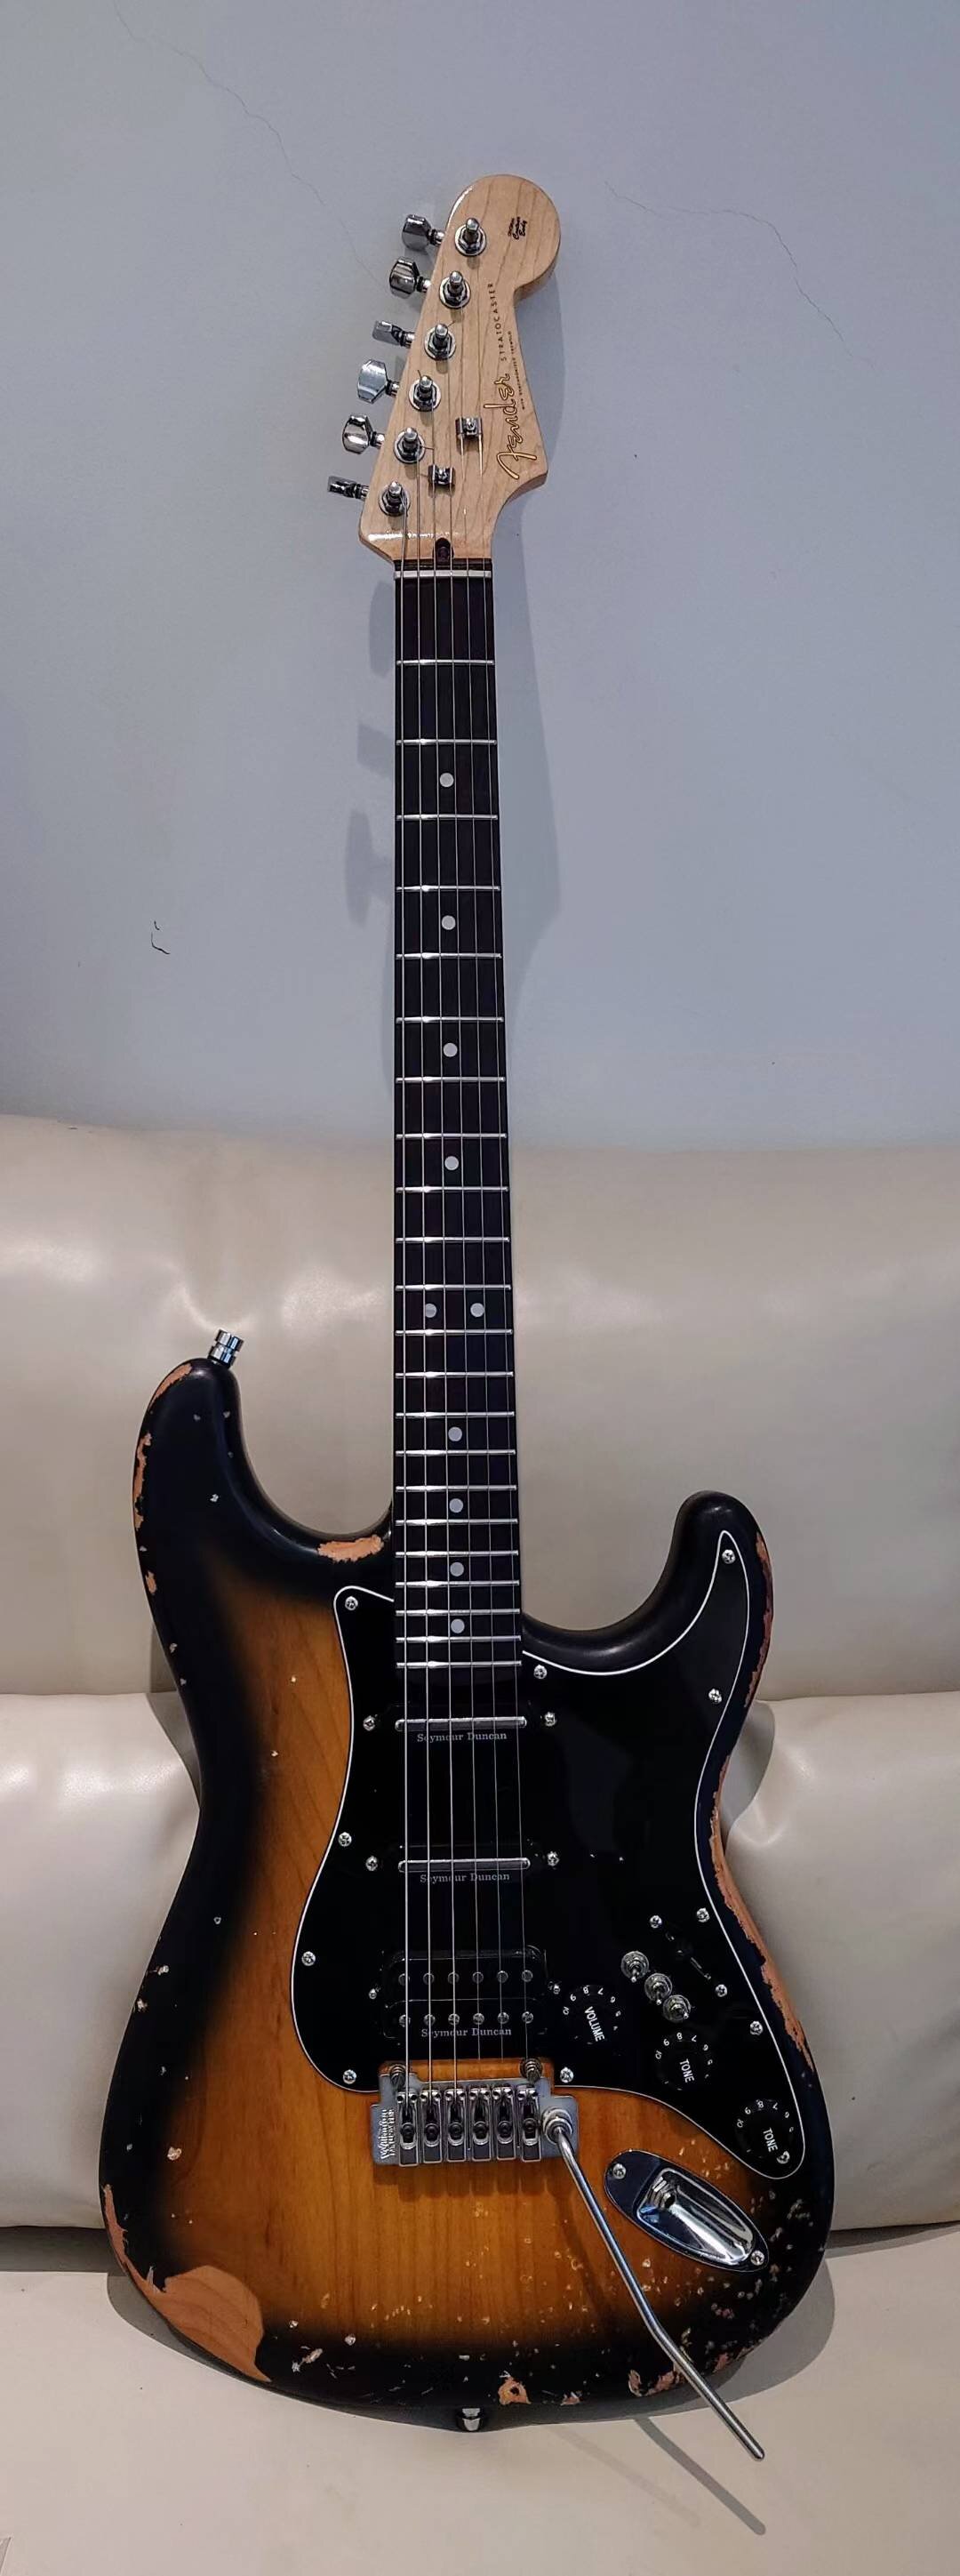
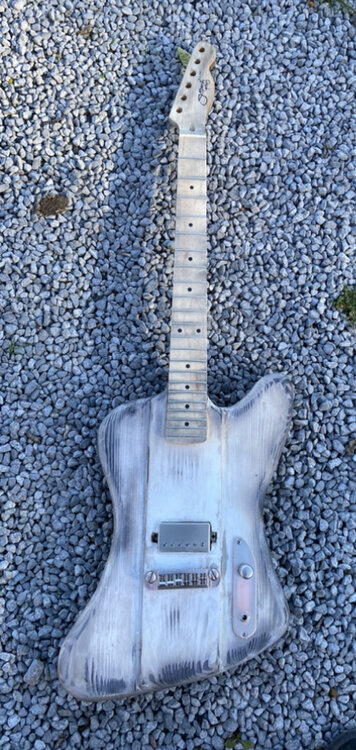
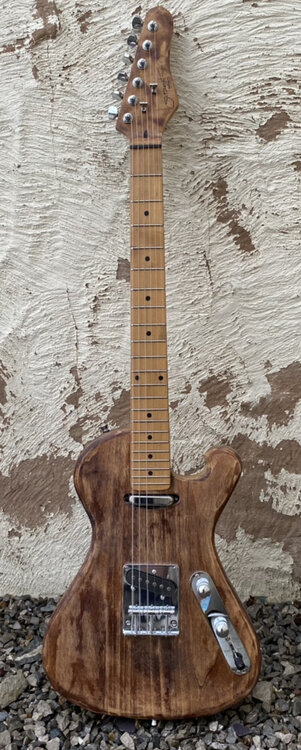
And it's done. Had to do a lot of routing to get the bridge located properly including plugging and redrilling one bridge post 1mm further way. The wiring was a challenge, I spent three days of eliminating possible causes to arrive at only one conclusion, the pickup selector switch was faulty. My midboost preamp didn't work and I wasn't going to spend a week trying to troubleshoot it, so I bought one only to discover that the guy who build it didn't include separate earth and -9v wires. So had to jury rig something up to provide the output socket with an earth connection, the boost is definitely warm but it lacks the glassiness I expected. So I have on order a genuine Demester Fat Boost (Tyler style) and at some point I will probably wire the switches so they are series, phase and parallel. Although they were fiddly to solder as well. However, after a fret levelling and proper set up, it plays very nicely and has more sustain than my other two strats. I have no idea why. It's quite a warm and loud sounding guitar as well acoustically. More aging is needed on the sides and back but I have other things to attend to in advance of being in the UK next month.
 2 points
 -
A common mistake is for folk to stick to the minor pentatonic when improvising, whether the key or chord is major or minor. Try and make sure you’re complimenting the chord by emphasising the 3rd note. A lot of players tend to play through the scales from one end to the other. Stand out from the crowd by making some interesting, intervalic jumps (Carl Verheyen is the king of this, check him out). Don’t be in a hurry to show your chops too early, build to a crescendo and release (the solo from Stairway is a great example of this).2 points
-
Or, pretty much, exactly the same.2 points
-
Wouldn't surprise me. The older I get, the more I realise 99% of the electric guitar market is about selling branding an intangibles far over the actual, physical product. It does seem to vary by location, though: players in the US on average still seem to be much more likely to be emotionally invested in the idea that a guitar made in the USA *must* be superior, or is somehow otherwise "the real thing". Which I suppose shouldn't be surprising given that's where the electric guitar boom started, and so there's a sense of "loss" that those aren't dominant in the market any longer - as opposed to being "only" another import product as they are for us in the UK.2 points
-
I am a musician and teacher based on the west coast of Ireland. I teach online lessons across Ireland, the UK and the rest of Europe. I play electric, Acoustic and Spanish guitar in a variety of styles. My influences are diverse, from Led Zeppelin and Pink Floyd to John Williams, SRV, Rory Gallagher and Tommy Emmanuel. Music was my 2nd love, but it's the one that never left me. (a good line for a blues).2 points
-
Steady on, it's not like some of them need extra reasons to slap a premium on a five quid set of parts.2 points
-
Gordon Smith, although better known for their Gibson types, also do a very nice Tele - https://www.gordonsmithguitars.com/shop/stock-guitars/blaggards/ TBH, though, I'm not sure that's how I would go. Clearly you're not looking for a more affordable alternative to Fender's US or CS ranges if you're thinking of spending that sort of custom money anyhow. Now, this is only a personal opinion, but.... for me it would depend a lot on what you want. A tele is such a utilitarian design that if what you want is the standard set-up Tele, it seems to me madness to spend custom-built money on it. If that's the only way - you want something really offbeat like the Jack White signature, or a Trussant Steelcaster, or you have an original 52 that you want to clone so you can leave the vintage piece at home and play a facsimilie out.... then, sure. But if what you want is "just" a Tele, it seems to be it's hard to justify spending vast sums on it.... I'd buy whatever MIM / Tokai / whatever you like and maybe rewired if you want, or track down a CIJ Fender that's good to go as is. (IMO, the top end Japanese Fenders are as good as anything form the US, typically wired the same with the same specs, and usually cheaper - nut much harder to find.) Unless you want something that's just not available otherwise, imo having a custom built Tele is a bit like having a Saville Row tailor copy a pair of 501s for you. They'll be an exquisite example, but....2 points
-
Many thanks for the feedback both. Seems that what I want to achieve isn't quite in the remit of my amp. I might just go back to my comfort zone of 90s solid state.2 points
-
I guess it depends on what you see as noiseless. EMG's original series and Lace Sensors vs Fender seem worlds apart. I'm not a fan of Lace, they do indeed sound dead. EMGs have their own character which is evocative of eighties and nineties guitar tone. Thwey have a place. The Fender noiseless are indeed noiseless, the original replican 54 pickups they replaced were both weak and noisy, virtually impossible to record with.1 point
-
Interesting - I had not noticed that. Amusingly, the tech mentioned that though he is a Gibson man he has often coveted Jaguars when they've come in, and whilst dealing with this he finally succumbed to the GAS and ordered a Fender custom shop model. Apparently, according to what I have read, they were originally meant to be a luxury model to poach Gibson's customers.1 point
-
Good evening, @danhkr, and ... ... Plenty to read and amuse you here, and lots to learn and share.

 1 point
 -
I wouldn't worry: I have the same problem with Jazz basses. LOTS of players - be it people I know, or well-known bass-heroes - have played great basslines on them. But I can't seem to make the sound work with my playing style. Give me a Precision or a Thunderbird and I'll be happy as Larry, but for reasons I can't fathom, I've never been satisfied with the tones I get out of a Jazz. It's just something I've had to accept! That said, have you ever tried a "super-strat"? I've seen H/S/S setups, and twin HB setups - the former might do something for that "shrill" bridge pickup, and you still get the look and feel of a Strat.1 point
-
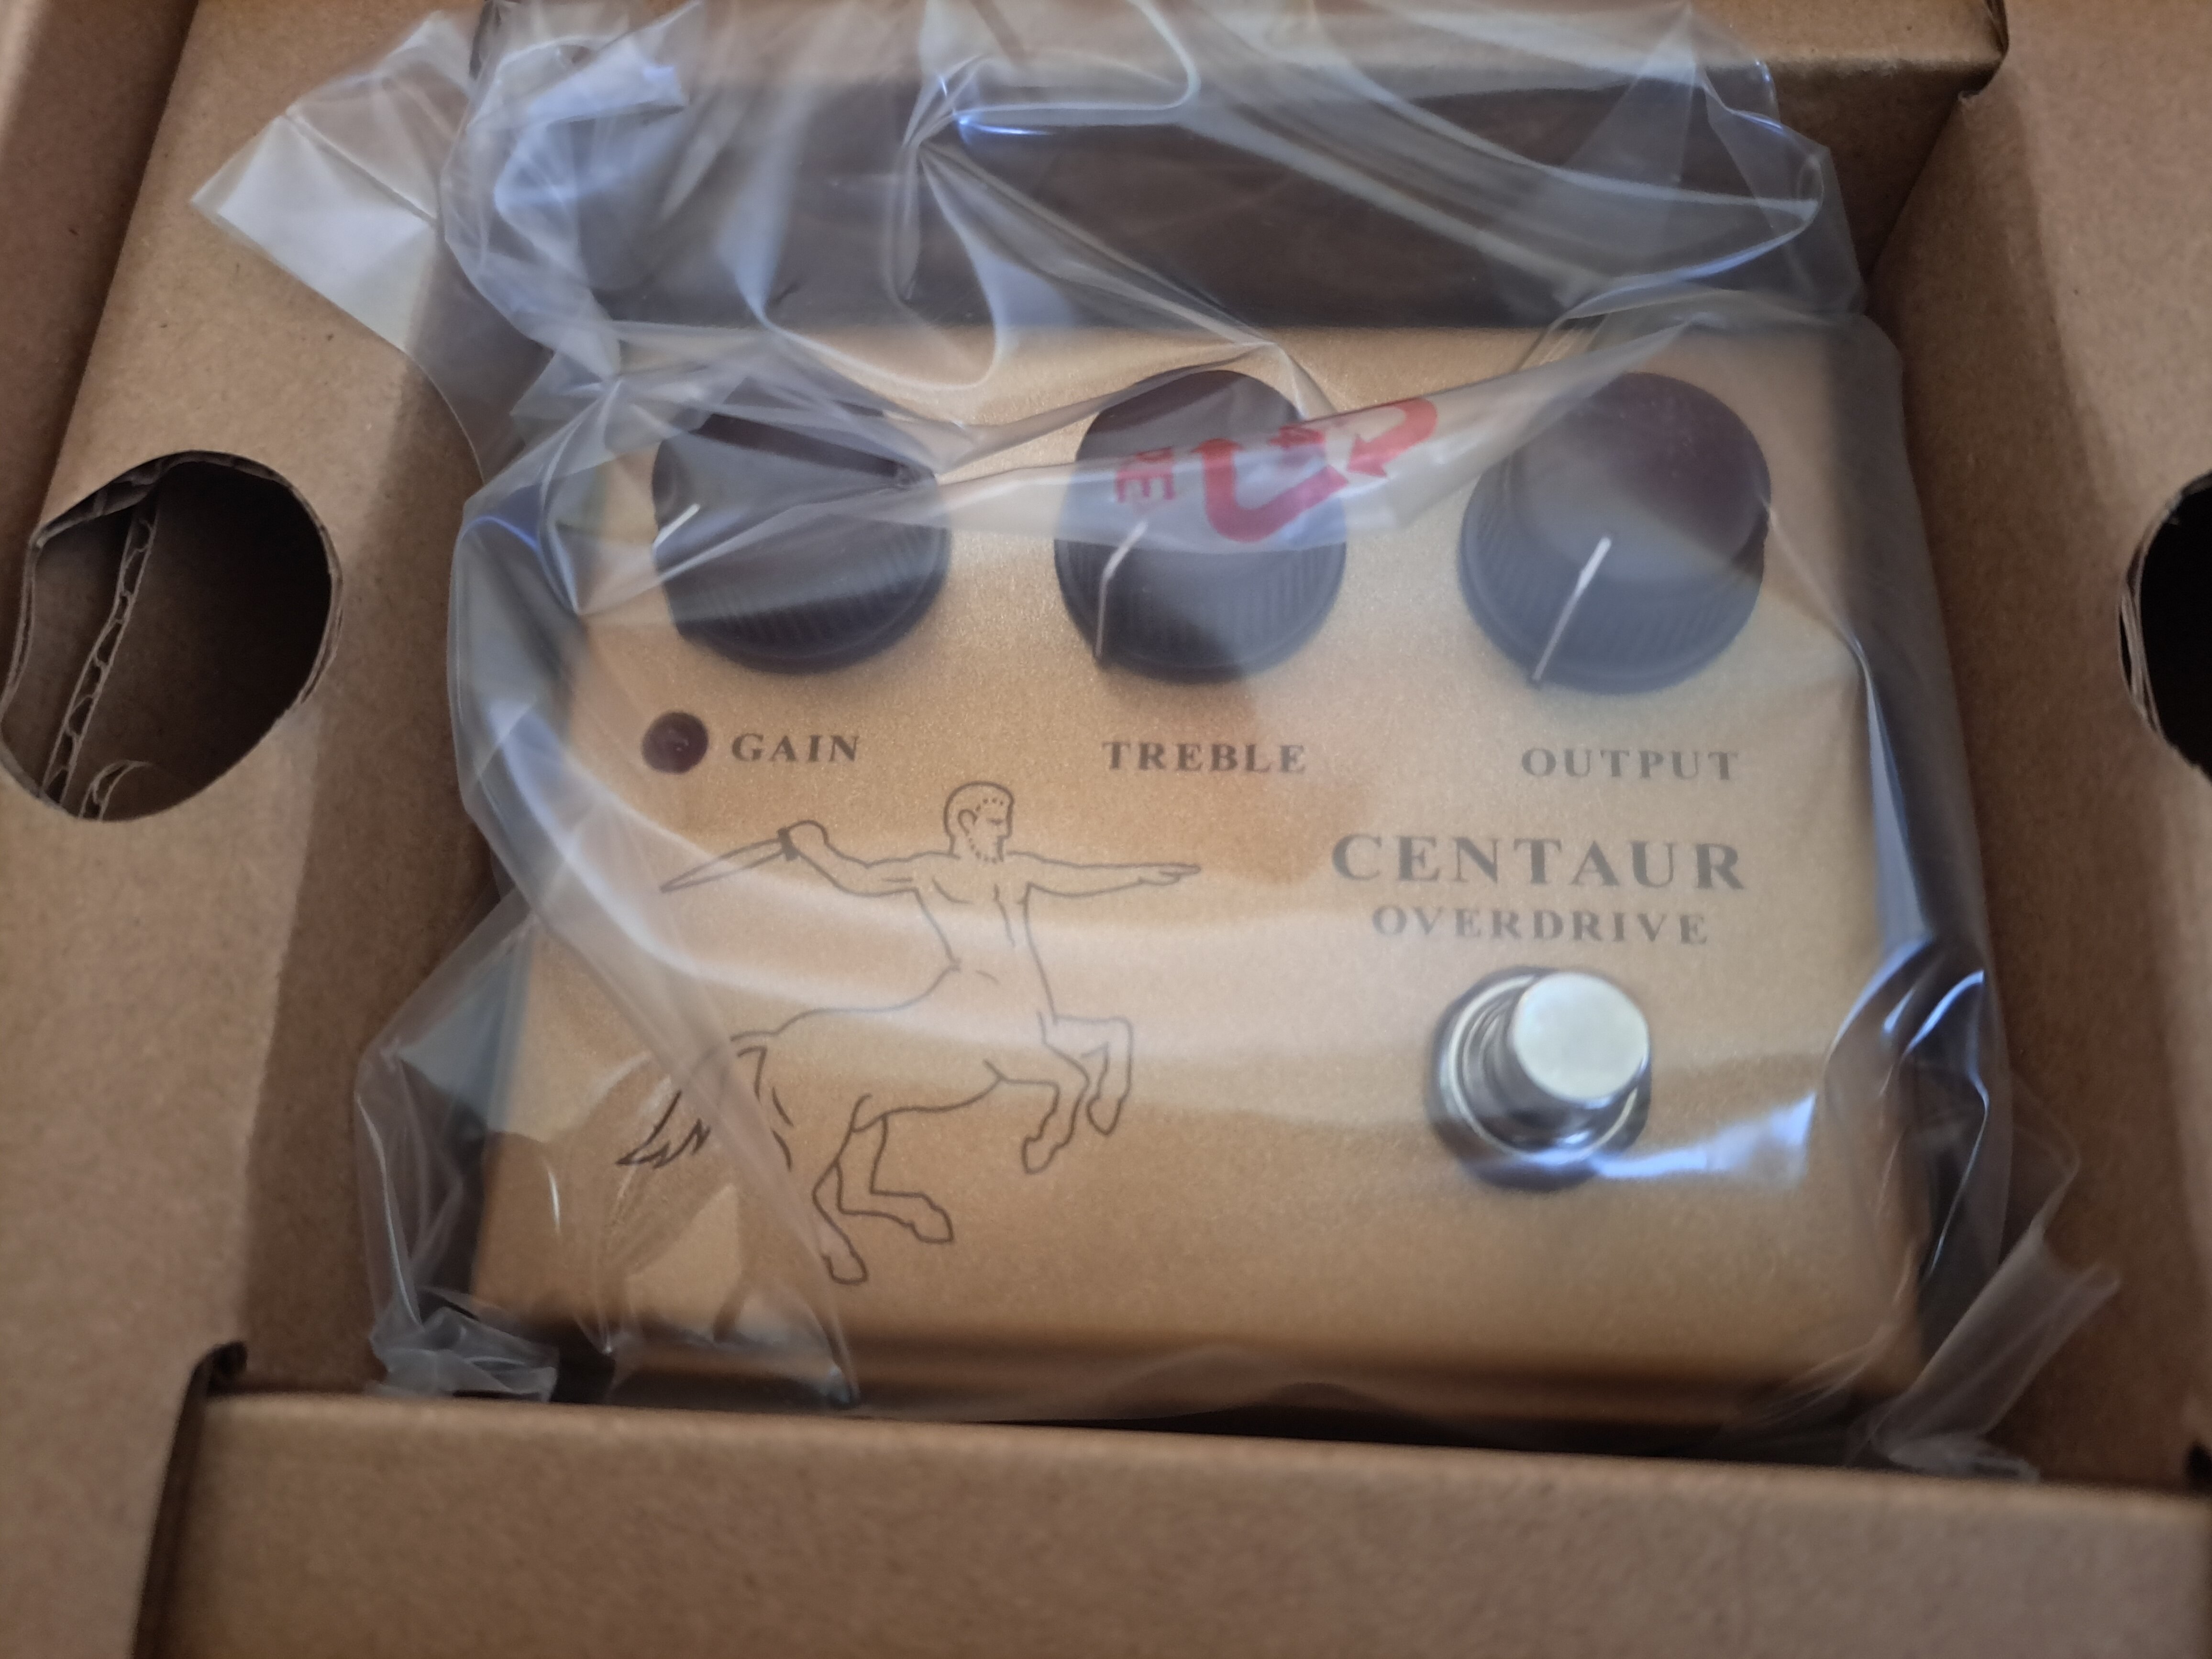
Behringer can be fun. I like my Centaur! I know OP's request is sorted, but for anyone else looking for ideas, I'd also suggest Mosky, particularly the Big Fuzz: They have quite a few fuzz pedals, but this one would be my pick as it offers a couple of different runs at the obvious Big Muff sound (which went through several generations each having their own thing). Edited to add: it comes it at about forty quid as of November 2025, widely available on eBay, Amazon, and the rest.1 point
-
Blinding call on the exact same Godin that I have but just Thinline... now to find a 'used' one!1 point
-
Phase I instigated, just bought one of these. Looks just about as simple as can be and can't go wrong for under £40. I can't imagine taking my guitar playing on the road so just for home use. Nevertheless I have been using one of their wireless jobbies for gigging/rehearsing for 18 months or so and it has behaved faultlessly.1 point
-
The guitarist in my band bought an Ibanez that he'd been looking out for after I passed the link to the auction on and I bought a six-string fretless bass (for just under the lower estimate). Postage isn't cheap (about £50 IIRC) and I went down to pick up the bass, and collected his guitar while I was at it. Buyer's premium was around 25%. With a seller's premium of about the same, the buyer pays around double what the seller receives, which puts Ebay's buyer fee in perspective. There were quite a few 12-strings, which makes a change. I am a bit tempted by the idea of a 12-string solid-body but managed to resist. The guitar: The bass:1 point
-
So... My Thomann box arrived a couple of weeks ago. Got around to opening it today. And looky what we have here...
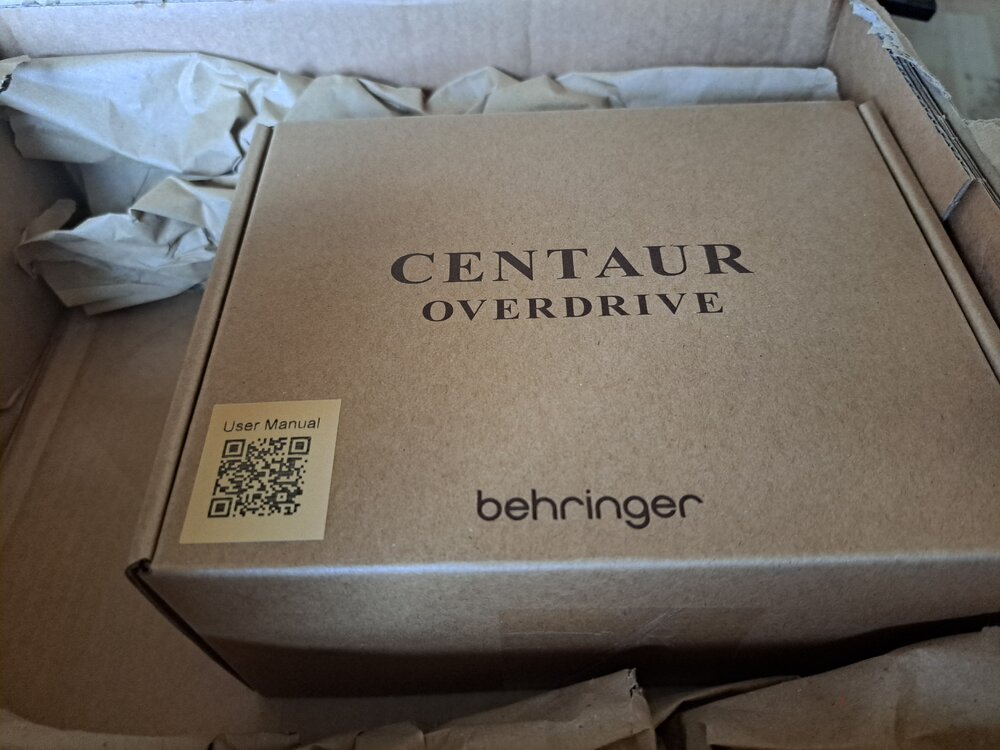
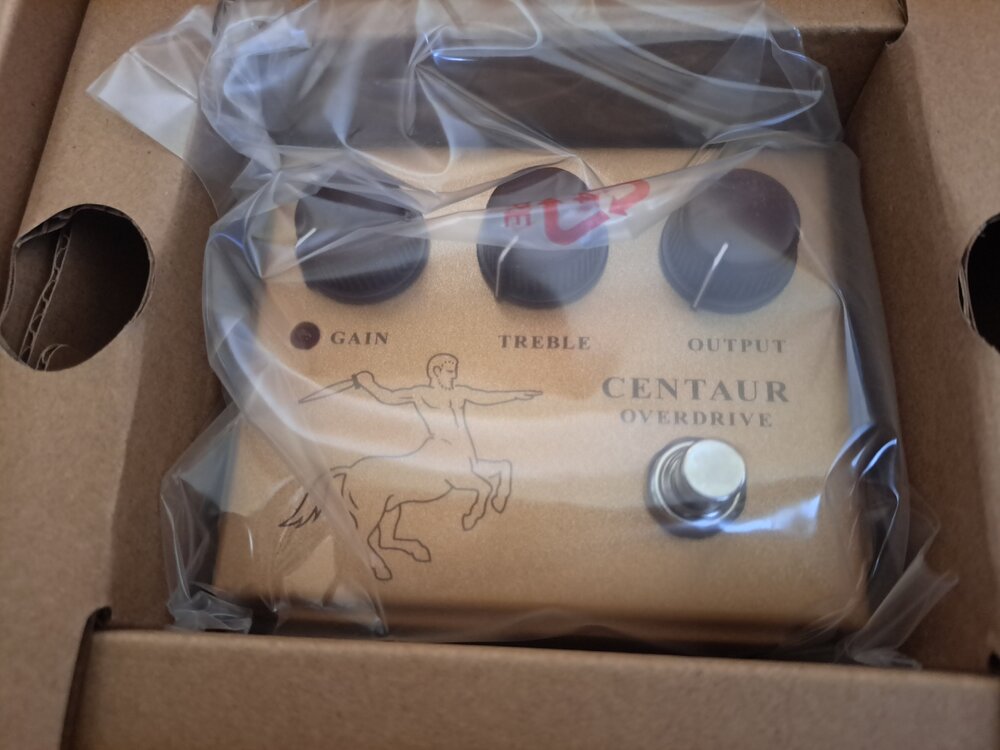 1 point
 -
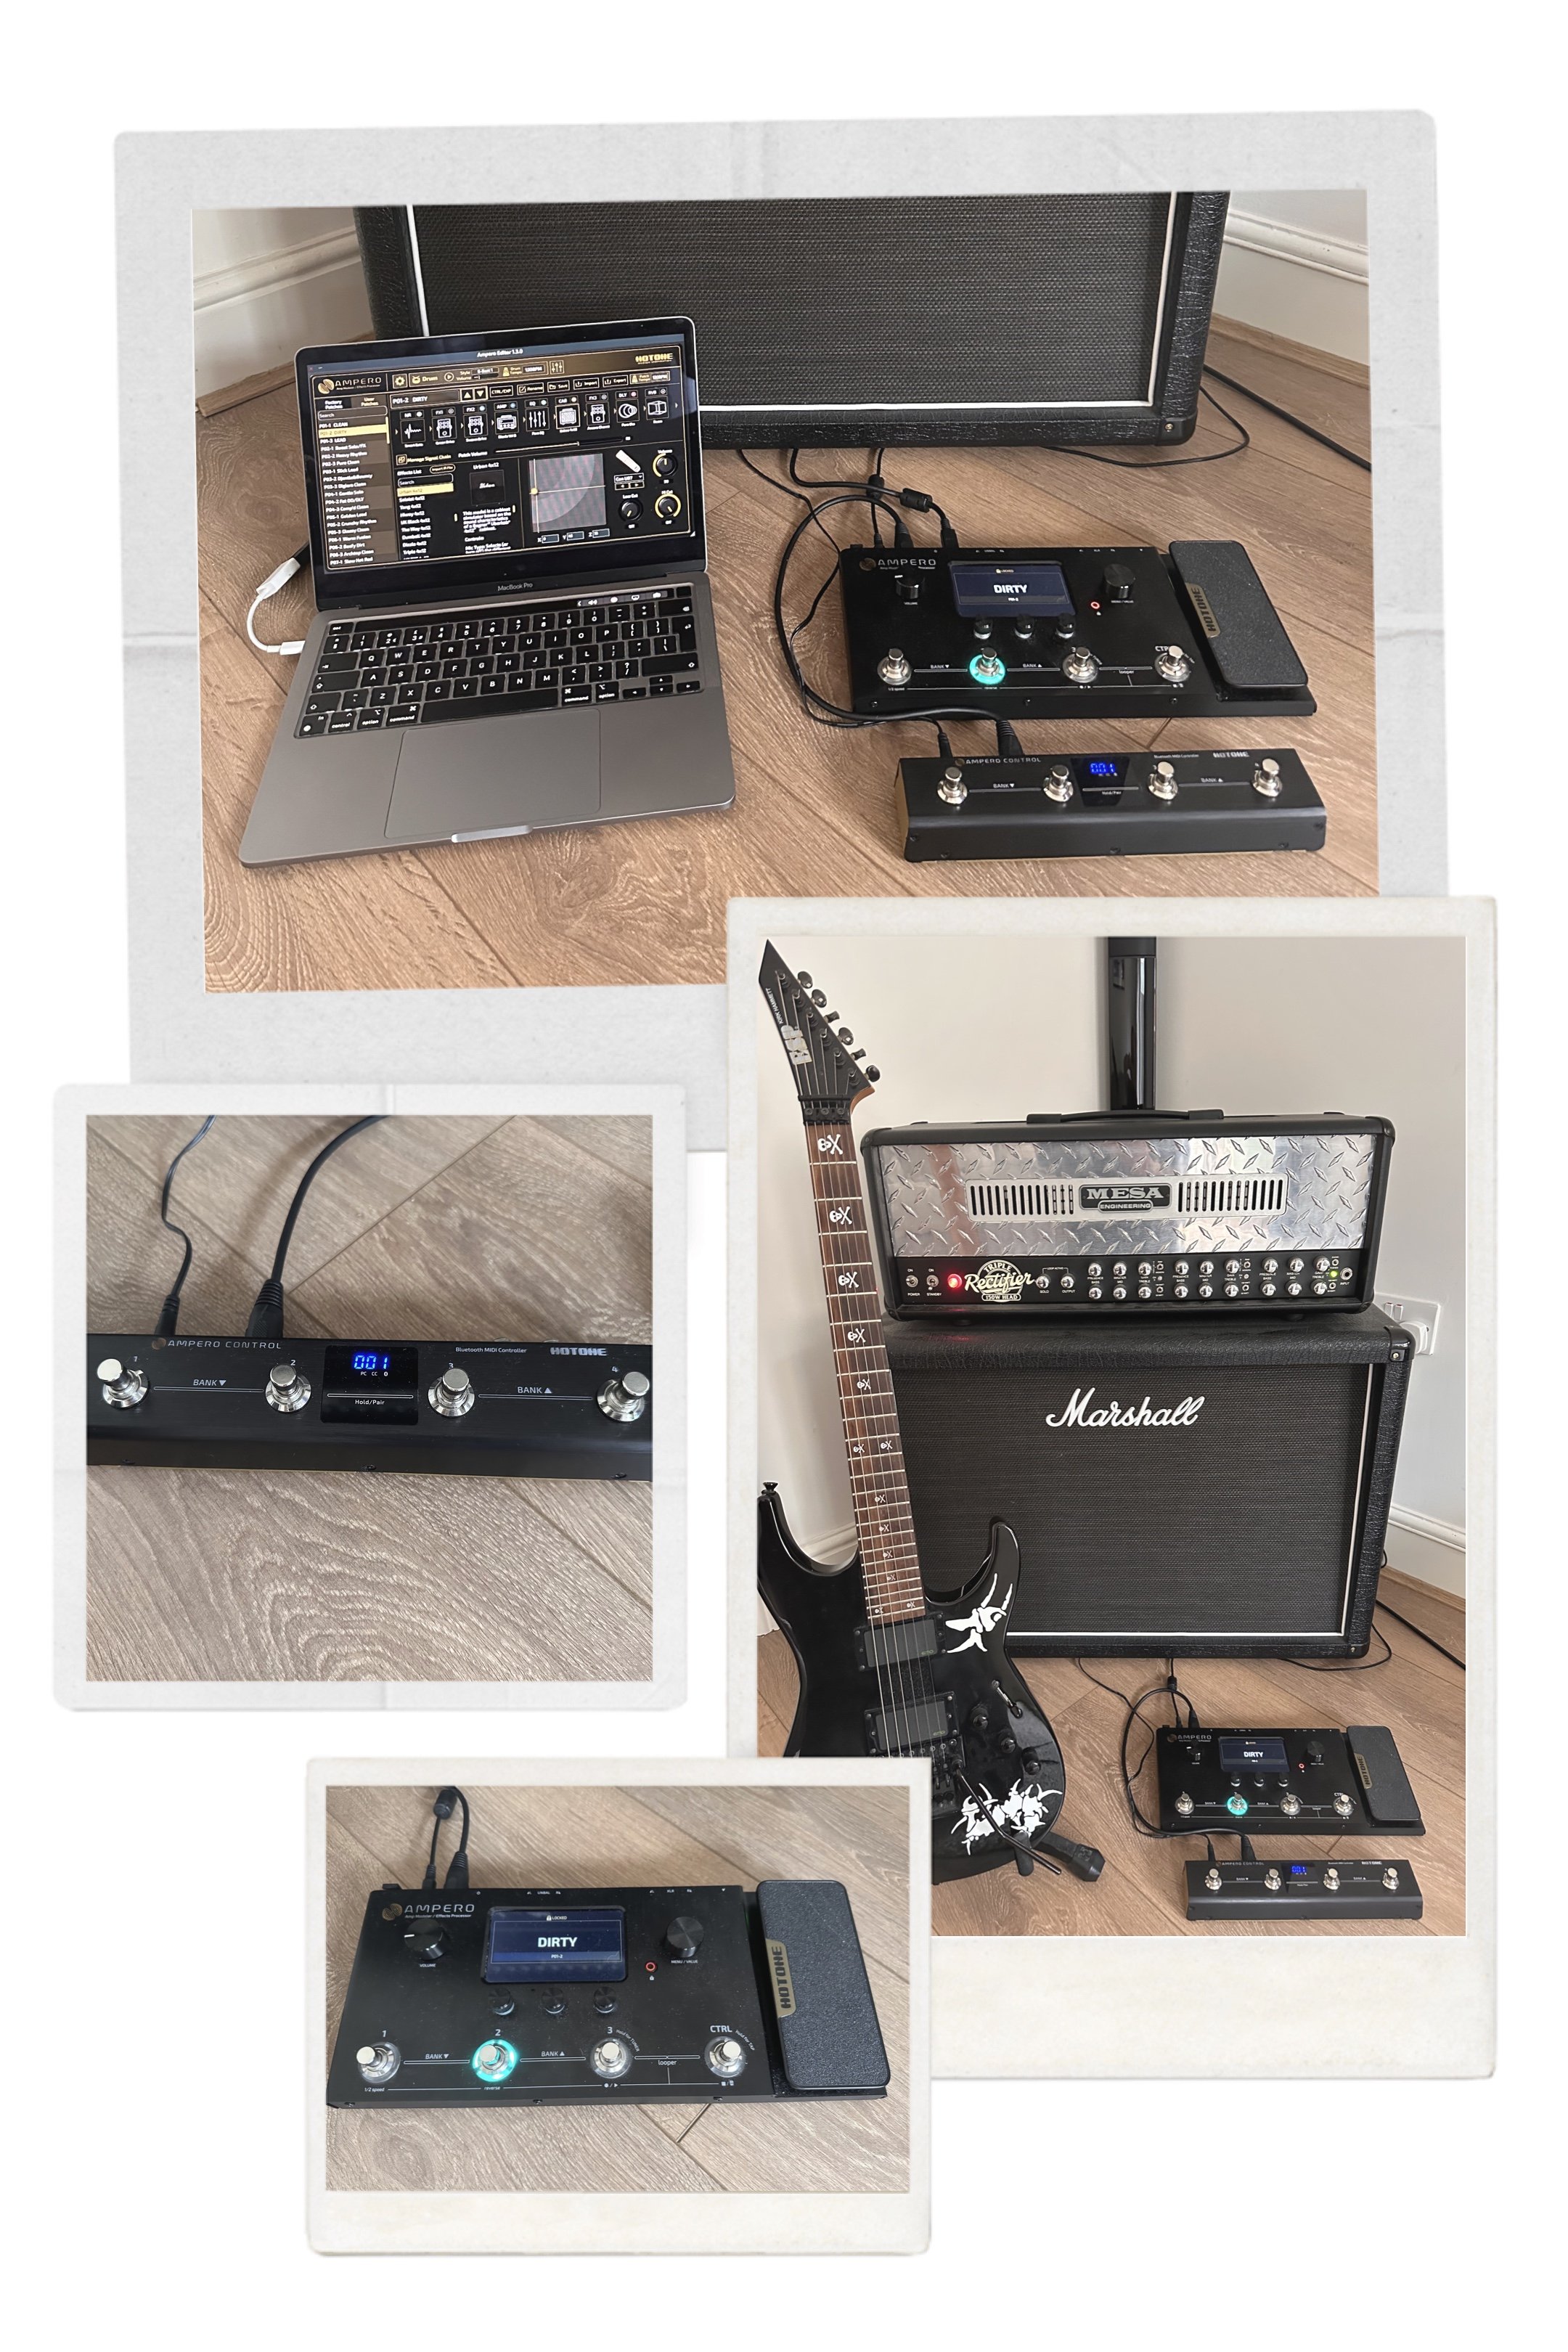
All change again !! I've been trying out the Hotone Ampero products, surprisingly very good !!
 1 point
 -
Hi. I can't help out with Bethnal Green, but I can offer some online lessons if that interests you.1 point
-
Sounds like a real bargain. I had a quick look on Reverb and other Cox Classix electric guitars are selling from about £150 second hand. Obviously, they aren't covered in stickers with repainted headstocks, but your is now in the same condition after a little work. Well done.1 point
-
Hey thanks for the info, and as you say, a nice project. I've been slowly removing the paint with fine wet and dry and it is woirking. I'll report back when I have it finished.1 point
-
You can't go far wrong with an Ibanez, whatever the price point, and this model has an excellent reputation, especially as a starter guitar. There are many models on the market in this range of prices; this Ibanez has nothing to fear from such rivalry. A matt black finish may be subject to marks from use, rather more than a gloss finish, but that's about the only remark not in its favour. Ignore the 'hype', for this and any other that piques your interest, and try it out yourself. You're not likely to be disappointed. Hope this helps.1 point
-
Thanks for this @Dad3353. Much appreciated and a detailed answer as usual. From a tone point of view I really like the Classic 20, I like the tonal variations it has and do understand that different amps have different tonal characteristics. I don't play actually clean, I find a mild overdrive sort of tone for rockabilly, blues and modern country. I have only played at home, not with a band as yet and would expect to mic amp up when I do, I don't need 'loud' really. So I am happy to have an amp that sounds right at whatever volume level that is and let the PA take the strain. You only really notice when playing along to a cd, not really when just playing with no backing. I don't want to get involved with pedals if I can help it, I have played without them for 30 years and don't want the hassle of cables and power leads. But as it stands, I just can't work out how it can be useful if I can't increase the volume output using the guitar volume enough to change from rhythm to lead on the fly. Even if I did do pedals, surely the pedals likely to give me the effect I need (volume boost and a small amount of gain/overdrive pedal) will likely just do the same as the guitar volume and just hit the amp with a stronger signal which would also give me more gain but no volume increase? Is this likely to be for most tube amps or is it just the EL84? Would a different amp suit this more style more? If not then I will just cut my losses and go back to my normal SS amp. It would be a shame as the tone is lovely overall and adds that extra sparkle that the SS sometimes lacks1 point
-
It should be understood that each amp manufacturer, each model, and each technology, have, inherently, very different tonal responses to controls in the (very different...) pre-amps, so there is very little commonality between them. The settings, and range of result, cannot be equated from one to another. The reasons are as varied as the amps themselves : solid-state does not behave as valve stuff, and EL84 valves do not behave like KT88's etc. The effect of 'gain', 'master volume', tone controls differ; some tone circuits are 'flat' with the control at centre, some with the control max anti-clockwise, some (many..!) are never really 'flat', whatever the setting..! All of these factors make every combination of amp-cab useful for its own range, but maybe not so good at another. What sounds good at home may well not have what it takes on stage; even less so on a stadium stage. It works both ways, too; the only way to get a Marshall stack to belt out 'that' sound is to crank it, which makes it a poor candidate for bedroom practice in a town centre high-rise block of flats. In sum, it's 'horses for courses'. One amp for home, another for rehearsals, maybe another for gigs... This is one (of many...) reasons for the advent of Fx pedals in the first place : the ability to 'dial in' the required tone at any volume. It doesn't surprise me at all that the Classic 20 doesn't 'cut it' on stage. Despite having the same power valves (EL84...) as the Vox AC30, the circuits and cab are not at all the same, and the tonal response are chalk and cheese. You can never get a really clean sound from a Classic 20, at pretty much any volume; that's not how the circuit has been designed. They don't do 'loud'; certainly not the 'loud' that an AC 30 does. What are your options..? Find an amp which has the tonal variance that you need, in all the situations, you'll be playing, or have a different amp (and settings...) for each usage, or start building a pedal-board around an amp which ticks most of your boxes. It's not really a case of 'SS' v 'Valve' v 'Modelling'. It's just that all rigs have their upside and downside. Such is Life. Hope this helps.1 point
-
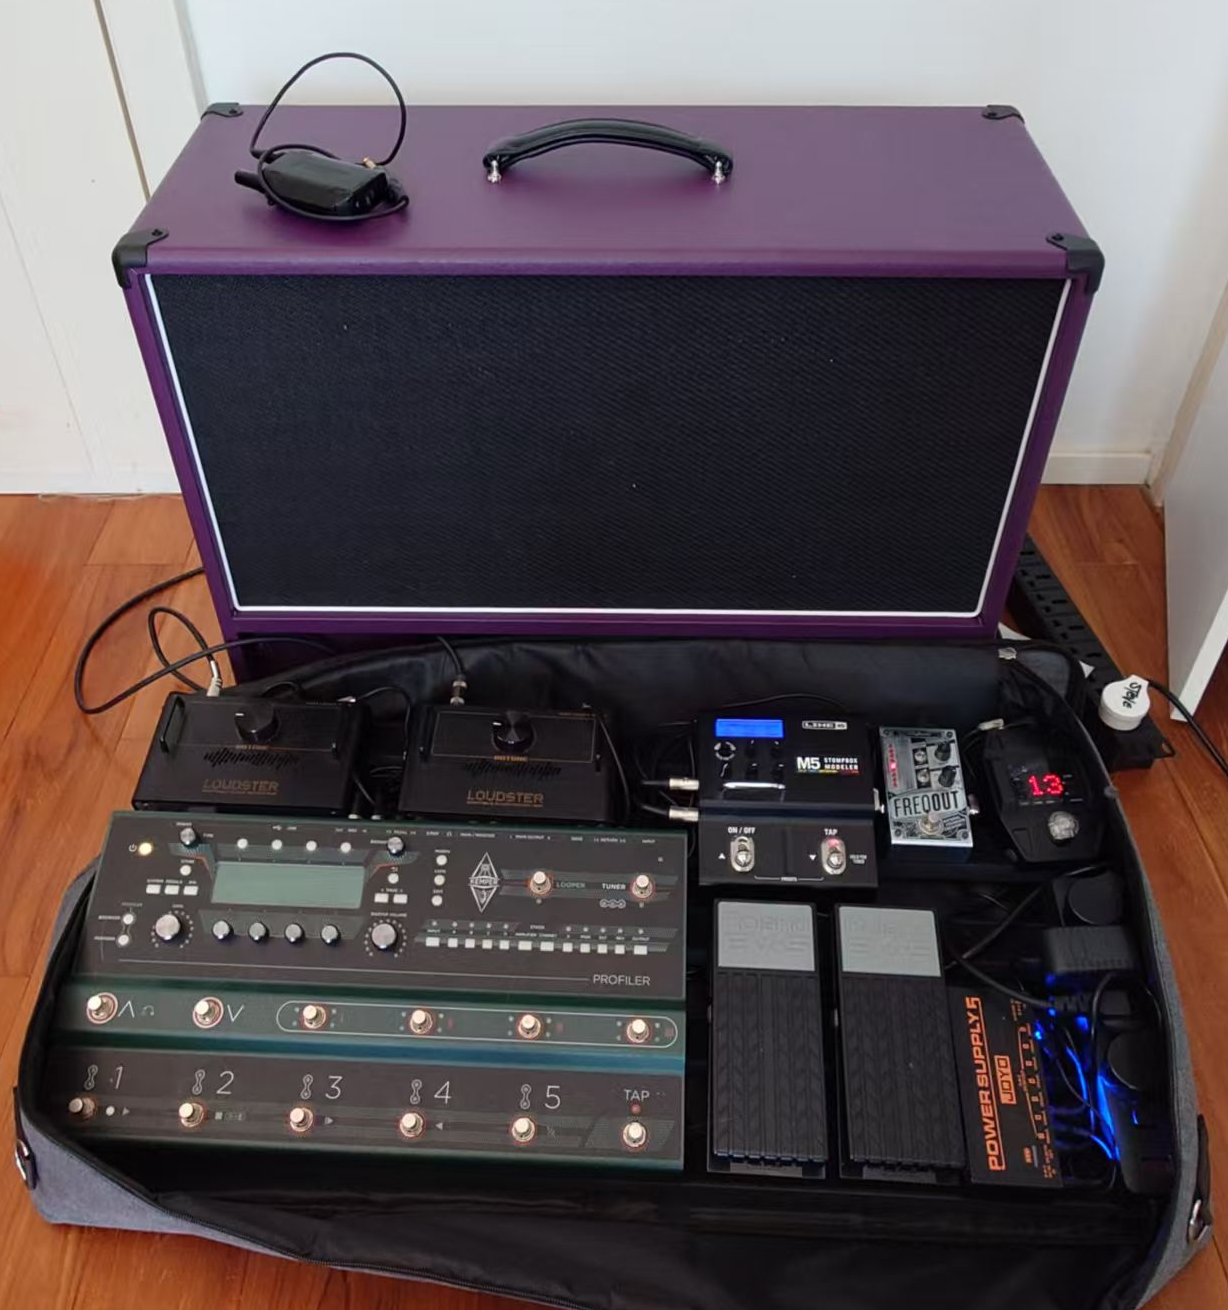
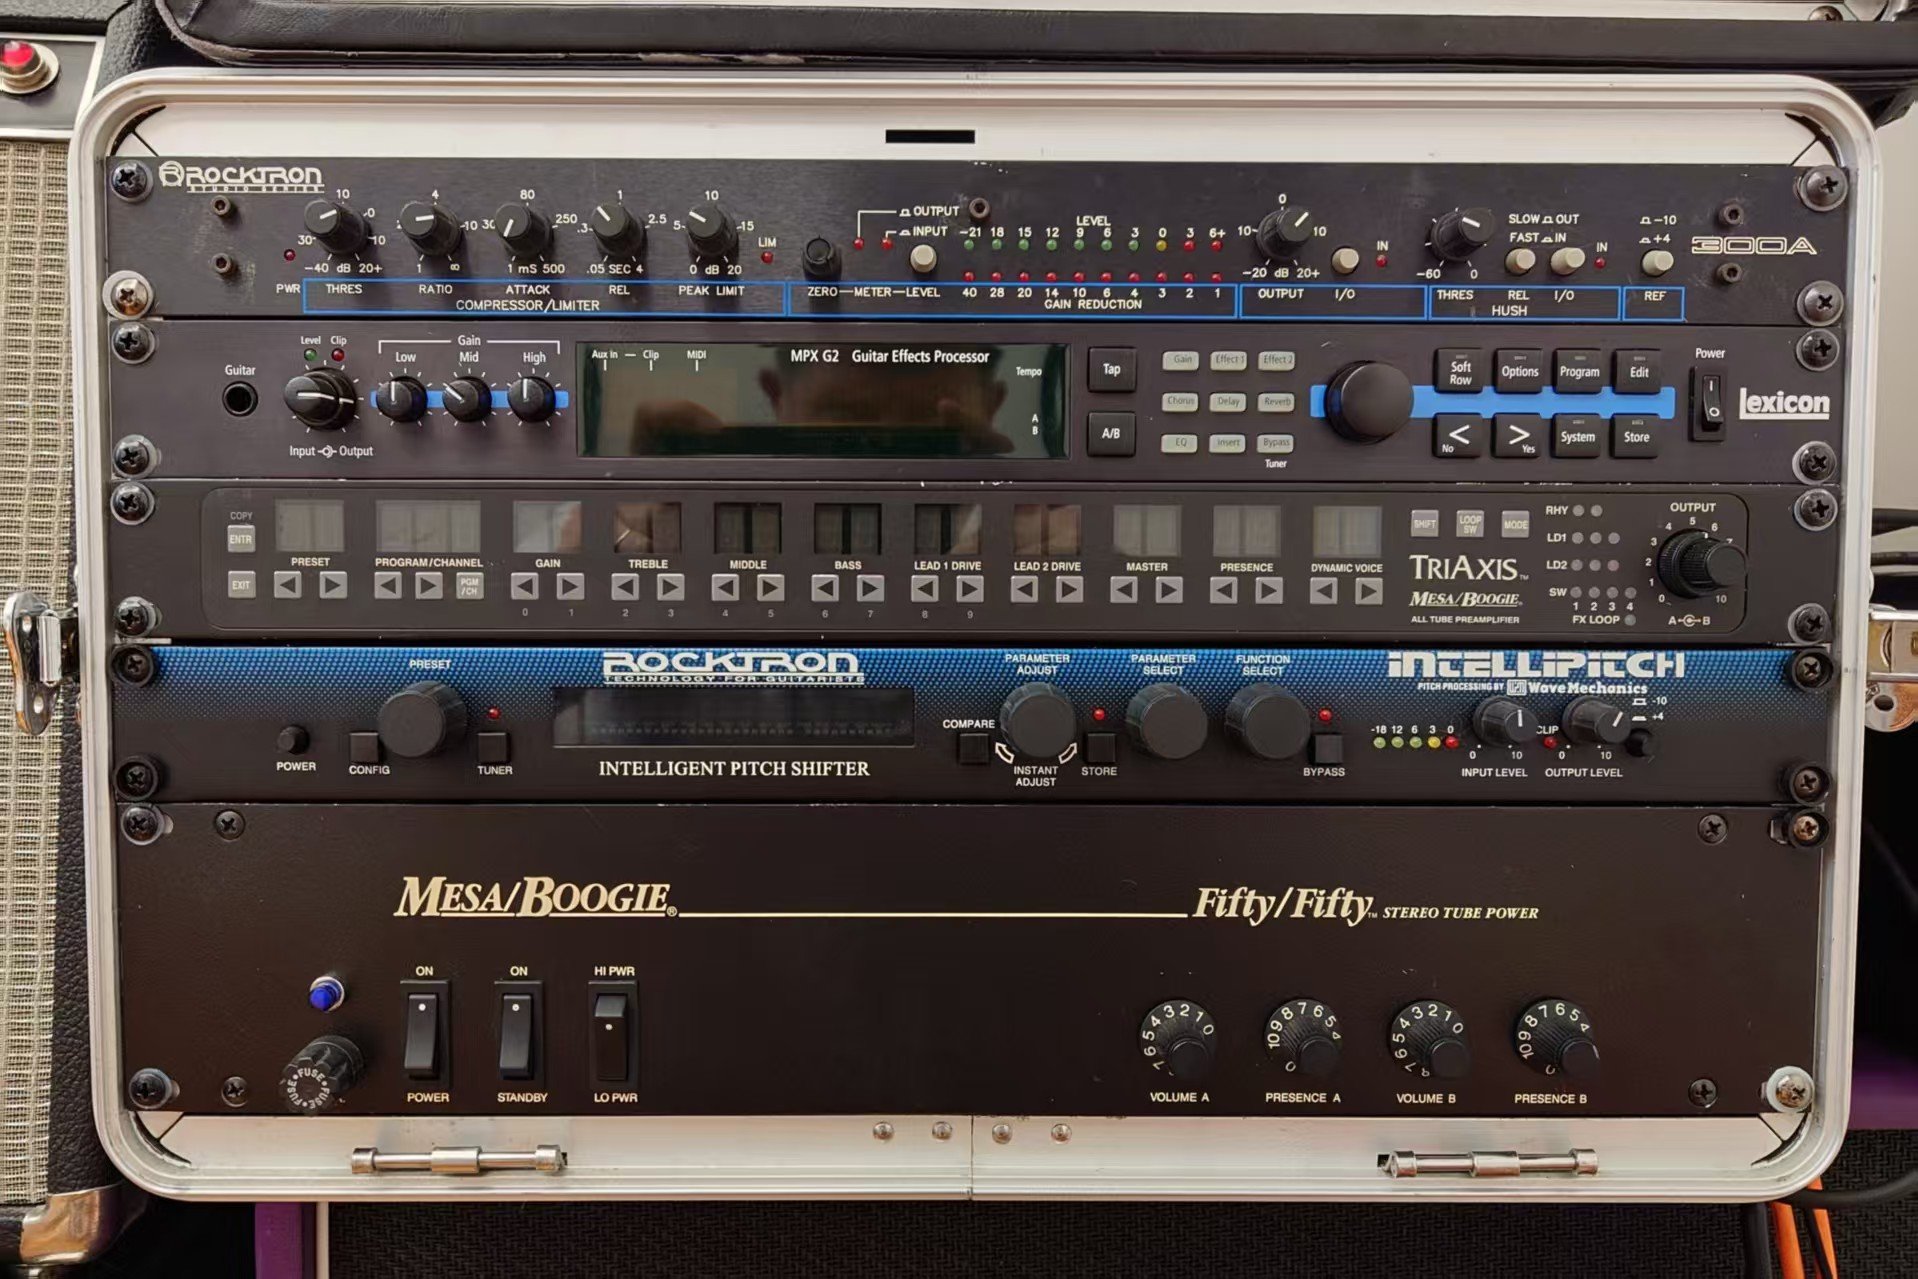
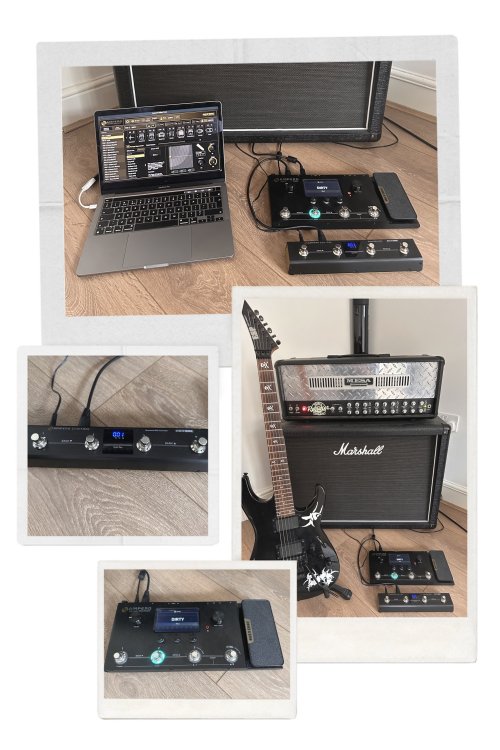
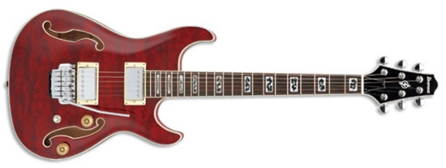
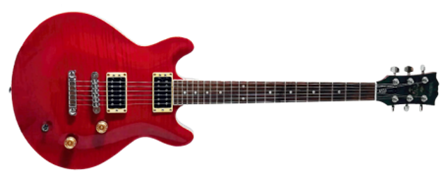
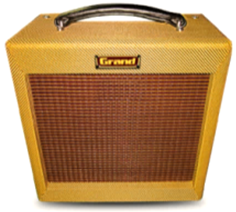
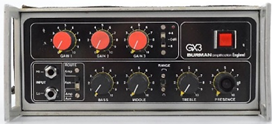
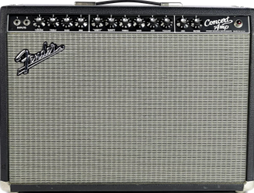
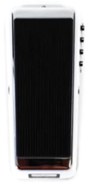
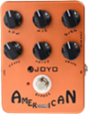
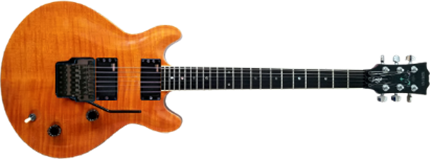
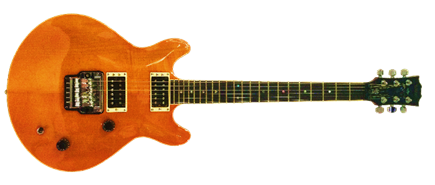
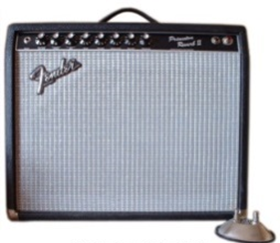
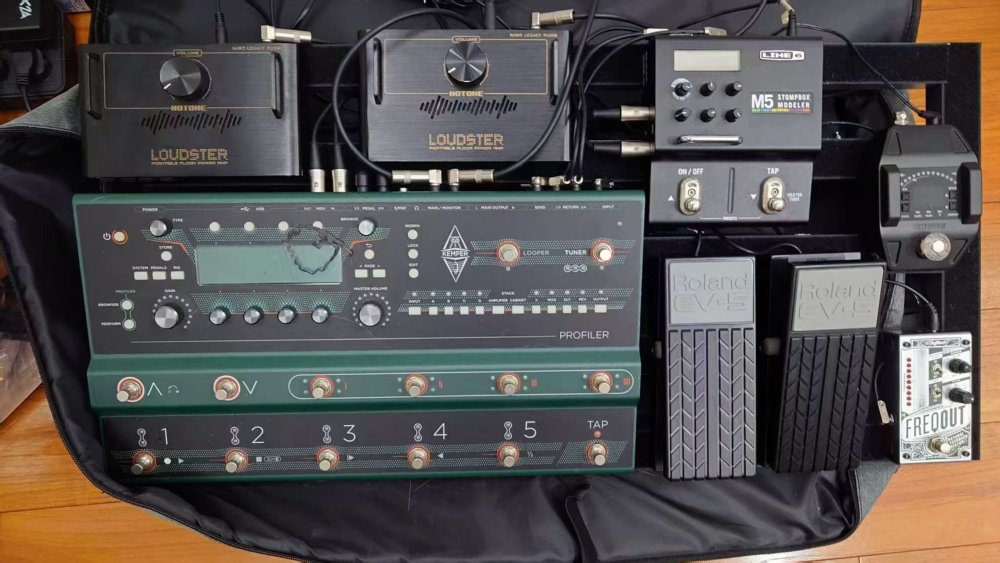
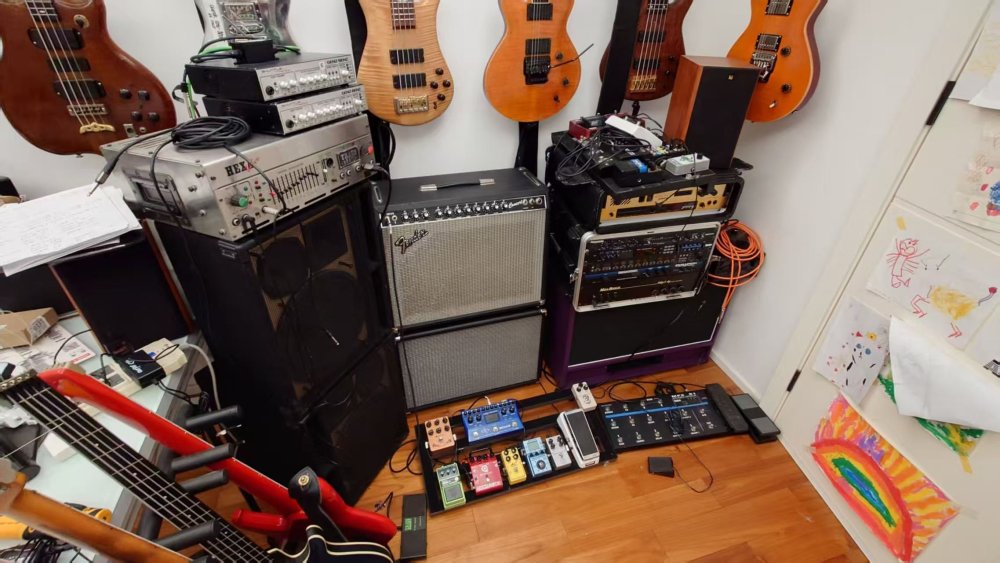
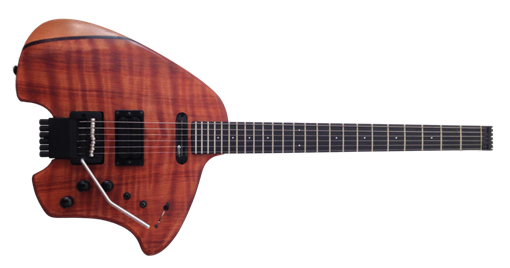
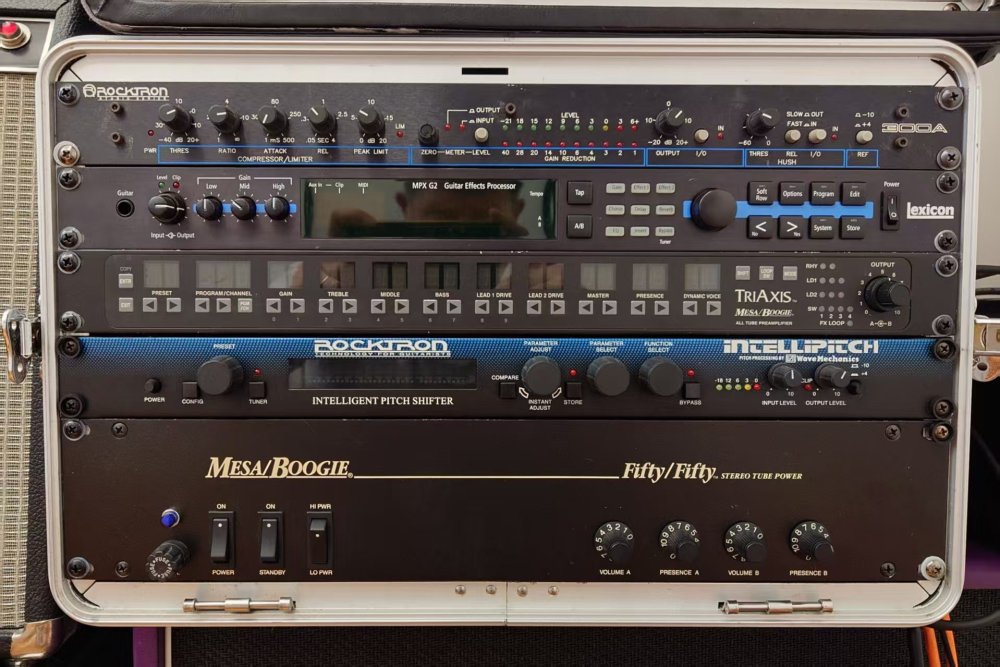
Right, let's try that update again now the server is back up. So there have been a lot of purchases in the last five years mainly due to the sale of a business venture. It's been a lot of fun trying out different gear as you do but reality is starting to bite and I'm running out of space! Guitars: Ibanez AWD83T: In the original post above, I mentioned an Ibanez AWD82 and a few months back I snagged an AWD83T (with trem) on a japanese auction site for a couple of hundred quid plus shipping. It must have been part of an estate sale because it arrived sticky with nicotine stains and rusted strings. However after a bit of cleaning up and new strings, it's a total honey. The factory installed bridge pickup sounds tight and mean when cranked. The bridge pickup could be a little mellower but it still sounds jazzy and the neck is straight as an arrow making for low action. Can't recommend these guitars enough. Sounds better than the Yamaha SAS II I also had my eye on (basically the semi hollow version of the MSG/Image). The Clean Machine: Over the summer two years ago, I took a week out with Jon Shuker to build a body and install the electronics I had been hoarding for a guitar that is intended to satisfy a curiosity about the Aria RS Esprit that was made famous by Alan Murphy and Yngwie Malmsteen in the eighties. It featured Alembic licensed bridge and neck pickups and low pass filters plus a boost feature. I bagged a set of three genuine Alembic Activators off Reverb for 150 quid a few years back and Nuno at Lusithand deserves a huge shout out for customising a set of his DLPF circuits for guitar (and his customer service follow up is nothing short of outstanding as well). Not wanting to rest on my laurels, some Graphtec piezo saddles were installed on the Wilkinson VS100C trem and connected to a Ghost Acoustiphonic preamp. A rotary selector switch was needed to select between 5 pickup positions and the piezo. It still didn't deliver quite the sparkle I was looking for and I theorised it might be because the soft neck wood was dampening some of the higher frequencies. So more recently I had a custom graphite neck commissioned from a guy I know in China and installed it last weekend, it provides more sustain and a more pleasant bell like chime to notes, definitely gets me closer to where I wanted things to be but still lacks a certain something of the original. The really interesting thing is the impact that the filters have on the timbre of any overdrive or distortion, it's surprisingly versatile for recording at least and it's possible to get lots of interesting and not unpleasant sounds when messing about. The sensitivity of the filters make it a little impractical for live use though. Al Knight Hitmaker replica: As much as I like this guitar, it's sort of paid its dues and my tastes have moved on since. So it'll be up for sale over here at some point in the near future. Plays great and sounds exactly like Nile's guitar on the first Chic album. Yamaha MSG Deluxe #1: This was the first MSG I purchased, it's a transition model has the Mach 2 headstock but Mach 1 control locations. It's a little lighter and brighter than number three and in better condition. Not quite as smooth sounding and doesn't have quite the same depth of flame in the top but it's still nice. In a pinch, I would put it up for sale though to make room for other toys...and probably have sellers remorse as a result. Yamaha MSG Deluxe #3: Bought a long time ago, it was the third MSG purchased off Ebay (I think). Number 2 was a sunburst deluxe that was ultimately sold because it was light and bright sounding. This one by contrast is smooth sounding but with a nice midrange punch, even more so after installing my favourite Armstrong pickups so it will do rock and jazz with a flick of the pickup selector switch. Unfortunately the fine tuner screws started wearing out in the proprietary RM Pro trem and the only available replacement bridge chassis was black (off an RG). I actually prefer it in black. Yamaha MSG Standard #4: Originally I bought this because I wanted a simpler guitar and wanted to see how much of an improvement a tune-o-matic style bridge might make to the sustain. I picked it up for cheap because it was in desperate need of a refret and fingerboard dressing. So I took out the frets, carefully reradiussed the 13" radius fingerboard to a slightly flatter 12"radius and installed new frets. As it turned out, the bridge didn't make a whole lot of difference however, I installed some PRS Mira pickups in and it's an outrageous, raw rock machine when paired with the Marshall rack gear. However it may go up for sale in the medium term as the lack of a belly chamfer makes it uncomfortable to play sitting down and while it does rock really well, other guitars can fill the same niche even in a slightly different way and offer more versatility. Kleinberger: I've completely changed my mind about this guitar after trying it through the Marshall rack! While it may not have the most scintilating cleans, when it's cranked there's a real girth to the midrange that punches well above it's relatively small (but wide) size. However, I have another build with a sustainer planned so may let this one go at some point...after I've sorted out a case for it. Rig 1: Guitar rack: This will do pretty much anything from mid eighties onwards. It sounds tight, modern, smooth and well defined. It can do practice volumes as well as performance. Rocktron 300A compressor: This was my first piece of Rocktron equipment and it got broken before I had a chance to try it when a friend plugged in the wrong power supply (it takes AC not DC). So the power caps were replaced and it works fine now. I found it needed some careful dialling in and it sounds OK but not quite as clean as the DBX. However it sits ahead of the Lexicon MPXG2 in the guitar rack now so it does the job it needs to. I probably need to spend more time with it dialling it in. Lexicon MPXG2: I've had two for DECADES and I love them, especially with the R1 foot controller. The only thing on the market that comes close and then offers slightly more versatility with the extra loops is the TC Electronic G system. The MPXG2 was way ahead of its time; the effects chain and routing can be configured at will into parallel, left and right signal paths and in any order. The only limit is processing power, so loading it with compressor, detuning, wah, chorus, delay, and reverb probably isn't going to swing. I took the R1 into my tech earlier this year, and he replaced a lot of worn switch contacts and reconnected the slave power through the 7-pin DIN cable, so now it's as responsive as new. Mesa Boogie Triaxis preamp (x2): One v3 with the v1 British mod in Lead 1 red and the other is slightly older V2 and a little more worn membrane front but it has the recto board which gives recto tones in Lead 1 red. The MkIII (Lead 2 red) is the sound that has been in my head ever since I started learning guitar so both are staying put for the foreseeable future. Just amazing pieces of kit, there's not a bad sound in either of them. Rocktron Intellipitch: Given the limitations of the Intellifex XL (see brelow), I bought this purely for its modulation including 8 voice chorus. It's a fairly rare beast, not many were made - certainly not as many as the Intellifex. Again, like the Intellifex, it lacks a certain sparkle so best suited to parallel signal chains rather than in series, but I have taken all of Leon Todd and others' tri-chorus settings and manually programmed them in. Mesa Boogie Fifty Fifty power amp: I did a gig dress rehearsal with the Marshall 20/20 and it wasn't quite loud enough, so ended up getting a Mesa Boogie Fifty Fifty for about half the price of a 2:90. It almost makes the 20/20 redundant for practice due to it's high (50w) and low (15w) power settings and sounds a little smoother. But it's a lot heavier so I don't know how much of a practical improvement it actually offers. Joyo 112V cabs (x2): Currently loaded with Celestion Neo Creambacks (which aren't available in China), I'm using these with the Kemper pedalboard at the moment but I'm tempted to put the V30's back in as I'm not planning to gig them in the future since getting the Thiele cab made. So the lightweight Thiele cab will stay with the rack and the Joyos with the Kemper pedalboard but the Thiele cab will be gigged regardless of whether the Kemper or the rack comes along too. Rig 2: Vintage I like to use this for songs before the mid eighties. Eagles, Toto etc. Pedalboard Xotic XW1: I originally bought this instead of a Crybaby because it didn't produce a volume drop when disengaged and it can be tweaked to sound like other wah pedals using the tone and Q controls. After I got it, I learned it was a favourite of Paul Jackson Jr and this year, Steve Lukather has been using one with Toto. At the moment I have it set up based on Paul Jackson's settings from one of his YT videos about the pedal. Keeley C4 compressor: This has replaced the Effectrode simply because there is no power bank available on the market that I can run the Effectrode off, so it always needs to have it's own separate power supply and that's really too inconvenient for live use. I did have a Joyo Dynacomp in place before but the footswitch was too noisy and there was some crossleakage under high gain. The Keeley is well made, it fattens and squashes the signal without sounding too intrusive. There are a lot of different kinds of comps on the market designed to appeal to many different tasts but I have no regrets buying this one. Initially I had it in front of the gain pedals but I may just experiement with putting it after. Xotic AC Booster: I had been playing around with various cheap TS and Klon style pedals as boosts into the Amptweaker but while they all fattened and articulated the mids nicely, they were a little flat sounding. So I bought the AC Booster and as soon as I plugged it in, there was some extra harmonic saturation that I had never heard before. It sounds good with the Concert II but really shines when pushing the PRII, the saturation from both seems to synergise into this rich mid range with some lovely thick harmonics and the tone controls allow tweaks to taste. I know some keep the drive below 12 o'clock but I've found that around 1-2 oclock delivers more saturation. Nobels ODR1: I got this pedal to trial but fell in love with how articulate it stayed even with higher gain settings. No wonder it's the favourite of producer/guitarist John Shanks. It also has very juicy levels of harmonic saturation which is enhanced when boosted with the Xotic AC booster. I almost prefer the combination to the sound of the Tight Rock. And into the PRII this combination sounds even better. Amptweaker Tight Rock: See above. Still my favourite high gain pedal. It's not subtle but does plexi and 6505 with almost no noise. Crowther Hot Cake: This was inexpensive and I was really curious about how it sounded after seeing PRS use one. It's sort of half way between fuzz and distortion with a really grungy character if you push the gain into meltdown terrirtory. But back off and it's a very thick and warm fuzz/overdrive. Mine is from the mid noughties so has all the blueberry switch and different options for selecting different versions in previous runs. This one tends to swap places with the Joyo. Joyo American Sound JF14: I mentioned above how good this pedal is and I ended up with two but only really use one. I keep coming back to this one, there isn't a lot out there to beat it apart from the pedal it copied - Tech 21 Blonde. It can do astoundingly god versions of Twin and Deluxe amps and when the mids are pushed using the character, mid eq and drive it will get near Super Champ. Just a great pedal but the components aren't as durable as they could be. TC Electronic MImiq: This is a recent purchase with a view to starting the yacht rock board. Basically it replicates the sound of double tracking using two signal paths with one subtly affected by variations in delay and microtuning. I haven't played around with it much yet so don't have a lot to say about it yet. Zoom MDC70: This was a cheap way to access a trichorus sound. It has a patch that copies a TC Electronic Corona tri chorus setting. It's possible to add two more patches for a total of three accessed with a single button press. I don't have a lot more to say about it at this moment but I'm temped to see how well it can cover the trichorus+micro detune that was made popular by Mike Landau and his frdge of rack effects in the eighties. Mooer Ocean Machine mk 1: There's not a lot out there which can compete with this in bang for buck. The delays are pretty good, the reverb has an artificial sounding presence and I generally turn the shimmer control to zero which kind of reduces the transparency as well. Still, it's not likely to be noticed in live settings. A mark 2 version has been released which updates the algorithm and improves the effects quality but I haven't checked out whether the shimmer is better. Once finances permit, I have plans to overhaul the pedal board and make it more schmoo focussed. So the drive pedals will probably stay but the delay and reverb will be handled in one signal chain by an Eventide Time Factor and Strymon Big Sky, and modulation in another a Free The Tone Triavatar and a Yamaha Magicstomp for SPX90 style detune. Fender Concert II + 1x12 extension cab: Originally in an earlier post, I had planned to let this one go but it's found a purpose in supplying high volume Fender cleans. This was my first Fender and it took eight years to bring it over to China. Cleans are classic blackface, David Gilmour used a bank of them for Live Aid. There are some critics of the distortion but I like the overdrive on mine. It's got tweedy bite to the midrange but sounds smoother and warmer. It's also loud for 60W and, to make it push even more air, I commissioned a custom matching cabinet if I ever want to gig it. Originally the combo came with an Eminence Red White and Blues speaker but I've put Jensen N12Ks from a Tonemaster Twin instead for yet even more midrange articulation. The extension cab is from lightweight birch ply and even with the Jensen installed, it's a two finger lift. Can't say that about the Concert itself though. Fender Princeton Reverb II: I've said a bit about it in the original post. It sounds slightly richer and more saturated than the Concert II but doesn't get gigged due to its lack of power. It's also in fabulous condition and I wouldn't want to risk any road rash. Rig 3: Kemper Profiler pedalboard This was set up for portability (despite weighing at just over 10kg) and is essentially self contained from wireless to power amp. Guitar on back, Thiele cab (with neo cones) in one hand and this in the other makes for a single (just about manageable) load out. I also use this for practice due to it's versatility. First in the signal chain is a standard Shure GLX16 wireless. I've been impressed by the range, and have been able to go walkabout in a 600 seat venue already with no drop outs. Battery life seems pretty good too. Next is a Digitech Freq Out - mentioned in earlier posts, it's essentially a pedal for creating artificial feedback. The onset control is a little twitchy and the effect is unnaturally sensitive to disturbance from incidental noises and changes in volume, but for sustained and undisturbed power chords it does the trick. Then the signal goes into the Kemper which is set up with a bunch of amp profiles in song related 'performances' - basically scene shifts in different parts of the song, or a single setting for one song. I tend to have a bunch of classic amps and then some profiles from the preamps. I've found the profiling process adds a certain sweetness and extra midrange during the profiling process which has led to some profiles sounding better than the real thing. Inserted into a loop in the Kemper is a Line 6 M5 for any effects that the Kemper doesn't have, Dimension D for example, and it's connected via MIDI so specific effects are selected with specific 'performances'. Lastly, there are two Roland EV5 pedals connected for volume and wah and the outputs from the Kemper go to a pair of Hotone Loudster Class D pedal amps that put out 85w a side. They are fairly modern sounding as you might imagine but that's a good thing on a crowded stage, less volume is needed due to the extra articulation in the mids and highs that the Class D circuitry offers. The pedalboard then goes into a Custom 2x12 Thiele designed cab which was optimised and loaded with Celestion V30s which are chunky, heavy things. If I need to gig it in the future, I may just replace the V30s with Celestion Neo Creambacks because of lighter weight and extra articulation from neo magnets. The optimisation of the Thiele port might be a little off but I'll live with it. Other stuff: Ibanez TSA5 combos: One failed on me completely after a power cap exploded and burned the PCB beyond repair. So it got basically tossed out. The other one was getting quieter - maybe also the power caps were on their way out. So I gave it to a colleague at work and it sat under his desk for a solid 7 months. Grand Princeton Tweed combos: These replaced the TSA5s and were made by the company who supplies Peavey with its Classic line of amplifiers. Hand built and point-to-point wired. Pretty loud for 5W and well constructed but I don't really need them any more so they are up for sale. Carvin Quad X preamp (sold): Leon Todd wasn't particularly impressed by it's nine valves but I quite liked it for versatility and organic sound - sort of half way between the rawness of a Mesa Studio and the punch of a JMP-1 but not sounding like either. I discovered a lot comes down to valve choice and EHX 12AX7s sounded great in gain positions. However I kept gravitating to other preamps not because the Carvin was bad but because it wasn't quite the sound that was in my head. Burman GX3 preamp: Mentioned above, I still haven't tried it with the Pro501 (which is for sale in the UK) This does a lovely, almost fuzzy overdrive, almost with the midrange of a Tweed but with more bass. I haven't yet tried it with a rack-mounted power amp either and that could get interesting. Marshall JMP-1 + 20/20 EL84 power amp: Currently up for sale where I am. It's a great sounding preamp by itself but when paired with the 20/20 power amp, together they deliver that classic Marshall roar heard on thousands of rock albums. The nostalgia hit when listening to it being played is almost overwhelming and the JMP1 can do any Marshall amp made before the early ninties from JTM to Plexi to JCM800. Mesa Boogie Studio preamp: was my first purchase and originally it was intended to nix my lust for a (heavy) Mark III. I had the studio preamp in a rack and really didn't like the sound of it when recording. But paired with a rack power amp, it sounds much tighter and less brittle. As nice as it is, I still preferred the versatility and slightly tighter sound of the Triaxis so it's currently up for sale. DBX 266XL compressor: I read online reviews about how coloured this compressor was but when I actually tried it, the warmth and smoothness was surprising. Lexicon MPXG2 seemed to play nice with it as well so it got transferred over to the studio rack where it has been ever since. Really like this one, highly recommended. It may get transferred back to the guitar rack at some point. DBX 215 graphic eq: I don't have much to offer on this. I generally use it for enhancing the sound I get out of the studio monitors, not much more than that. The Yamaha HS5s I have are fairly honest sounding so while they're great for mastering (which I never do) they lack a little sweetness and punch. Rocktron Intellifex XL: I got this for schmoo - a name for that chorusy, reverb-drenched, clean eighties strat sound made famous by Michael Thompson, Dann Huff and Mike Landau. Have to be honest I was a little disappointed by the sound quality, it's not as hifi as the Lexicon MPXG2 and the settings are more limited than the earlier 'Intellifex Online' version. I can only detune in increments of five on the XL where the Online allows detuning in increments of 1. The lack of subtle detuning makes tri-chorus difficult to achieve. Apparently this was done to provide more ROM memory for a more variety of patches. I'm currently troubleshooting the new studio rack, which has been set up for parallel effects so I will see what kind of improvement there is in sound quality in the short term but I get better reverb and crisper delay from the MPXG2 so the Intellifex is currently up for sale. Lexicon MX200 multi effects: This was only 45 quid and I had it in my studio rack for a while until it was time to reconfigure for parallel processing and then it stopped detecting input signal. I have no idea why, and it needs looking at. But basically, it offers Lexicon quality delay and reverb for relatively little money on the used market because there are so many of them around. A bit of a secret. Behringer Virtualiser: I bagged this after seeing it pop up in a number of online reviews and have to say it's quite impressive for the price. There's a transparency and fidelity to the reverb that is almost immersive. It's used in the studio rack for sweetening. There is a whole bunch of other stuff not included because it's not in use, for example an Empress Parametric Eq, Adrenalinn III, Digitech Bad Monkey, Mosky Silver Horse, Joyo Dynacomp etc. All currently up for sale and not significant enough to discuss.


 1 point
 -
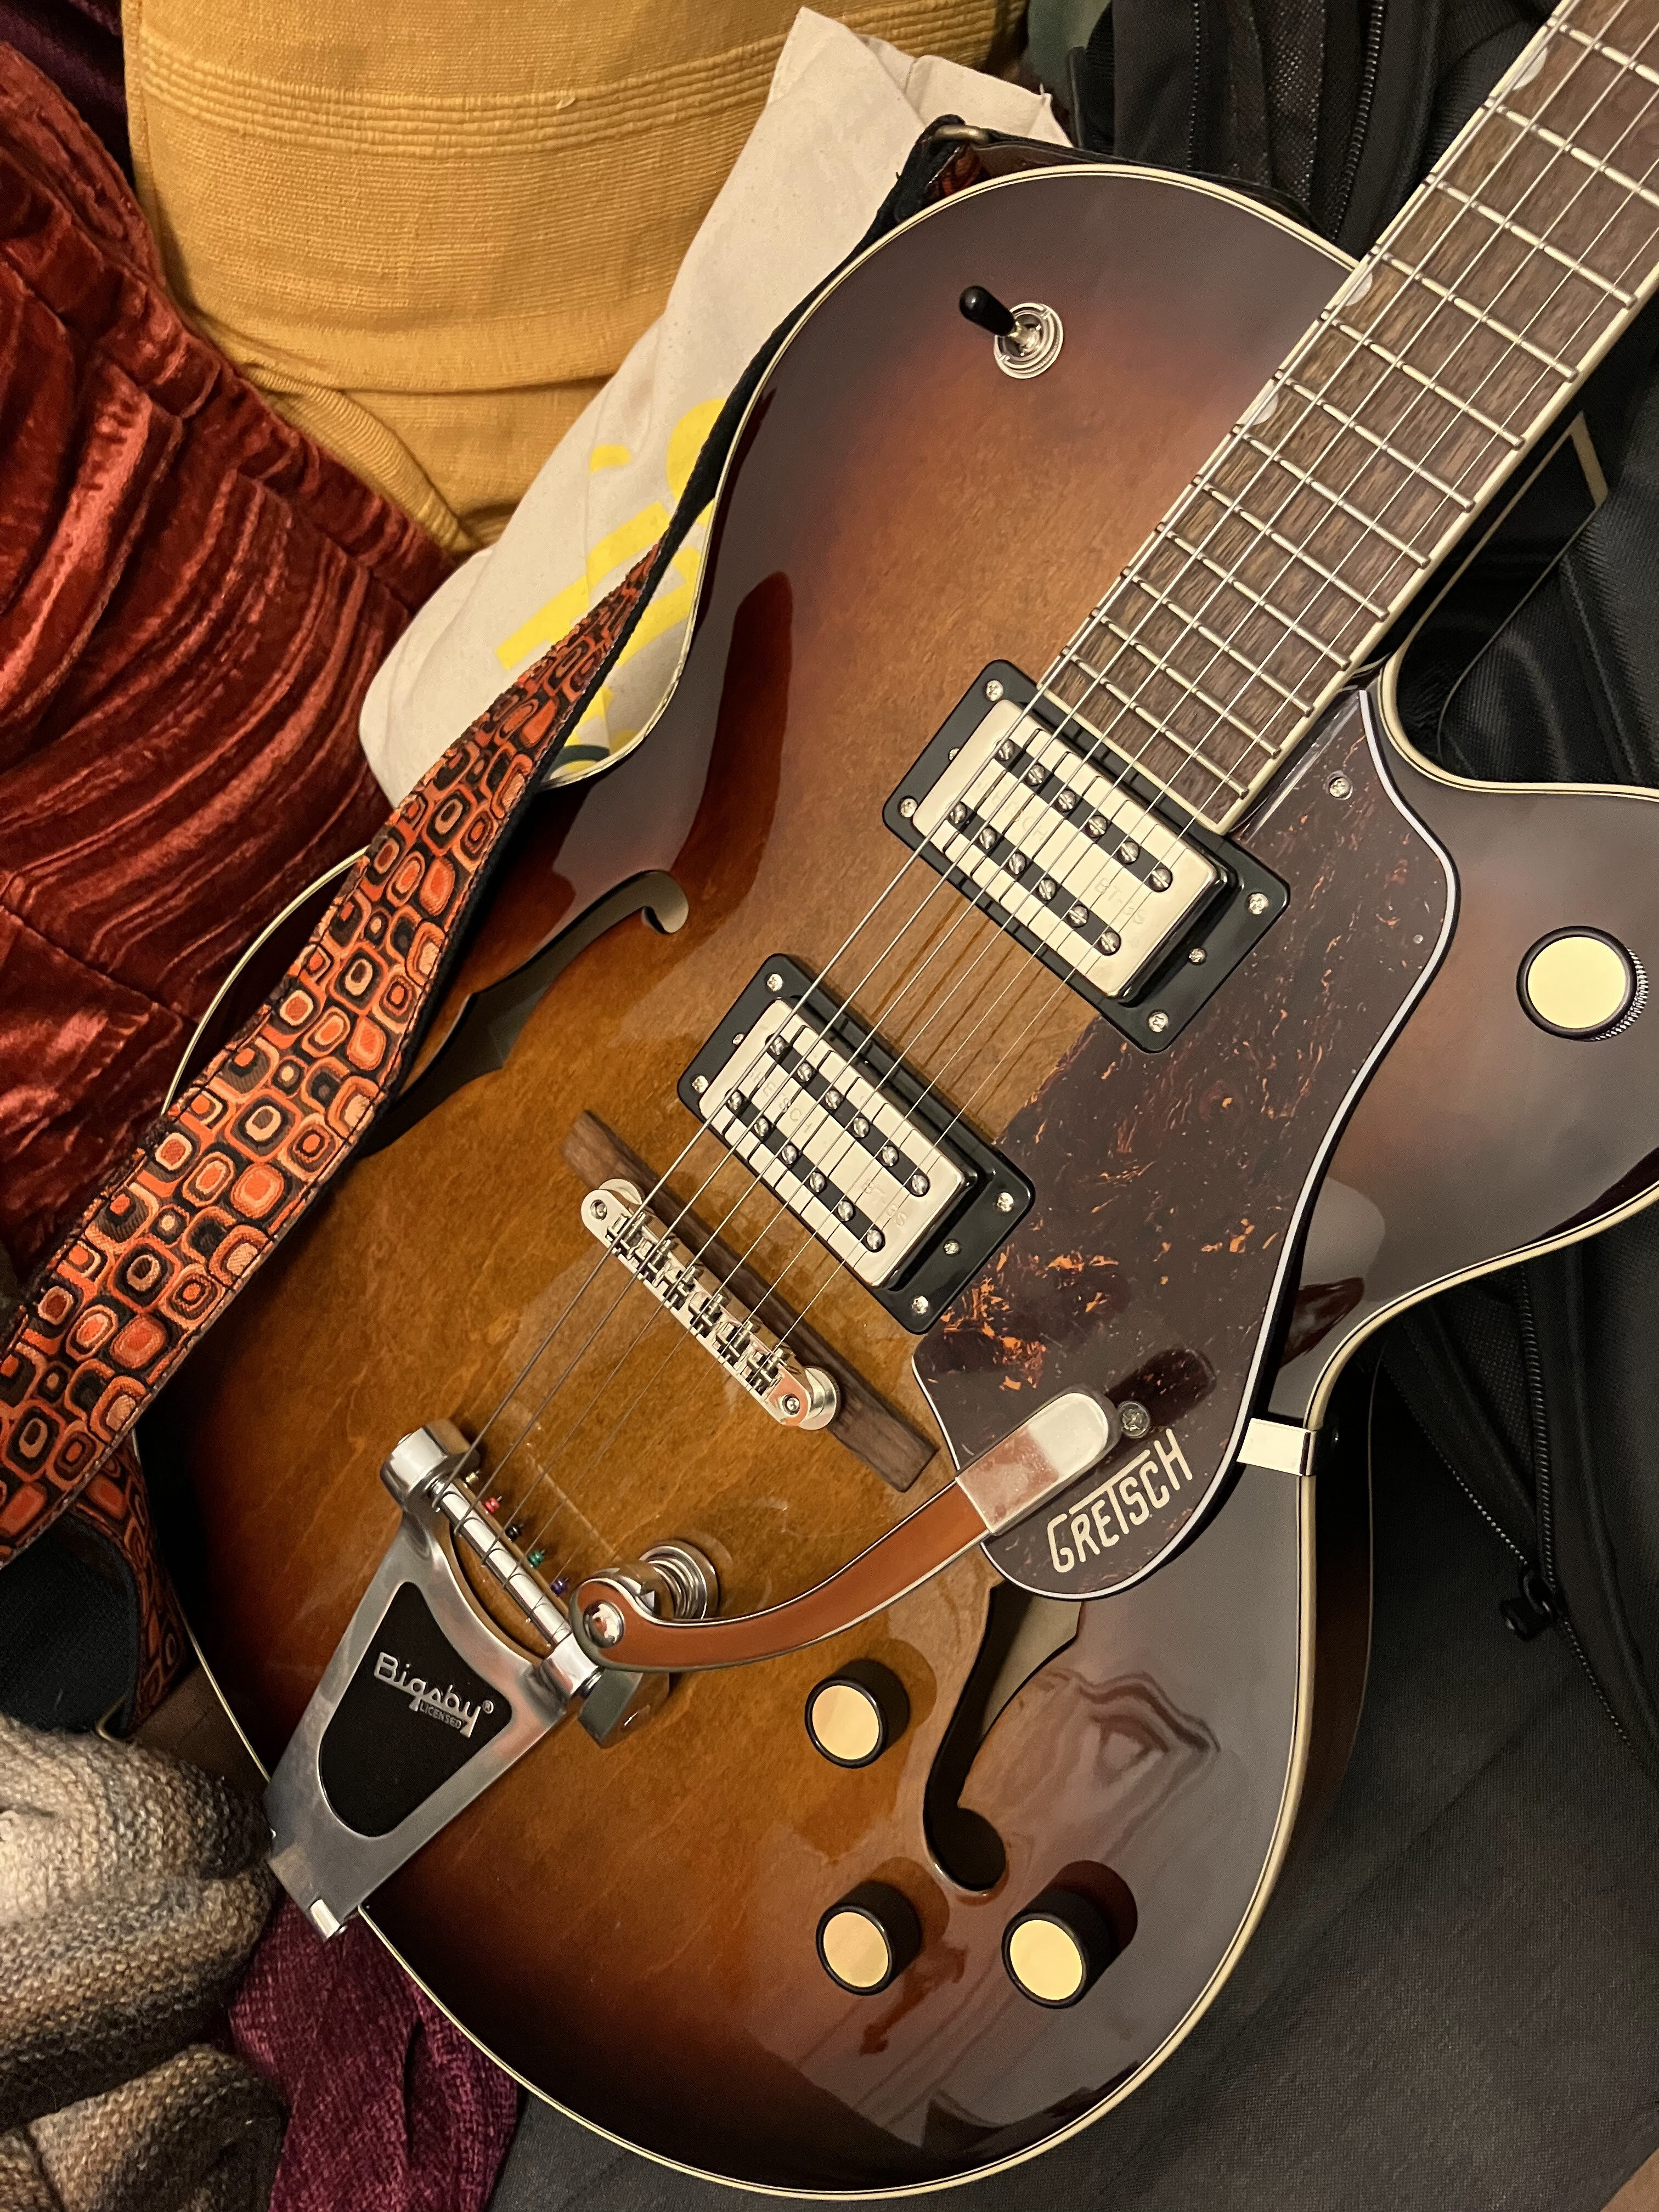
Thinking that I ought to have a hollow bodied guitar for jazz I bought a Streamliner and have indeed given that Bigsby a wobble from time to time despite it being considered inappropriate within the genre.
 1 point
 -
Price for price, and for equivalent condition, I'd suggest that the Fender would be the better deal. Any signs of repair, on any such guitar, would need to be fully investigated (this goes for most s/h acoustics, of course, but 12-strings have their own foibles...). Check carefully that the sound board (table...) of the guitar is nice and flat; some models have a tendency to have the bridge pull up, forming a 'belly', due to the extra tension of so many strings. To prevent this, it was a 'standard' trick to tune down one tone ('E' becomes 'D' etc...), and use a capo at the second fret to bring it back to regular 'E' tuning. It's always best to have a decent gig bag, at least, or a hard case; be aware that the extra headstock length has to be taken into account when buying a case. Other than that, it's much like any other s/h guitar. I'd expect to pay about 300€ for those models, in good condition for their age, maybe a bit more for the Fender, but not the double. Good luck with the hunt; report back here when you find what you're after..? Hope this helps.1 point
-
i used one continuous oak board (easy cuts) to make this: lots of sanding, some stain, etc. I used the scraps to create supports for the bottom side (given the stomping): i used a 1 3/8" hole saw to cut an opening for wires. i then took that plug and split it in half to make posts, to wrap the excess wire: on the underside, i used wire ties, tacked into the wood, to secure the power lines: in the far corner above, you can see i velcroed the transformer onto the underside. then, velcro on the top, and on the pedals, and a $6 leather handle: then, rubber feet on the bottom, and wire it all together. PS this is not representative of my pedal setup, this is just for testing! i'll post the actual rig soon. it's made it through 6 gigs. hopefully more to come (we have about a dozen lined up!). what i'd change- it doesnt stand on it's side, probably because of how heavy pedals are. to put a stand plate on one side would mess with the aesthetic. what i'm thinking of adding- maybe a shoulder strap so i can make one trip from the car to the studio. i can send plans if anyone wants.1 point
-
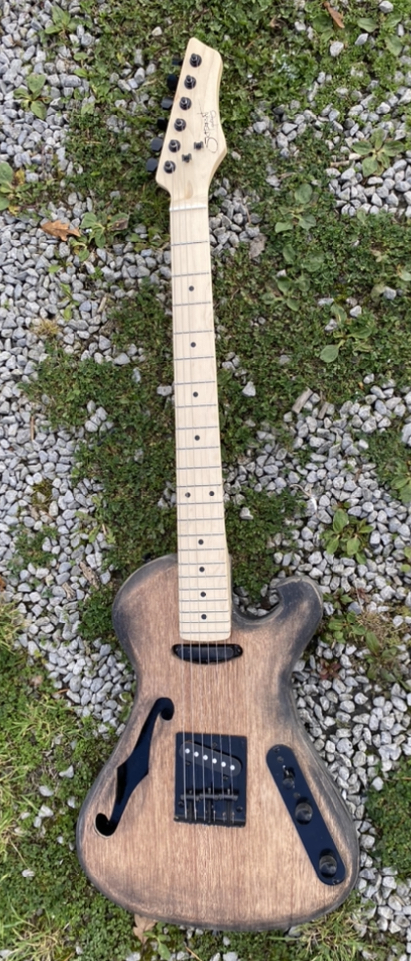
Here’s some new builds I’ve been working on recently…..
 1 point
 -
I too that there’s a lot of fuss over tight neck pockets. Yes they’re good for stability and alignment, but once set up, as you’ve done, I think it doesn’t effect tone, YMMV. I had a 1963 P Bass that had gaps around the neck heel you could drive a bus around (excuse the hyperbole) and it sounded magnificent.1 point
-
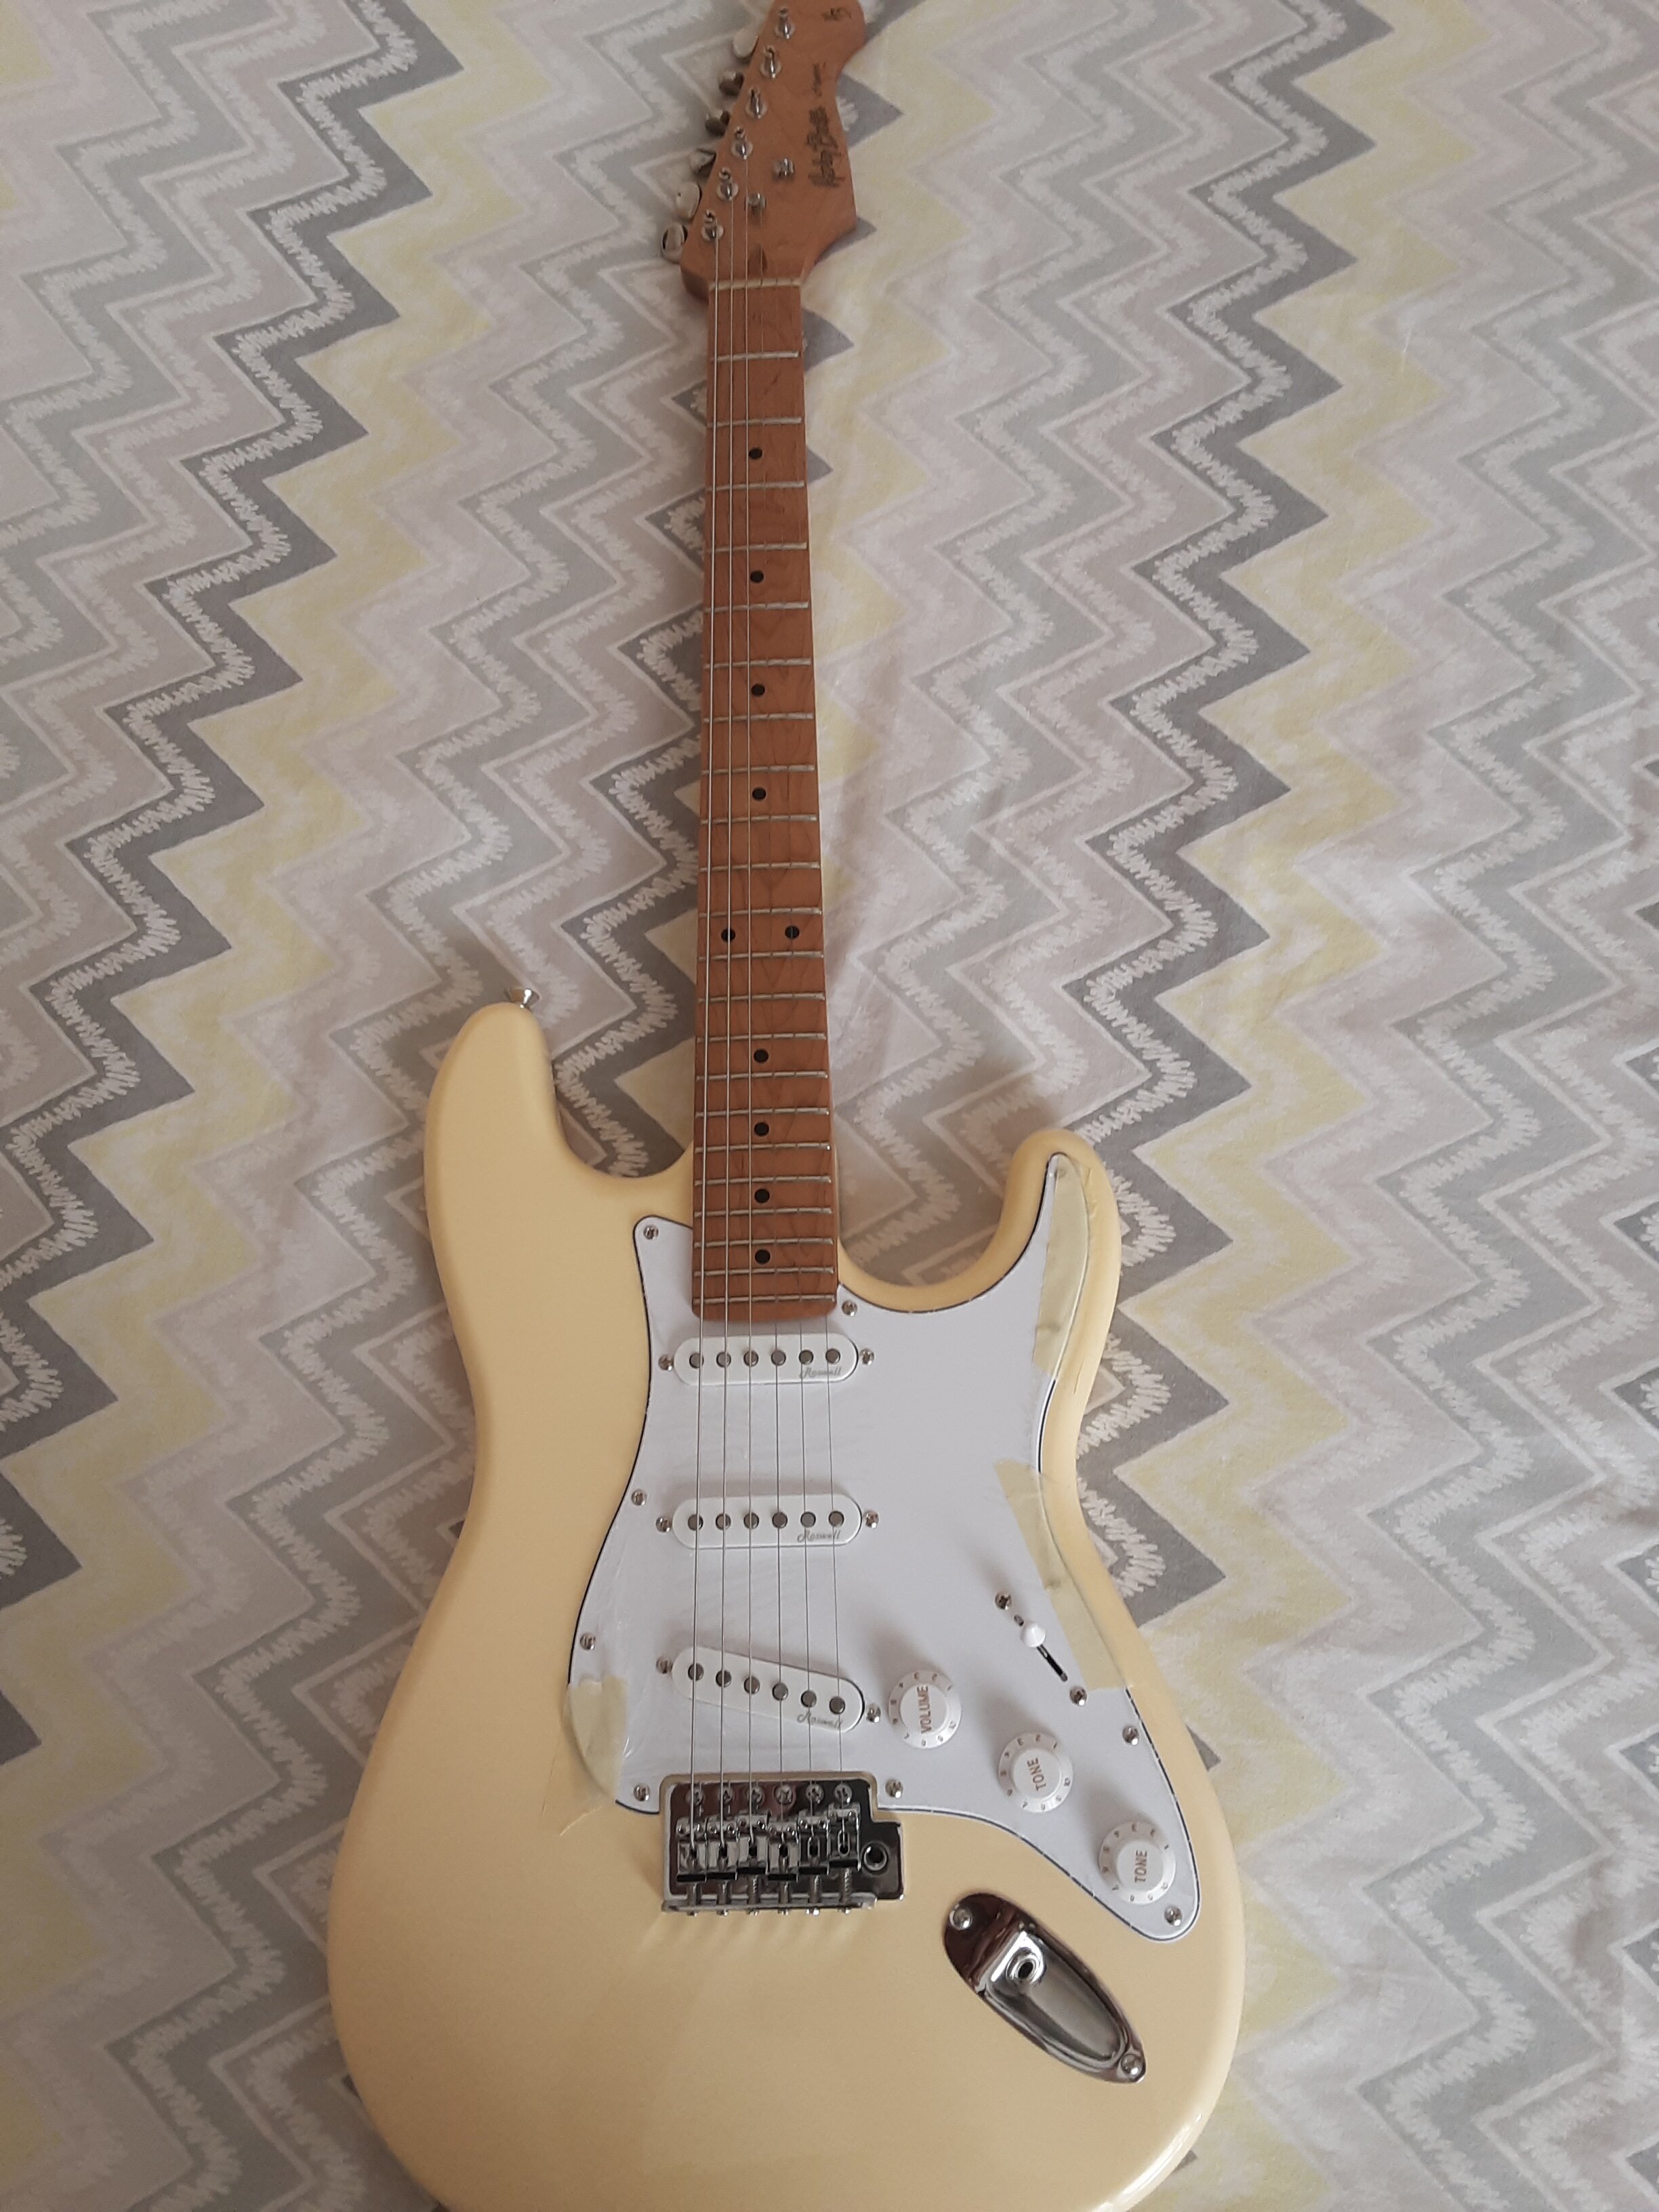
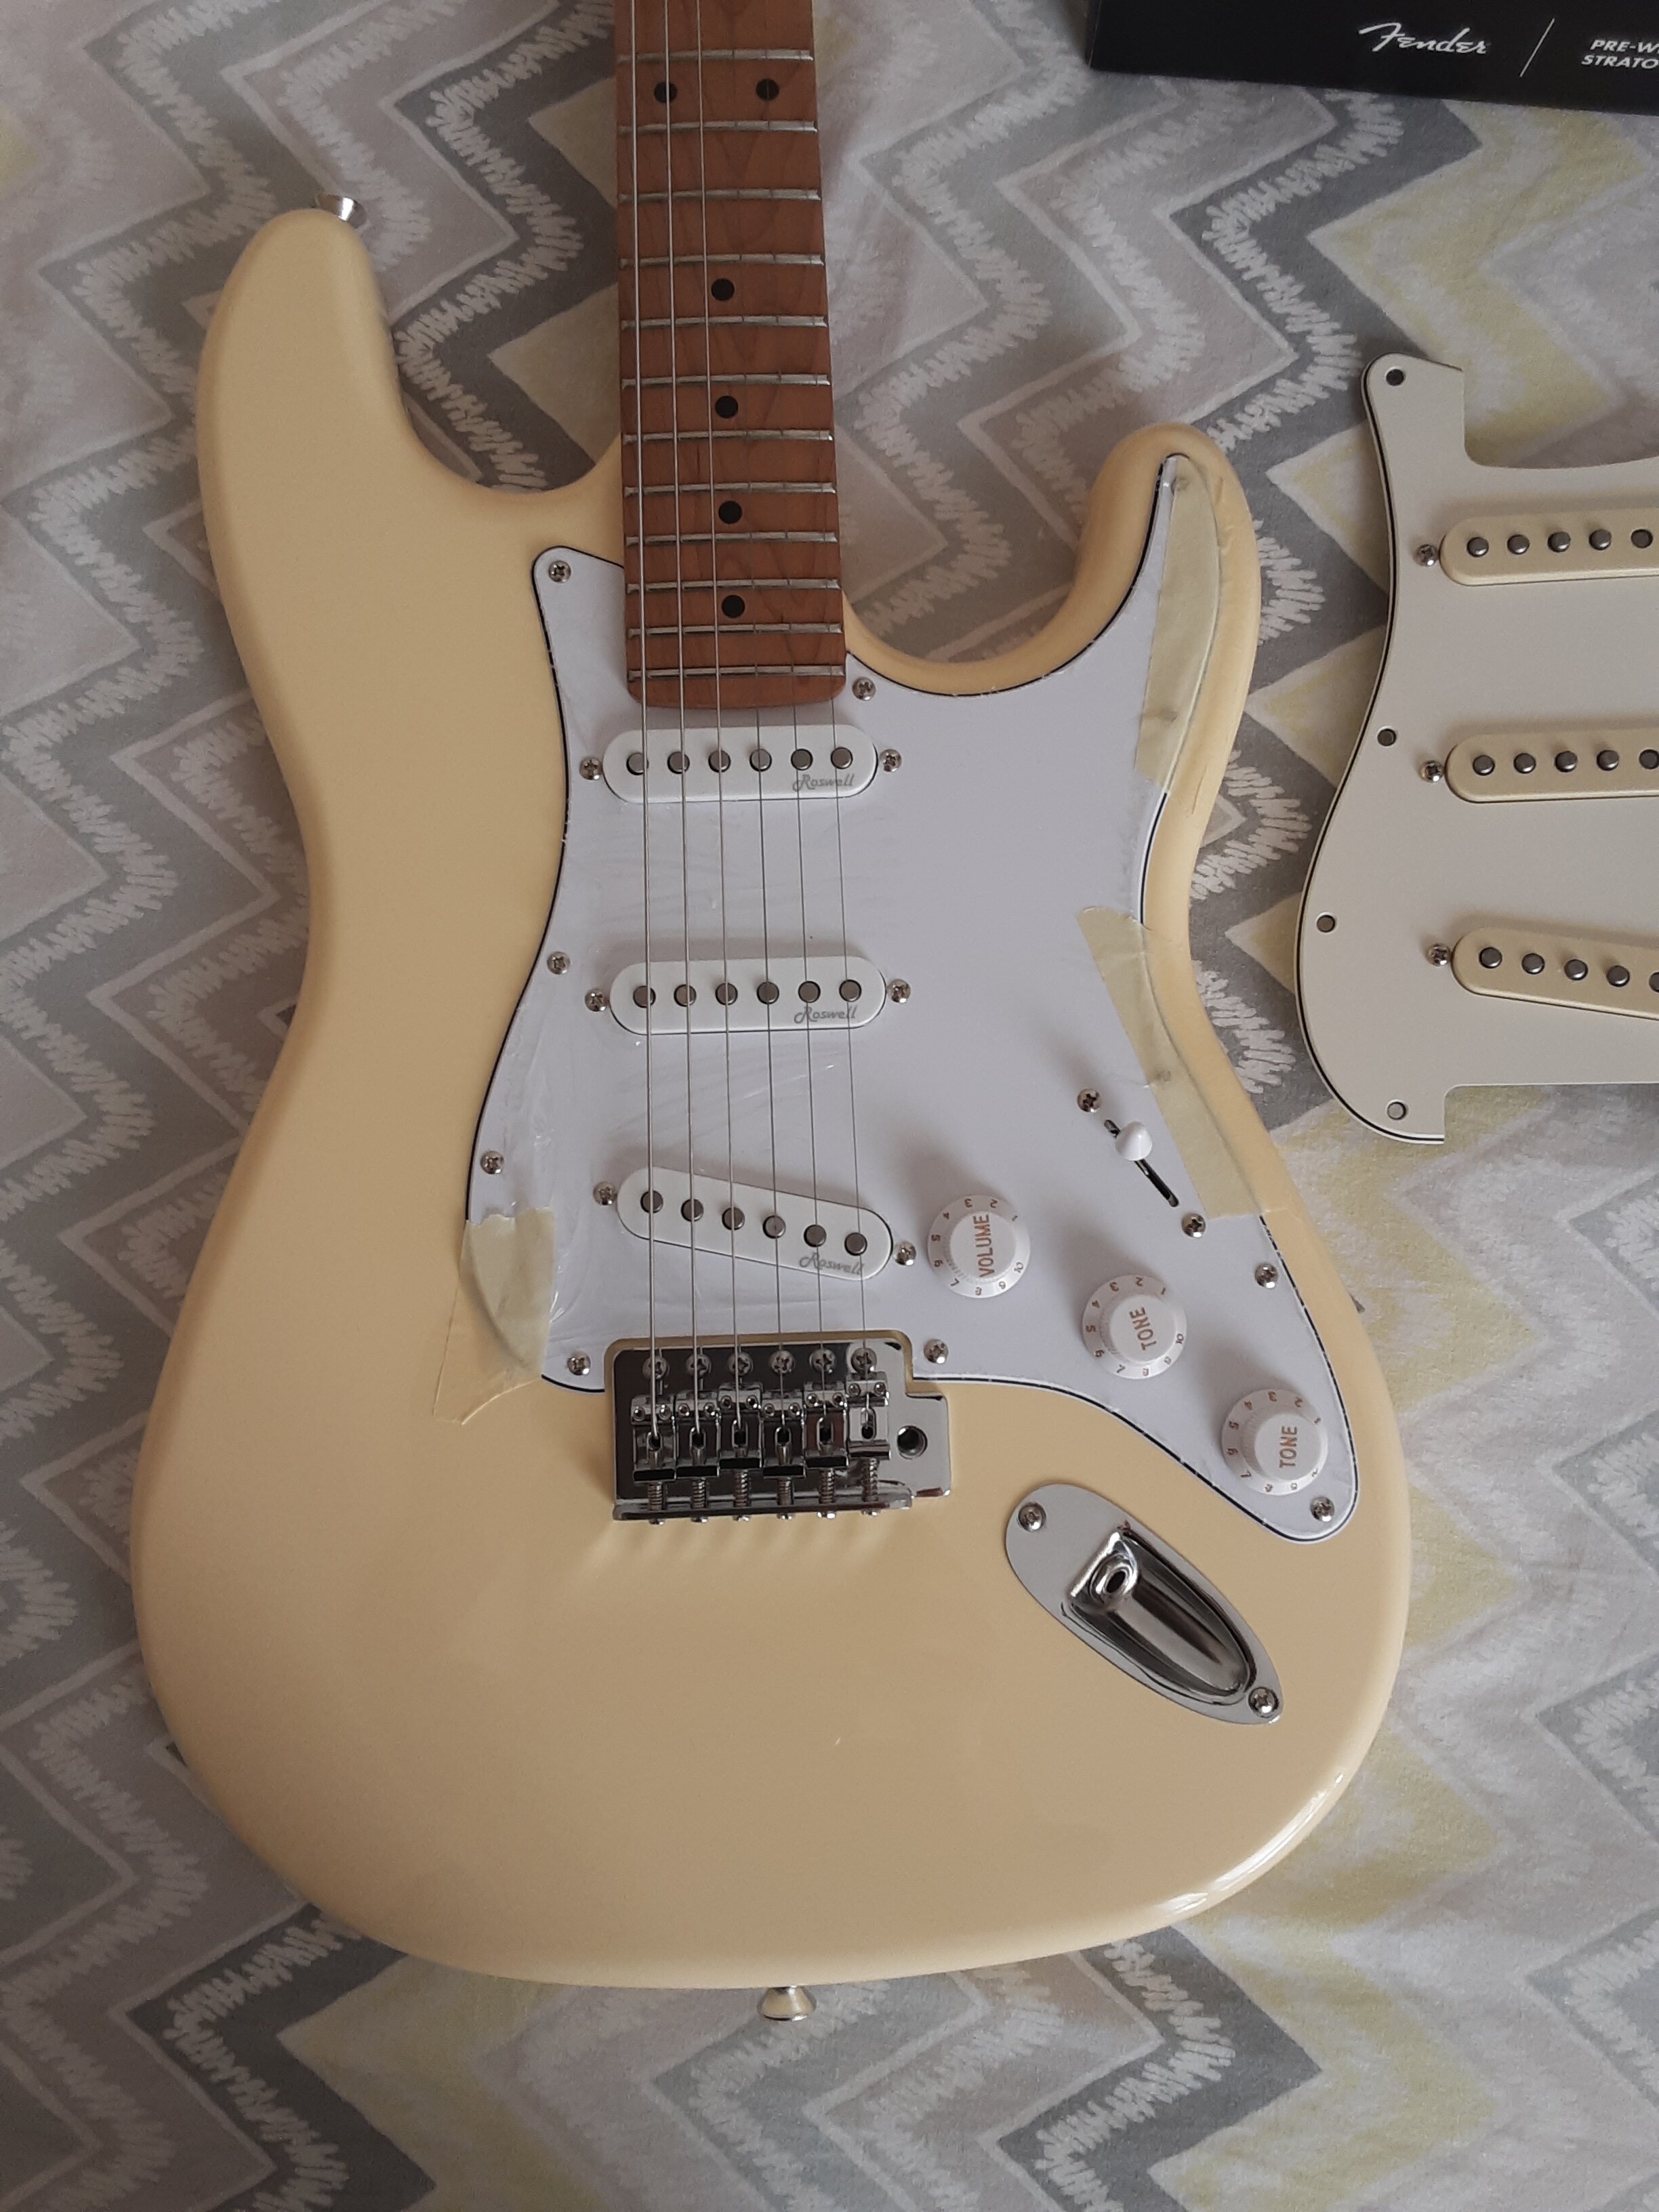
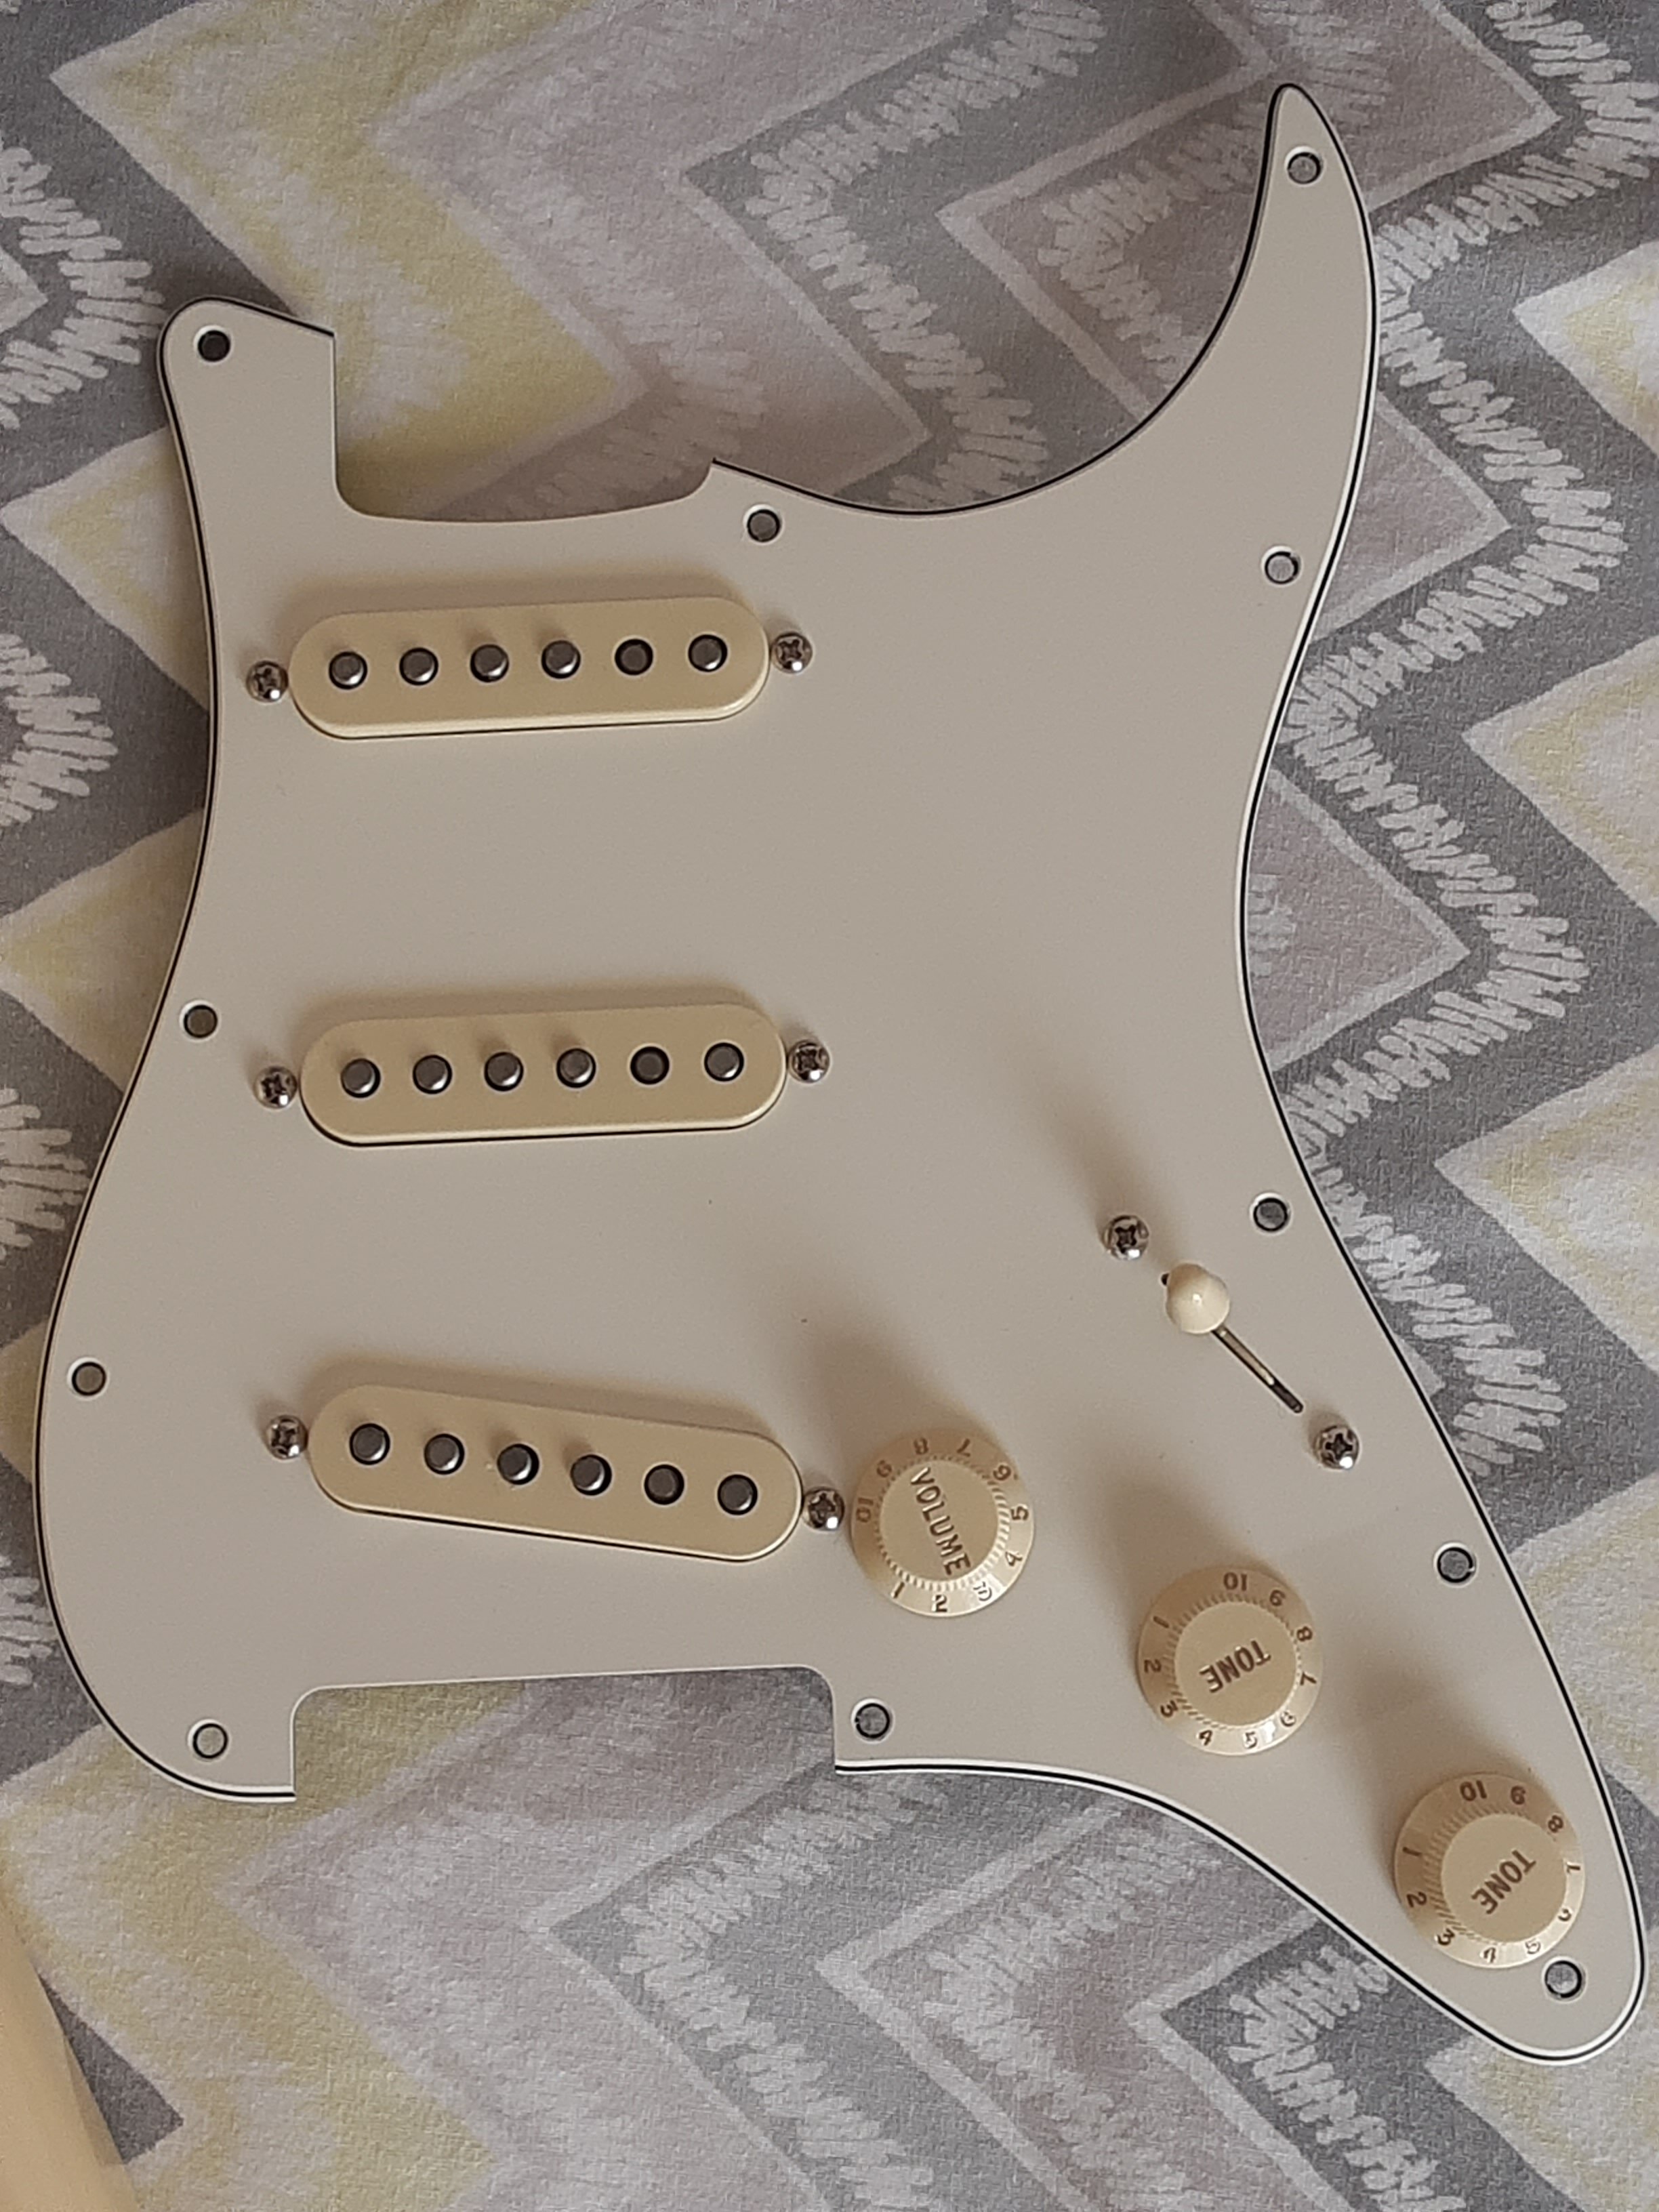
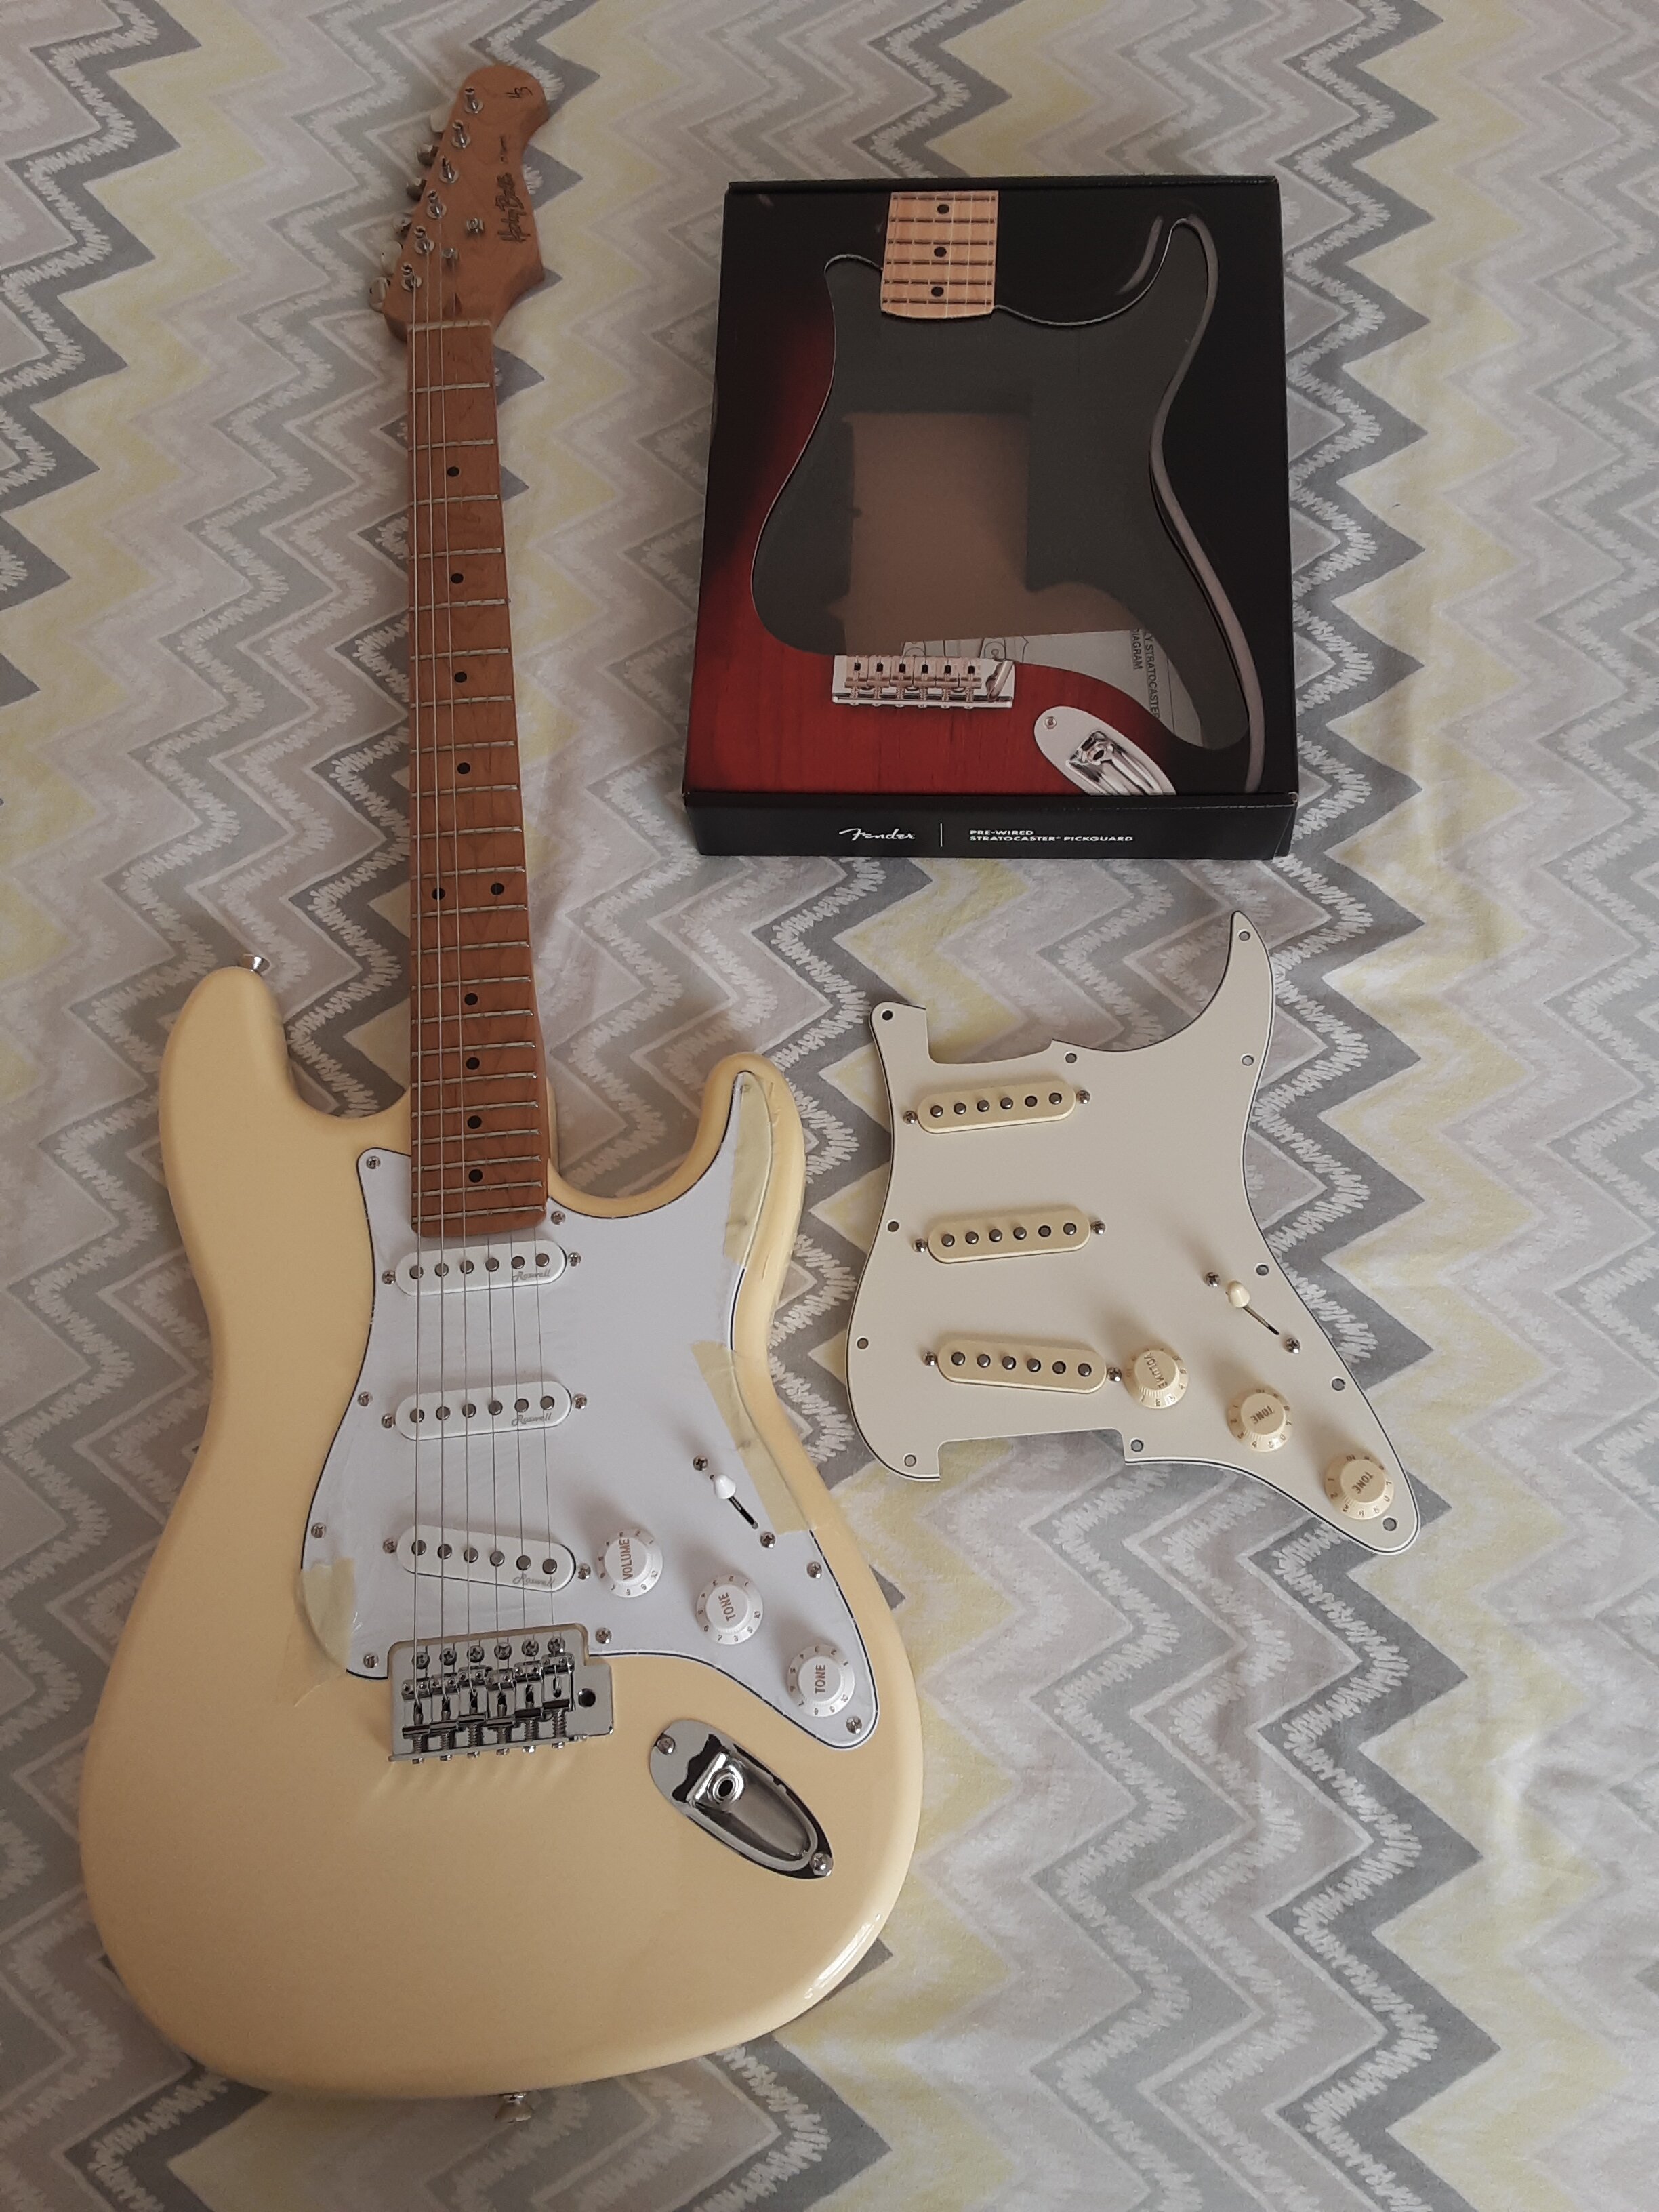
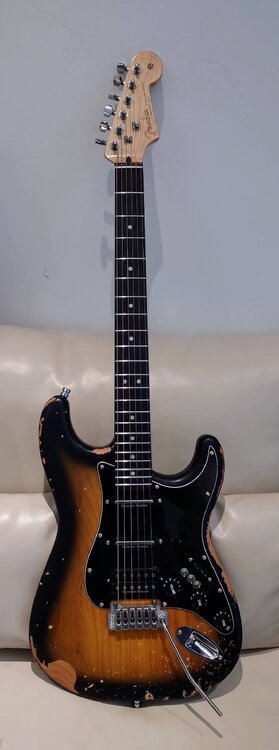
The pictures don't do it justice. The guitar looks impressive out of the box. The fender pre-wired pickguard looks amazing I have to say, it's creamy, not white, which will match everything better with a more pronounced vintage vibe. Colour scheme apart, the guitar is actually very good, above my expectations. The only real problem is that the pocket won't fit the neck like a glove. The neck was out of alignment by a couple of mms and I had to fix that, relying on my eyes and the distance of the strings from the edge of the neck. Question: is the loose pocket a big critical issue? However, half of the Strat pocket is not even there by design hence the pocket will never hold the neck very tight and always have to rely on the bolts. Also I went mad today and I took the guitar apart to the smallest screw to rebuild it tomorrow. It's an ugly duck in need of love but all in all it's a very solid purchase, with lots and potential and most importantly I love it very much. Anyway I will go through all of this when I write my review. The tremolo is set from factory not to work (so they can save time in balancing it with the strings etc) and the electronics were very noisy. More to come on HB... stay tuned.1 point