Leaderboard

.thumb.jpg.2f0f241a63381e5644f287abacd76760.jpg)

Popular Content
Showing content with the highest reputation since 29/04/23 in all areas
-
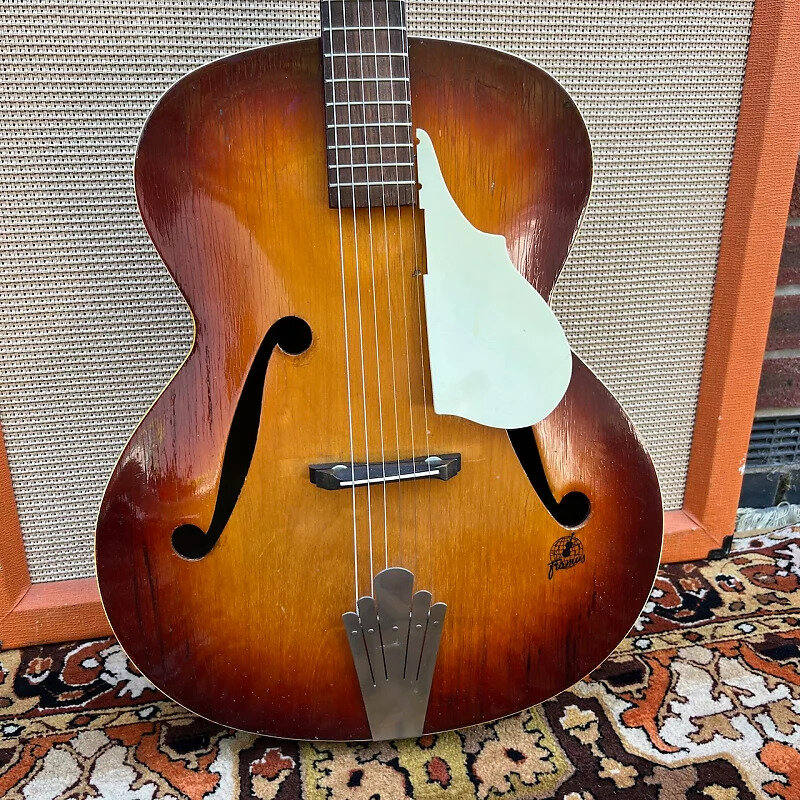
Six months ago I bought my Hohner acoustic guitar when I decided it was about time I started to play again, I then purchased an Epiphone Gibson Les Paul Studio 2. This week my wife brought home an acoustic classical guitar that was going to be sent to the tip. I soon realised that it's previous owner had restrung it incorrectly with the strings fitted in the wrong order, there is also a little damage to it but I figured for the price of a set of strings it was worth messing about with. Three days on and aside from the new strings taking a while to stretch its not a bad little thing to mess about with, and I have been trying a few of the easy classical pieces that I used to play. All very basic stuff ( probably aimed at primary school leve) but I am enjoying it!
 5 points
 -
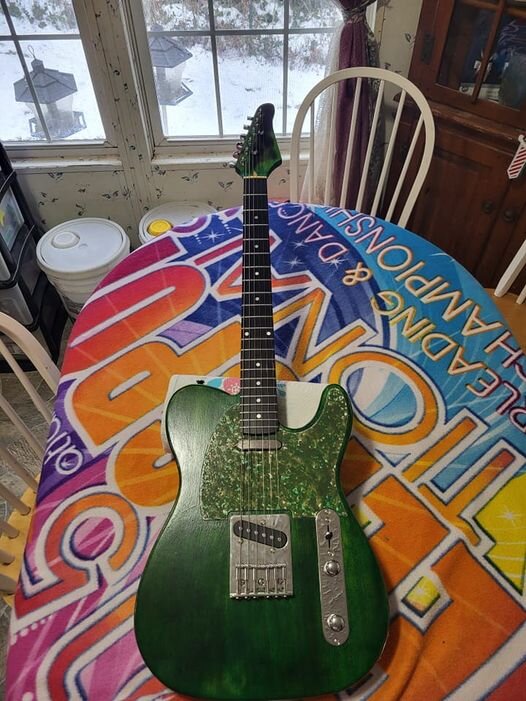
And...it's finished!!!! The 'last few jobs' always turn out to be a 'myriad of final jobs. Anyway, all sorted. I'm passing it across to Alex tomorrow - I will try and get him to do a bit of recording at one of their band practices but, in the meantime, you'll have to trust me when I say it sounds great . Although it is just a small wiring change and no hardware change, I've opted NOT to go for the P-rails standard wiring system which gives: Full series humbucker; parallel humbucker; P90; Rails. I've used that system in a number of my own gigging guitars and I found that: - the fact that both pickups are always in the same configuration for the four options is actually, ironically, quite limiting. I was always hankering for, such as, 'neck pickup full series humbuck for the depth, mixed with bridge pickup in split coil mode to add a bit of extra treble and dispel any muddiness' and similar - I also never, in practice, used the rails by themselves...not enough ooomph - and I never, in practice, used the humbuckers in parallel...not enough depth I talked that through with Alex and, for kickoff, we decided to have a standard split coil option for both pickups where the operating coil in each case was the P90. So he can go full series humbucker with 3 way options, P90 with 3 way options and one (either) pickup P90 and the other series humbucker. It's a 30 minute job to change the wiring to the 'P-rail standard' options if he wants to try that in the future. Anyway, here are some of the arty-farty finished pics: Thanks again for watching this develop and your kind remarks along the way5 points
-
I think HB are great value guitars and worthy of modifying too...here is a Youtube video showing what I do to them:- Infinity Mirror Guitar v3 with hot rail pickup.
 4 points
 -
I've recently bought a HB PB50 bass. I rolled the fingerboard edges and gigged it last week. £105. unbelievable4 points
-
And bringing it up to the present state of play... To balance the purple of the headstock and fretboard, I added a slice of purpleheart to a cut block of ebony and carved the beginnings of the bridge. I also cut the fretboard end to where it will meet the soundhole: Next, I turned my attention to the decoration around the soundhole. Although you have to be a bit canny to maintain the accuracy, I actually find the Dremel radius accessory reasonable for this job: I used a 1mm bit to cut a circle at the centre and wrapped some 1mm b/w/b purfling into it after running a teeny bead of glue onto the bottom edge. After scraping the excess purfling off, I drilled an offset radius tool spike-hole that will be used to put in a second, larger offsett ring (you can just see the pencil check marking offset and outside the installed ring): And then another radius tool spike-hole in between those two to be able to cut - using a 3mm bit - a mid radius to create an offset channel for some curved abelone that, all being well, would fit in between the two other rings. It worked!! And finally, the radius tool spike back to the original hole, but at a slightly smaller radius to now cut right through and create the sound hole : And that's how far I've got so far. It's dinky, isn't it!!!! : Next job is the bracing and 25 foot radiusing of the top. Other pesky distractions mean that it is likely to be into next week before I get to that - but when I do, I'll be sure to post the progress4 points
-
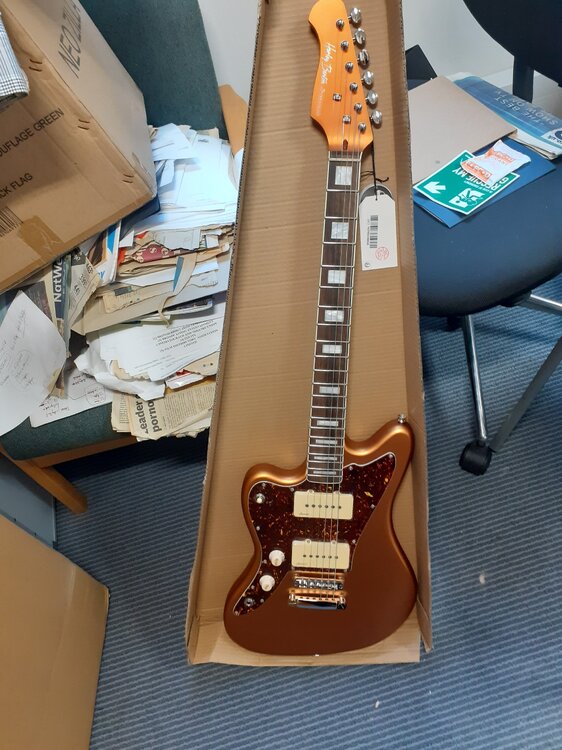
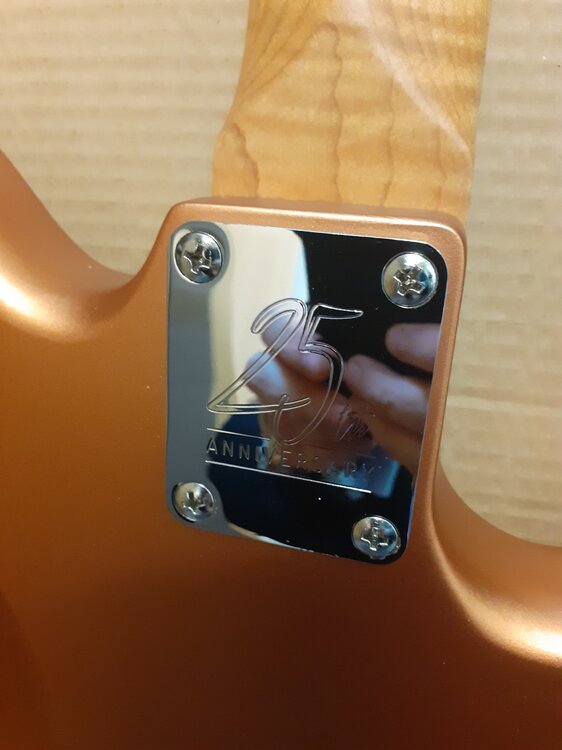
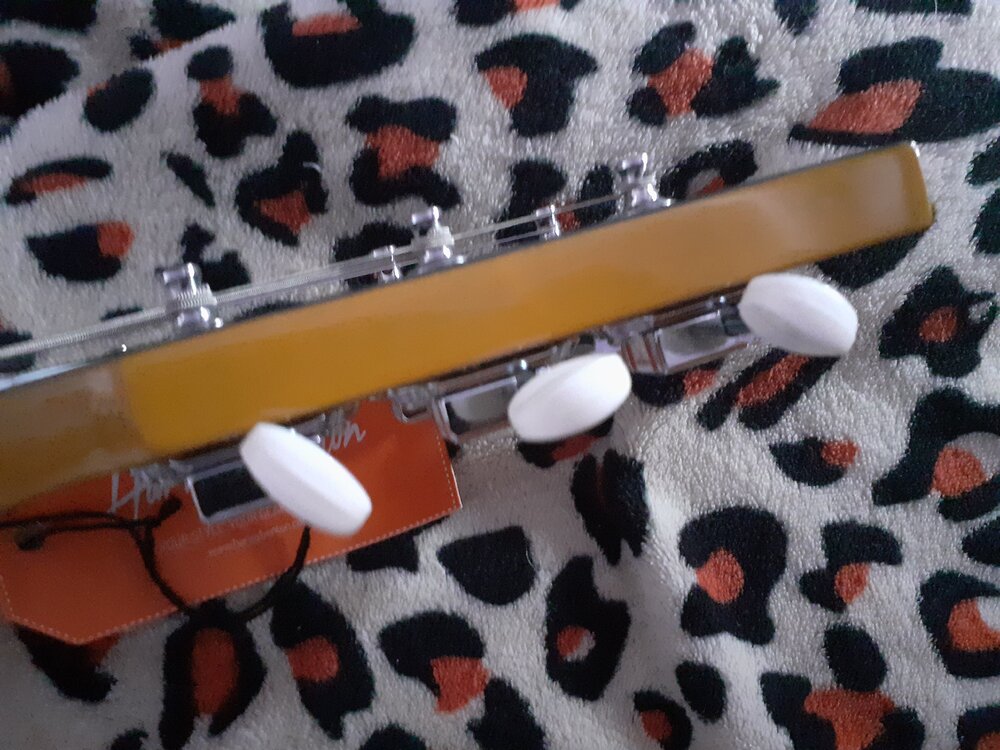
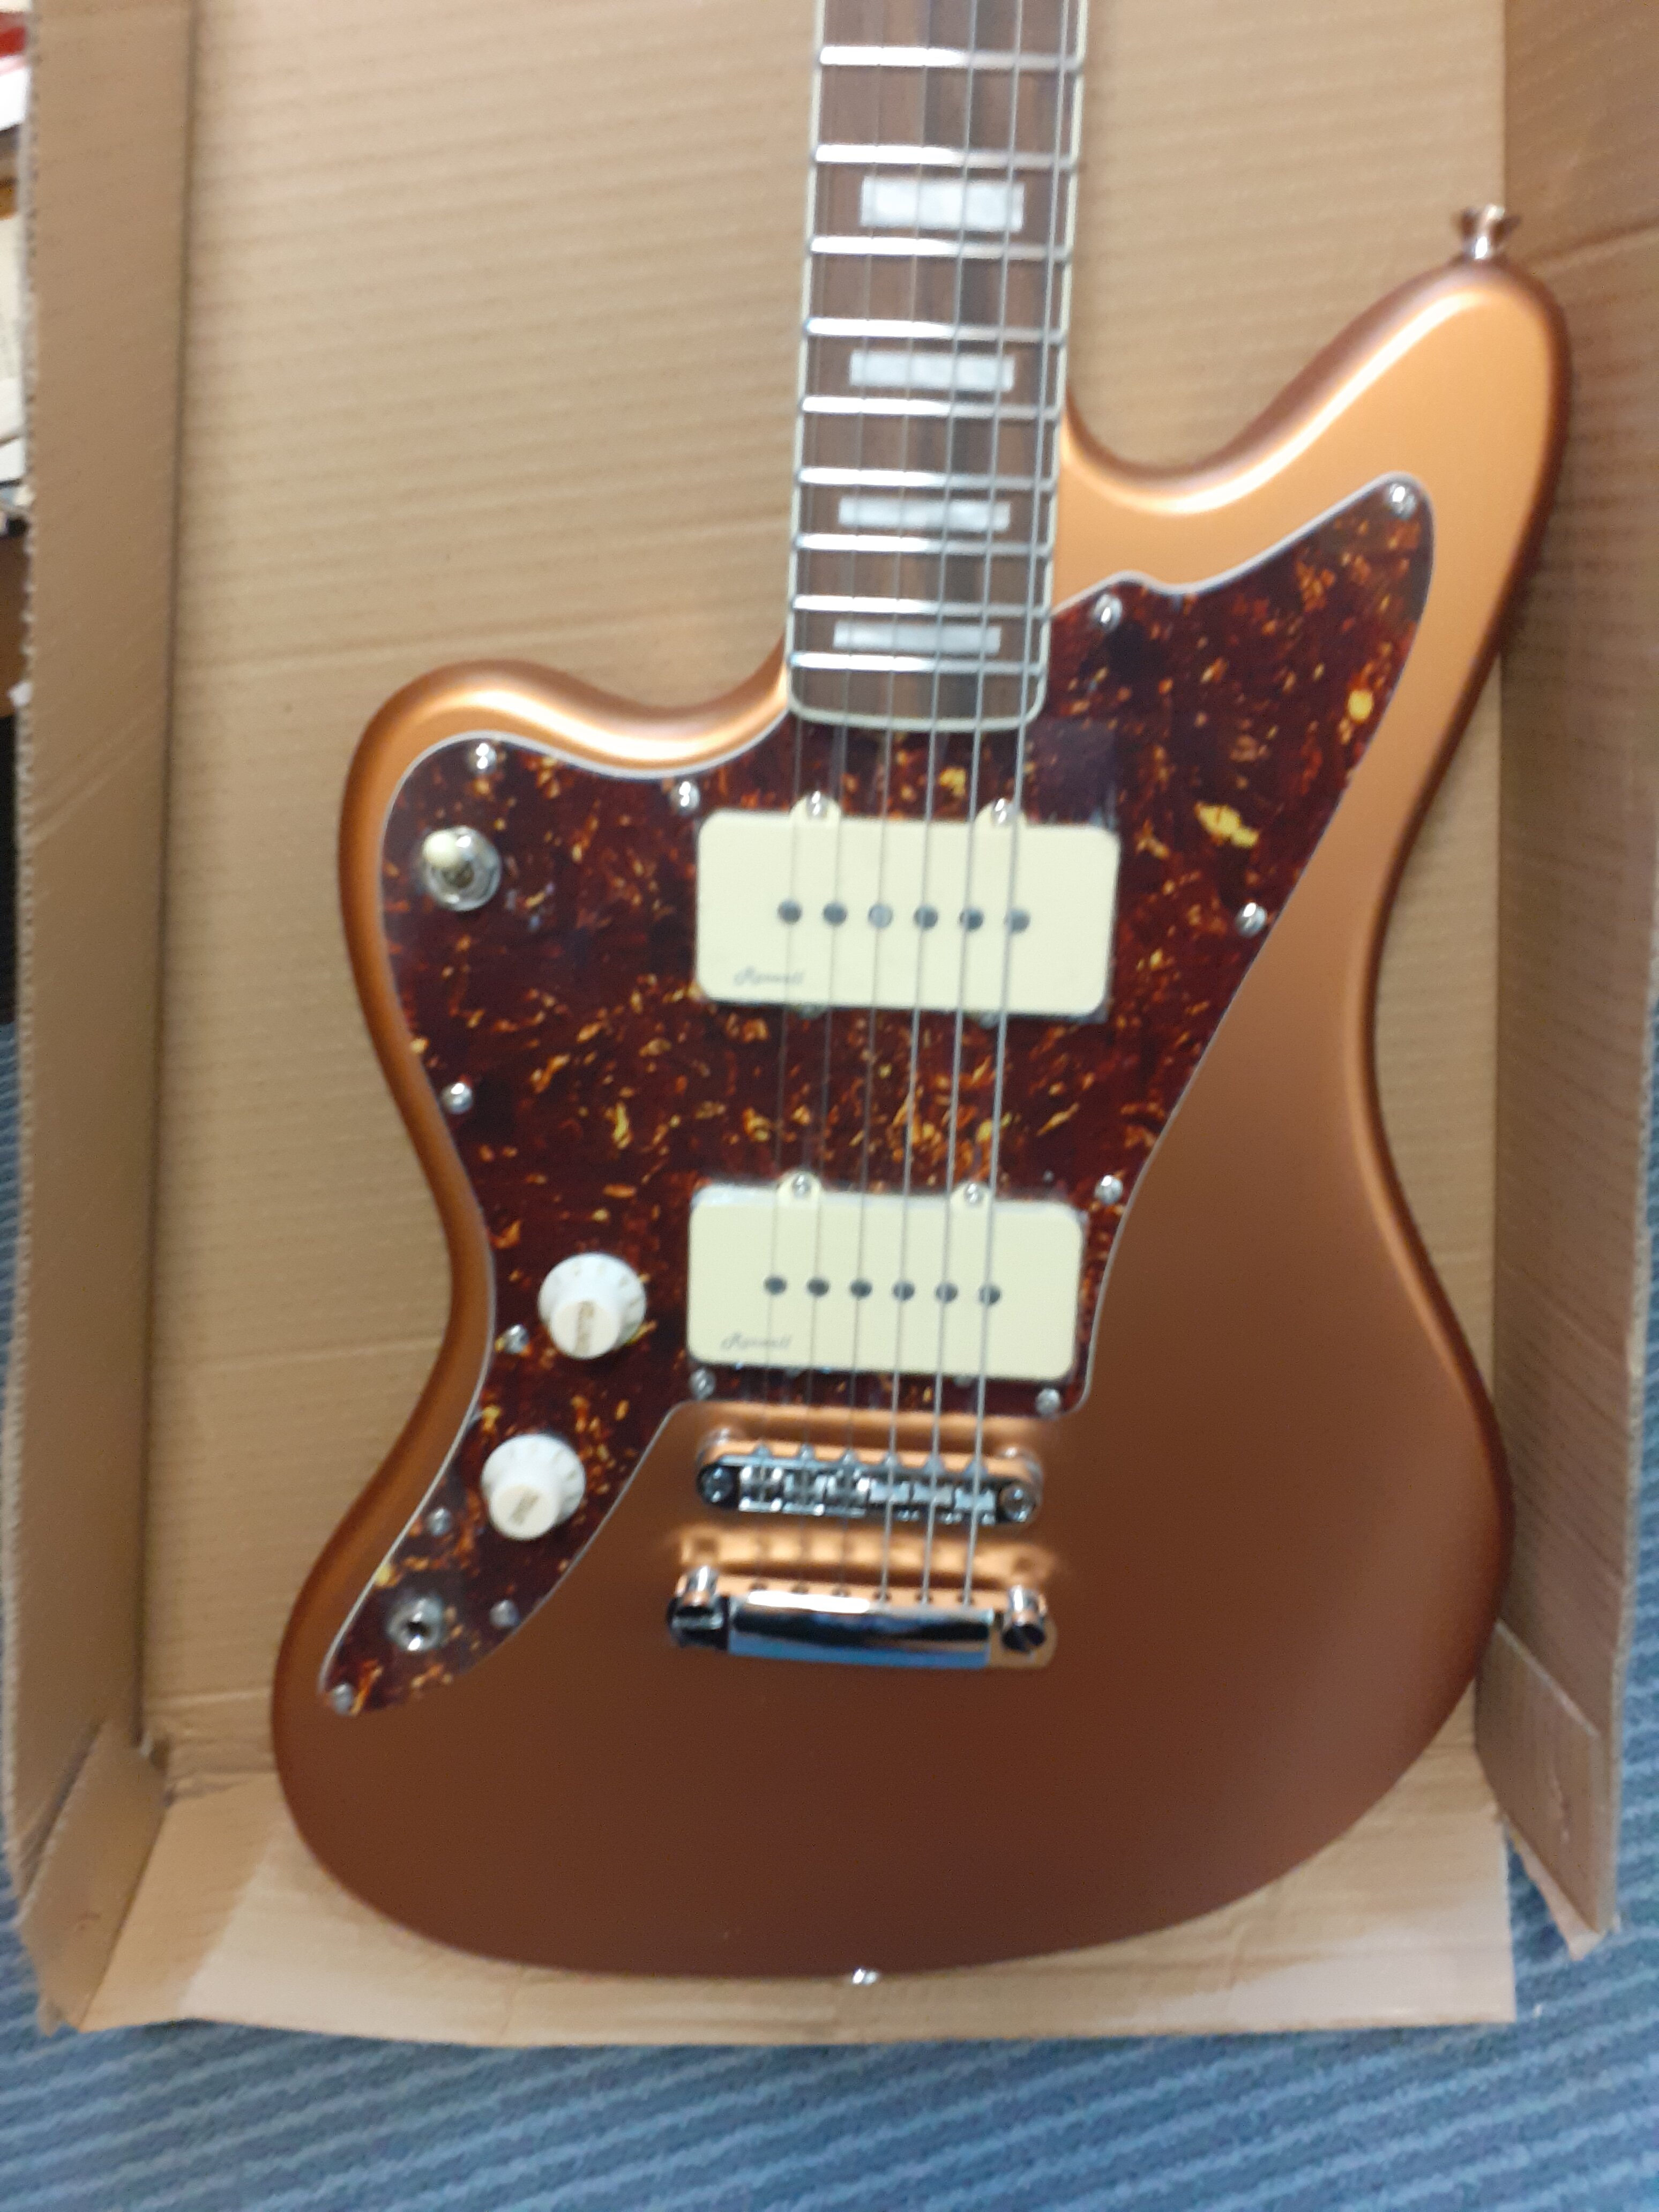
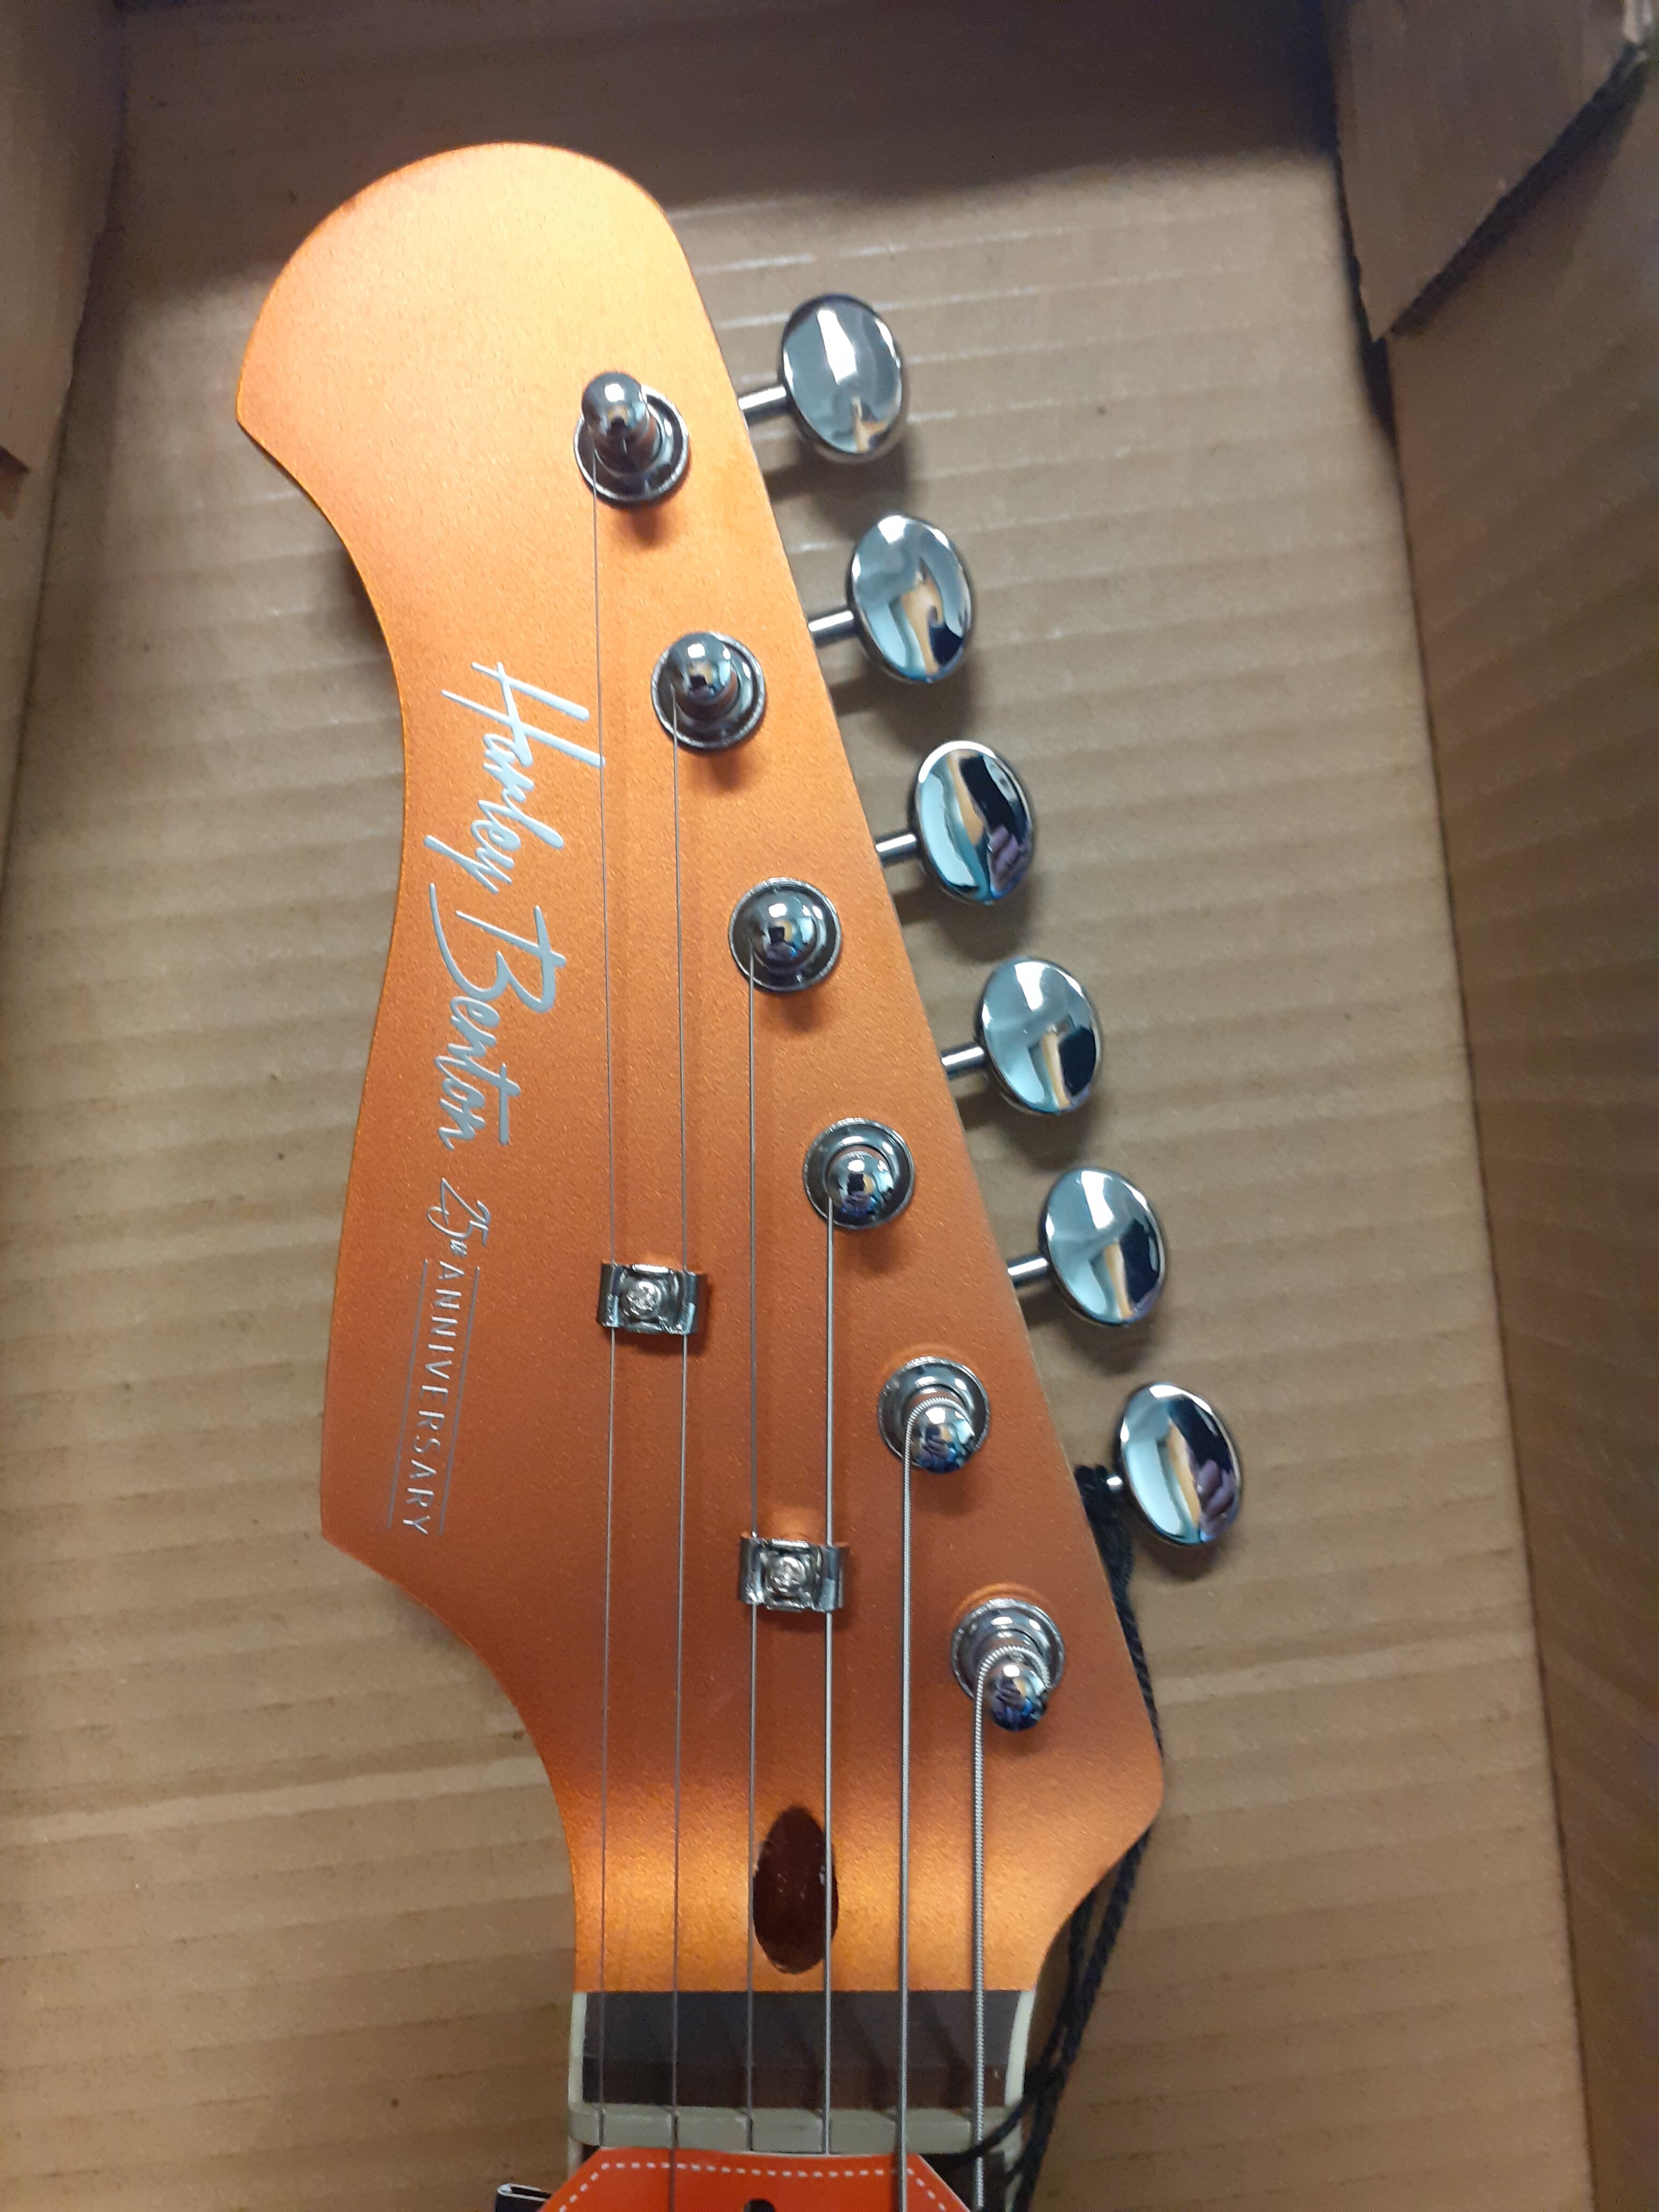
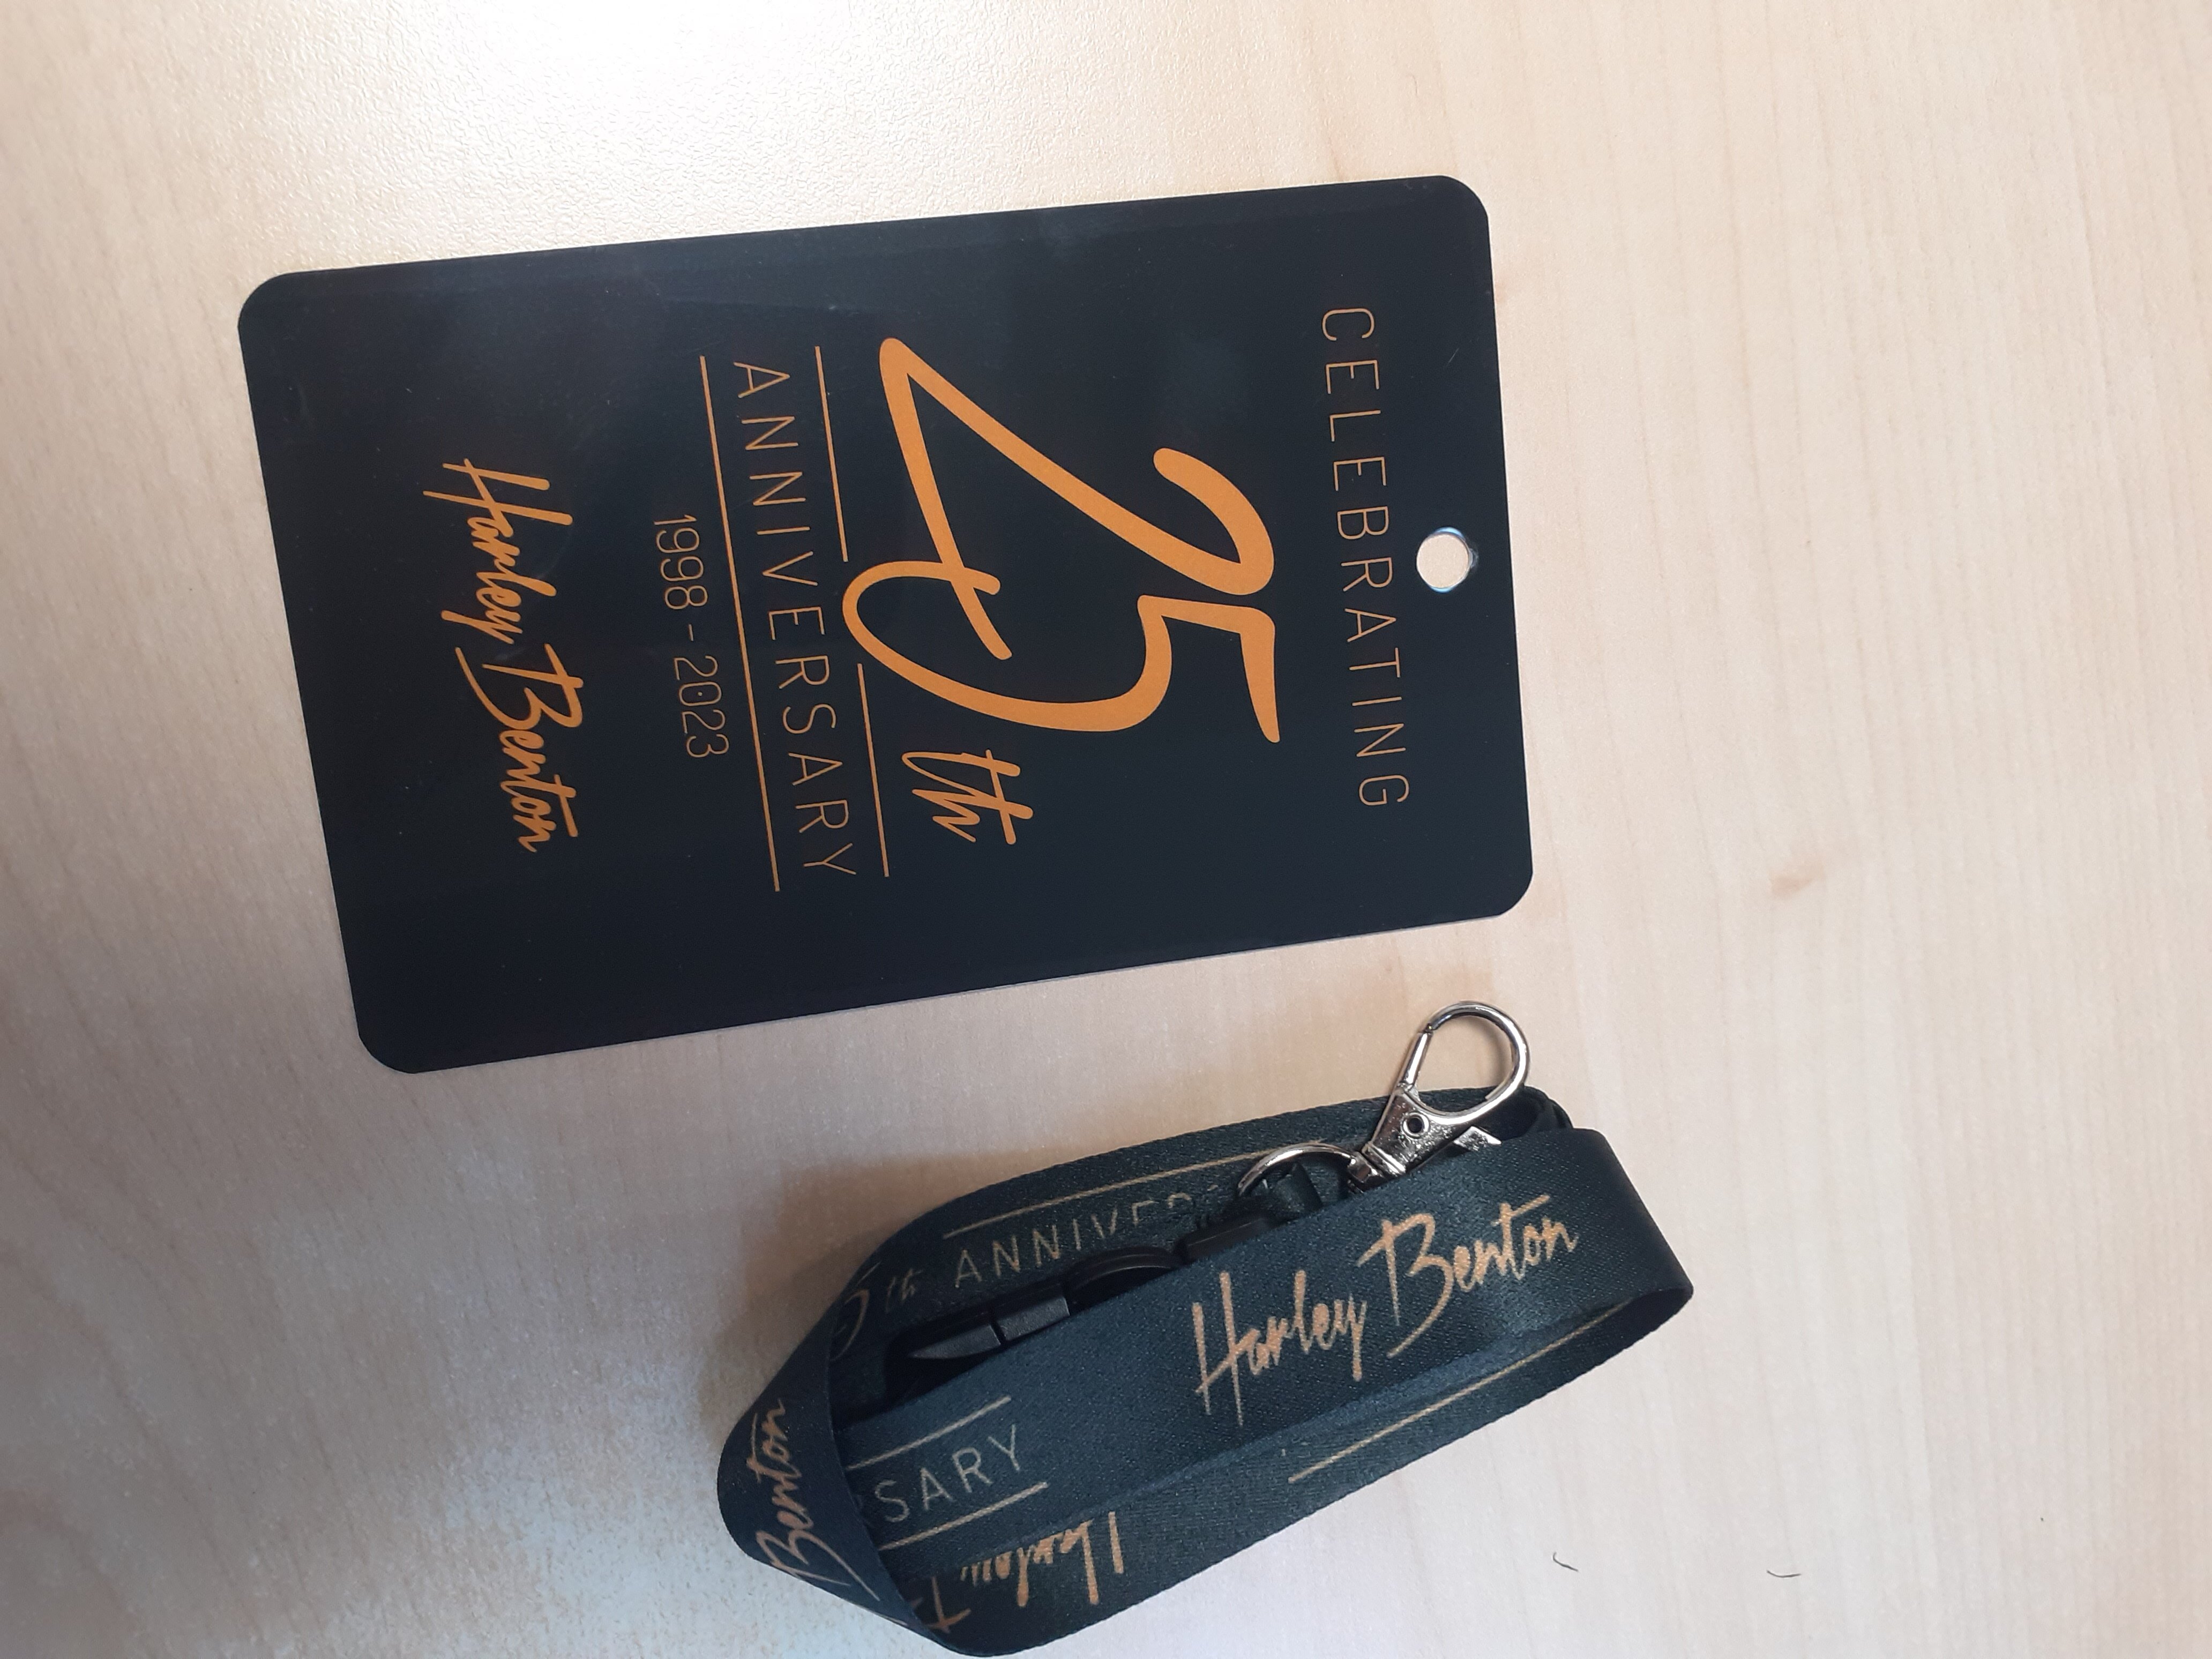
And here it is!!! Set up is lovely, and it was practically in tune (I will have to get used to the locking tuners). Frets feel like a tiny polish on top needed, but playing in will deal with that. Neck is gorgeous, and I love the firemist colour. Either a very, very almost imperceptibly tiny ding on the headstock, or a miniscule imperfection on the headstock finish, but that's the sort of thing it'd get in a few days' use with me, so.... Overall, a stunning piece. The gig bag is surprising good, much higher quality than I expected, and the 25th logo inside it is a nice touch. Highly recommended. I still hope they do 5his soec in the CC colours going forward, as a DLX model.


 4 points
 -
@Richards Guitars... I am one of several Moderators of this fine Forum; this task has been very simple for several years past, as the folk here are a great bunch. We enjoy the occasional bout of banter (whilst remaining civil, naturally...) between friends that are used to each other's little ways and foibles; nothing wicked or hurtful. If there is any doubt as to any posts here, there is, top right of every post, three little dots (...), from where it's easy to create a Report. Every Report is brought automatically to the attention of the Mods and Admin, and what rare issues that do crop up are handled with serious and diplomacy. Feel free to avail yourself of this function at anytime (this goes for all that read this, naturally...). This site is an extension of Basschat.co.uk, which has been active for many decades now. Here, things tend to be a little slower-paced, but there is a healthy cross-over from one Forum to the other (many here are members of both...). This leisurely pace suits us fine, so don't be surprised if some replies to posts come only after a few days. I'm usually here sporadically several times each day, but then again : I'm retired, so... Glad to have you aboard; meanwhile... Have a wonderful day. Douglas4 points
-
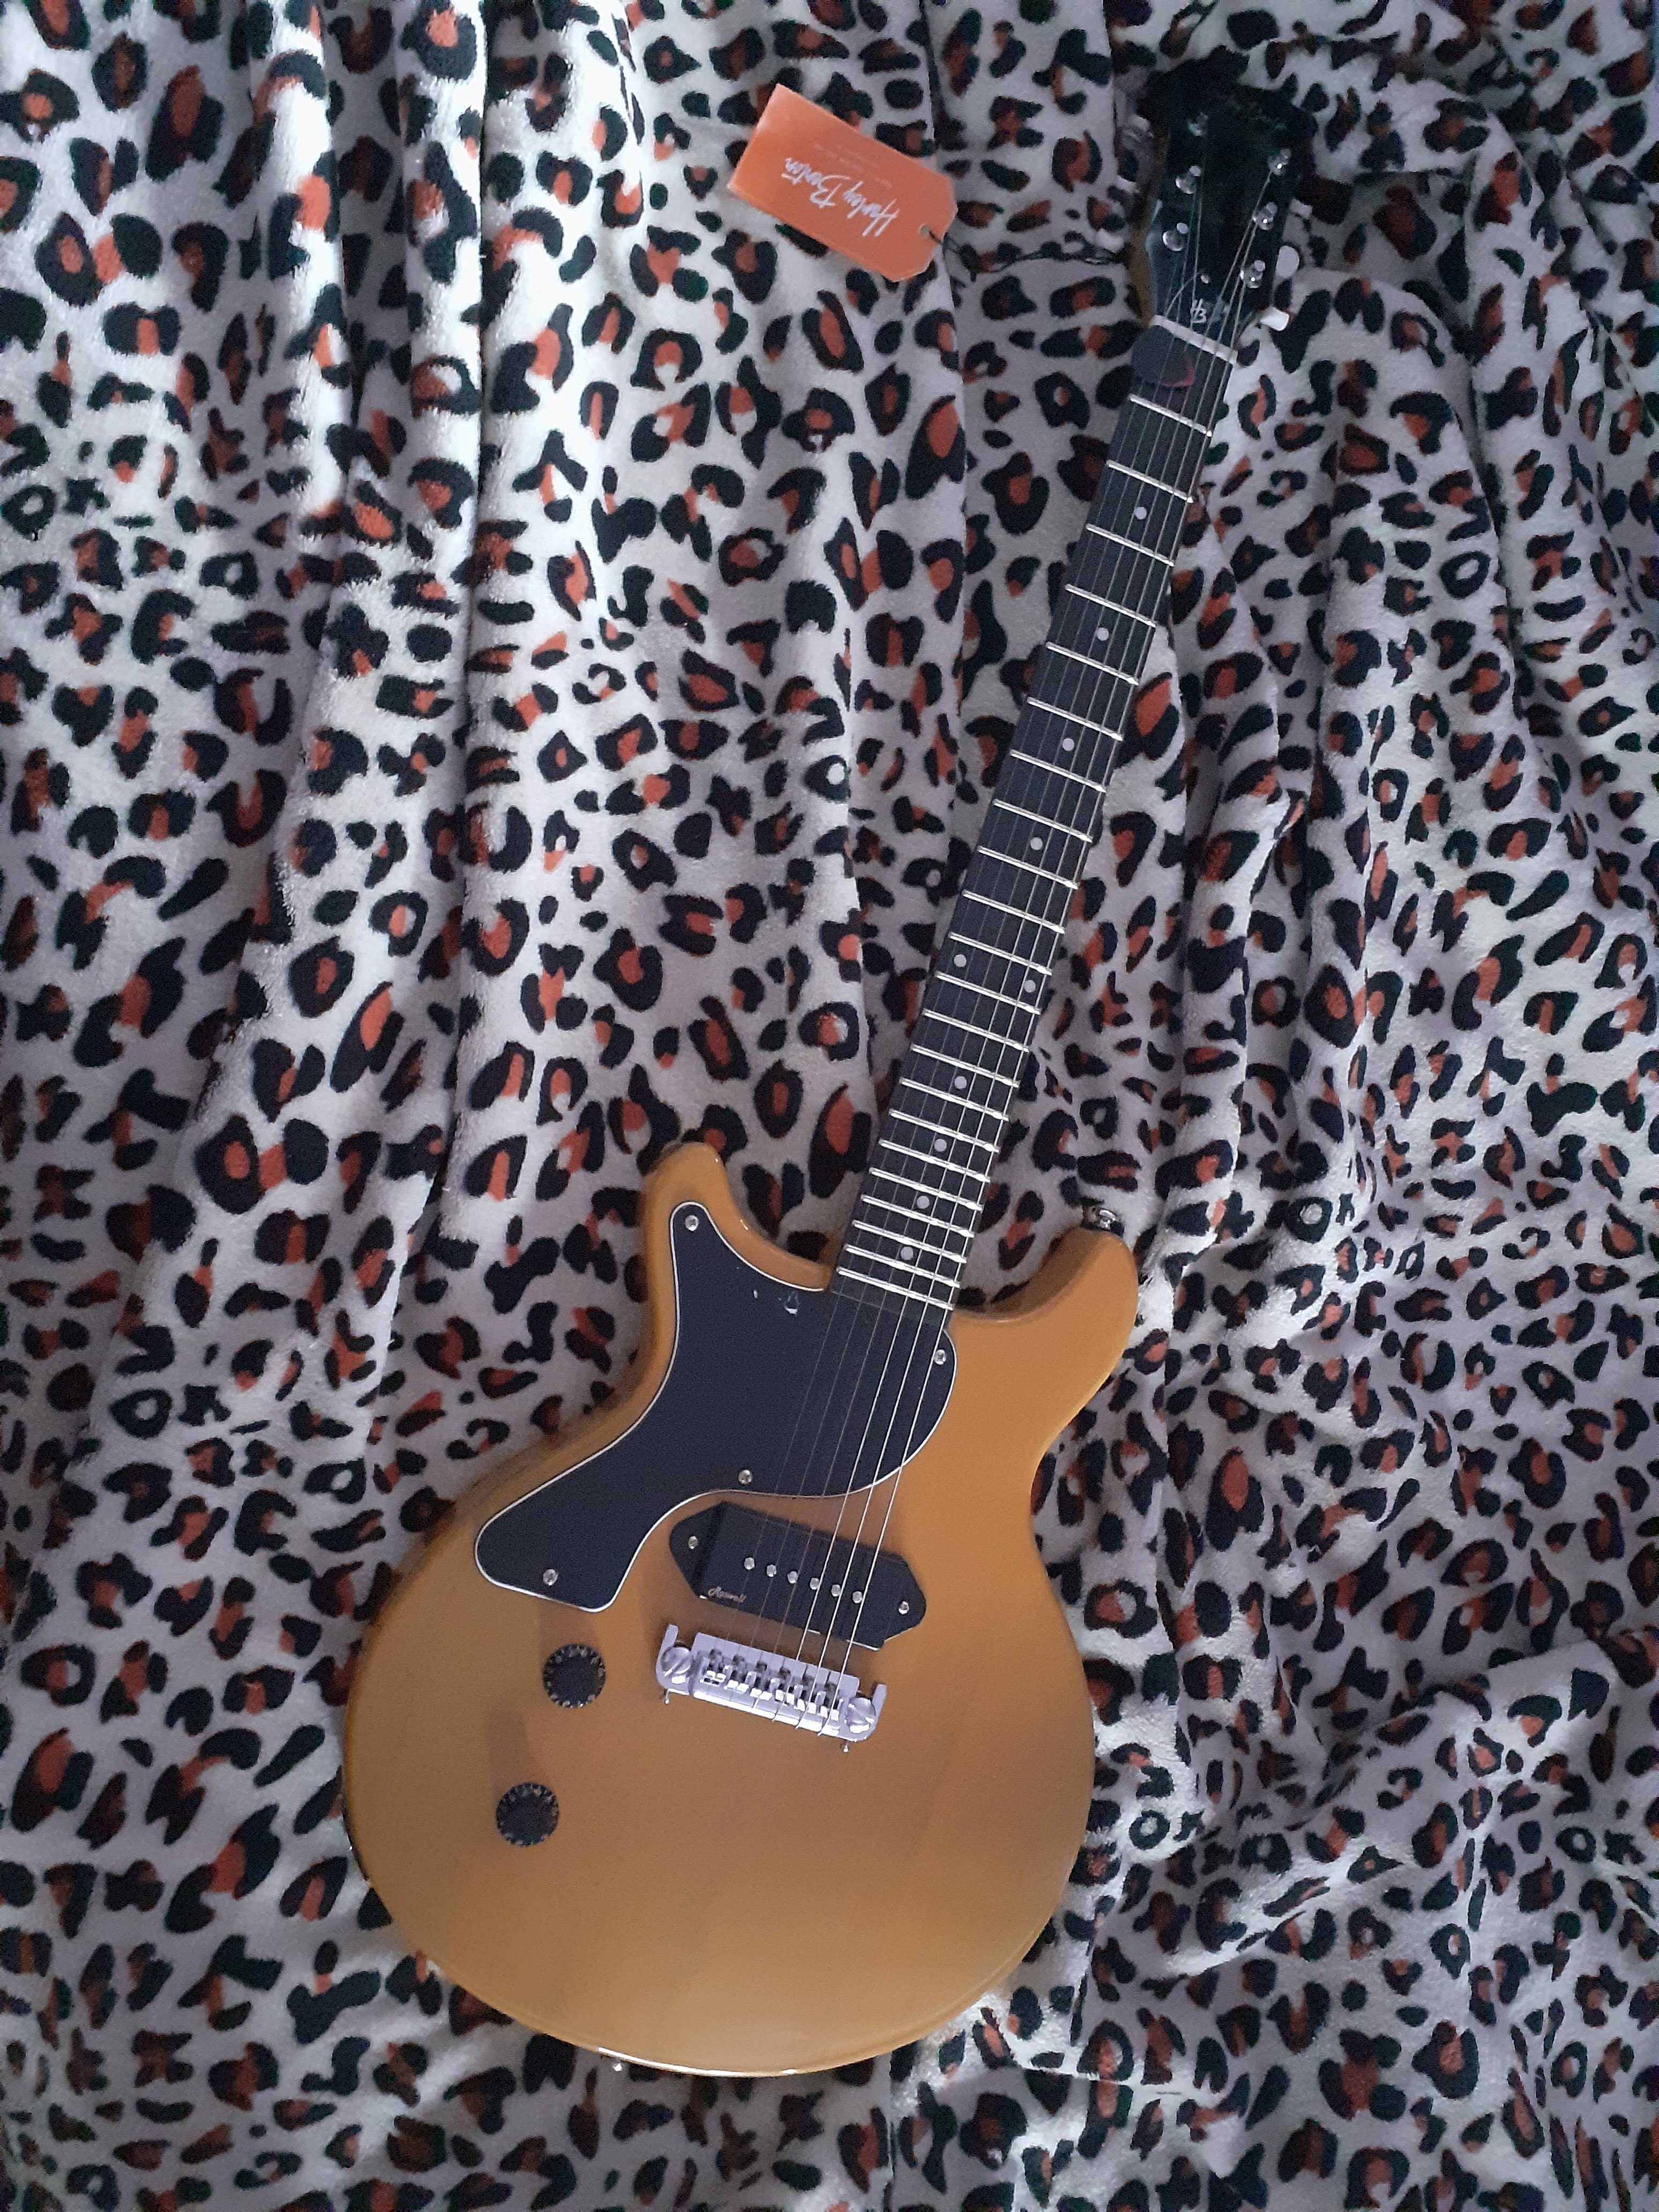
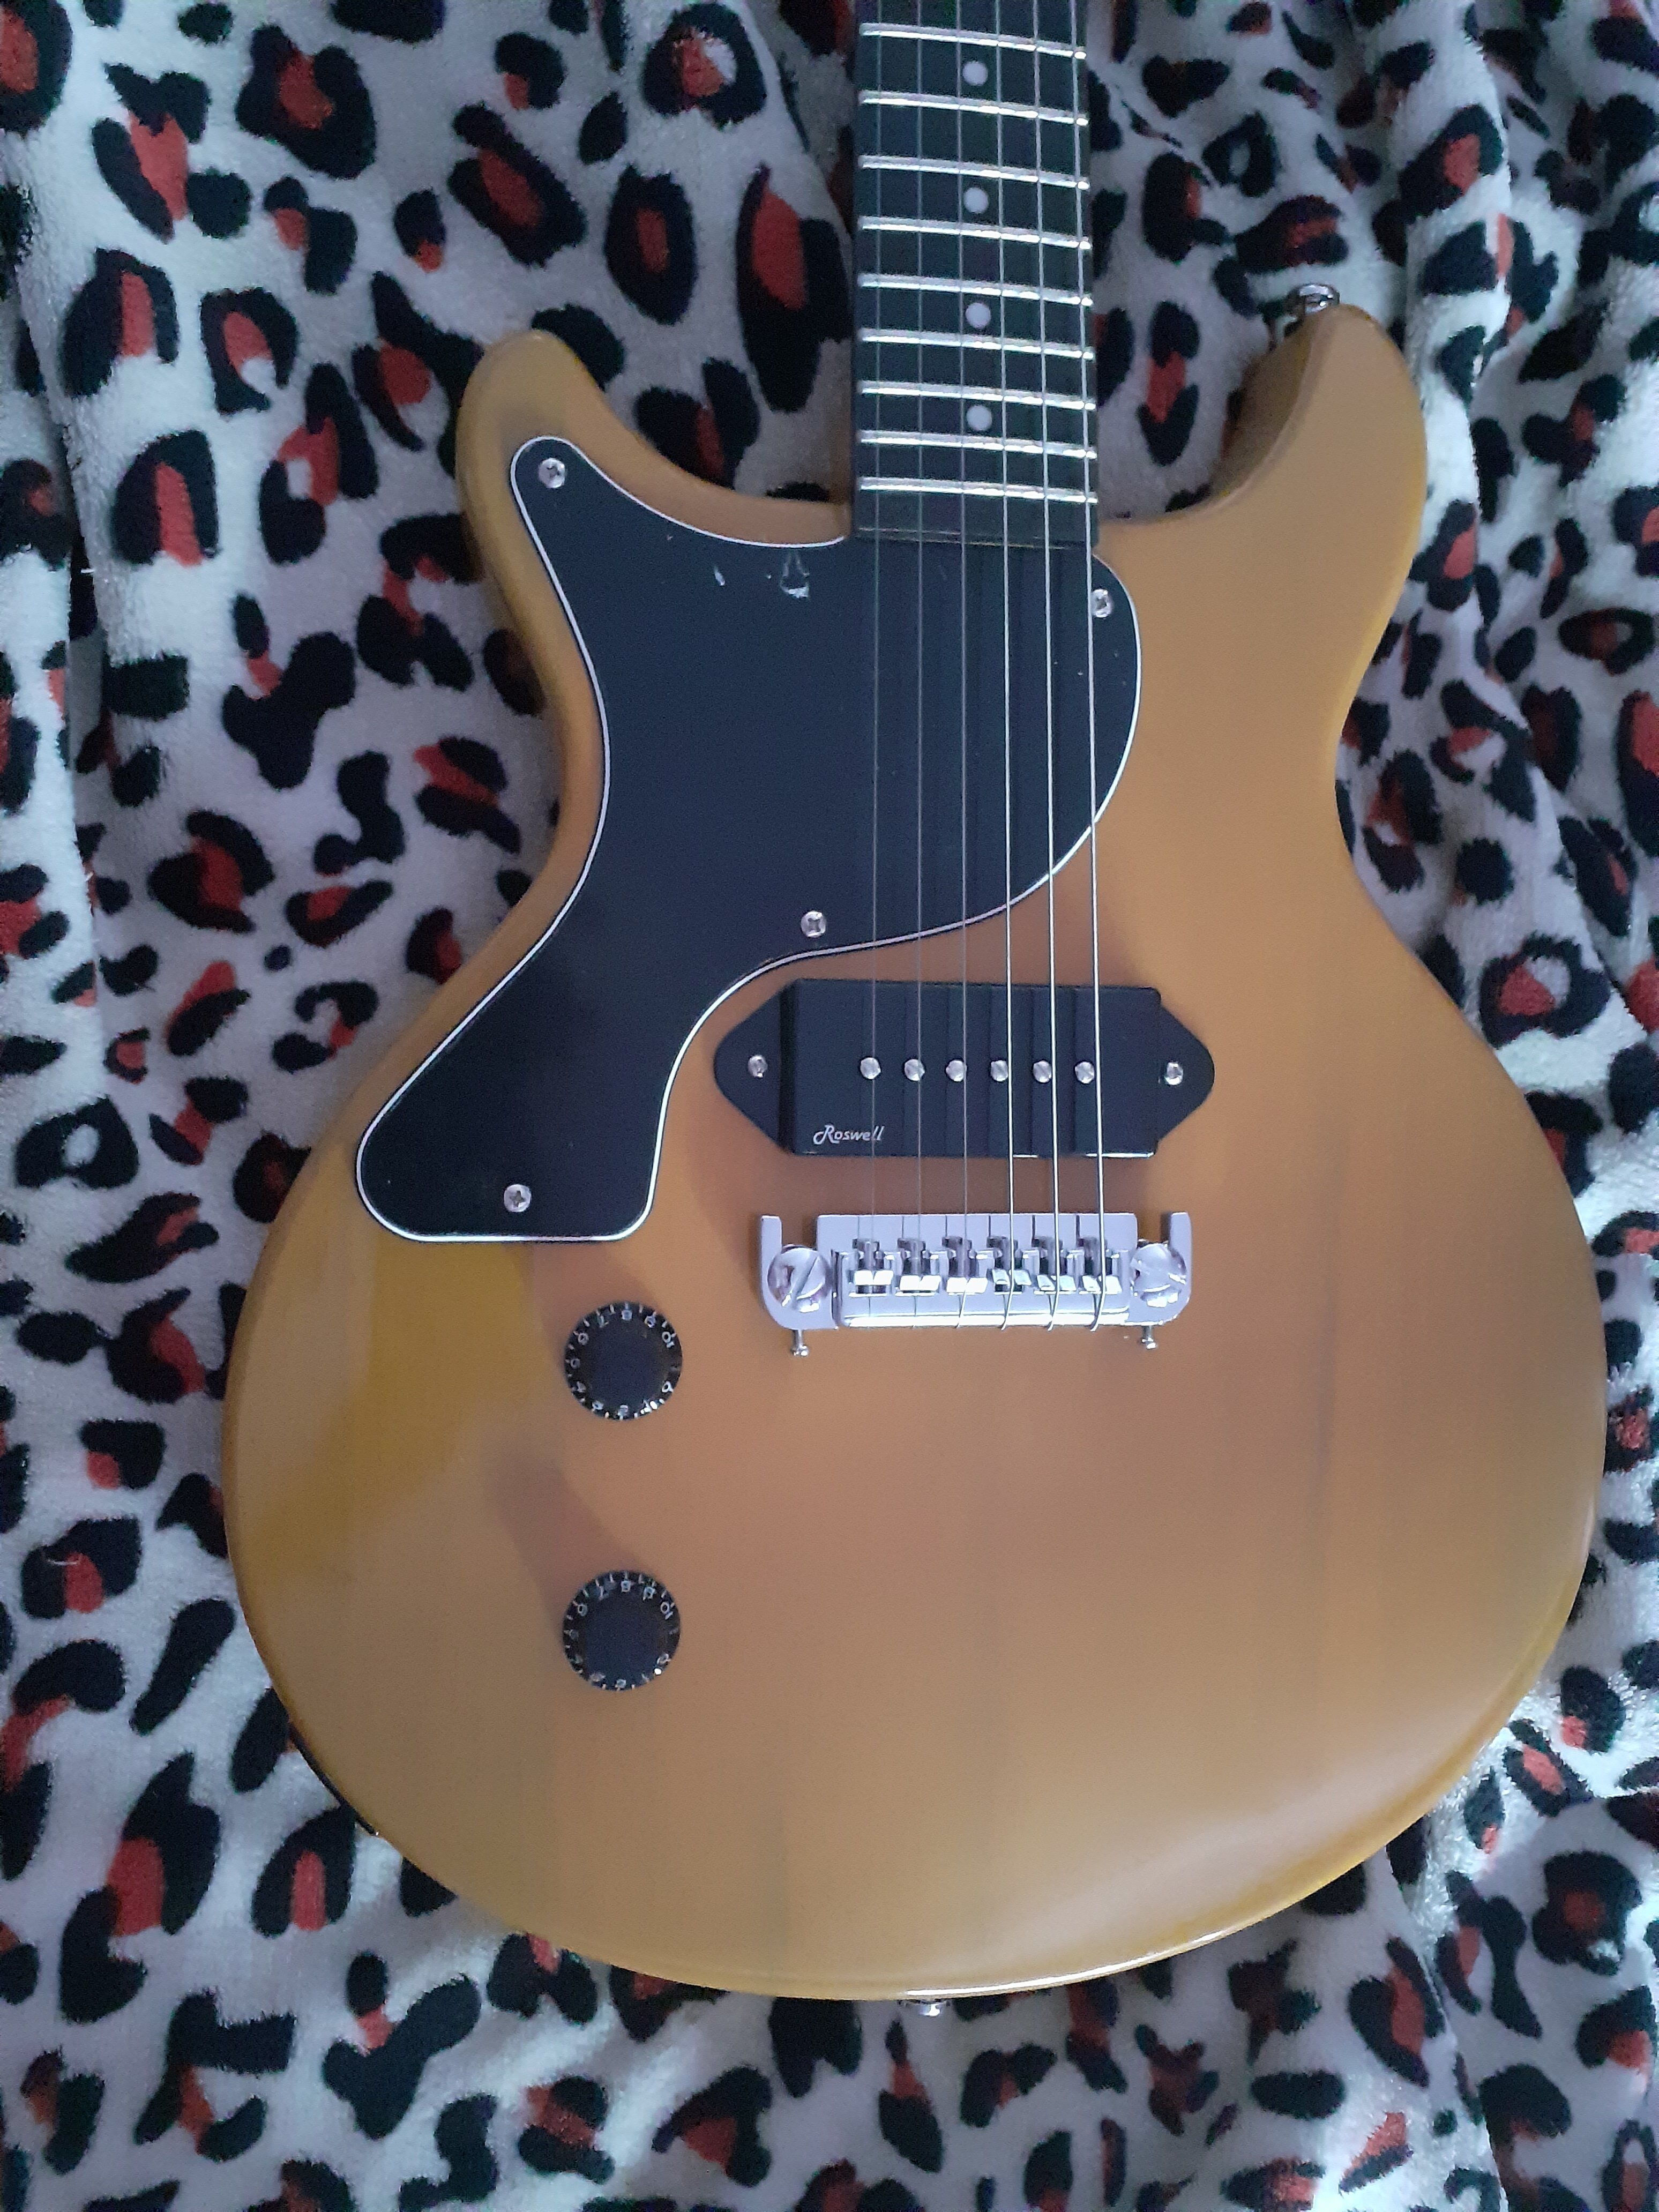
My loyalty sale HB DC Jnr. At £128, it cost less than I've seen tgem go for used.... I did wonder if QA might be a little more flexible at this reduced price, but the sole flaw I can find is that one of the screws on the back of the bridge is cery slightly angled. As with the MR Classic, the bridge feels a little cheap but perfectly functional; I'm not anticipating replacing it in the foreseeable. In the medium term, I want to add a totey guard for a Johnny Thunders vibe. I'm halfway tempted to switch the knobs for dice knobs as well. Overall, It's ridiculously impressive for the money. Great set uo out of the bix just needed tuning. Not a sniff of fretsprout or a sharp fret anywhere. This is what impresses me most at this sale price. Back when I started playing in 1991ish, the most basic, plywood Strat type cost more than this new (even without taking inflation into account), and wasn't always as good as this. I'd put it on a par with the Epiphone model. To really go a step up, I'd need to be looking at sonething like Maybach or a Gibson; the problem with those is that it always felt inherently 'wrong' to me to take what is by design a simple, budget instrument and inflate it to "luxury" level. The one thing that I'd like to see Thomann do better is to get the TV yellow colour right. I *might* have paid full rather than sale price over this one for that (throw in stainless steel fretsand it would be a given), but all other things being equal, if it was just the colour I wouldn't replace this one with another for that, which auggests it's not really that big a deal.... Thomann dodo a small range of "tribute" guitars, basically unofficial quasi sig models.... if the MR Classic is a great base for a Johnny Ramone tribute, this and the Fat version should surely provide a great option for a nod to both Johnny Thunders and Mick Jones circa 1976/77 especially. One thing I'm really impressed with, as on the MR, is the neatness of the finish around the headstock, where the black facing meets the colour on the rear.

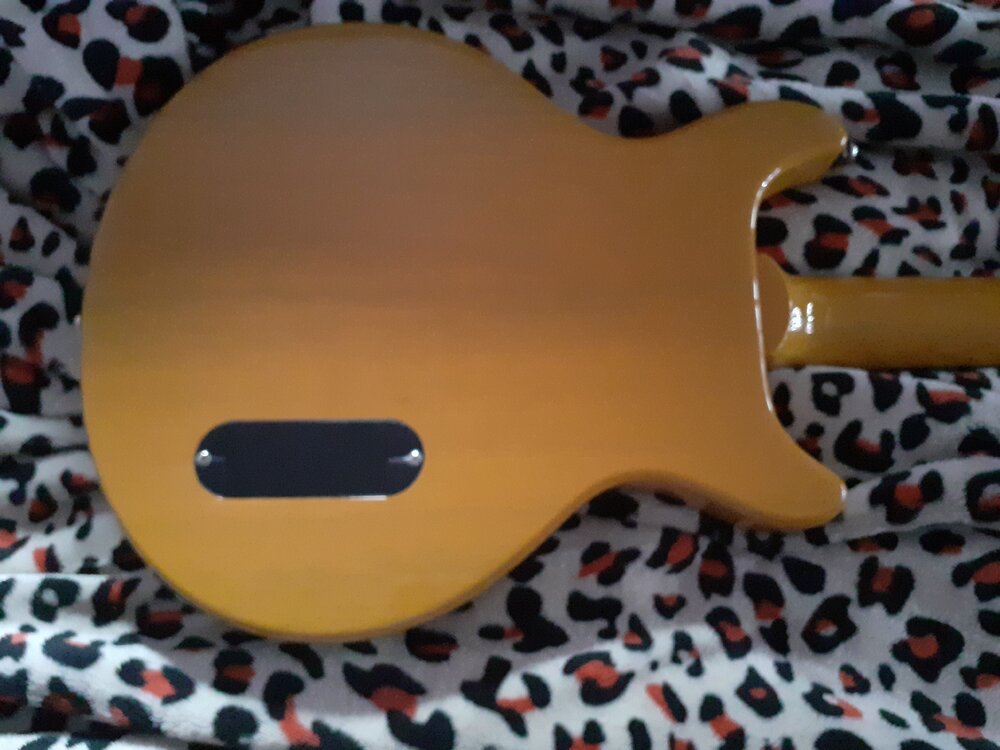
 4 points
 -
I believe it's a First Act Delia. Reminds me a bit of a Hofner Verithin (sp?).4 points
-
Well, on the final furlong. Basically, the finishing is finished and now just have to do the shielding, fretwork, electrics and final assembly/setup. The final stages of ebony sand-only and alder/maple Tru-oil slurry-and-buff is coming out nicely:4 points
-
The quick answer is yes I am happy and have become even happier as my skills have developed. I guess in retrospect I should have asked more how would a more expensive guitar reflect in feel and my playing. I was lucky enough to come across a rather nice Epiphone Les Paul Studio electric guitar for what I have been advised is a reasonable price, there is not a mark on it. The same guitar tech that checked the acoustic changed the pick up switch for me and he is suitably impressed with my purchase. And bonus a work colleague gave me this little amp.
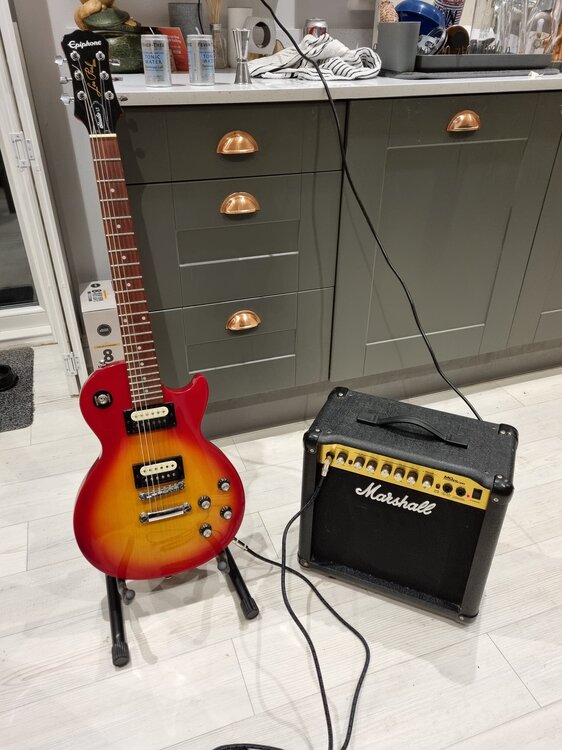 4 points
 -
I spent some time this morning with the guitar strung up and on a strap for me to 'fit' the neck profile to suit Alex's style of playing. Basically, he played, I then scraped material off the neck haunches and then he tried it again. This was repeated over an hour until it 'felt right' for him. We can do further tweaks once it's finished and he can play it with amp/etc but it's probably close enough for me to start the final sanding, which I started this afternoon. As folks who have watched other builds will know, I often use some Tru-oil slurry and wiped to act as a grain filler and also as a reveal coat... to spot dints and lumps or sanding marks that are difficult to see on dry sanded wood. The good thing is that it also lets bot Alex and me see how the final colours and grain are going to turn out to be. I think it's going to be quite nice:4 points
-
Well family stuff and domestic 'projects' largely clear and so I'm back to the build I'm not quite at the final furlong stage, but certainly getting closer to it. Next jobs were to finish the rough carving on the back and getting ready to sort the control chamber hatch. For the carve at the back, because it's curved, I am mainly using the larger of the two round-bottomed Ibex thumb planes and also the gooseneck card scraper: Don't let anyone tell you the Ibex planes are toys - they really are precision planes: Those curly shavings are rock maple and ebony! I used a bottom bearing rebate router bit to follow the chamber and mark the outer edge of the rebate - but the curve of the back makes it difficult to get an even depth of cut and so the rebate was cut to final depth using carpenters mallet and some sharp chisels. Done, ready to create the paper template and cut the hatch:4 points
-
Couldn't resist doing a full mockup. In elapsed time (some pesky family commitments getting in the way ) this is probably around 4 weeks away from finish but, from the front view, it's getting pretty close. In the third pic, @Matt P, I also gave the top half a wipe with a damp cloth to show what the final colour will be. Seeing this, I'm certain tru-oil slurry and buff satin finish is the way to go :4 points
-
So why are the body wings so deep? Well - because the body cross section is going to have some curves. Mind you, that will mean a LOT of carving - and I will creep up on the final shape and let the guitar show where it wants to go... Here comes in play one of my favourite hand-tools - the Veritas Pull-shave. I think it's designed for scooping out wooden chair seats, but it's ideal for this kind of job: But I also use the block plane, razor planes and cabinet scrapers. Off and on over a few days, it's starting to take shape. Carve here is probably 50% done for the body. In between carving sessions, I also added frets to the (still unglued) fretboard:4 points
-
I cut the top ebony around the pencilled line of the fretboard end which allowed me to lay the fretboard on the angled neck and position the top. I drilled a couple of positioning holes in the middle of the pickup positions which, with the addition a couple of kebab sticks will stop the top from floating around as it's being clamped when the glue is applied: That meant I could check that the neck angle is going to be correct for the height of a standard tune-o-matic roller bridge: And so what about the end of the fretboard that is hanging in mid air? Well, of course the offcut from the neck blank when I cut the neck angle in the first place is going to be the correct angle. So I will be able to cut a short ramp from this (ignore the odd shaped headstock in the background - that's not connected with this project ) I will also be adding a demarcation stripe of maple between the alder and ebony: And so, with the kebab sticks positioning everything until the clamps were all on and then removed before the glue set, the clamps can now go on! :4 points
-
This is going to be a through-neck and so the first thing to do is, generally, to sort the neck. 'Sort' means choose the timbers, assemble the laminates, incorporate the neck angle into the blank, calculate the headstock angle, calculate the body depth and the neck depth... ...but you can't calculate the neck depth until you know exactly what the fretboard thickness is. So, actually, that's where I started - by radiusing the ebony fretboard blank using the excellent G&W router jig: Then fifteen minutes sanding with a sanding block removes the router marks: So now I can do all the neck calcs and cut the maple/ebony/maple blank: The neck angle is around 3 degrees, starting from where the top body 'horn' meets the neck, and I generally opt for a 10 degree headstock angle.4 points
-
Hey all, I'm Shawn, 38 & fresh to the guitar. Yesterday was my very first day at getting stuck in (probably spent a little too long at it - finger tips feel like I burned them on a stove!). I spent my first hour awkwardly & awfully strumming between D & A chords, but hey, I'm excited for the months ahead. I intend to follow the tried, tested & trusted Justin Guitar lessons to see if I can get myself going. Looking back on this first video I can already see the importance of reallyyyyyy slowing every thing right down & it reinforces the need to let things naturally develop in its own time. Oh, and I need to get to grips with holding the pick properly. After just one hour I can highly recommend recording yourself practicing if you don't already! I noticed there's not a great deal of content around showcasing absolute beginners & it's clear to see why - seasoned amateurs & pros tend to sound a lot better! So, I decided to start this channel to not only periodically document my own progress from the very first day, but because I thought it may also be useful & intriguing for other beginners to watch both now & further down the line. A sort of way to truly realise that we're not alone all frustrated & wondering if things could ever possibly get better. Well, I'm going to find out if they do, anyway! If you fancy offering motivation, encouragement, tips, a chat etc. do feel free to follow along! https://youtu.be/zT9ij0RV4M43 points
-
Apologies for the two months absence - super busy with life stuff! I hope anyone who's still around from last year are keeping well & have had a good start to this year! On my front.. bad news is I didn't have time to record updates or really progress much through modules... However.. good news is I still managed to put in circa' one hour practice pretty much every day which has just helped me further cement the early foundational stuff as well as the new things learned in the first module of grade two, which I've now completed between the start of Jan & now... in the next module I'm about to start I (finally) start taking a first look at the F.3 points
-
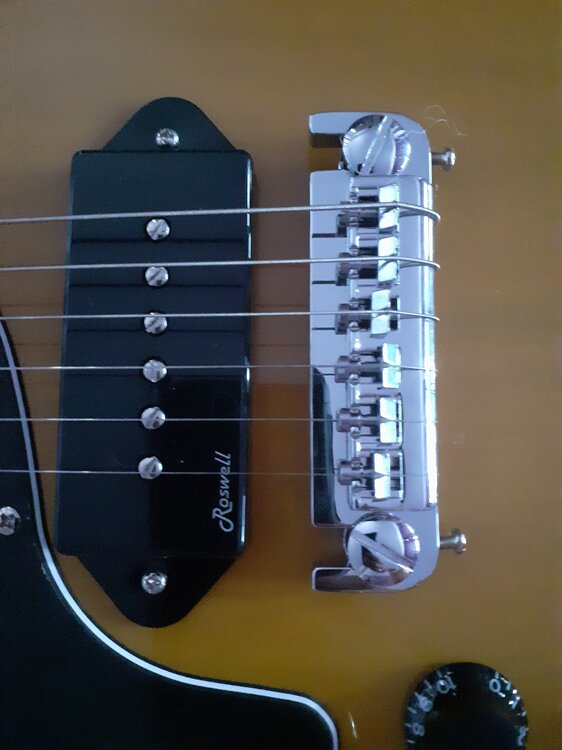
Was originally an HB TE52, but I added a neck PAF: https://i.imgur.com/nOhln0N.jpg3 points
-
New here well New to Guitars at 54 years old, was Gifted a ME952 first act, I poked around with it still learning though well found BexGears Kits well pulled a trigger on a Telecaster I call Swamp Thing (a tribute to those actors/actresses and crew members of the 1982 Original movie), I dyed, painted and assembled.. yes yes the kits although I am the "FNG, NOOB, CHERRY" I have a few friends whom play They are impressed with the playability of the kits, more so how more and more are becoming "CHERRY, NOOB, FNG" friendly with the plug n play systems with NO soldering needed. If asked Telecaster or Stratocaster I will play both, some odd reason the tele is my "Zen"
 3 points
 -
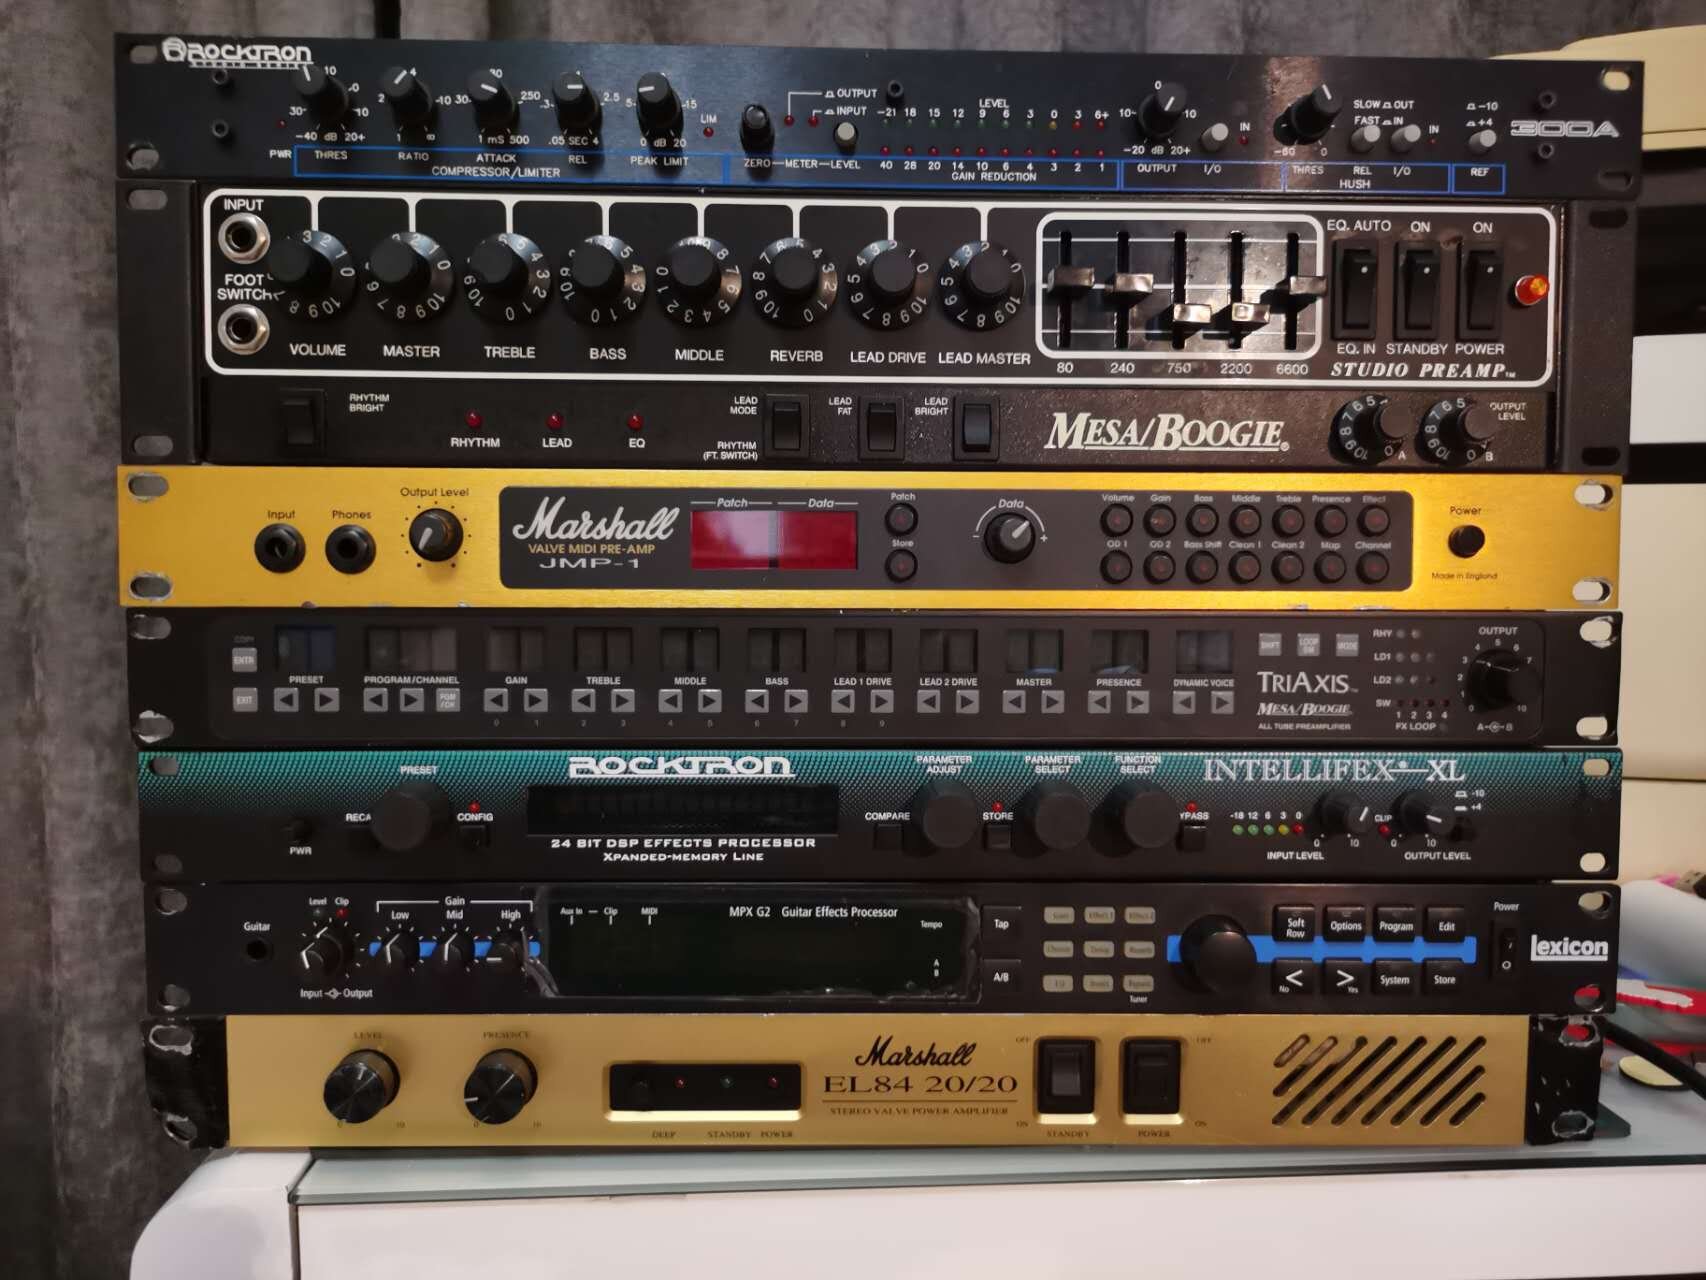
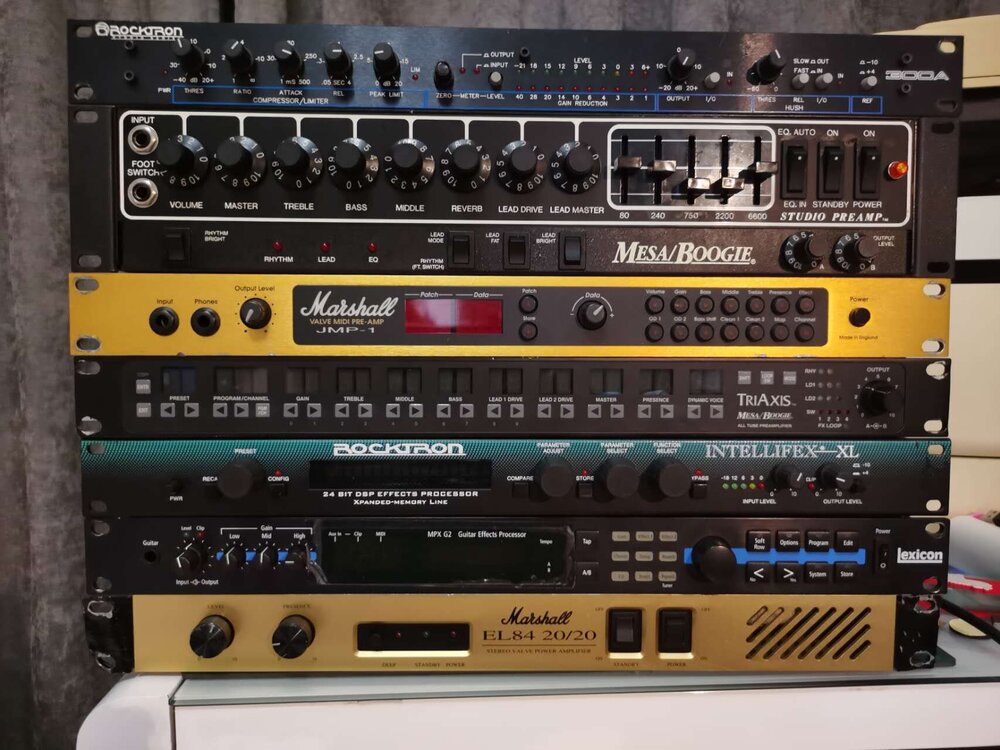
I came back from the UK yesterday with an entire suitcase of stuff I'd managed to squirrel away over the last 7 years in it's own suitcase. All of it bought for less than market due to being in the right place at the right time. With the delivery of a couple of V30 loaded 1x12 cabs today, I spent a decent chunk of this afternoon, jetlag permitting, putting a couple of the preamps through the MPX G2 (which I already owned). My favourite amp is a Princeton Deluxe which is being shipped over, it nails the sound I've always wanted to hear. But I didn't expect how much I would like the Marshall JMP-1! I even preferred it to the Mesa Studio pre.
 3 points
 -
I'm loving this all. For years I've wanted something very much like that for plugging in headphones or hooking up to the PC at home. I've not bought anything as yet because I'm not really interested in most of the potential they have - years ago, I bought a Vox Valvetronix (still got it). The original, blue cloth one, size of an AC30, 2x12. Thing is I only ever used one amp model, and I don't bother with the built in effects. Something like this, though, I might be more inclined towards as at that price, as long as the sound I want is good, it doesn't matter so much more of it is "wasted"....3 points
-
I've probably got too many jazz books already but why not order this one as well? I just have, for delivery before the end of the holidays. Already got the turtleneck.3 points
-
Short snappy update as I come to the end of a consolidation phase... bigger & newer things to come in the next week or so.3 points
-
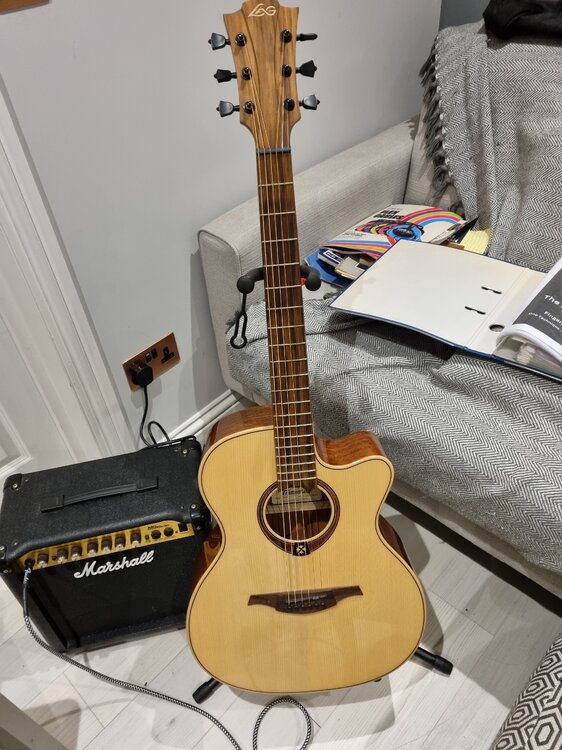
You may have seen elsewhere in other posts that I have been asking all sorts of questions ahead of a potential upgrade, well today I bit the bullet. After much research, asking questions and visiting several guitar emporium today I picked up a rather lovely Lag T88 electro acoustic for a bit more than I was planning to pay, however I am absolutely over the moon with my purchase. I hadn't visited this local music shop previously and I was delighted with the service, right down to the fact that my wife was offered a seat as she struggles to stand for too long due to severe arthritis in her knees. The sales guys listened to my story and then proceeded to thrust a selection of guitars into my hands and being as my abilities are limited took each guitar back and played the same pieces on each guitar so that I could hear the difference. I wasn't sure that I would hear much difference between guitars unless the difference in price varied by thousands rather than just a few pounds. My wife and I quickly discounted the lower price ranges around £200 and in the end plumped for the most expensive, and the clincher was that the difference between the last two was that the cheaper of the two was of natural satin finish and my final choice is gloss finish. I really liked the satin look finish but the gloss finish has a much fuller sound. When I told a guitar playing friend that I was looking to upgrade he said that you really need to hold a guitar before buying and that once in your hands you would know it is the guitar for you, these words are so true in my opinion. Finally back to the sales guys who offered me some advice on my playing and I may even book the odd lesson or two now.
 3 points
 -
I will do a build diary to document this when i get started, but am going to do a neck only p90 build. Going to use a humbucker size p90 so I don't need to increase the size of the rout on the body I have and to keep it flexible for the future. Will keep you updated.3 points
-
Apex Music in Earley, Reading https://apexmusicshop.co.uk/3 points
-
Ah, it is a fine balance between looking cool and being comfortable. ... there is a reason that a stratocaster has been around for over 50 years.3 points
-
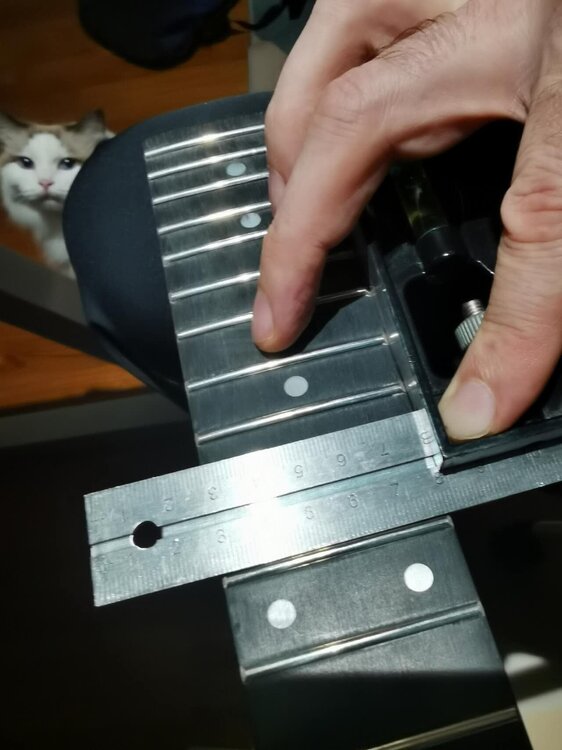
Last night I decided to check the new neck out. I have had issues with necks sent in the past when they had a new guy working their production line. He recycled a discarded ebony board, basically flipped it over and glued the slotted side to the new neck and reslotted the blank front face then attempted to disguise the fret slots showing on the side with black dye - which I discovered after I cleaned the wood with meths. I didn't actually agree to them using a used ebony board either. It's a bit sneaky. However, using a set square on the frets revealed something more serious. The frets are inline with the square when checked from one edge but not when checked from the other. This basically means the frets are trued to one edge of the fingerboard rather than the centre and this will produce a guitar which can't be intonated accurately. So I got back to them and they've agreed to build a new neck. This could only happen in China but this supplier is honourable so it means mistakes can be corrected. It's the second time this has happened though. Once is a bit of a howler...but twice...? Still, it gives me an opportunity to correct a few other things, like asking for a little more flame on the maple. I also found a supplier of custom glass pieces. Normally he does optical glass but he's got 19mm thick glass which is enough for a sanding block for fret levelling. I use a steel beam already but glass is...well, one better...er, innit? And I'm determined to up my fret levelling game in these builds so I can sort out my other guitars too.
 3 points
 -
Its a stripped out Framus Capri 5/53 from the 1950s - There were a multitude of differing types,but yours just looks 'basic stripdown' ! https://www.framus-vintage.de/en/5-53-Capri/5-53.2-Capri/
 3 points
 -
After a few days child-minding the said special little people, I'm back in the cellar For the bracing, I am using my home-made 25 foot radius dish although, for this build, will dispense with the Go-bar deck - I should be able to get away with just clamps and cauls. The bracing pattern is going to be pretty basic X-bracing with the standard-recommended tightly vertically-grained spruce. I've taken a bit of a guess at how much to scale them down. I started with the X-brace with gluing the cruciform and then sanding the bottom curve on the radius dish: This was glued to the top with a long caul keeping the curved brace bottoms pressed against the radius dish while the glue cured : After that was set, it was time to add the other braces and sound bars. All of the braces will be chiselled to create the nodes, etc, once it has dried overnight: And here it is ready for tomorrow's chisel and tap-tuning work :3 points
-
Thanks folks! For the fretboard, I had found an offcut of some purpleheart that I used for neck splices in the past. I sliced a length off on the bandsaw and radiussed it with a radius block: Then used a 24.75" (I think it was) scale in my fretting mitre jig starting at the 5th fret to give me the 17" scale: Next I added some sawn strips of purpleheart to act as binding, curved to radius and taper using my little block plane: As the purpleheart gets exposed to the light it will pinken markedly. Originally, I was going to put a plain ebony headstock plate over the mahogany...but maybe a bit of purpleheart there too? Got me thinking and experimenting. Hmmm...and was there room for a swift in there too? : Then add some dots and frets to the fretboard - this might work: Then back to the neck. No trussrod needed but, as it is a mahogany neck, maybe a little extra stiffness would not go amiss - so I slotted the top for a couple of hollow carbon-fibre beams: With that sorted, I could bandsaw the neck and start shaping that. Before shaping the heel, I added an extension to its length. The neck is just laid on top of the fretboard - it won't be glued on until the neck angle is fully sorted (a long time yet!): Did a bit more carving to start sorting the neck profile and, in the same way that you can't have too many clamps, you can never have too many swifts! You can tell the age of my iphone by the colour aberrations of its camera!! Starting to look like an acoustic guitar neck3 points
-
I've found quite a bit of stuff for it in my various bits-boxes and rubbish bits-piles. Including - and I have NO idea why I have a set of these - some classical guitar tuners!: I found a mahogany offcut from one of my bass builds. Would the tuners fit? Wow - clearly this was meant to be : So, after cutting a headstock angle, out came my little Proxxon pillar drill: Back to the band saw to cut the rear face of the headstock, then back to the pillar drill and scroll saw to drill/saw the slots: Well - that went better than I thought it would!3 points
-
I got confused and watch an old episode of "Crossroads" at midnight. I couldn't understand how Benny and Miss Diane were going to teach me how to play guitar.3 points
-
Turned out the switch wiring on one pair was reversed (the colours on the cable are different to the pdf) All positions working now, so I can get my SG back and he can do all his crazy tuning stuff again. Hurrah !3 points
-
I had the chance to check out a brand new new LP Standard during a course and the fretwork on it was shocking for a three grand instrument. Sire do a much, much better job.3 points
-
I'm not going to replace my fingers3 points
-
Having played it a bit more since last post, I have to say this is a really fun guitar to play. It's not a shredding machine, and as a lead guitar it doesn't stand out as much. As a rhythm guitar though, it's f'n awesome! It sounds great with everything from a little crunch to hooked up with a high gain amp. I think it's actually the best guitar I own right now for playing fast metal riffs, every note played sounds clear and the riffs doesn't get mushy no matter how fast you play. It's got this twangy, almost percussive quality to it when played through a high gain amp, which can be fixed easily with a channel strip if you want a more conventional metal sound3 points
-
Just to follow up on this one, I did end up taking my nice Yamaha on holiday (I figured if I was going to cart one around it might as well be a decent one). Ended up playing on the beach watching the sunset with mates, and also jamming with some local French musicians I met in a campsite on the way home. Definitely the right decision! And guitar seems happy with its adventure.3 points
-
Well, today was the big day and she loved the guitar (though she seemed to be more excited by the Batman car Lego set ). The guitar looks great and the pale blue colour goes really well with the vintage look of the Mooer amp. The only flaw I can see with it is a slight gap in the neck pocket, on the top side, but it doesn't affect the playability and she'll not notice it. The amp is great fun. It has chorus, delay, reverb, flanger and vibrato. She loved the sound of the flanger. It sounds good too. There are clean, overdrive and high gain presets (plus bass and acoustic) and a bunch of amp models.3 points
-
My first Guitarchat build thread! Oh no, say the folks who have followed some of my tortuous threads over on Basschat over the years! Yup. Another Andyjr1515 build thread...and it's a guitar...and you saw it here first My building has slowed down quite a bit - partly the pesky arthritis in my hands and partly the usual life's distractions - but there are one or two projects that have been on my list for years. And this is one of them. It is a variation on the theme of the iconic Gibson Firebird. 'Essence of' is probably a closer description as it aims to tackle some of the compromises of the original and is being built for a specific player and the specific way he plays. It's for my son-in-law who plays the excellent Epiphone Firebird. And can I make it better than an Epiphone Firebird? Of course not...but I can make it different. - lighter - easier to fret in the specific fretboard zones he plays - better on the strap and over the knee - less (hopefully no) neckdive - less flat-bodied And it's a chance to use this type of ebony again for those of you who saw the build thread a year or so back where I used it last: So off we go!3 points
-
I just put a new true tone jack in my Jackson Rhoads and it is like I just upgraded my pick-ups. This is the second Jackson I have installed these jacks into. They really do make a difference. I am so frigging impressed. I was going to install new EMG's in this guitar, but now I'm going to wait and see. That was my problem before, I just felt like there was something missing from my tone, then this morning I put the true tone jack in and bam, I have what I was searching for.3 points
-
I mallet-tapped the outline of the rugby-ball jack plate with a variety of radius chisels and then used a small chisel to start creating the rebate: Once it was all level, I rounded the sides, drilled the hole with a 20mm forstner and popped a drop of tru-oil to match the alder before doing a trial fit: And after a couple of experiments, I had a go at the ebony. The great thing about ebony is that it will sand/polish to a good finish. What I didn't know was whether the brown streaks would behave in the same way. They do This is after around an hour, progressing through around 15 grades of emery/micromesh from 180 grit up to 8000. Nothing else - just sanding through the grades: There are a couple of dints that I will lose by repeating the process, but this will be pretty much how the top will finish up.3 points
-
It's a Takeharu MR-302, made in Japan by the Suzuki people, in the Gitane Jazz style, similar to those of Maccaferri and Aria at the time (mid '70s...). Quite well reputed; I've seen them for sale at 300€, 800€ and 1200€, so a wide range of values. It should have a piezo pick-up under the bridge, with an o/p through the lower strap button/jack socket. Not a style that appeals to me, but some folk love 'em, so... Hope this helps.3 points
-
The little amp has arrived. I opened it just to check that it works and had a very quick play through it. It's very light, but the knobs, buttons and switches all feel fine. It sounds great. I played through the a few of the presets they all sound superb. There's a built in tuner, which will be useful for my daughter. It's all boxed up again until her birthday.3 points
-
Cutting the pickup chambers meant that I could do a mockup to talk to Alex what his preference for the position of the controls is before I cut the control chamber: And then the control chamber could be cut and the carve continued at the back - this time switching to the trusty gooseneck card scraper: Next was fitting the trussrod, cap and gluing the fretboard after laminating it with a maple and a black veneer to give me a demarcation line: Starting to get there: Time to start the neck carve and then blend that in with the continuing body carve.3 points
-
Before fitting the top, I have to cut the slot for the fretboard, and before I can do that I have to cut the taper, and before I can do that, I have to slot the fretboard as, in my jig, that is a LOT easier if you are starting with parallel sides. So slotting the fretboard was next job. I use another G&W tool - their fretting mitre jig: In ebony, it is pretty hard work, but over the day all were done. Then I could both taper the board and also add a couple of mother of pearl swifts at the 12th before I fret it. I tapered the board and marked in pencil where I would eventually need to 'intercept' the ebony top: The swifts are pencilled freehand onto the sliver of mother of pearl and cut out using a jewellers saw. I then pencil round the inlays onto the ebony and carefully route out to the inlays depth using the precision base for my Dremel with a 1mm bit. I double check that they fit and then I will fill the chambers with epoxy mixed with ebony sanding dust and firmly press the inlays in. And finish with a final sand with the radius block As always, thanks for looking!3 points
-
With the neck blank done, I could start trial-fitting the wings and top. I joined the book-matched ebony top and cut out the broad shape. I also cut the alder back wings slightly oversize and a couple more strips of ebony between them and the neck and dry fitted them to make sure everything was going to end up in the right place: The ebony will have a sheet of constructional maple veneer (1.5mm) as a demarcation: All good so out came the sash-clamps: The neck is the top face of the original billet and the length between the top wing front join to the tail is angled the 3 degrees to give me the required neck angle. Double check that I've got it right before the next stage:3 points
-
I should say that this build is very specifically for Alex's (s-i-l) playing style - it wouldn't suit many players, and especially players who need decent access to the dusty end...because this one will have almost none In order to get a better balancing guitar, I am bringing the whole scale rearward - quite a lot! And, so that Alex can at least reach some of the upper frets, I'm also moving the lower horn back. Yes - I know... that is one of the primary design features of the original...I told you it was only going to be 'essence of'!!! Finally, it is going to have some curves - and a slab of the figured ebony on top. This was an early sketch: I've opted for Alder for the back and this is broadly how the two sections are planned to look. As the saying goes, 'What could possibly go wrong?'3 points


.thumb.png.5ee2f5dc8ab253d965d437b6a37cbc2e.png)