Andyjr1515
-
Posts
107 -
Joined
-
Last visited
-
Days Won
43
Content Type
Profiles
Forums
Events
Shop
Everything posted by Andyjr1515
-
I've used a John East unit something like this: https://www.east-uk.com/index.php/all-products/mpm-01.html There is also an Artec 'Master Blender' (I think MB-2 is the simpler and therefore better one) that does much the same job. There may be others. Search for 'Magnetic and Piezo Mixer' - should pull up most of the options
-
Yew-topped SG-style Guitar Build * Finished Pics!
Andyjr1515 replied to Andyjr1515's topic in Guitars
It was very well seasoned but, even so, I'm glad it was just for the top - those 'knots' were big and on the edge of being separate items That said, the main challenge with working Yew is that is it quite poisonous! -
Ah - OK. Just re-read with brain in gear. So is what you are saying that they buy something lighter and smaller from someone like Squier (though that isn't a given) and then upgrade the hardware, etc, to bring it up closer to a 'big name' spec (though that also isn't a given )?
-
I'm clearly on a bit of a different page here and therefore am not entirely sure I understand the question. Why would the hardware and electronics need to be different? I have worked over the past couple of years on designing guitars that appeal to older players, female players and young players, but it's absolutely nothing to do with hardware and electronics. It's about the weight, the actual or effective scale length (especially for basses), the neck profile, these sorts of things. It is these physical characteristics that make the difference to being able to physically play the instrument at all or, at best, for prolonged periods. A 10lb Les Paul is a problem to many women, most youngsters and a lot of old guys... I am intrigued. Where are your own thought processes coming from?
-
Hi So this is embarrassing. I have just completed an SG-style build on Basschat and clean forgotten about Guitarchat! The build thread is here if anyone is interested in a blow-by-blow and hasn't also been following on Basschat: https://www.basschat.co.uk/topic/414021-yew-topped-sg-style-guitar-finished-pic but here are some finished pics: ]
-
Hi, @Schwiftaaay and also welcome! Hmmm...I might be wrong, but I pretty sure that, while they are right that there is a strong enough signal from the piezos to make it perfectly possible to take a jack output straight into an amp or DAW without a pre-amp, nevertheless mixing that signal with the output from magnetic pickups is quite another thing. To do that, while it isn't actually a pre-amp as such, you do need something electronically similar to balance the impedance difference of the two types of output. I fitted a Hannes Piezo bridge to this: But I installed a Schaller Flagship blend unit in it to enable the two outputs to be balanced. There are a number of onboard blender/mixer units on the market but I think something like this is probably essential if you want both signals to be routed through a single jack.
- 7 replies
-
- 2
-

-
- hannes piezo
- wiring piezo
- (and 1 more)
-
There's not a hard and fast rule - it depends what sound you are after - but the 'classic' Fender Strat SSS is 250k pots and .047 caps and the 'classic' Gibson Les Paul HH is 500k pots and .022 caps. Basically, the .047cap is trying to tame some of the treble of a single coil strat and the .022 is trying to stop a humbucker sounding too bassy and muddy.
-
Why can't guitar makers line up strings and pickups?
Andyjr1515 replied to darkandrew's topic in Guitars
Hmmm...bit looking at the pickups vs the top centre line, I would have said that those are also spot on centre of the pickups. Curious. But as I say, it really won't make much difference to the tone. -
Why can't guitar makers line up strings and pickups?
Andyjr1515 replied to darkandrew's topic in Guitars
Actually, just spotting your top photo, the bottom E is indeed closer to the edge than the top E. Realigning the neck to correct this (a slight tug at the headstock towards the treble side) would probably get the alignment at the pickups closer. -
Why can't guitar makers line up strings and pickups?
Andyjr1515 replied to darkandrew's topic in Guitars
It's poor making /QC, to be honest. As you say, with off the shelf pickups, then it is often the case that the E to E pole widths aren't going to exactly match the string E to E spacing at the positions the guitar design place them. But what you WOULD expect is that the pickup would be central to the strings, which the above are not. If the strings are offset on the fretboard too, then it is often just that the neck is simply at a bit of an angle in its pocket. Loosening the neck, pulling it straight and retightening will often line everything up. However, if the strings are equidistant from the edges of the fretboard, then either the bridge, or the pickup routs or the positioning of the pickups within those routes is slightly out of line. Is it going to affect the tone greatly? Well, in that you can raise the pickup one side to compensate, then probably not that anyone would ever notice. Hope that makes some sort of sense -
New fangled solid body acoustic hybrid from Fender.
Andyjr1515 replied to Cato's topic in General Discussion
Fascinating...it would be interesting to see its strengths and weaknesses against the competition - especially head to headed with my own latest acquisition mentioned in my Nemesis thread on Basschat. To explain, just picked up my Gillett Contour 6 electric in Rocklite that has been doing the shows for the past two or three months. I'll do a full review thread as soon as I can find the time to fully put it through its paces -
We tend to play the bass through the PA so it probably is closer to bass amp than guitar amp. I've played it through my guitar amp as well though and it sounds distinctly different to the bottom 4 strings of a guitar - mainly due to the choice of strings (flatwound) and the pickup (a SD Coolrails, much loved by a number of Jazz players for the neck position). I've got some clips somewhere of it being played. I'll try to find them.
-
Gillett Guitars have just posted this. It shows my Rocklite and the production Mahogany versions played side by side by the excellent Ben Fletcher. Some interesting glimpses of the amazing internals, too
-
No - apart from the issue of patents (a very wise move), trust me - this is SO out my league in SO many ways I'm going to ask Gillett if they intend to show some of the photos of the innards and machining. I can understand if they didn't want to, but some people (me for instance) would have to buy one for no better reason than the technical wizardry and the engineering mastery. It's jaw dropping. I reckon they could sell these to people who don't even play guitar!
-
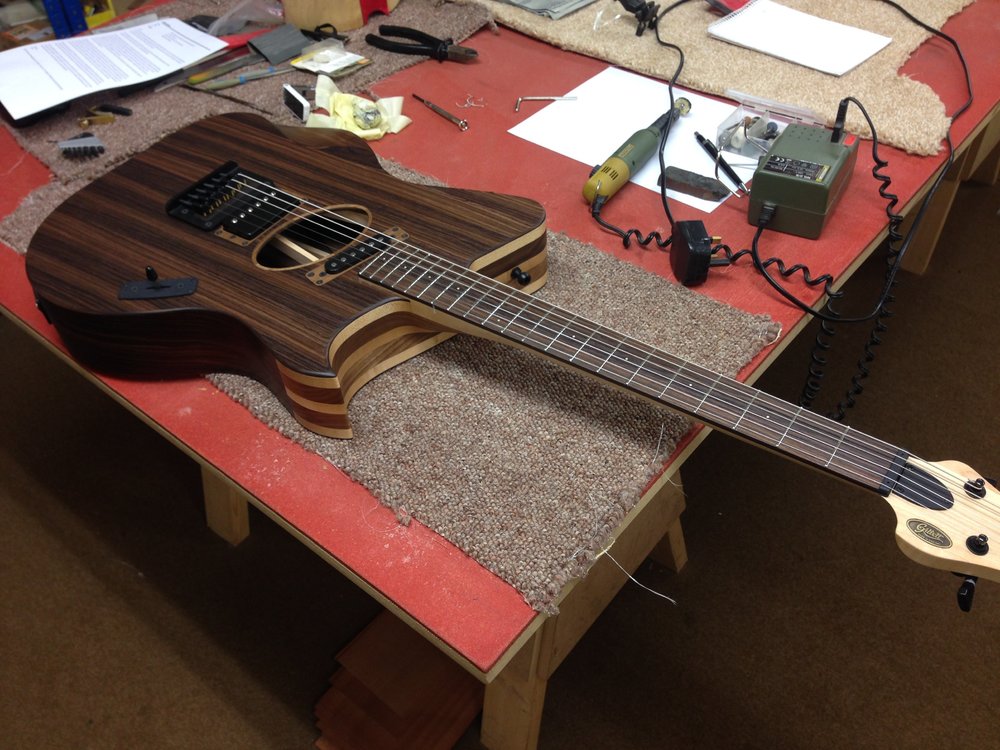
Hi Now - because I build guitars, I don't buy them. Haven't for years. So why have I just spent twice as much as I have EVER spent on a guitar? Because it's this: Not only is it one of their first production guitars - this one is unique. The top, sides, back and fretboard is not natural wood - it's Rocklite. Gillett and I have agreed that I will guinea-pig their first try of Rocklite as a constructional material. Based on this, I am stunned how good it is. First of all, the guitar. Forget the Taylor T5 or the Carvin copy - they are lovely in their own right, but they can't do this: Nor can I, truth be told, but you get my meaning And it will do a lot, lot more. At their workshops last week, I could get 'proper' amplified acoustic sounds just as easily as 'proper' electric sounds. Gillett are going to take it to the Kempton Park London Guitar show this Sunday and then I get possession soon after. Can't wait. If you are going, then Basschat's very own @scrumpymike will be there, I think. Let him know that you are off the forum and I'm sure he'll let you have a play of it. Just promise not to drool slobber all over it!


-
Look forward to seeing this one progress!
-
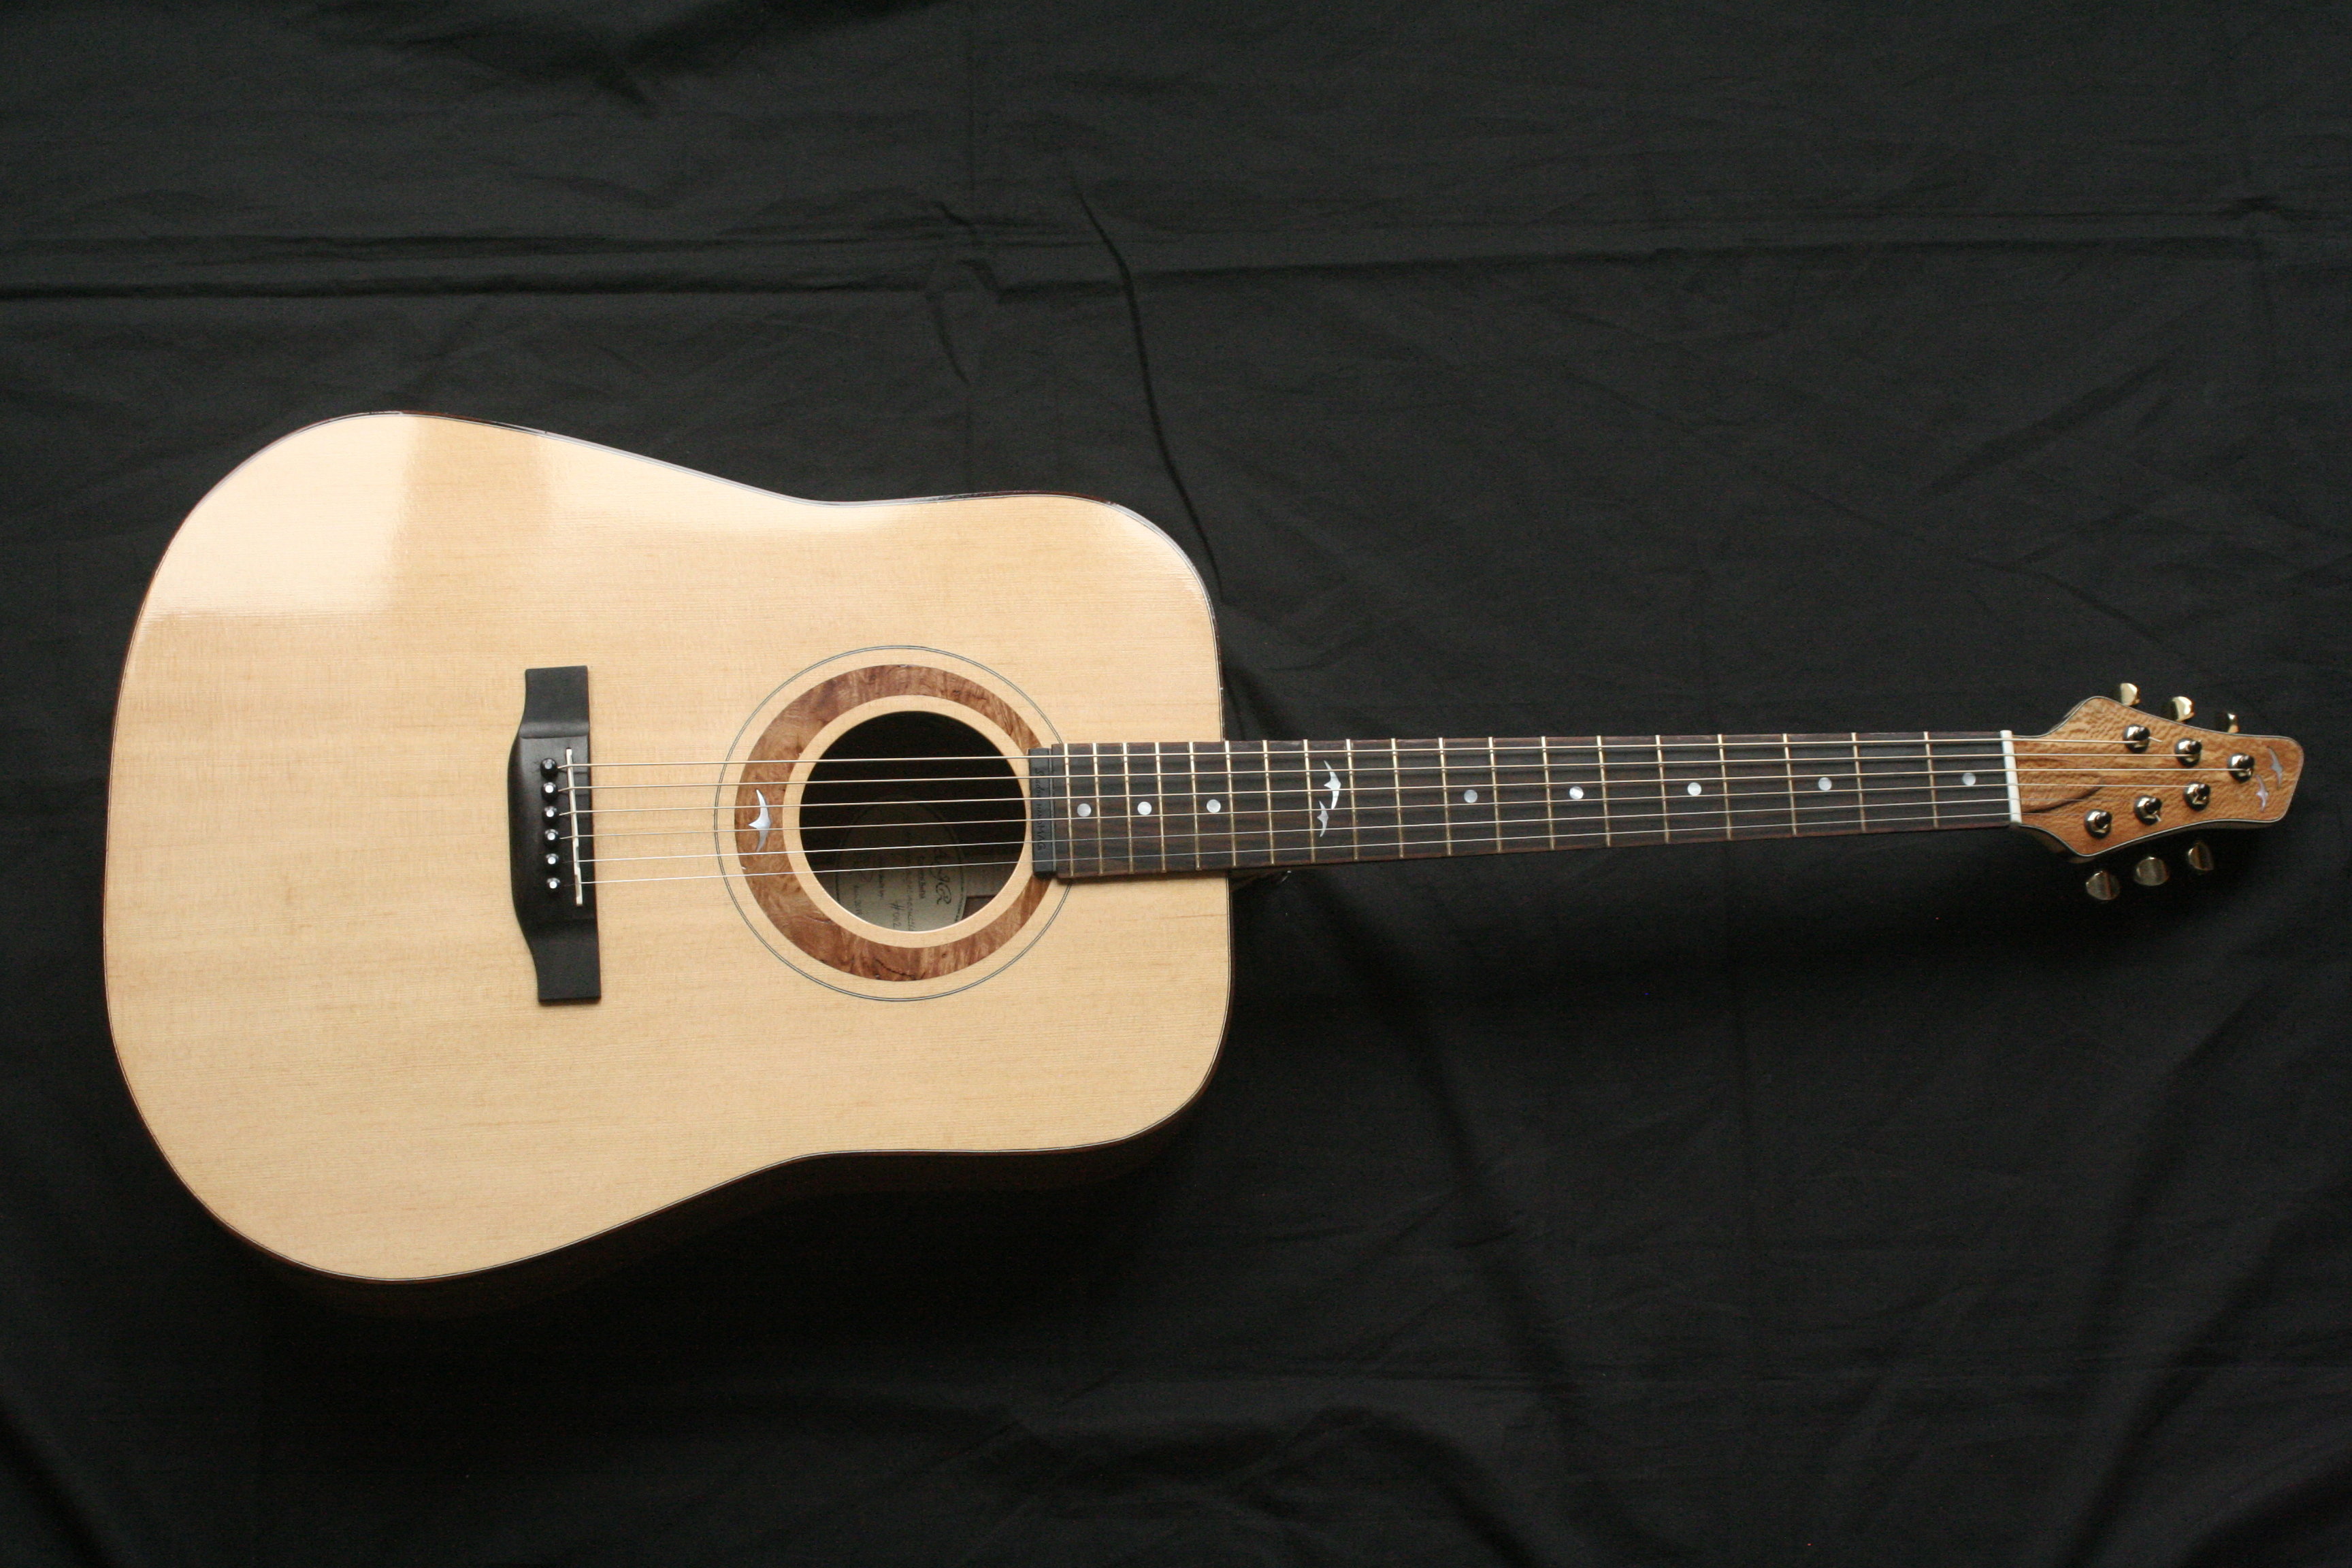
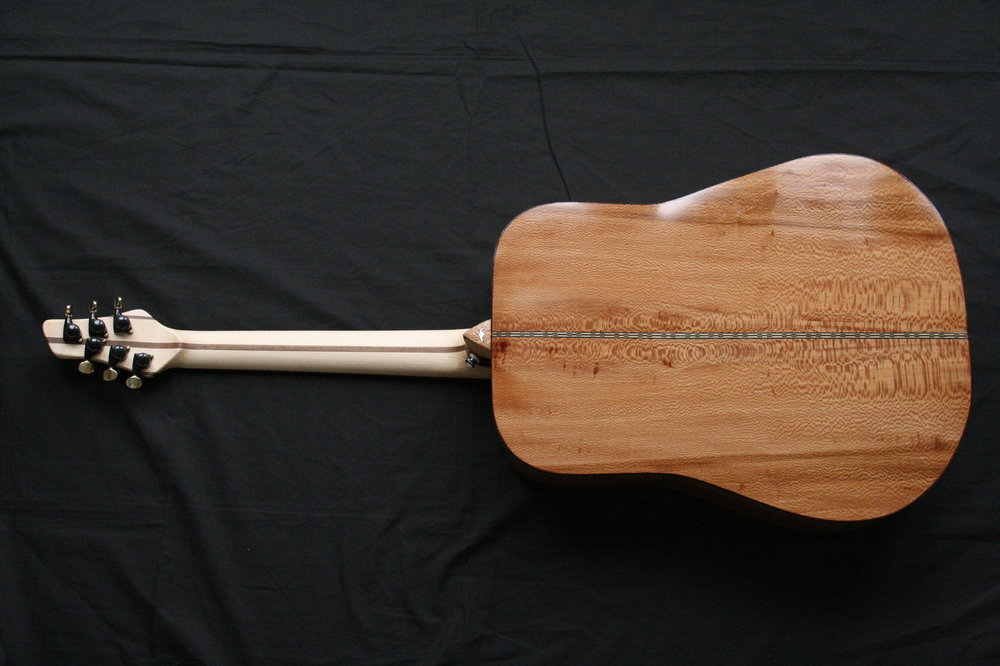
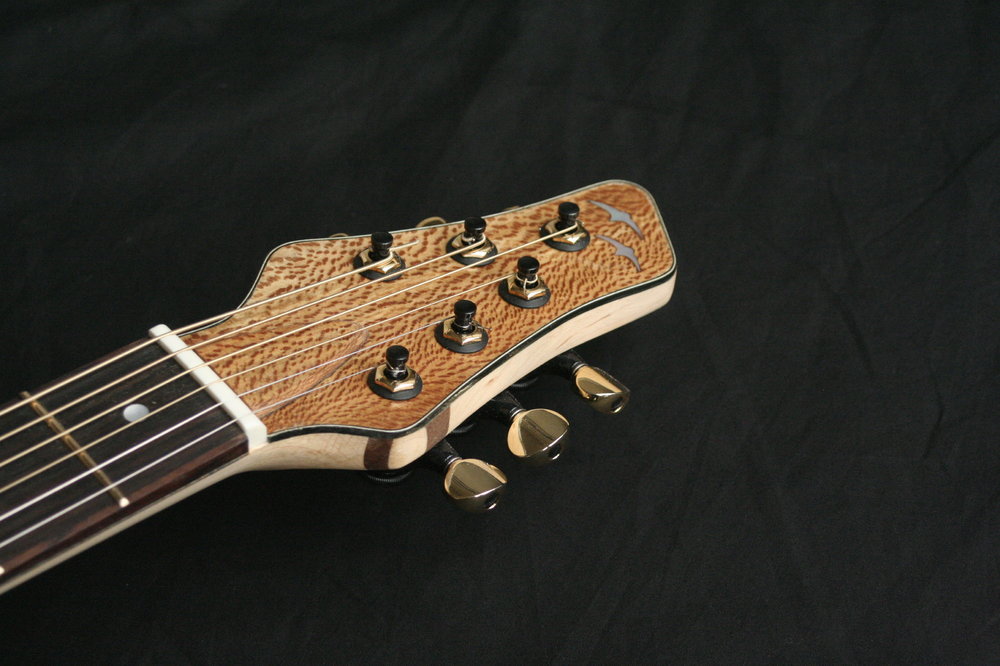
Finished pics! A Bitsa Dreadnought for me :)
Andyjr1515 replied to Andyjr1515's topic in Build Diaries
And the finished pics Like me, not perfect but - in spite of what MrsAndyjr1515 might say - broadly fit for purpose. Thanks for your kind words along the way


-
Finished pics! A Bitsa Dreadnought for me :)
Andyjr1515 replied to Andyjr1515's topic in Build Diaries
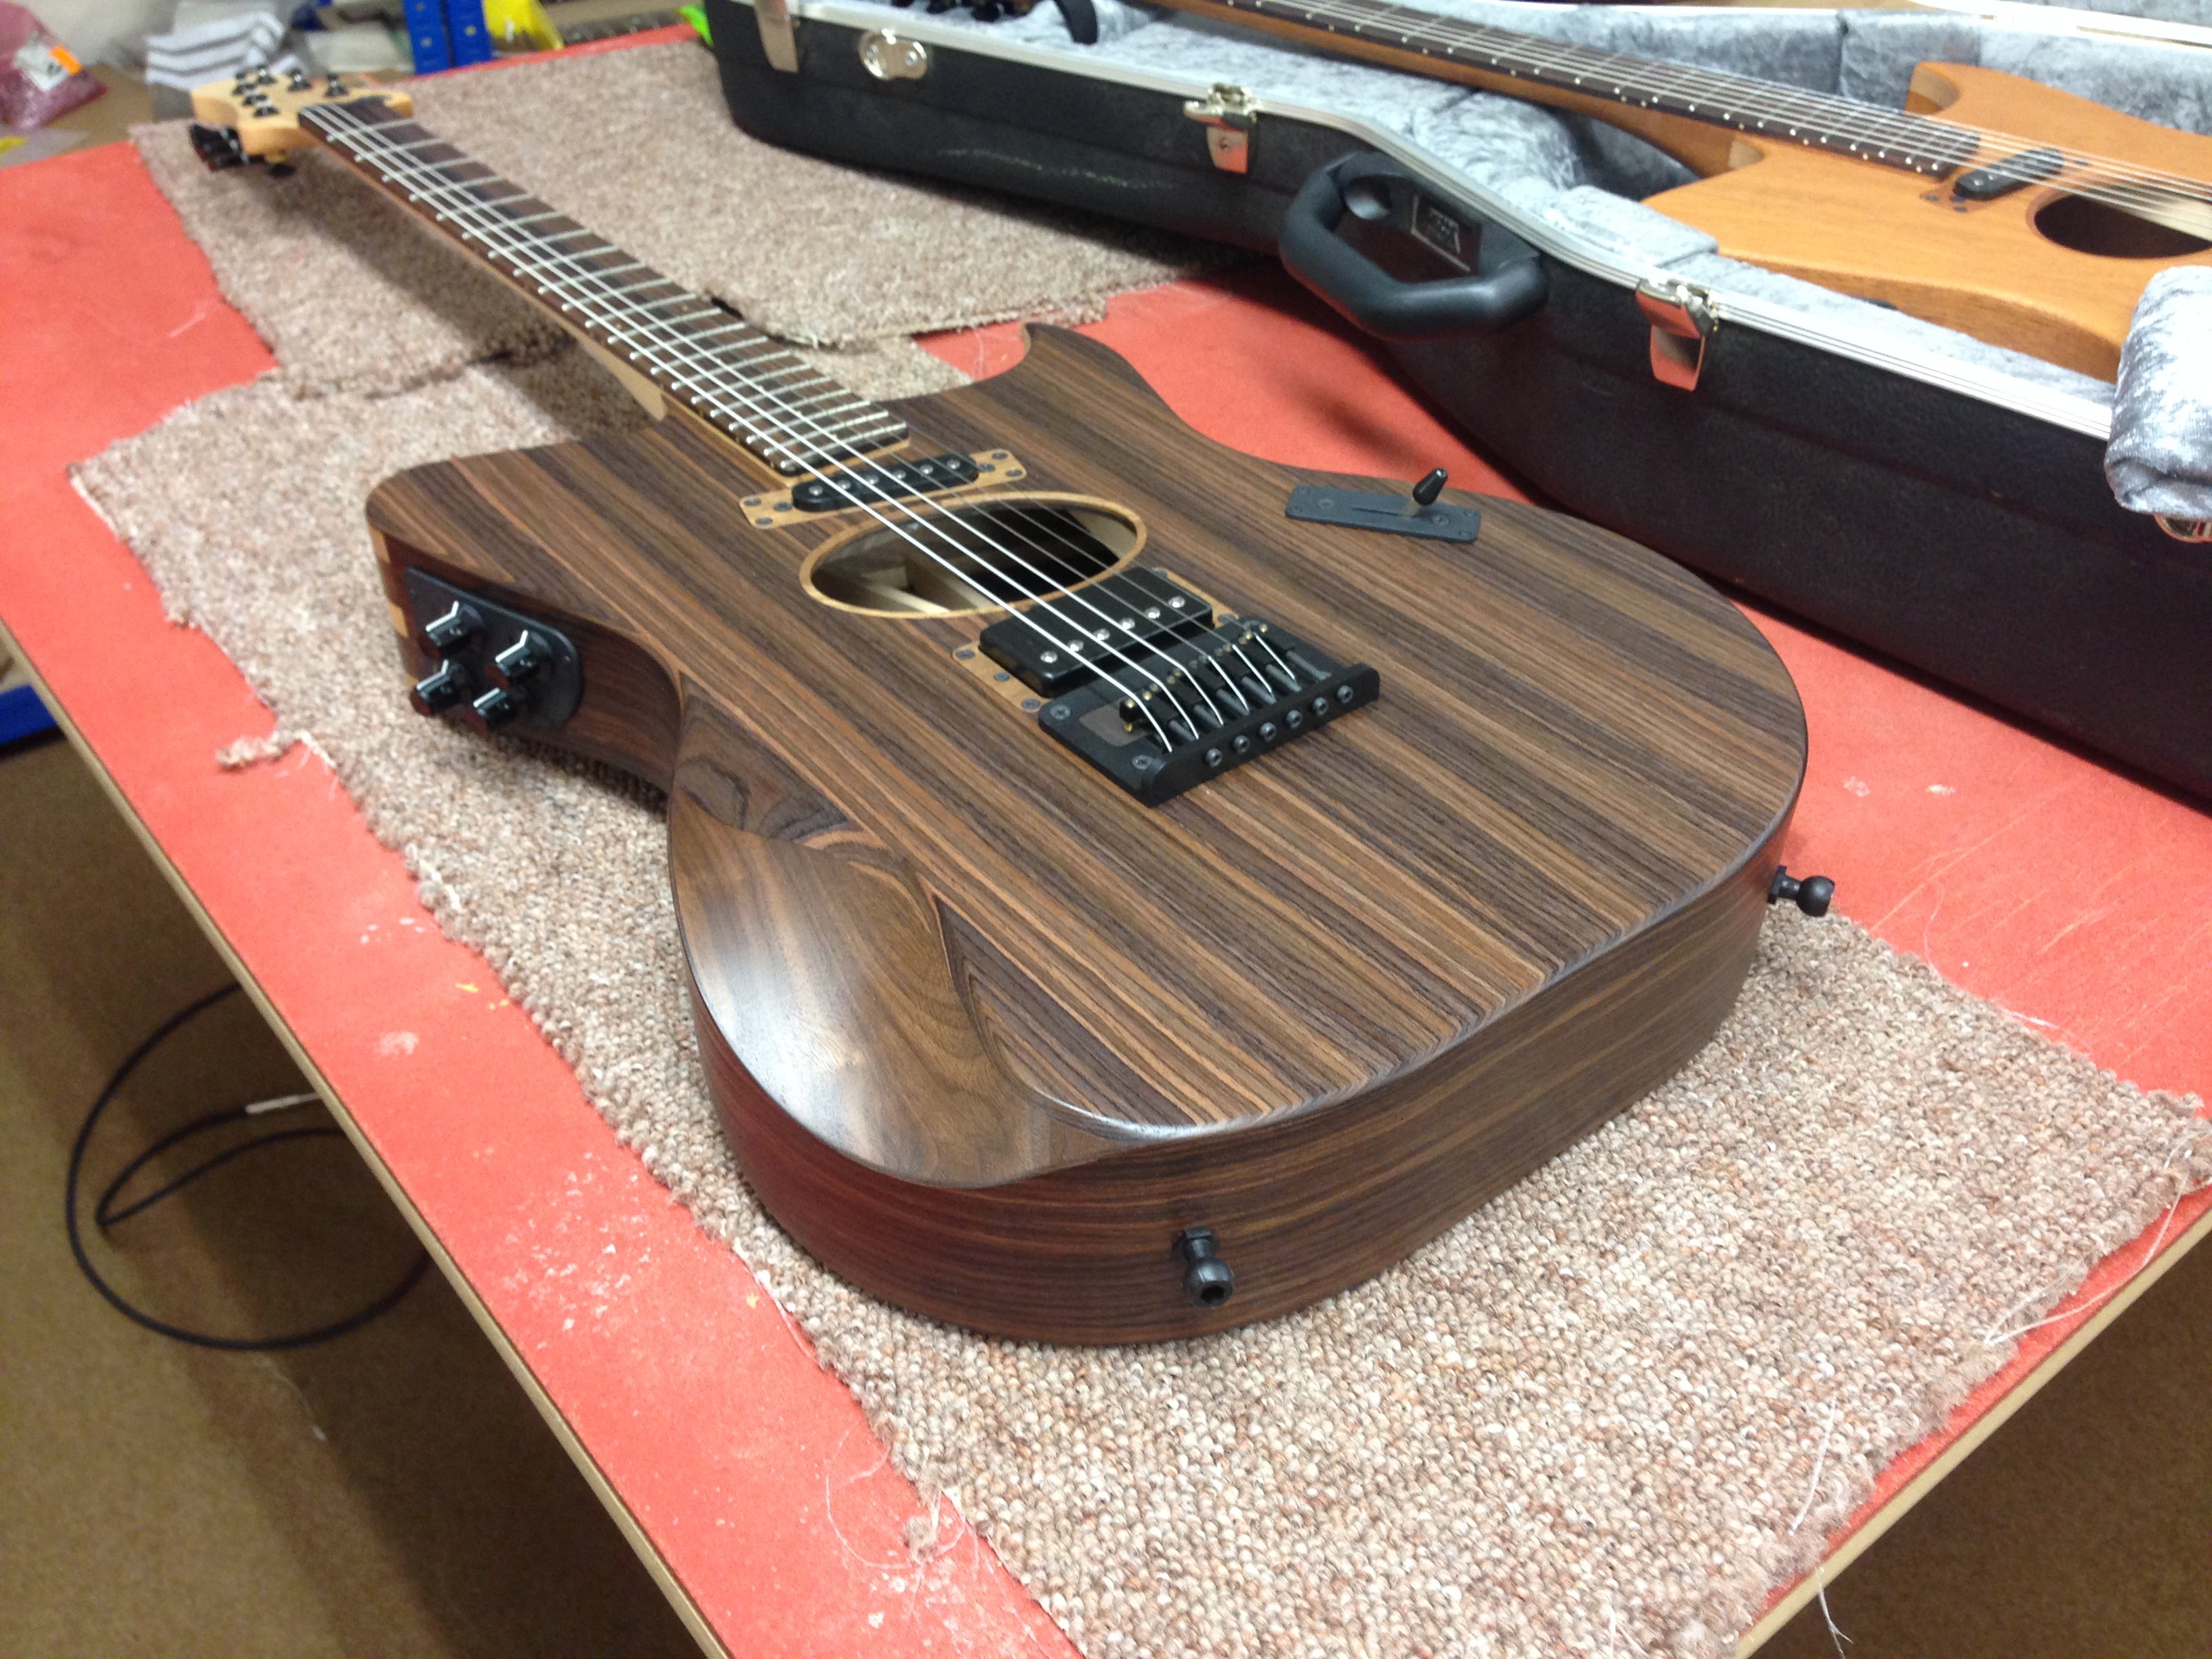
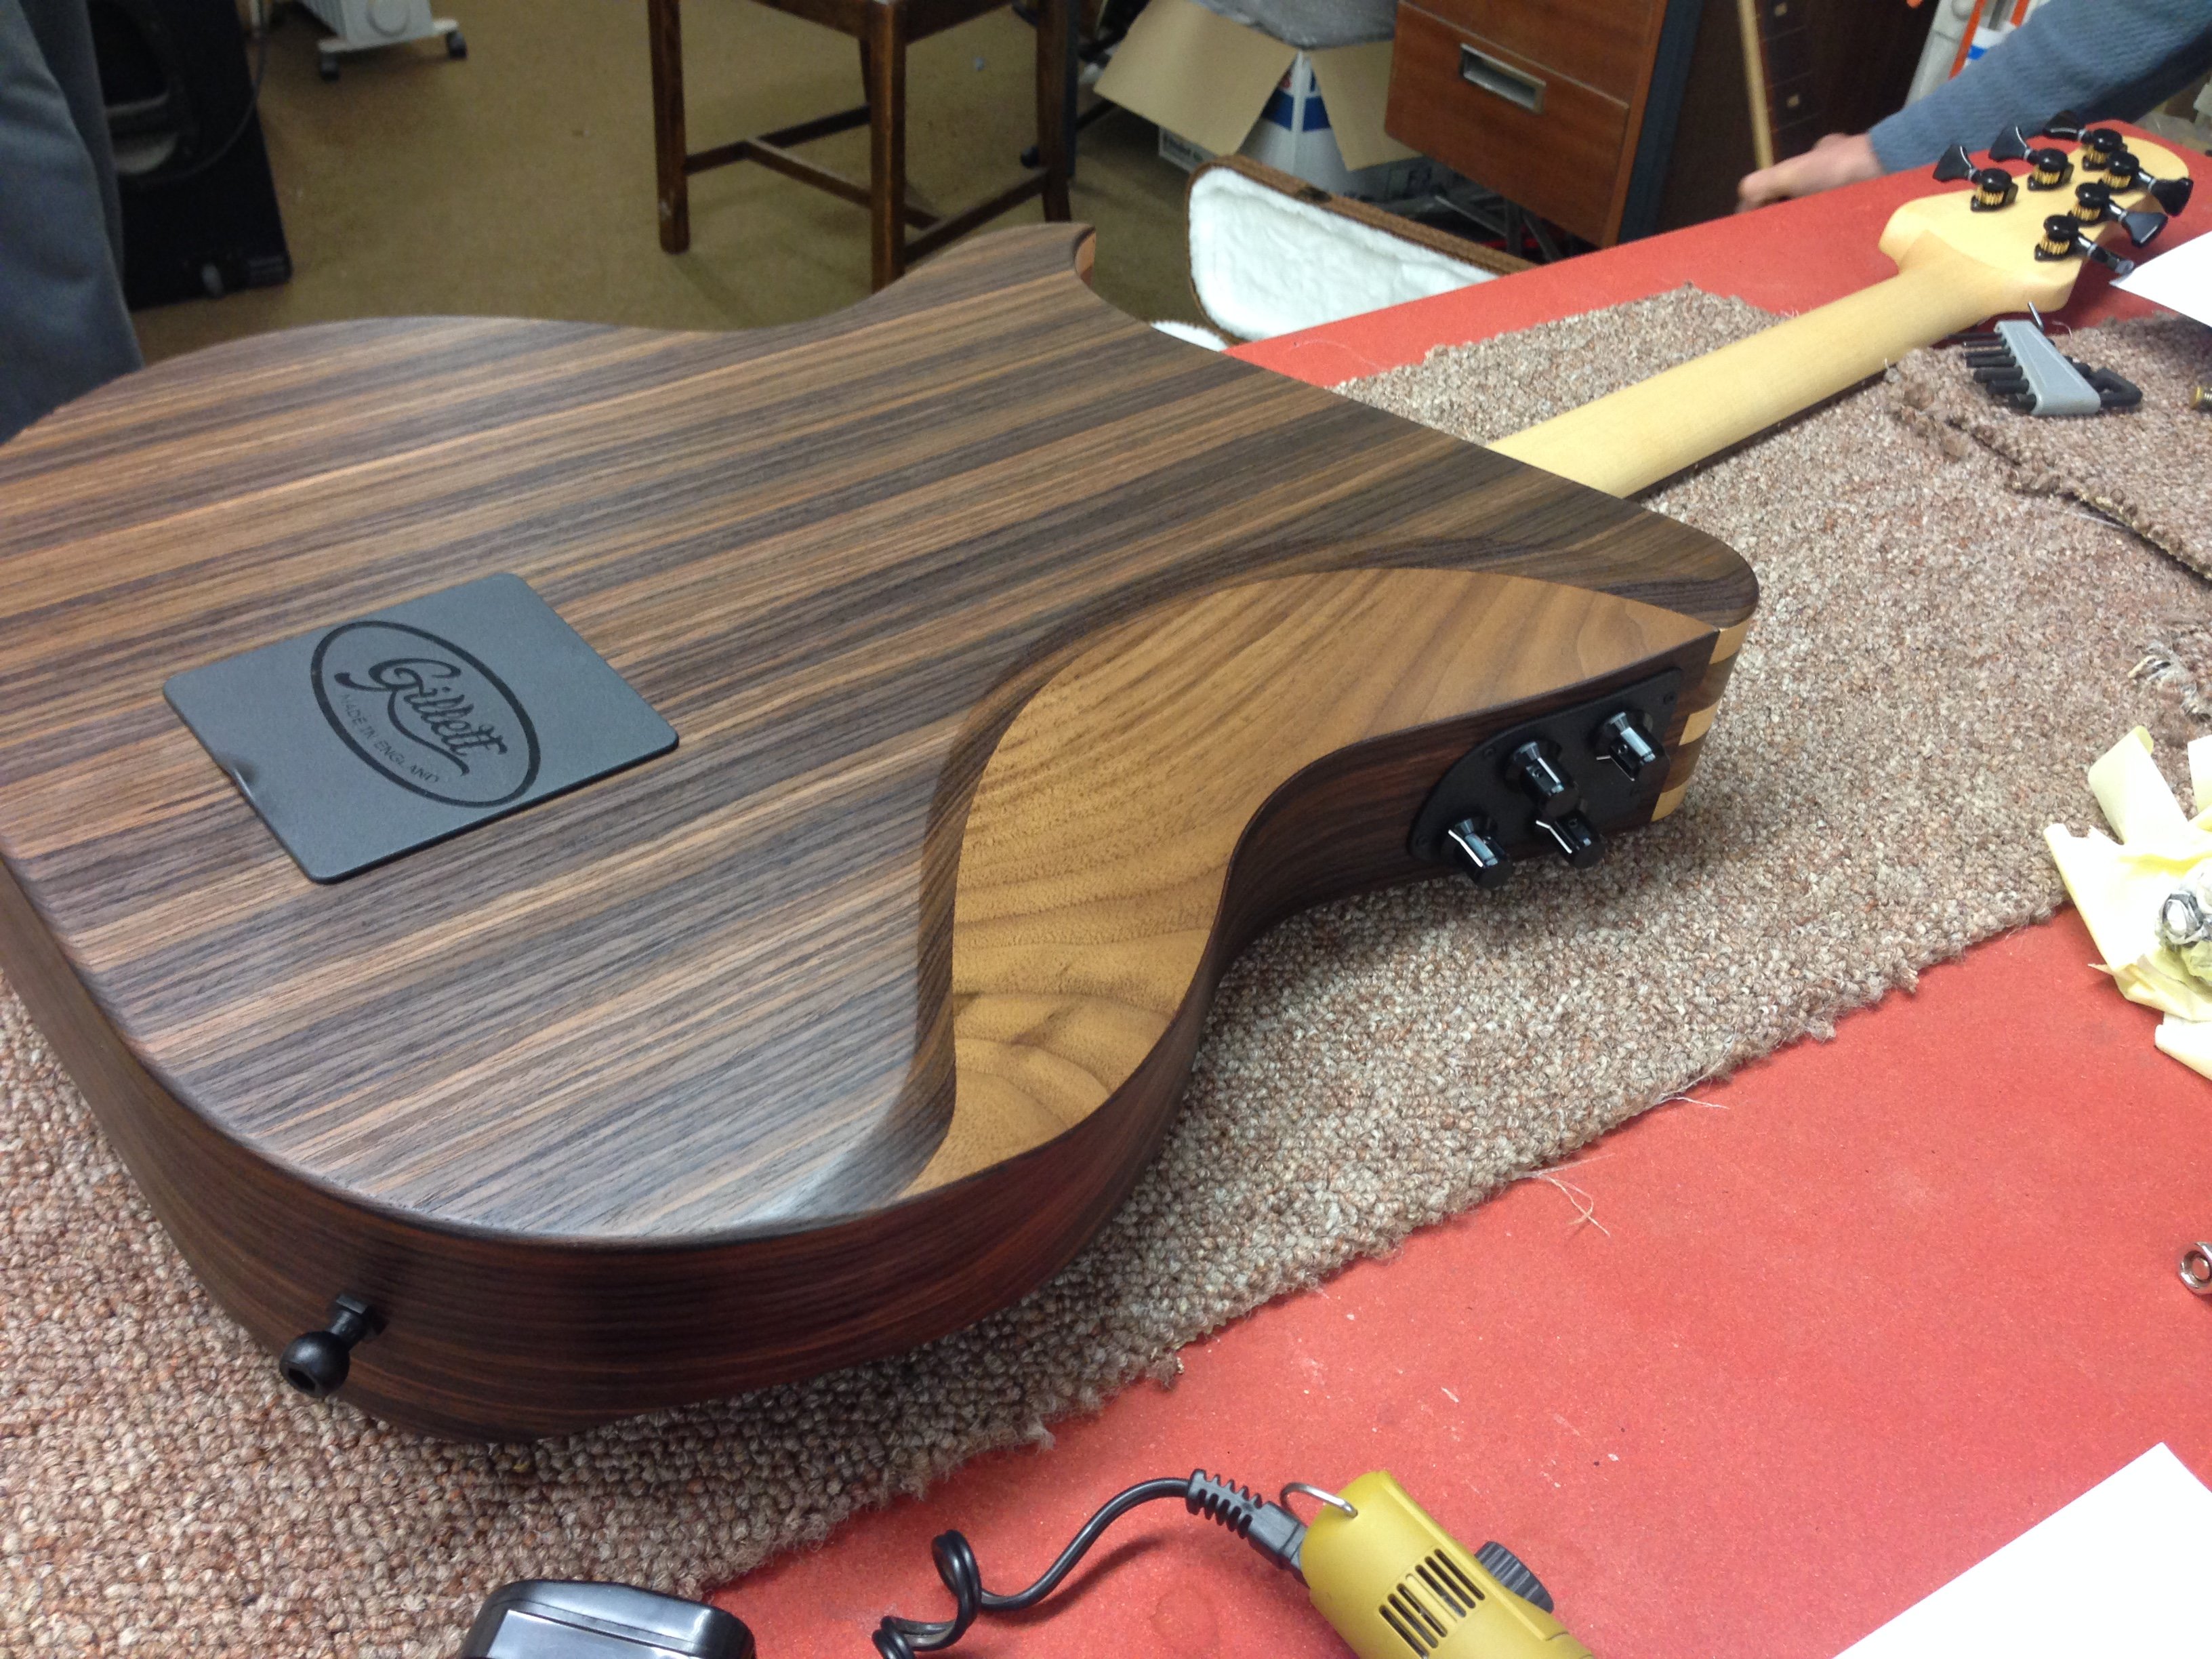
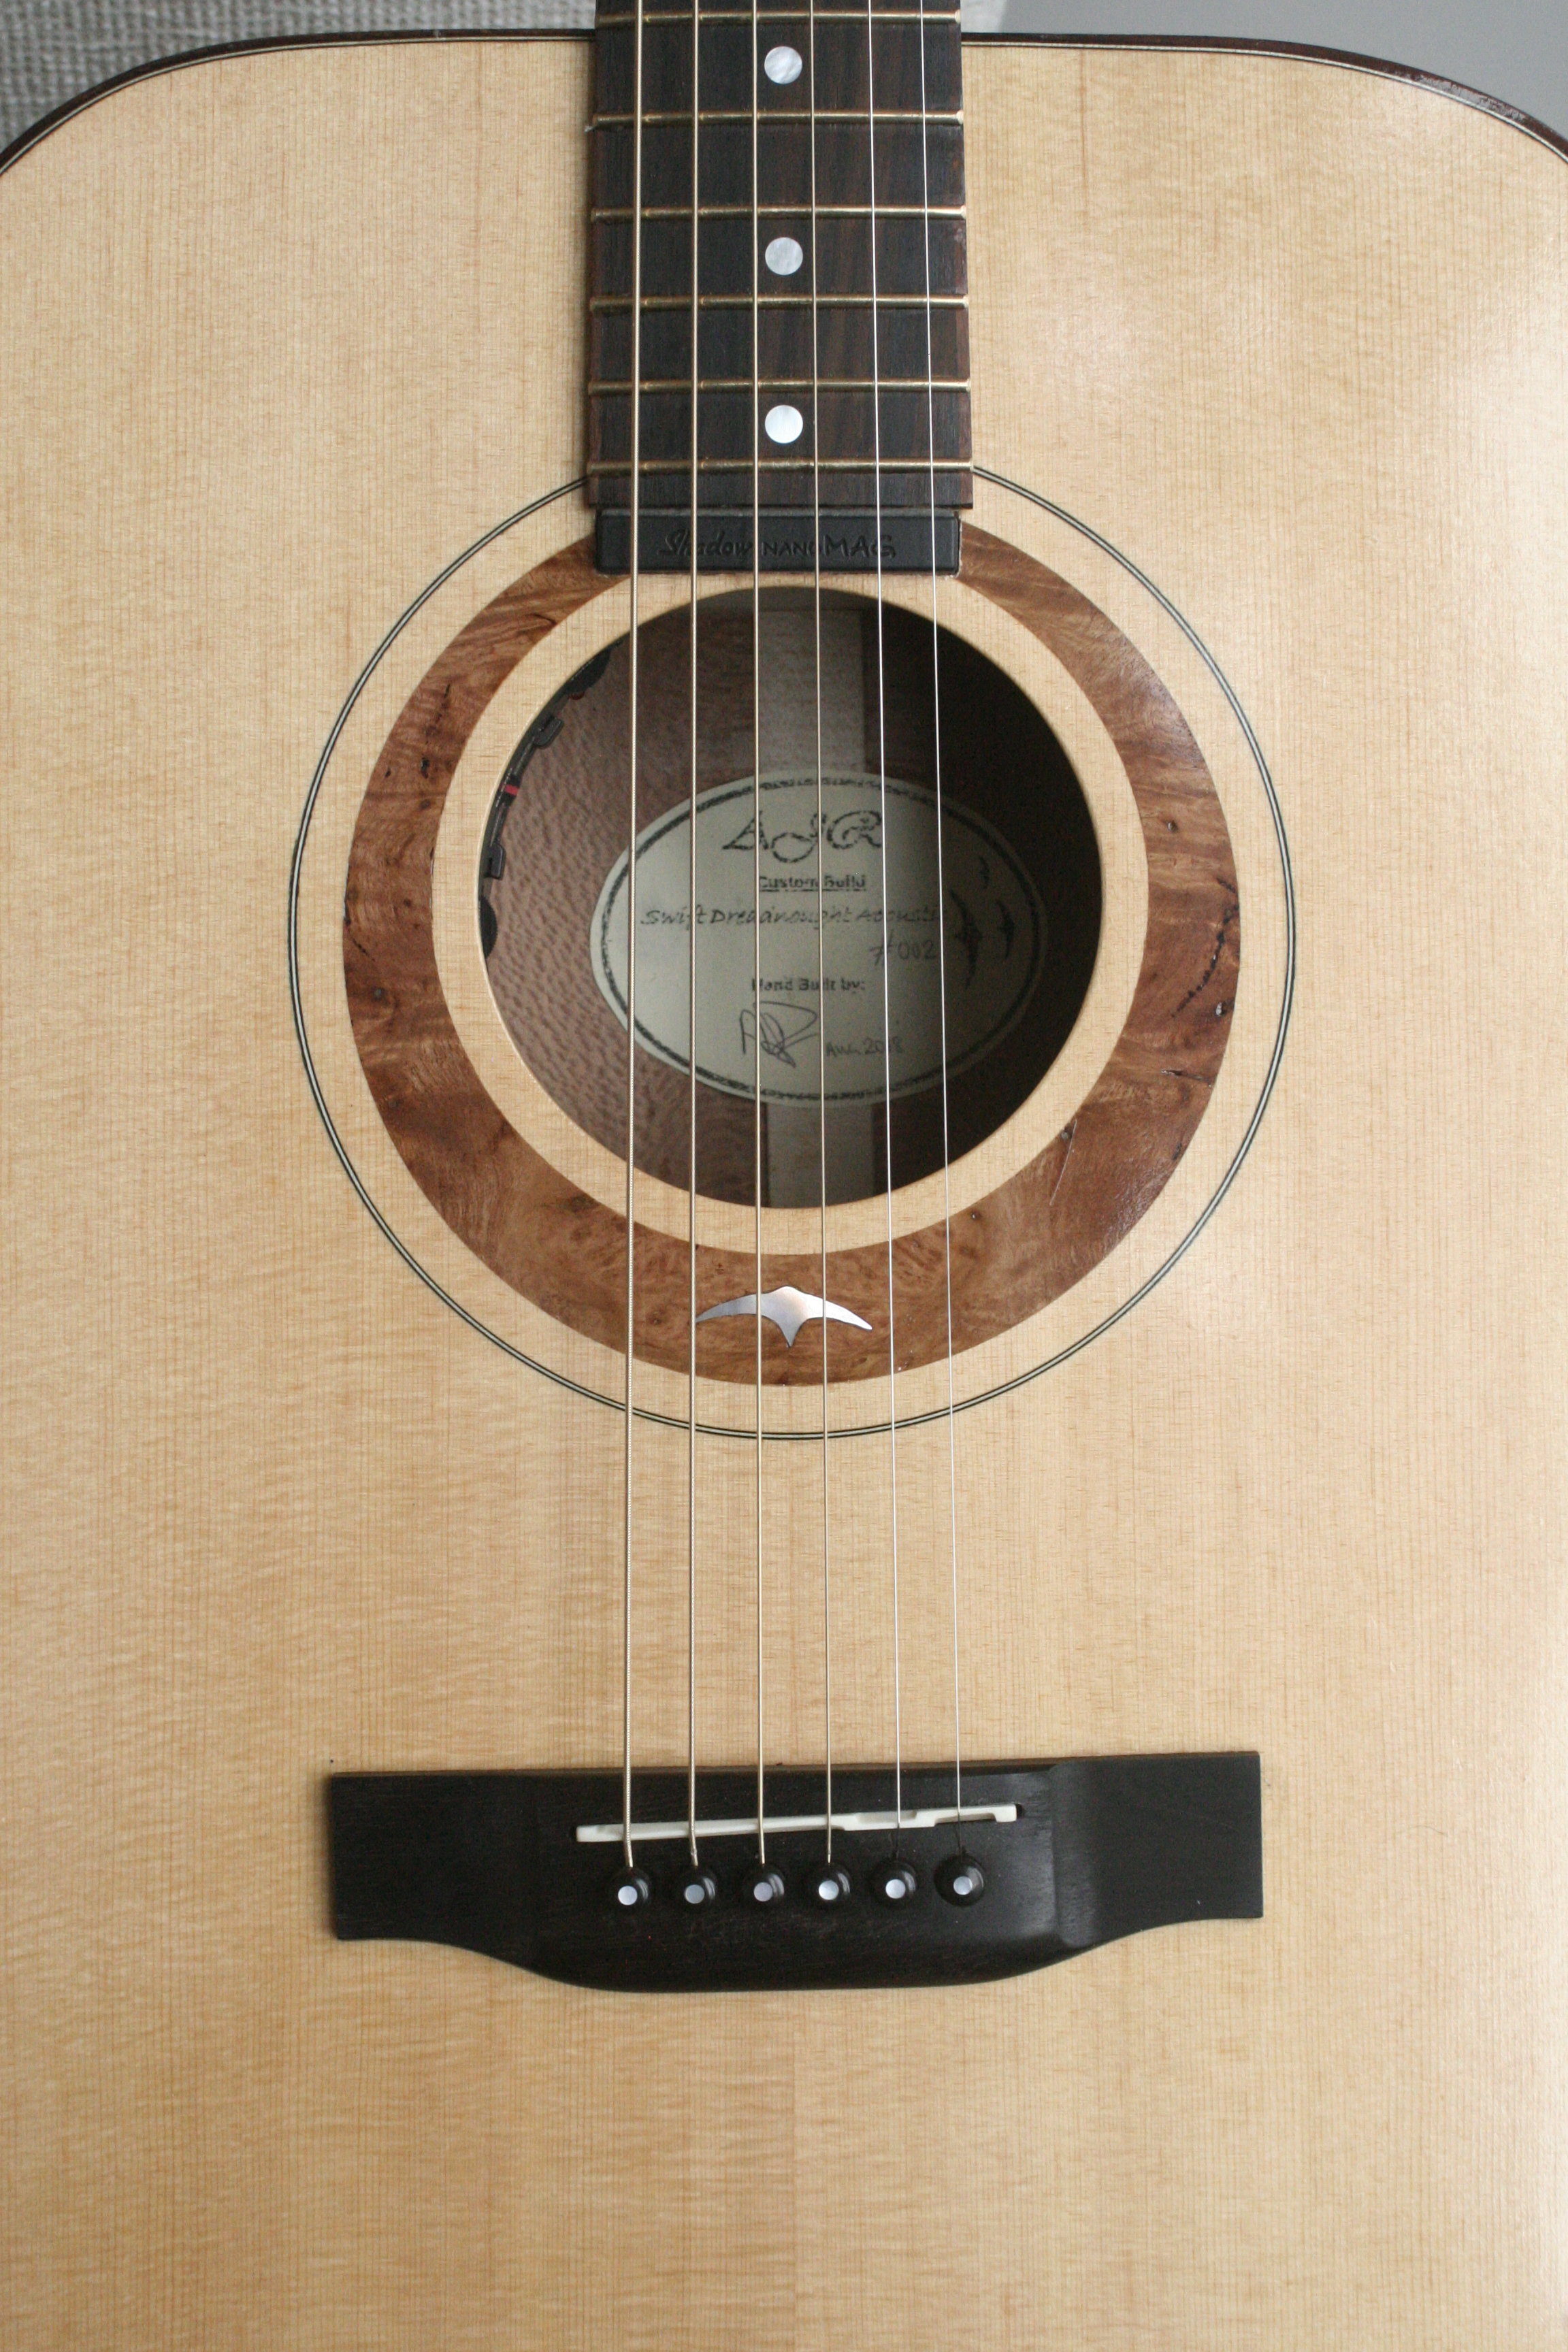
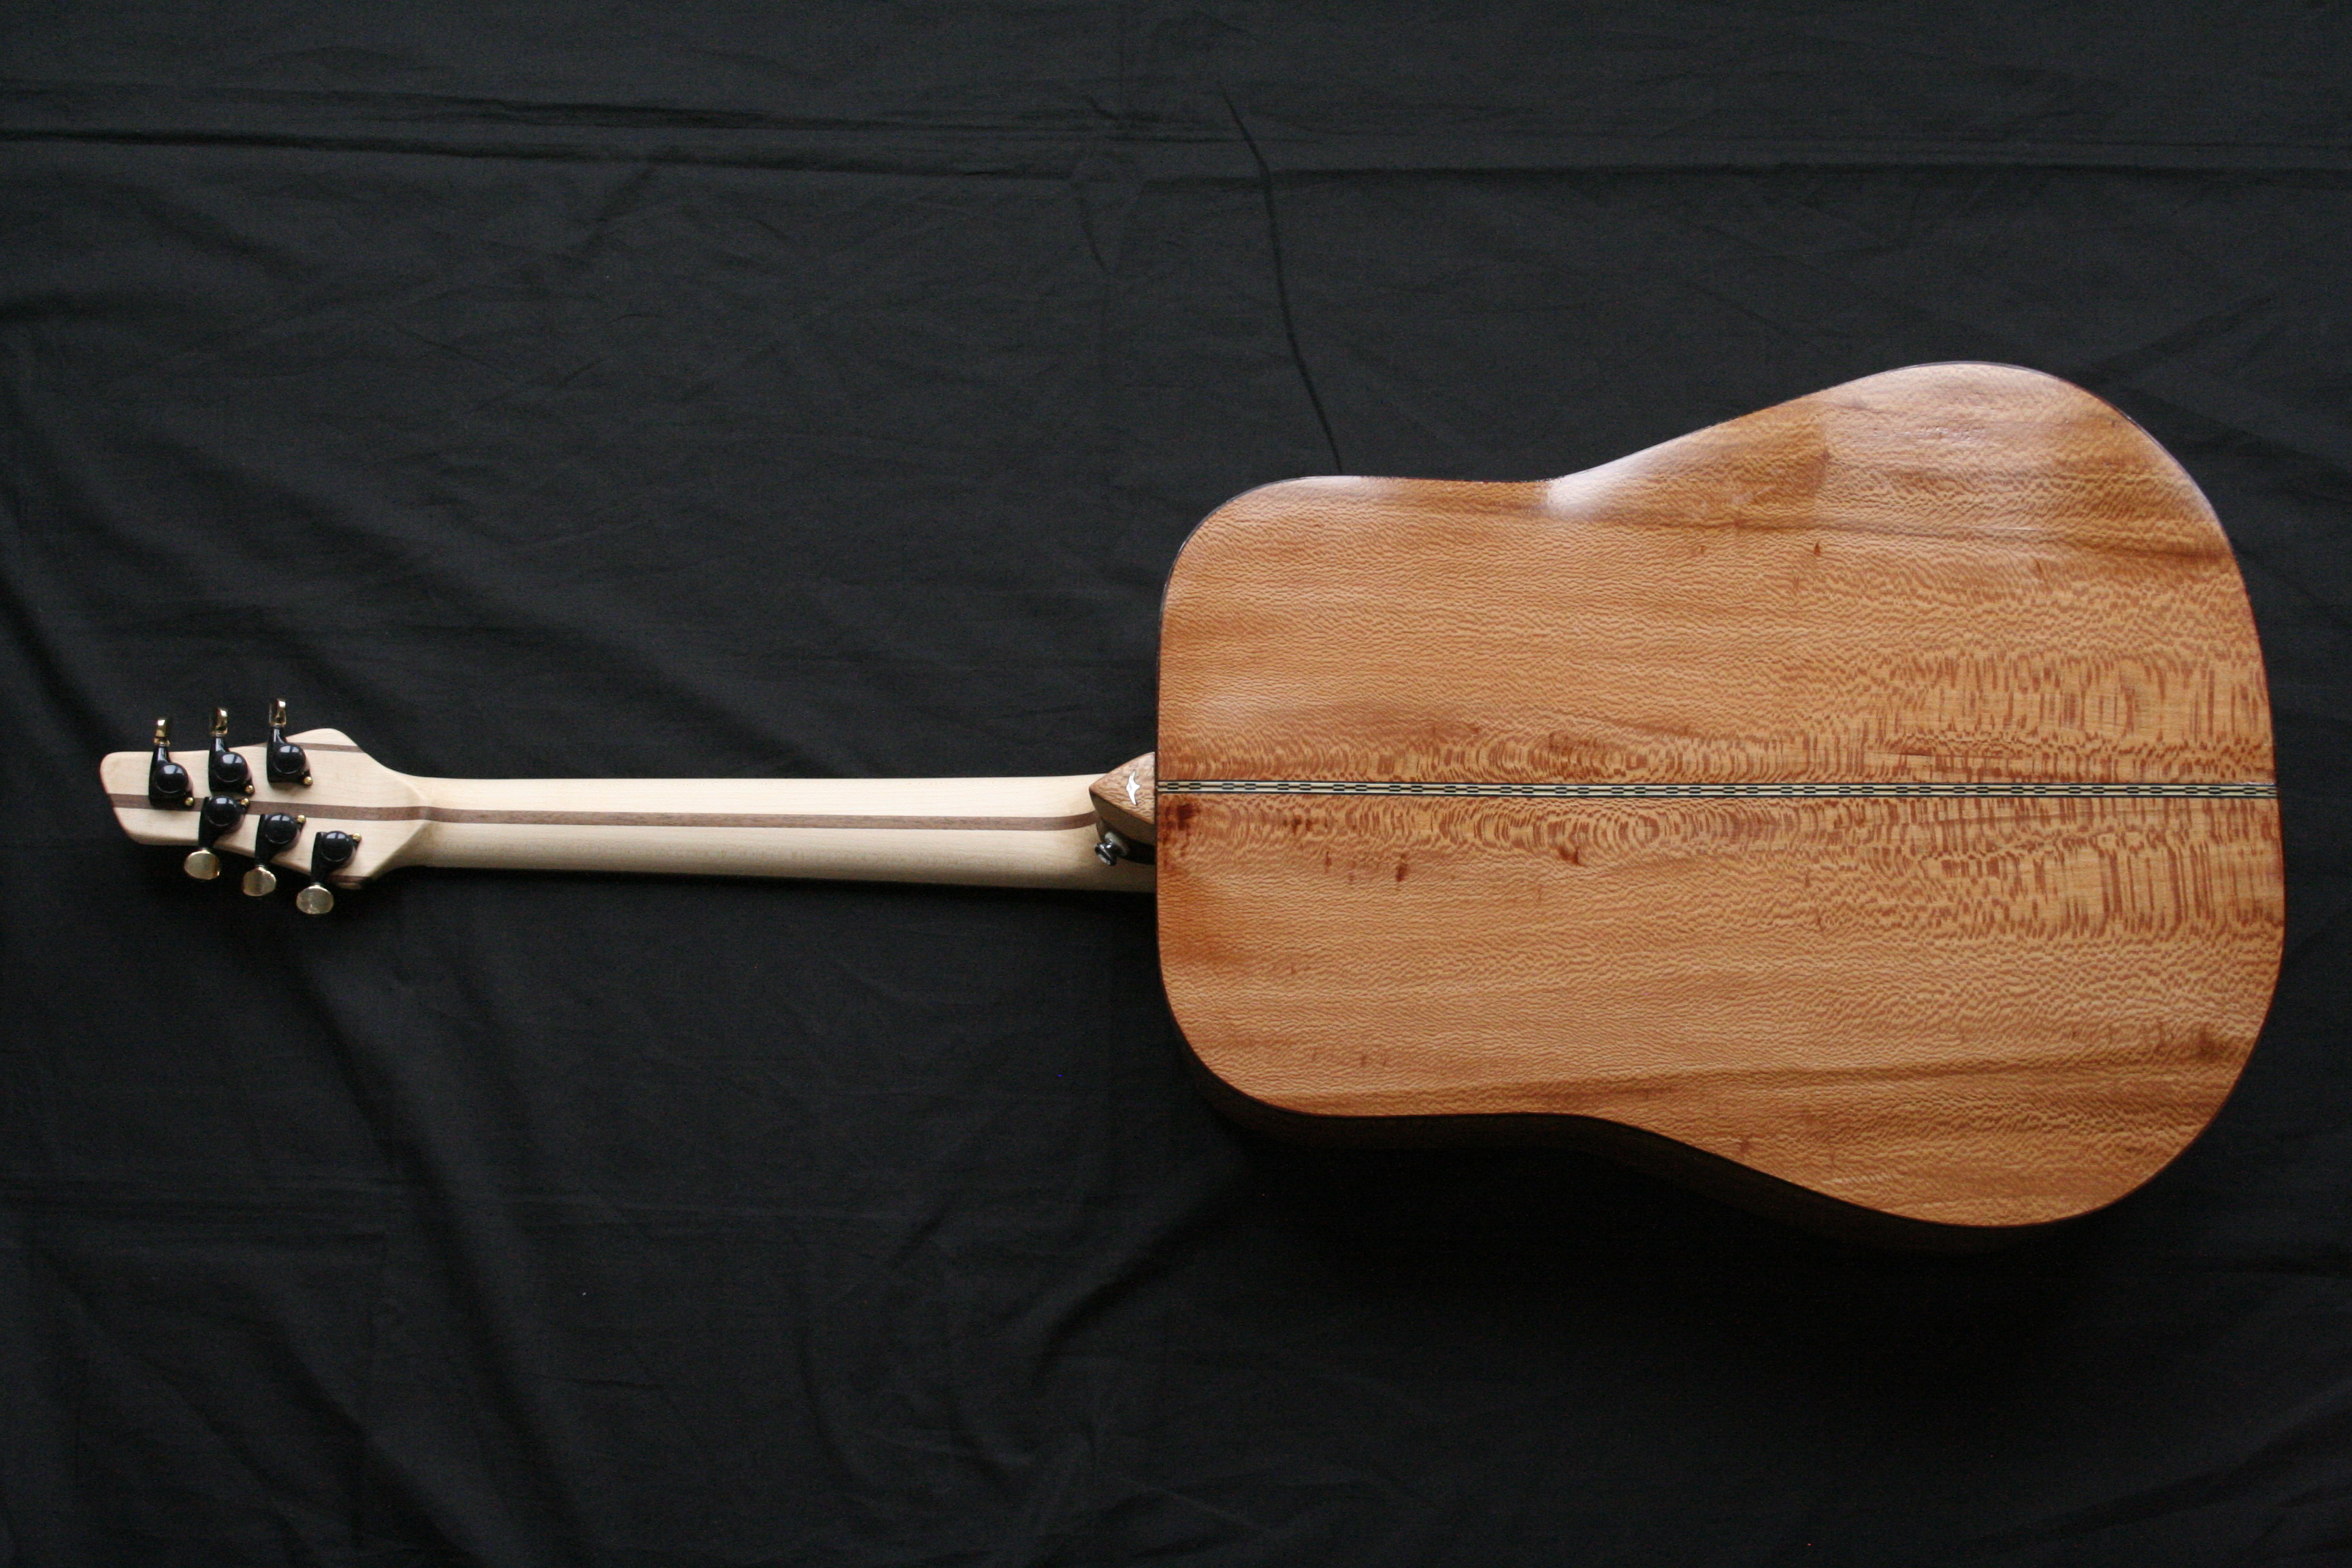
Tried to finish this off. Almost but not quite. First popped the magnets onto the truss-rod cover: ...and hey presto: Then installed the Shadow Doubleplay electrics. It comprises a blendable under-saddle piezo: and a mini magnetic pickup at the end of the fretboard: I suspect that this is intended for a flatter fingerboard radius (prob 12" - I've build closer to an electric neck with 10" rad and locking tuners. Makes it easier for me to transfer from my electric to the acoustic) so I sunk it into the top to make sure it didn't foul the top and bottom E strings: As it turns out, I've overdone this and will, at some stage, take it off and pop a shim underneath. I then installed the preamp / blend unit that sits inside the soundhole (I'll photo it in the 'finished' shots) and the rear strap pin / jack socket. Before I put the strings back on, I cleaned up and oiled the fretboard. The frets - well, at the moment there is absolutely no buzz anywhere so I haven't even polished them! When I get a moment, I'll at least do that but there is no need for levelling and crowning By the way, before you go thinking I know what I'm doing, that is a first... And - other than the low nano-mag pickup being a bit quieter than the piezo - we have electric amplification. Lastly, now the strings are on, I do my usual 'sit it like a cello and scrape the neck to the final shape by feel, spinning it round and playing it then re-scraping until it feels like I want it. This is followed by a quick tru-oil slurry and buff and it's good to go within an hour. Am I the only one that does this? No matter how well you fit a neck to the profile templates, I don't think you can really tell if it's right until you play it. So that's what I do. And the most subtle tweaks can make all the difference! Remaining jobs: - Replace the nut with a slightly wider one (plays fine with the present one but it isn't quite wide enough - Raise the nano-mag pickup (ditto) - Side dots! It's a big b****r and there is no way you can see the top of the fretboard when you are playing it - Final polish in about a week's time - Take the arty farty photos In the meantime, here are a couple of unplugged noodling clips - probably best listened to on headphones: https://soundcloud.com/andy-rogers-6/sets/ajr-dreadnought-acoustic-soundclips Andy -
Finished pics! A Bitsa Dreadnought for me :)
Andyjr1515 replied to Andyjr1515's topic in Build Diaries
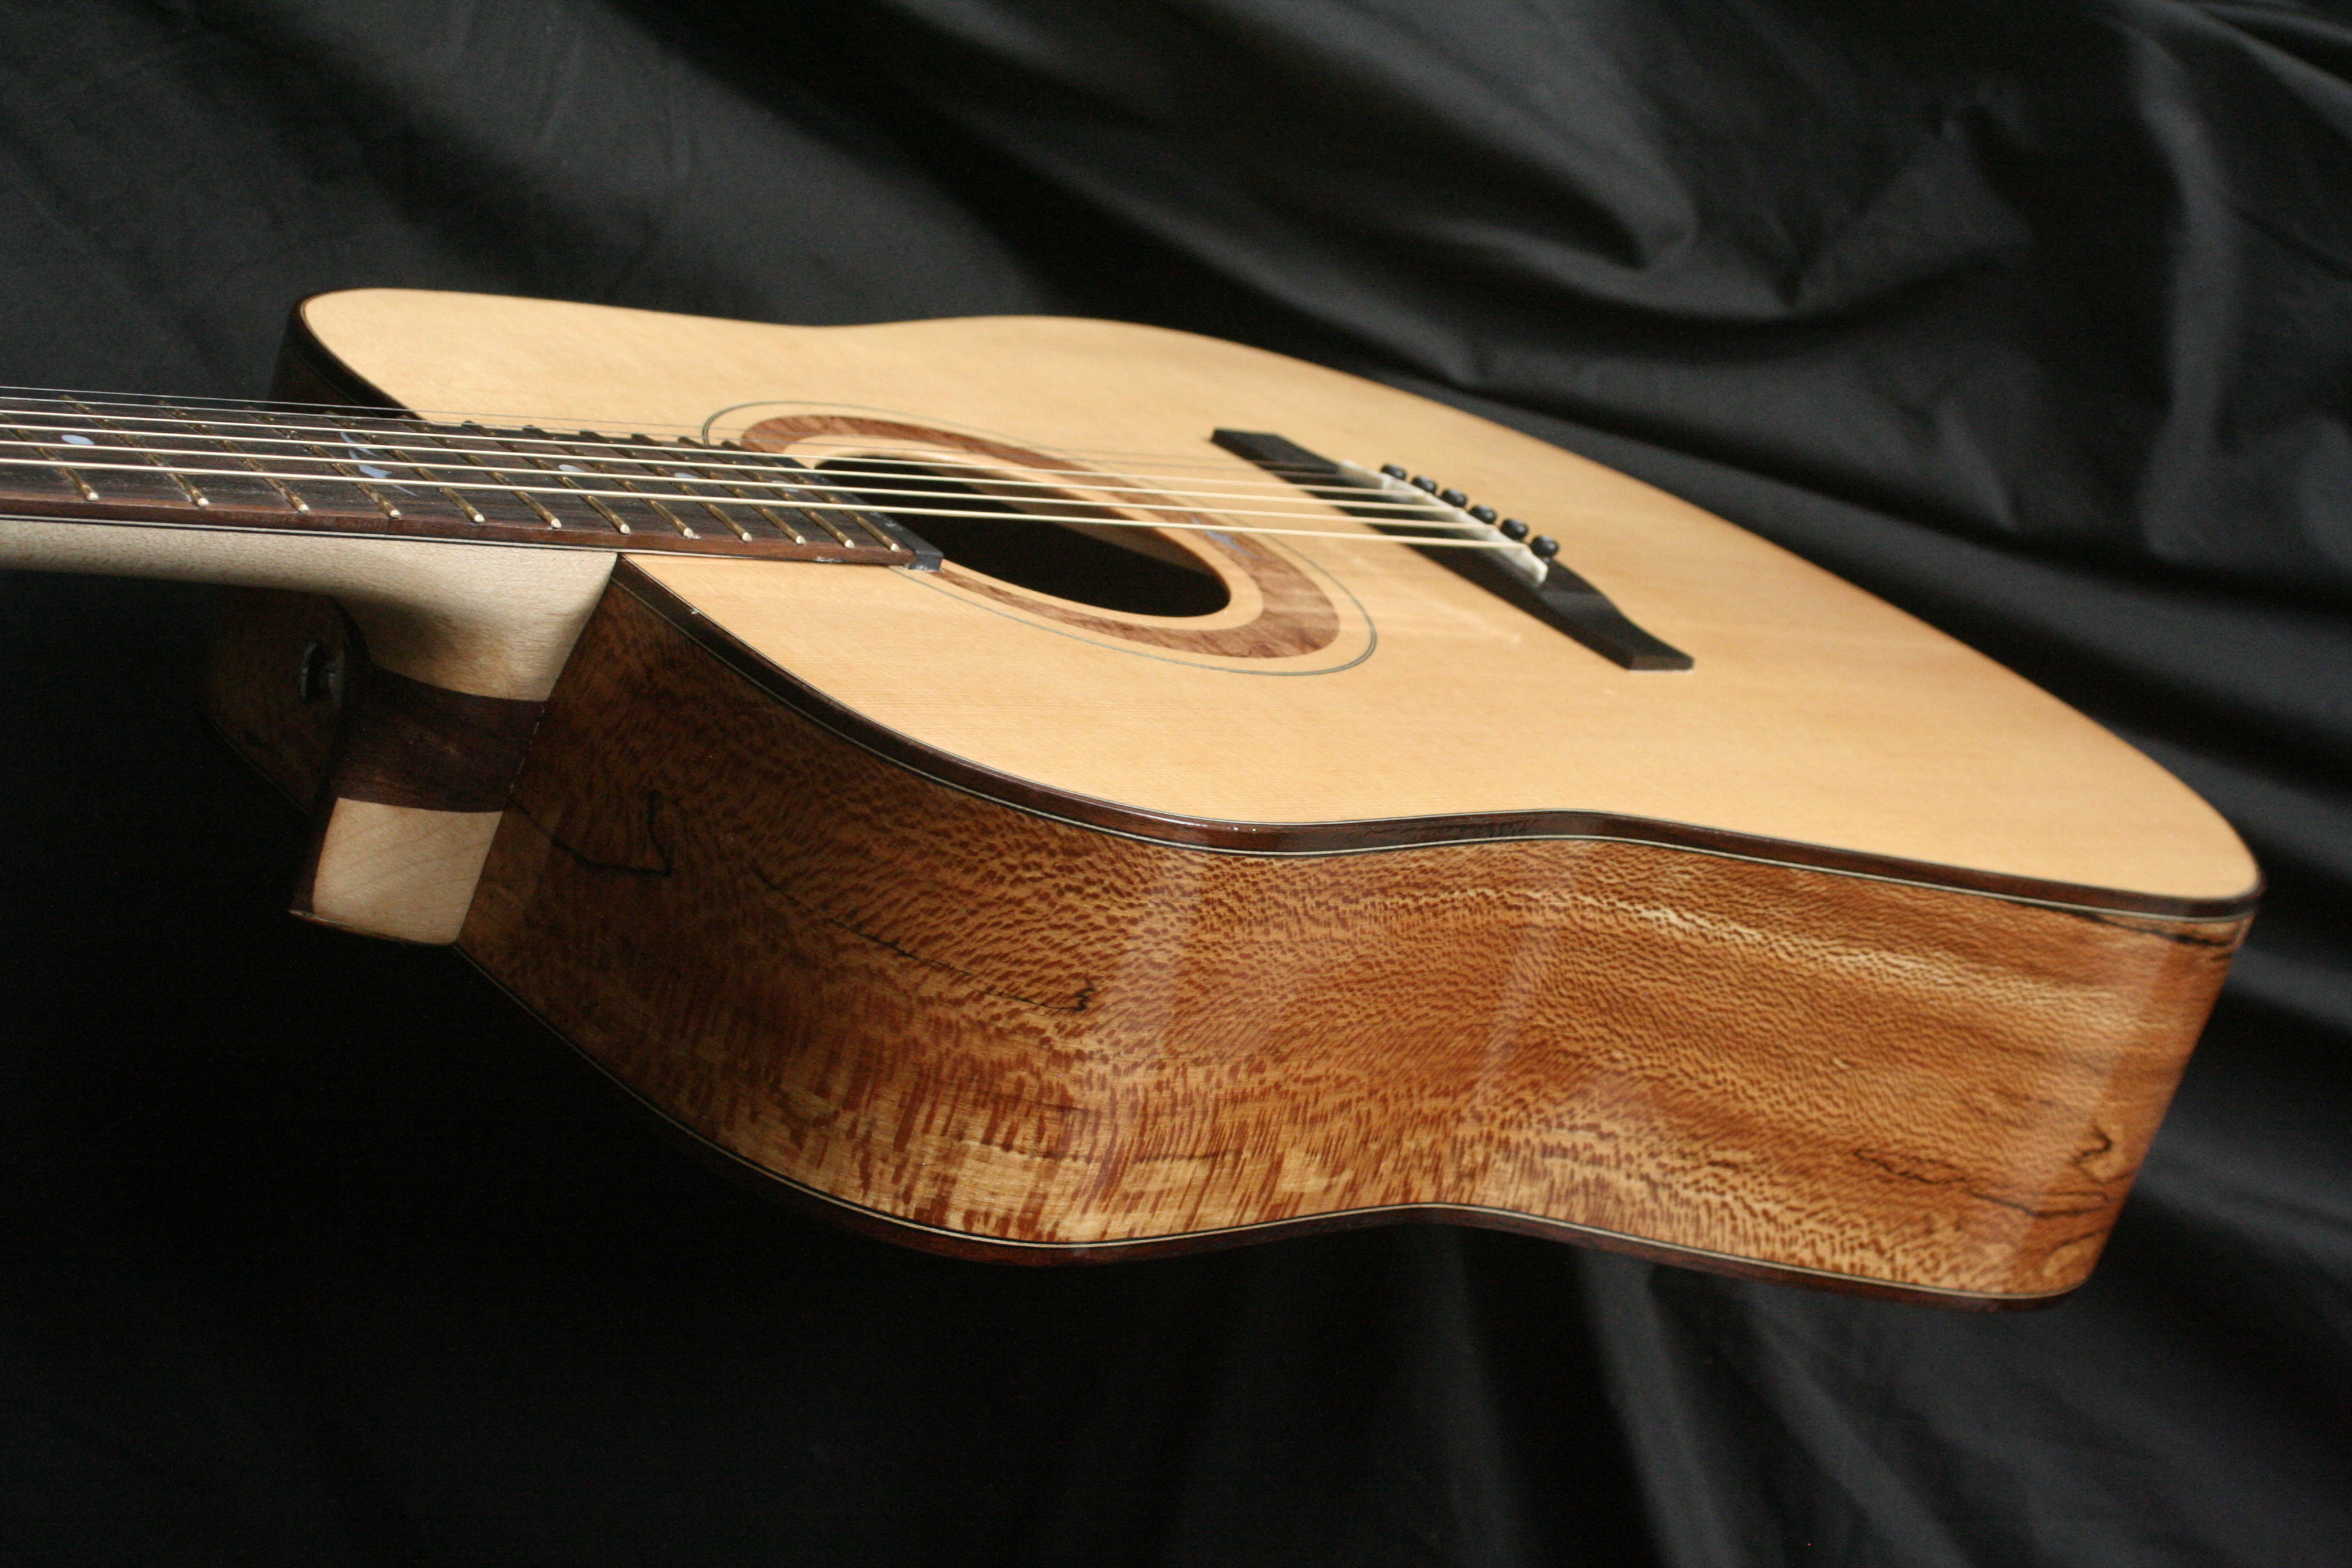
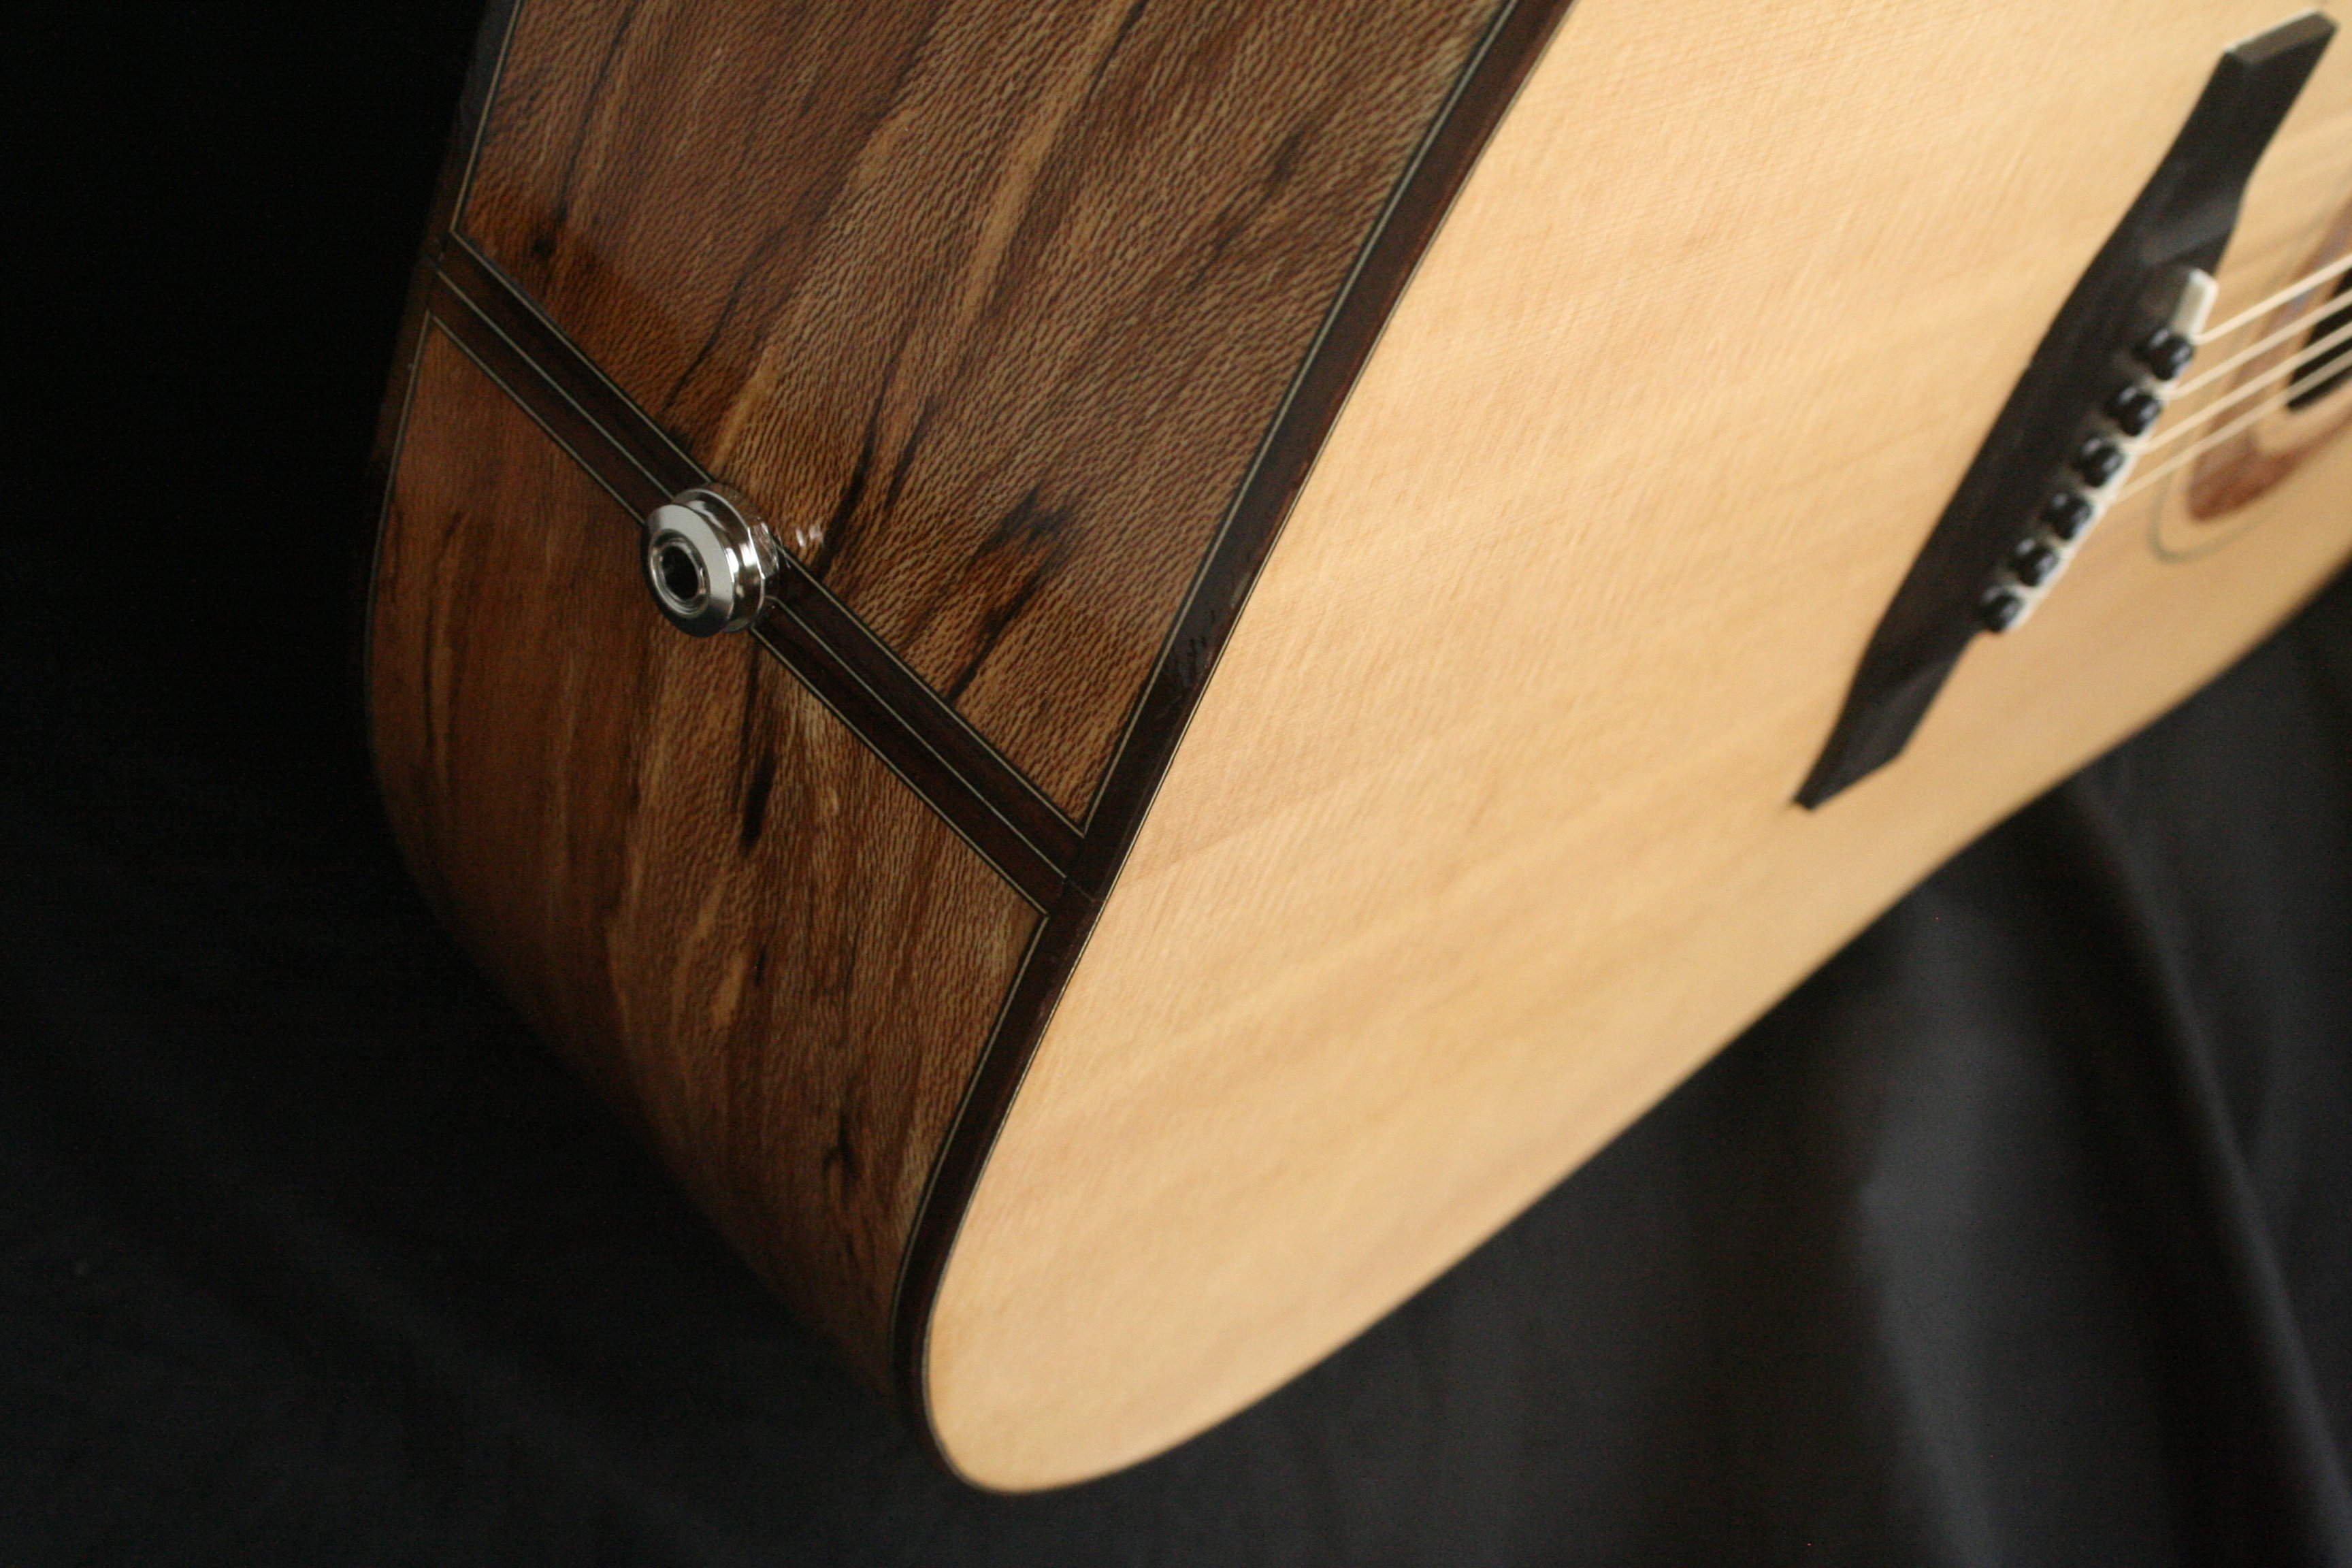
Bit of catch up to do. There's more detail in the Basschat thread but these are the highlights. The finish on the body, while not perfect, is probably at the point where further work will make it worse rather than better - so this is where I will stop and, once it's dry, I'll hopefully be able to polish out some of the aberrations And that means I could get on and do the bridge. In pictures. I use the Stewmac fret calculator to work out exactly where the bass and treble mid points of the saddle slot need to be. I use masking tape to mark the position: Next is to score round the bridge with a scalpel into the finish: Then to scrape away the carefully applied finish from within the score line!: Then I double checked the position and drilled through the peg holes for the top and bottom E. The two pegs will be used in the initial clamping to prevent the bridge 'floating' out of position on the wet glue: Then I put more masking tape around the back (should have done this first and just scalpeled though it round the bridge!) and got out my bridge clamp and home-made bridge sides clamp: Then added the glue, and at first just used the metal clamp, positioning the bridge with a couple of string pegs through the bridge and into the two peg holes drilled in the top. Once I was sure the bridge was secure, I removed the two pegs and popped the home-made clamp to press the bridge sides firmly down: Then carefully wiped off the squeeze-out before removing the masking tape. This will be left clamped overnight to fully dry: And the only way of telling if it's in the right place is to string it up! So this morning, that's what I did And I'm very pleased with how it looks. And more to the point - even though not even the frets have been levelled and the saddle or nut aren't yet height adjusted - it sounds fantastic! I'm thrilled and surprised in equal measure! Oh, and yes - against all odds - the bridge does seem to be in the right place So still to do is: - Levelling/crowning frets - Cleaning up fretboard - Installing electrics - Setting up saddle and nut - Strap button on heel - Fine tuning neck profile and final slurry and buff - Final polish once varnish is fully cured - Play it! -
Finished pics! A Bitsa Dreadnought for me :)
Andyjr1515 replied to Andyjr1515's topic in Build Diaries
The finish has maybe 2 coats more to do. There's a lot of waiting around, though, when the varnish is dry enough to touch and handle but not dry enough to take the next coat. So in that time I've started on some of the other jobs. The bridge goes on last (you have to scrape away the finish that you've just spent weeks putting on!) but needs to be shaped to match the spheroidal shape of the top. This is where the old 'engineers blue' approach comes in - except you use blackboard chalk. I put a wide strip of easy peel masking tape where the bridge will go and gave it a liberal coating of chalk. Then placed the bridge on top and moved it around a couple of mm. Hey presto - the high spots: Then all you do is scrape where the chalk is and repeat (multiple times). Here it is after the first scraping: So same m.o. - now scrape these areas away. After about 8 iterations, I am getting there: So I know now that most of the area is making good contact. Just a final bit of tidying up and it will be ready to fit as soon as the final coats of finish have been applied. The colour won't change much now - it will just get glossier. Here's where we are at in overall look so far: So - all being well - a few more days of finish coats and drying and then I can move towards final steps -
Test it out first, but I think I remember that white spirits and de-natured alcohol are both OK. I lot of people do that, so it's not a bad idea depending how you are going to use it. Folks certainly thin it down to spray it, as far as I know.
-
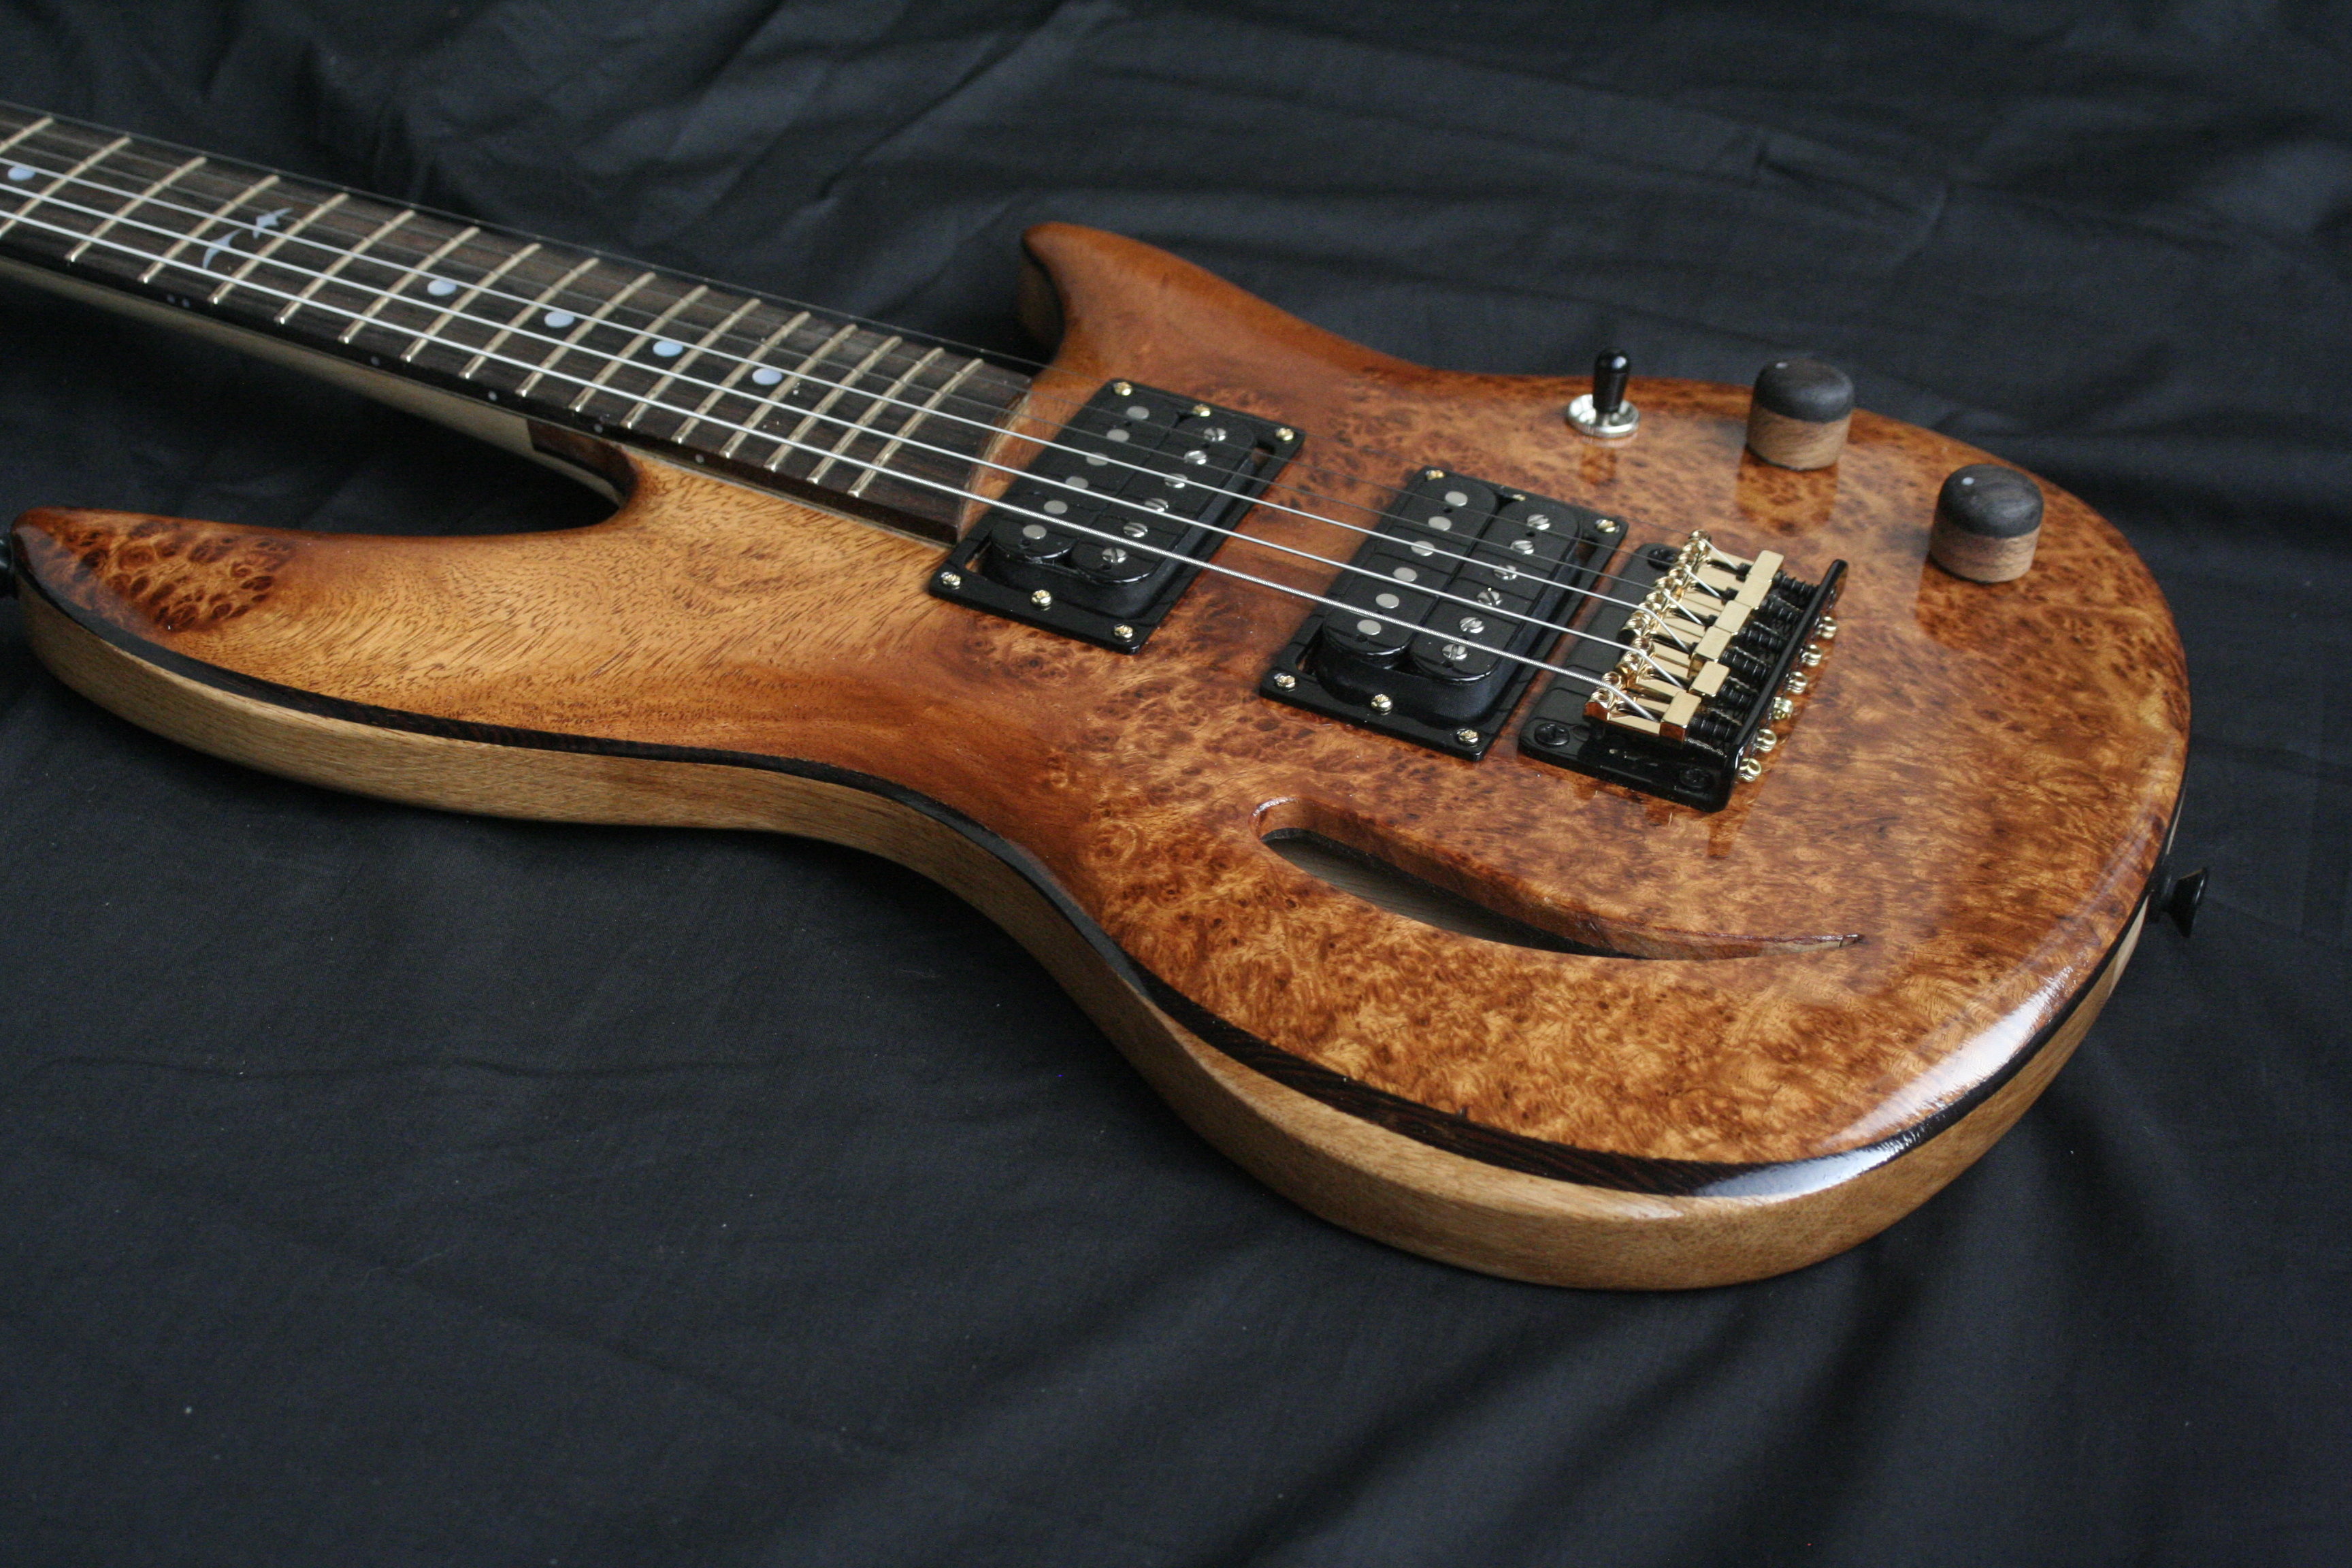
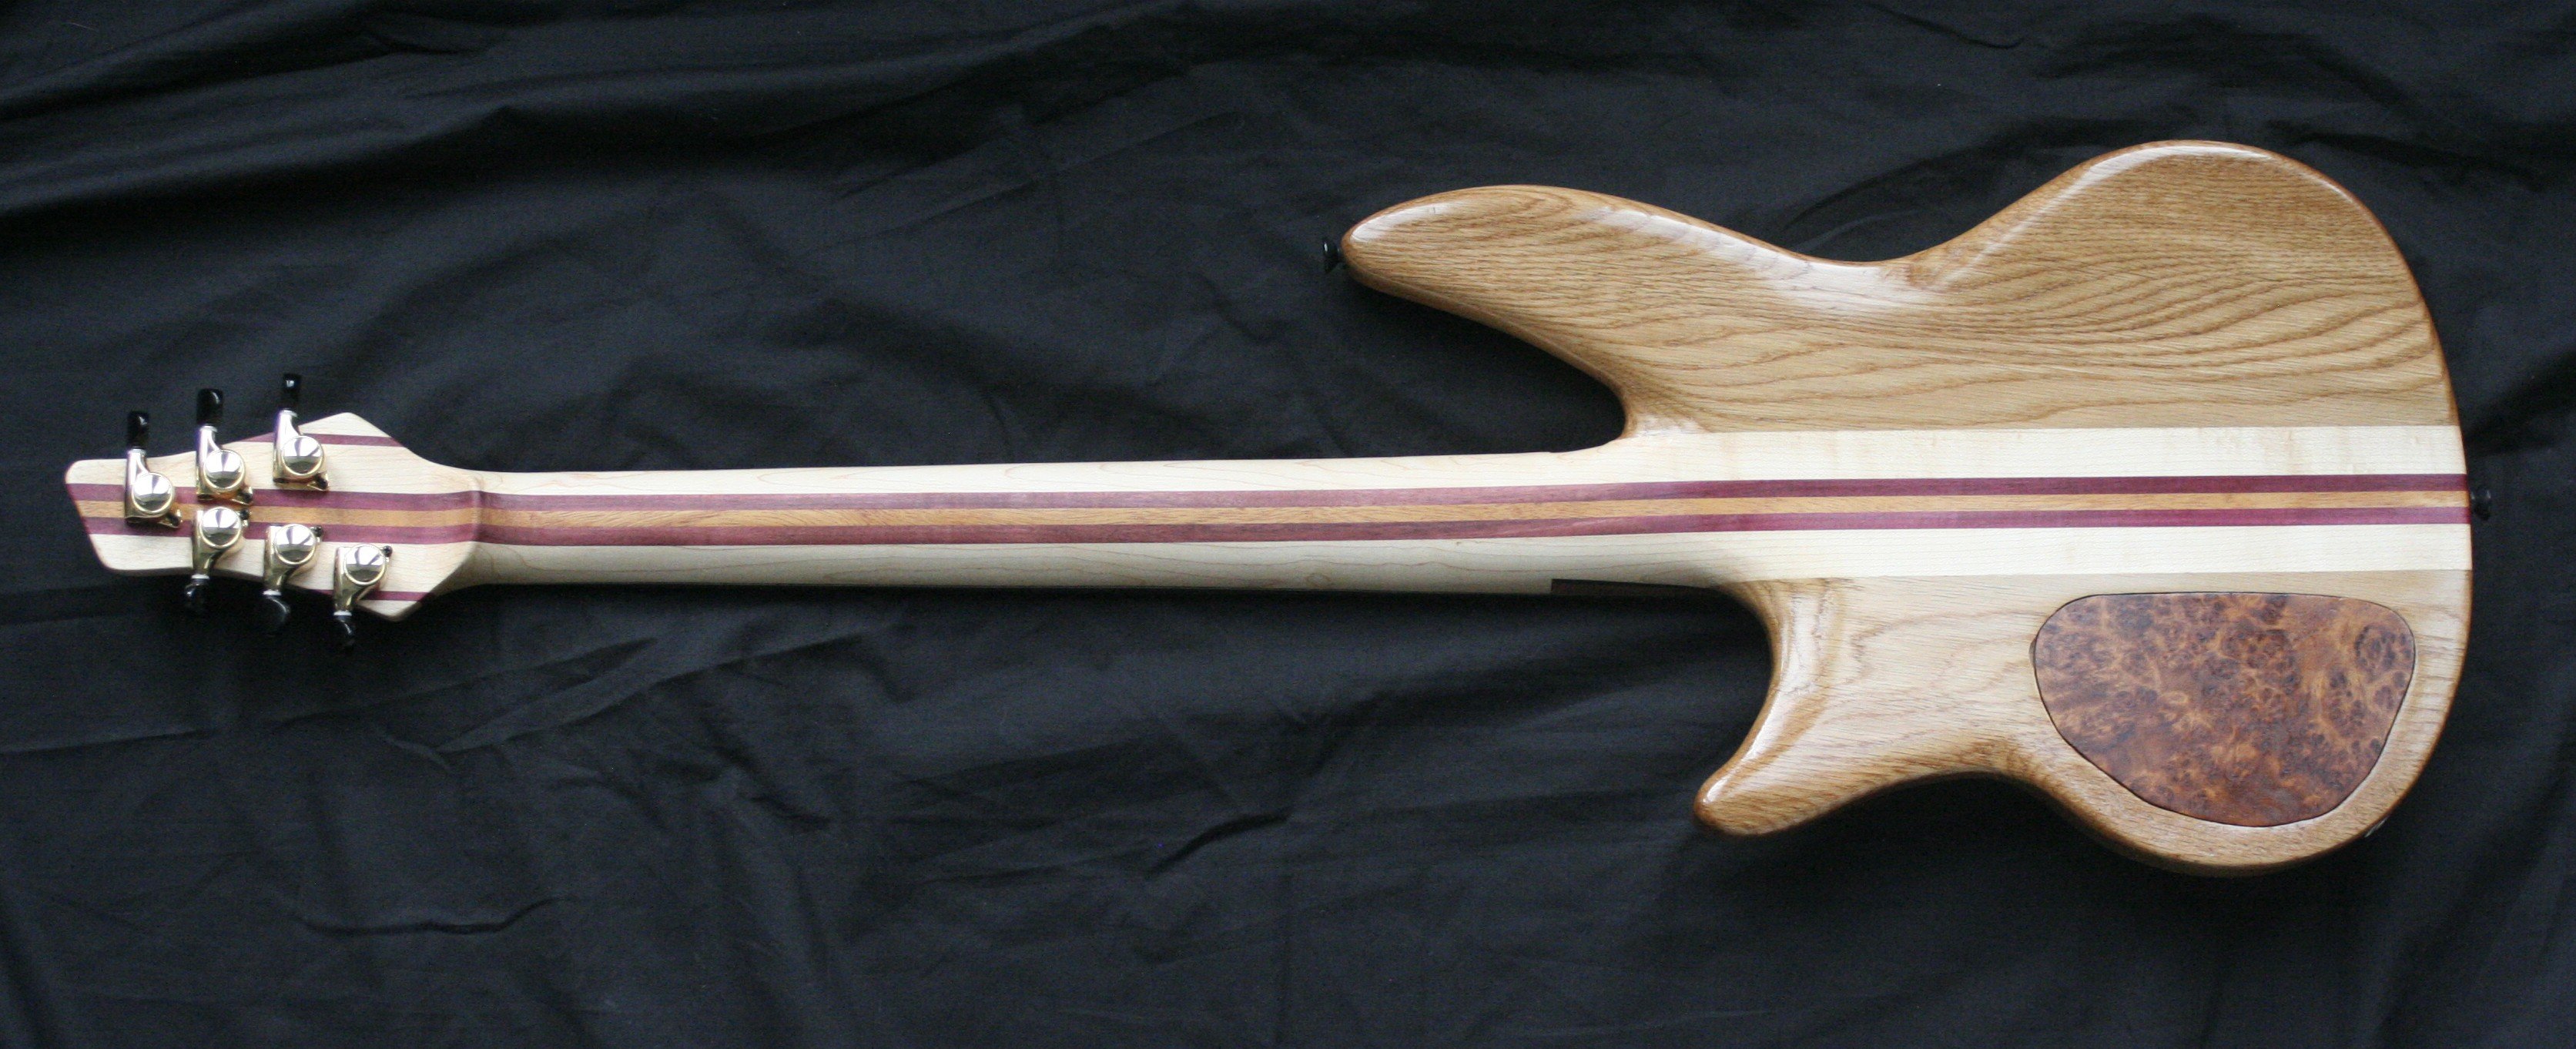
OK - here's one of my recent lightweight builds. Built for my sister-in-law at 25" scale length and 5lbs 3oz total weight. Amboyna top, oak back (from her late mother's mantlepiece), maple/purpleheart/mahogany neck :


-
Finished pics! A Bitsa Dreadnought for me :)
Andyjr1515 replied to Andyjr1515's topic in Build Diaries
Started the neck carve. It will probably take the rest of the day off and on but the bulk is removed: Other than checking the neck thickness with some calipers, I'm carving this one pretty much entirely by feel - sitting in a chair, holding it like a back-to-front cello and using a variety of tools including spokeshave, cabinet scrapers and microplanes. I often tweak the shape in the same way once the guitar is fully finished and strung up, just using a cabinet scraper and finishing off with sandpaper, followed by a quick reapplication of tru-oil slurry and buff. -
Finished pics! A Bitsa Dreadnought for me :)
Andyjr1515 replied to Andyjr1515's topic in Build Diaries
Spent a bit of time double checking lengths and positions of the fretboard, and also fitted the trussrod ready for fixing the fretboard to the neck. One job needed was to cut the fretboard to length. The pickup system I am installing is the Shadow Doubleplay As well as a piezo under the saddle, it has a mini magnetic pickup that fits at the end of the fretboard. It is the same system I fitted to Chris's build in 2015 shown here: As you can see, the fretboard has to be cut to the correct length to fit the magnetic p/up at the end. That cut, it was time to glue the fretboard! And yes, @TheGreek - you can NEVER have too many clamps! -
Finished pics! A Bitsa Dreadnought for me :)
Andyjr1515 replied to Andyjr1515's topic in Build Diaries
Back home after another 16 hours driving (the things we do...!) and back to a bit of normality for a couple of weeks. On the critical path is gluing the fretboard - but I can't do that until the neck is absolutely spot on in all planes. So out came a huge array of hand tools to try to create a 1.4 degree angle on the heel in one plane to straighten the neck without affecting the other plane, affecting the neck angle and string action height. Eventually got there. It lines up: And - using a long thin strip of abrasive cloth the floss the joint, I have a secure and even contact between the heel and the body, confirmed by transfer of chalk (seen in the above picture) from one to the other when the two are assembled. A bit more tweaking and checking, then the trussrod can be fitted and fretboard glued