Andyjr1515
-
Posts
107 -
Joined
-
Last visited
-
Days Won
43
Content Type
Profiles
Forums
Events
Shop
Everything posted by Andyjr1515
-
Finished pics! A Bitsa Dreadnought for me :)
Andyjr1515 replied to Andyjr1515's topic in Build Diaries
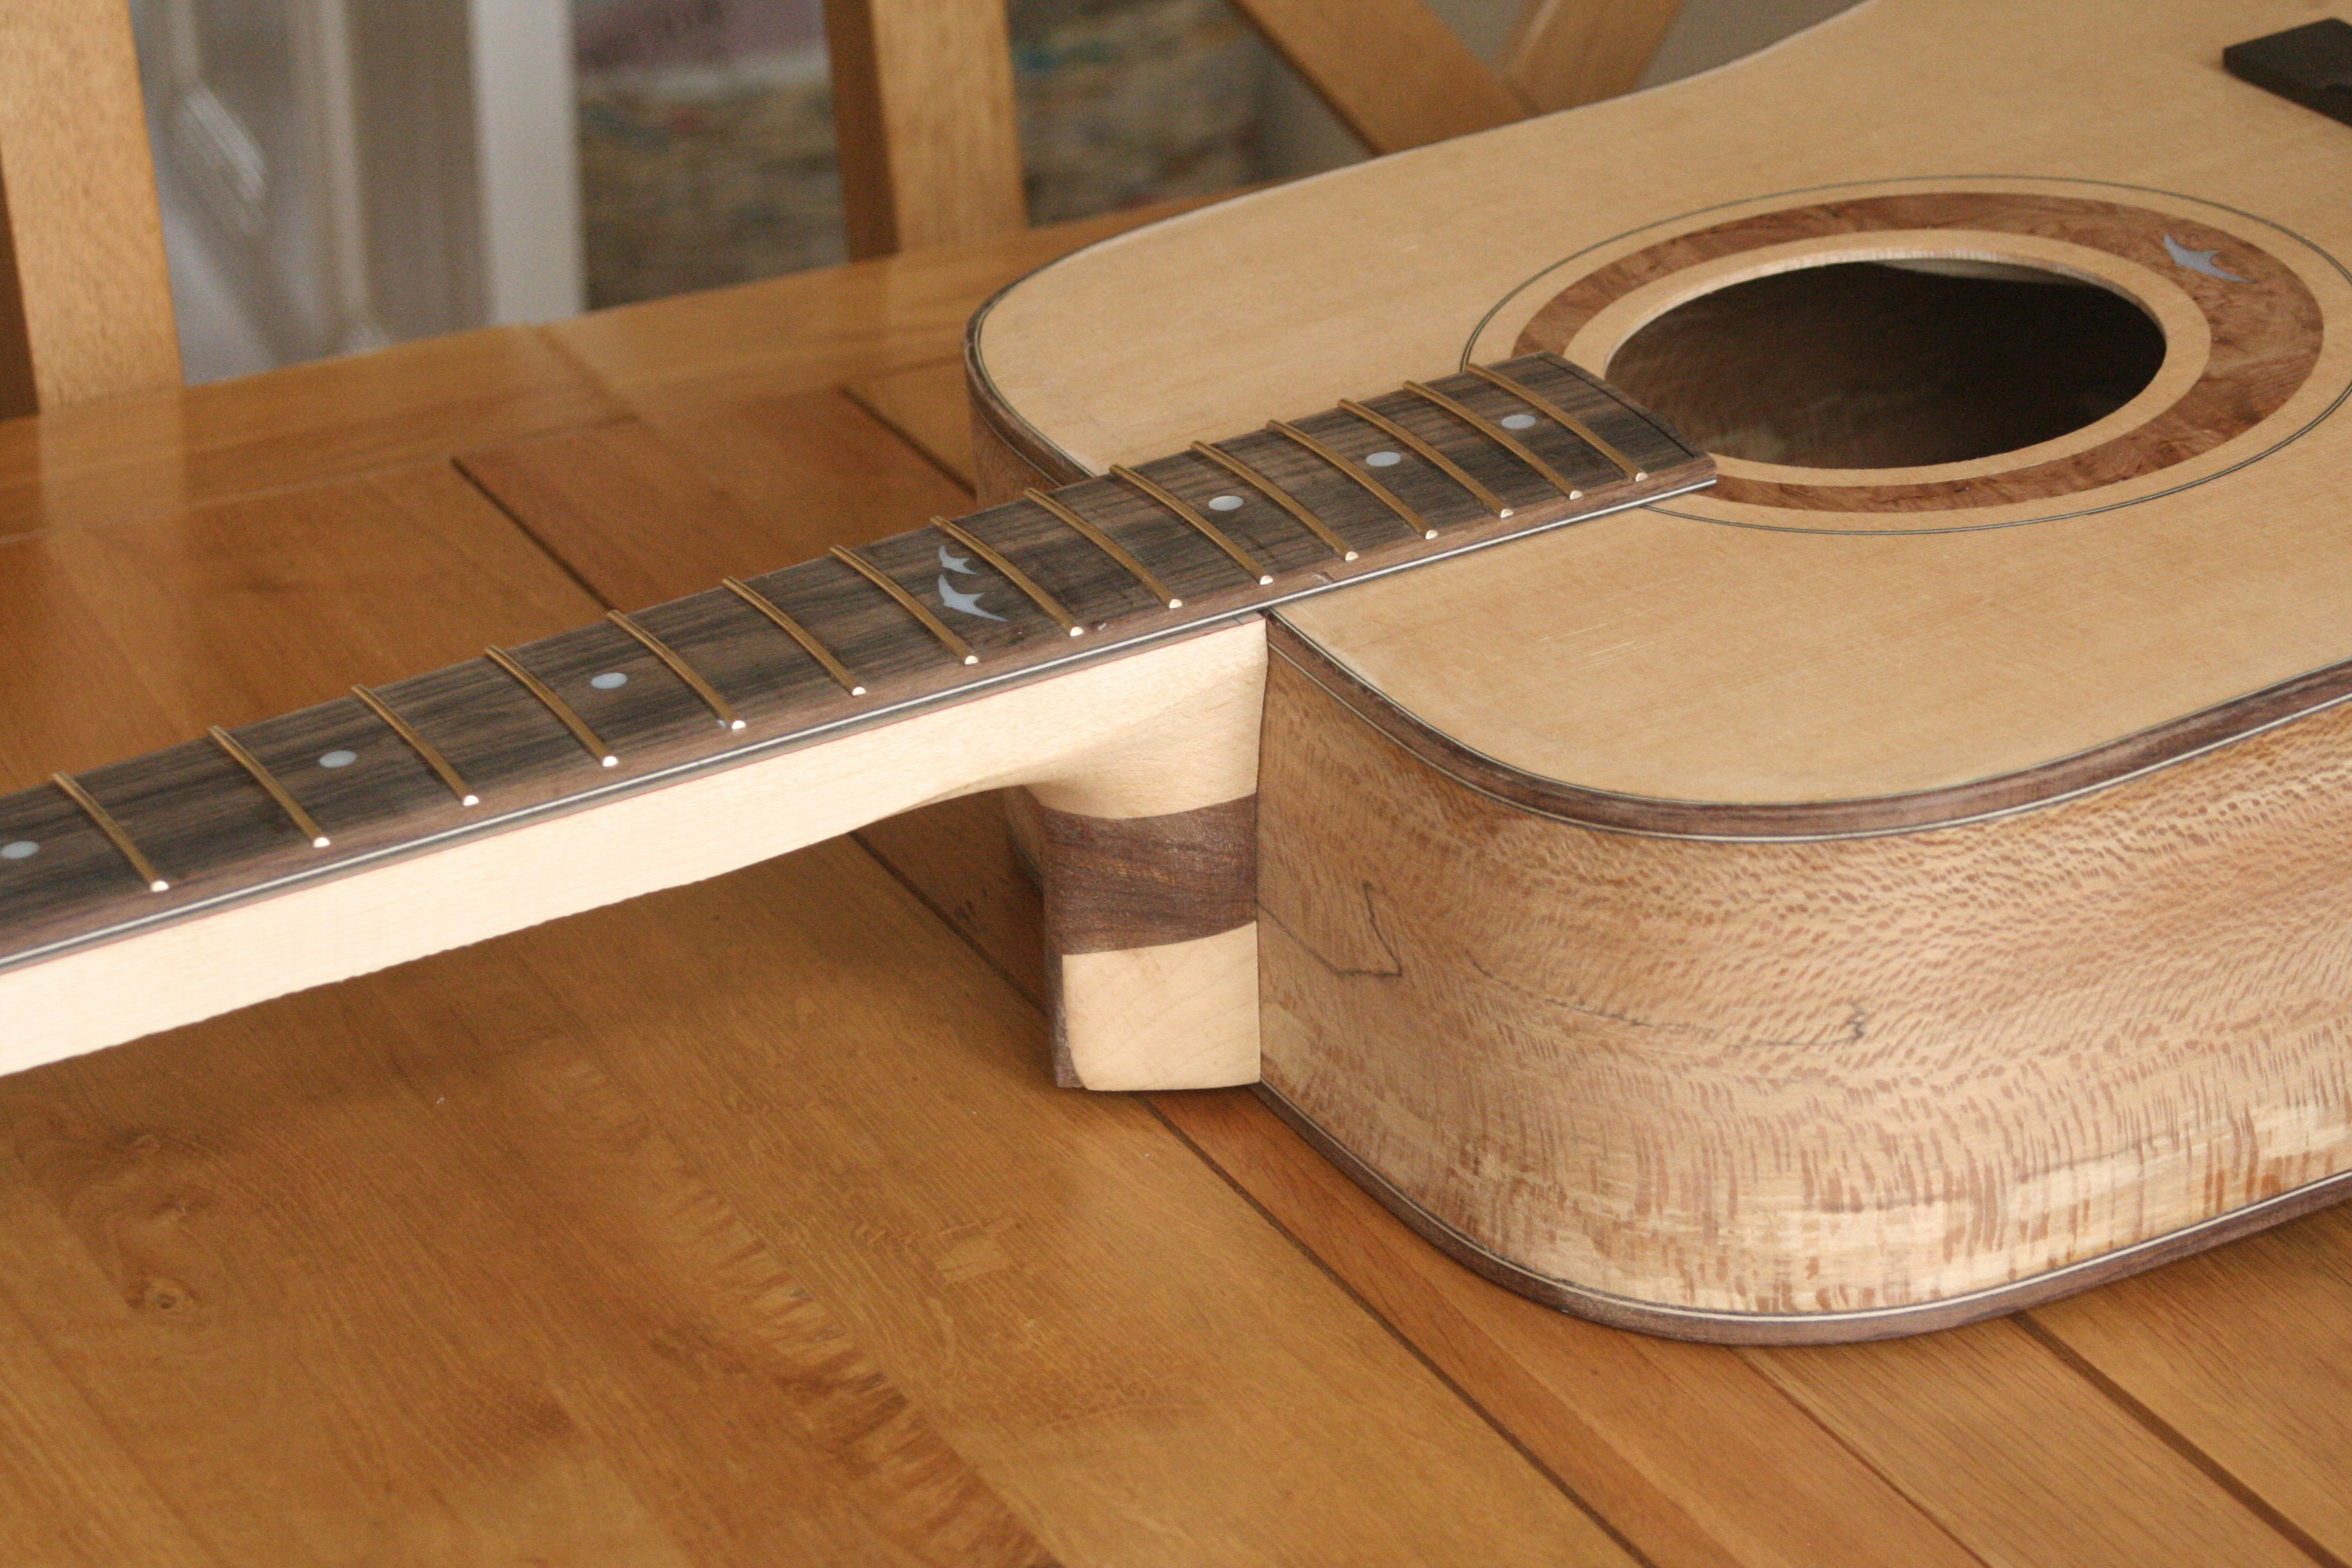
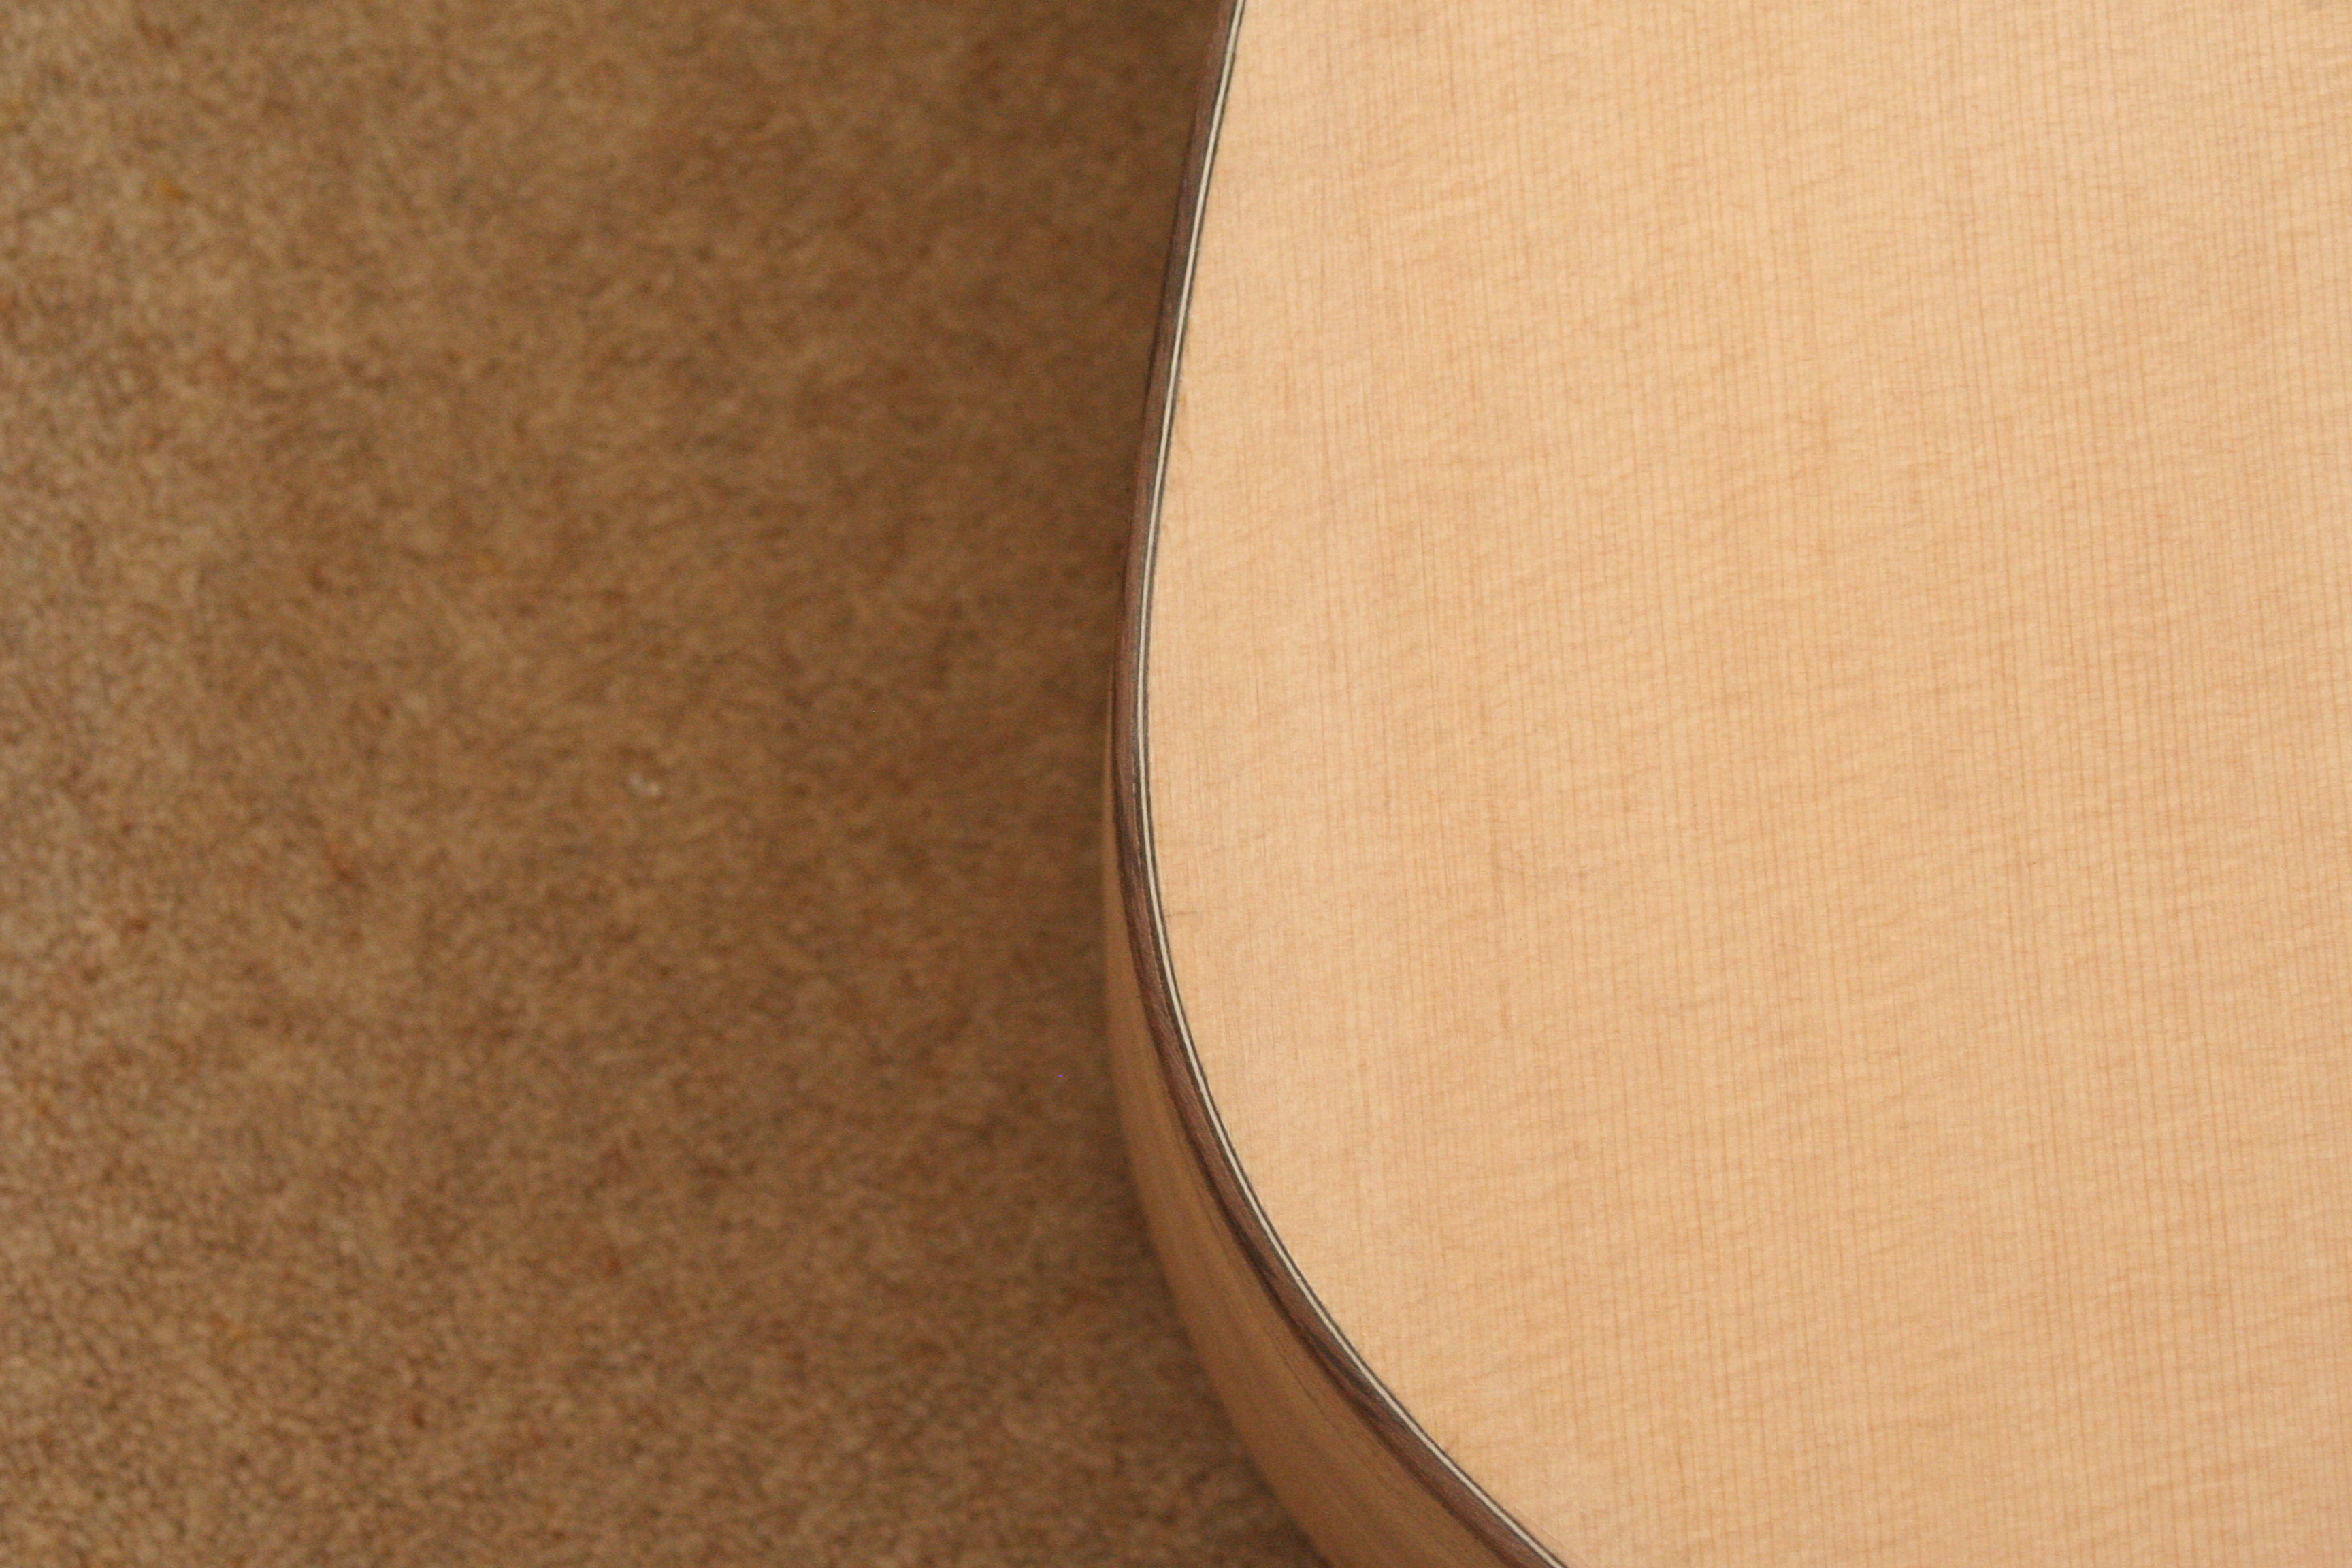
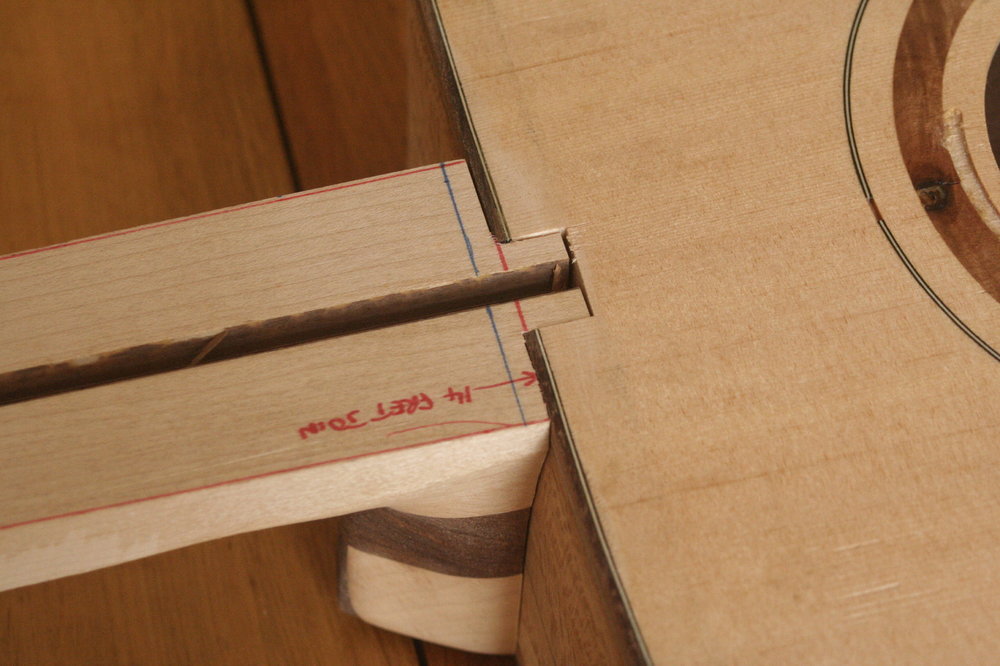
This is the same post I've just done on basschat so if you've already read it there, it will seem curiously familiar! Anyway, it's going to be a disturbed weekend again so I have tried to get some more of the major steps sorted in the last couple of days. I have started the finishing process on the body. I'm a bit unconventional in that, regardless of what I will eventually finish it with, I 'grain fill' and seal using a tru-oil slurry-and-wipe approach. Here's the back and sides after the first application: While that was drying, I carried on with the neck fitting. It is going to be bolt-on mortice and tenon, using captive nuts. This all has to be very accurate and square: When screwing in the inserts, not only do they have to be very square to the hole, but - from bitter experience - I also support the sides to avoid the process splitting the wood: This means we have a self-supporting neck that can be tightened fully against the body... ...for the next somewhat iterative process of checking and adjusting the neck angle on both planes. By the way, note at the joint that the inside is scooped away so that the only contact is at the sides of the heel. First check is whether the neck angle to bridge is correct: This is, happily, exactly where I need it to be - the level from the fretboard is just touching the top of the bridge - the bone saddle will provide the string action height Then I have to check the alignment of the neck: Not so good. So I need to shave a touch off the base side of the heel - while not affecting the neck angle and maintaining a good heel to body joint. This will have to wait until next week -
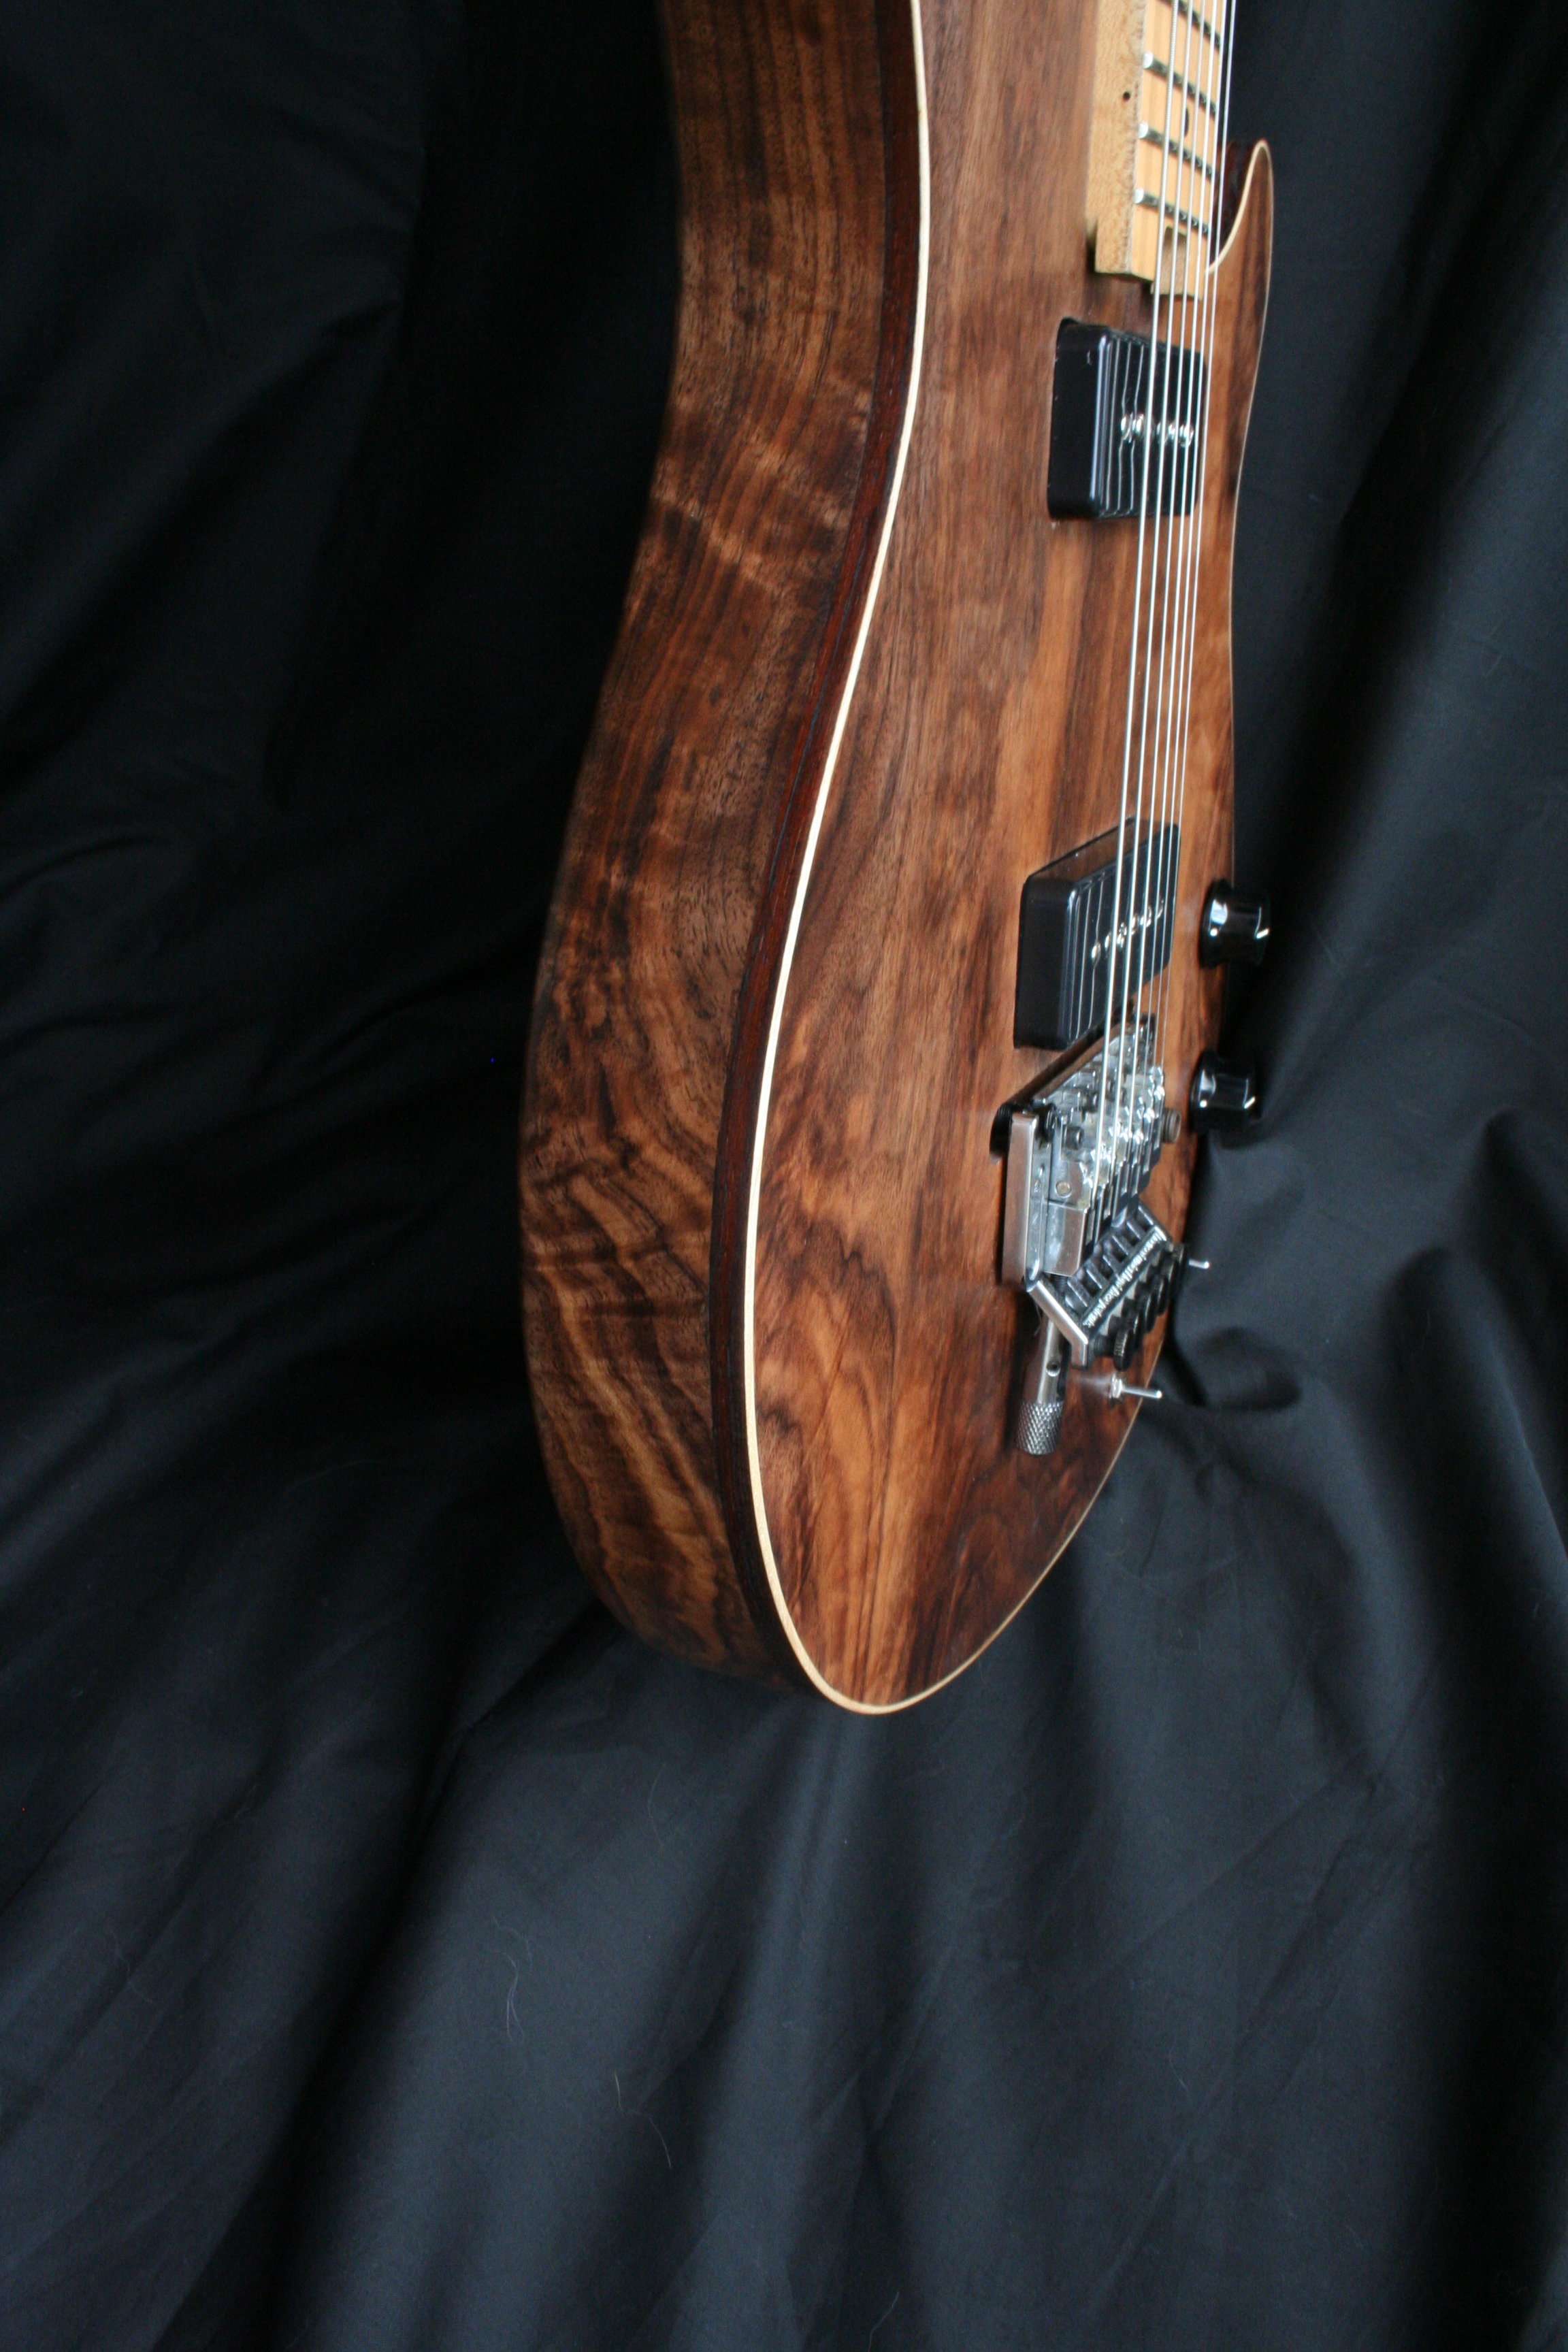
On a darkish wood, it will darken it pretty much the same as most other finishes - similar to the colour the wood goes when wiped with a damp cloth. On lighter woods (like maple) you get a slightly amber tone. The above is naturally a very dark wood ( n.a. Black Walnut?). It would go the same colour if you wet it.
-
Finished pics! A Bitsa Dreadnought for me :)
Andyjr1515 replied to Andyjr1515's topic in Build Diaries
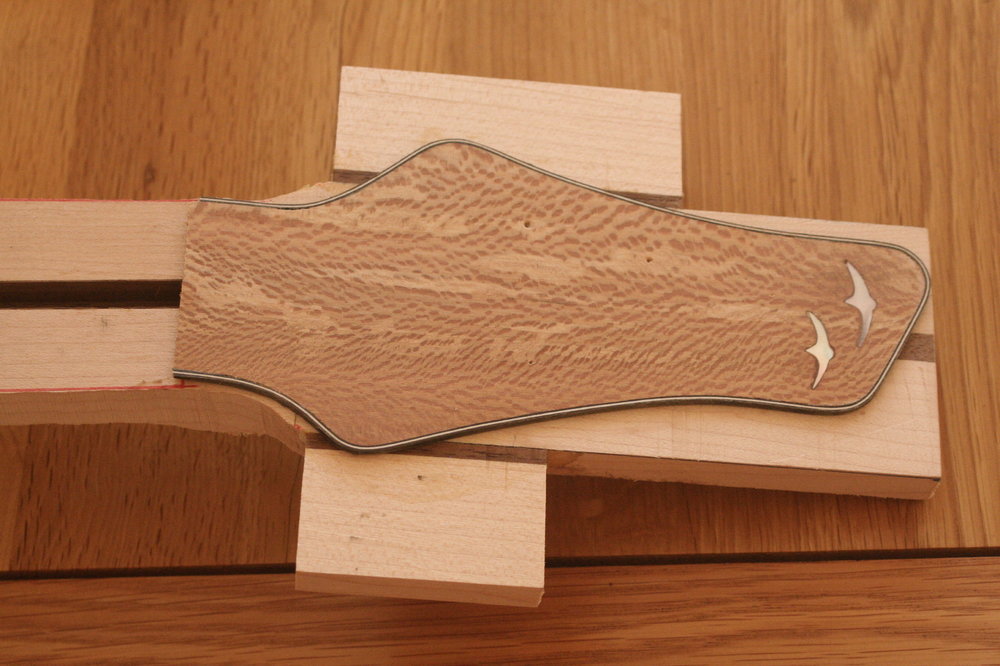
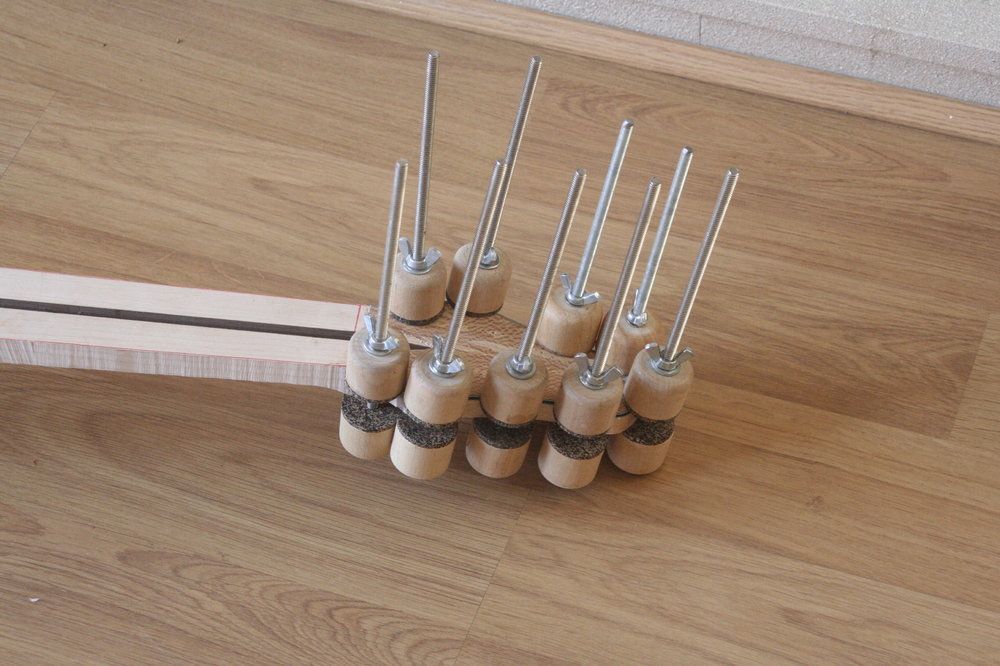
Last bit on the body - the rear binding strip. Yes - it is flat...: Then back to swifts! A couple on what will become the headstock plate Then one for the bottom of the heel, being glued here at the same time as a couple of wings to widen the headstock: The finished cap, complete with swift: On my own builds, I tend to try out stuff I've never tried before. I've never tried binding a headstock plate before, but am pleased how it has come out: And with the neck trimmed, being glued on: Well - I think the neck will have to be carved soon, but I really need to fit the fretboard first and have only just ordered the trussrod Plenty to be getting on with in the meantime, though...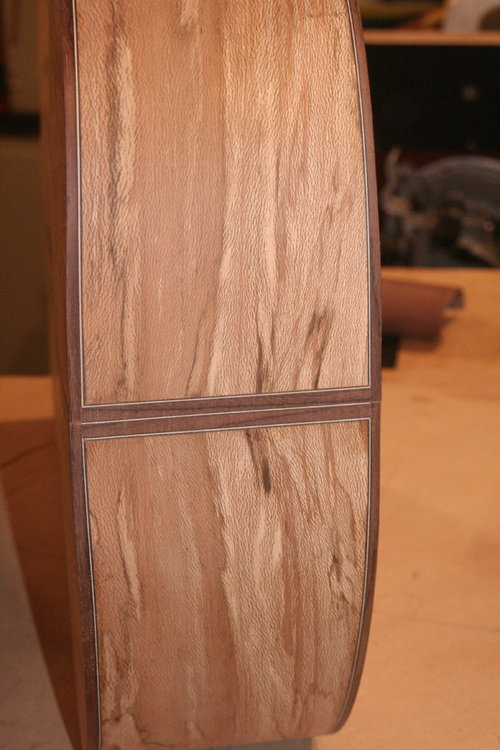


-
Finished pics! A Bitsa Dreadnought for me :)
Andyjr1515 replied to Andyjr1515's topic in Build Diaries
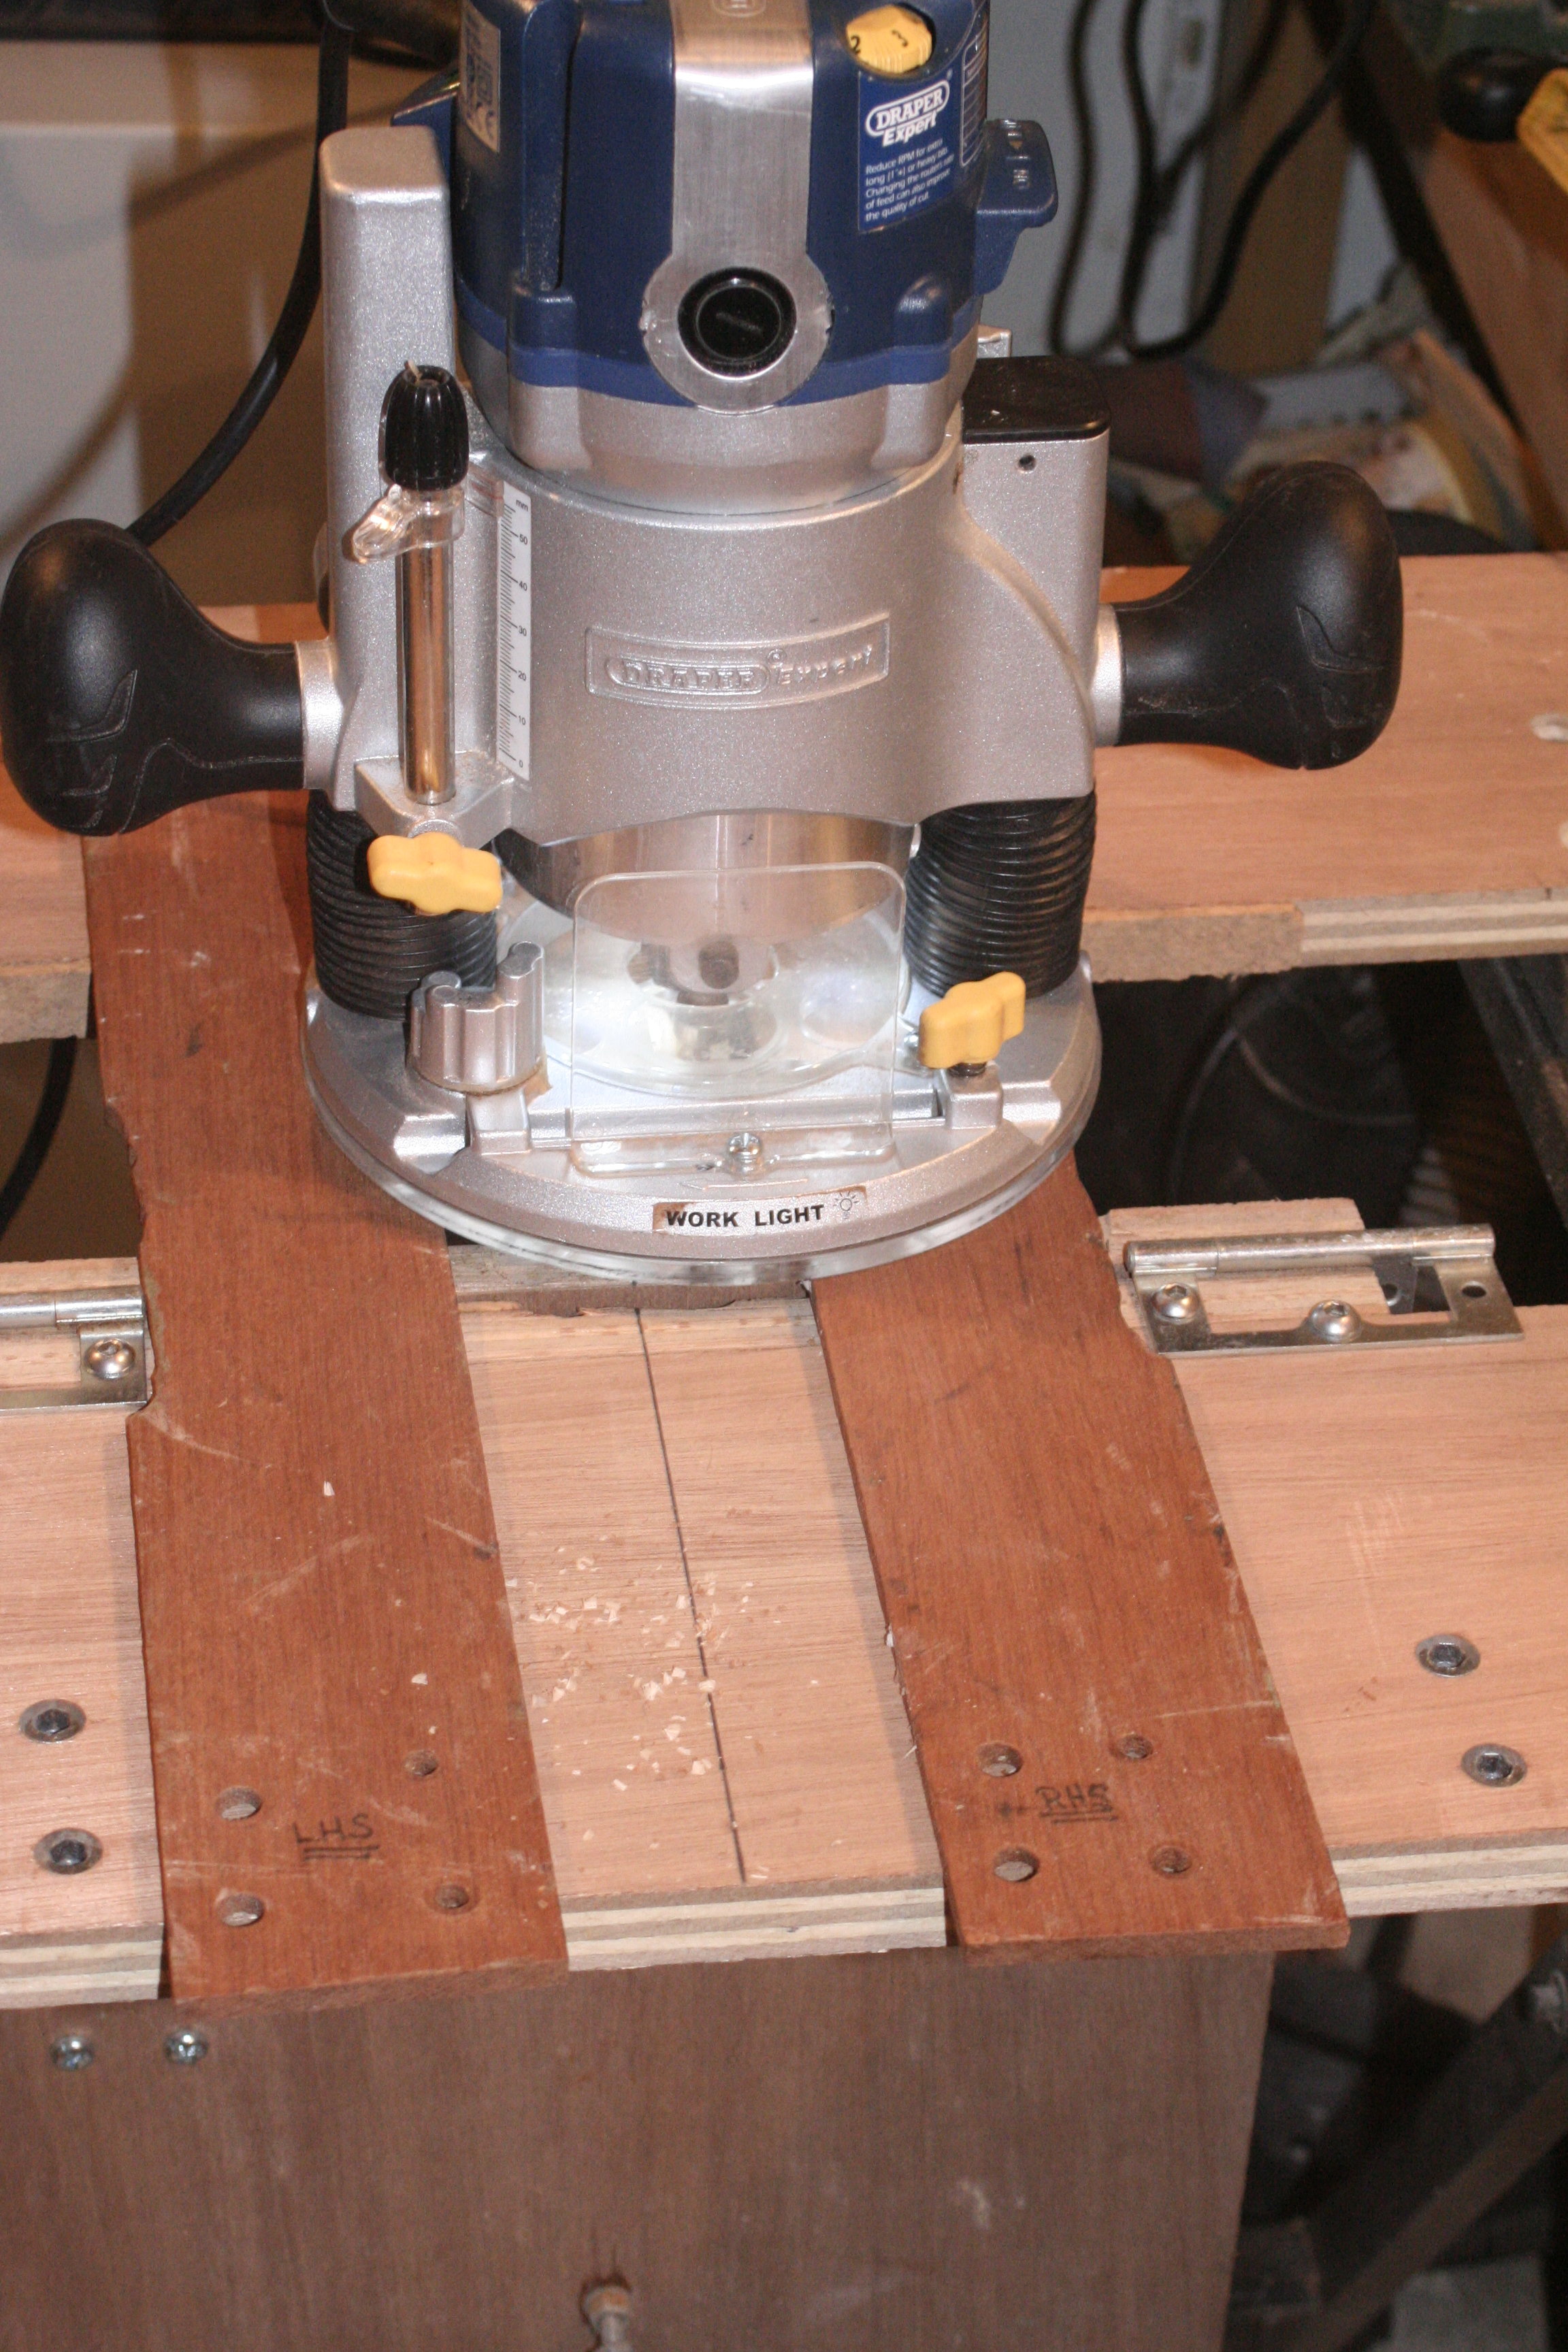
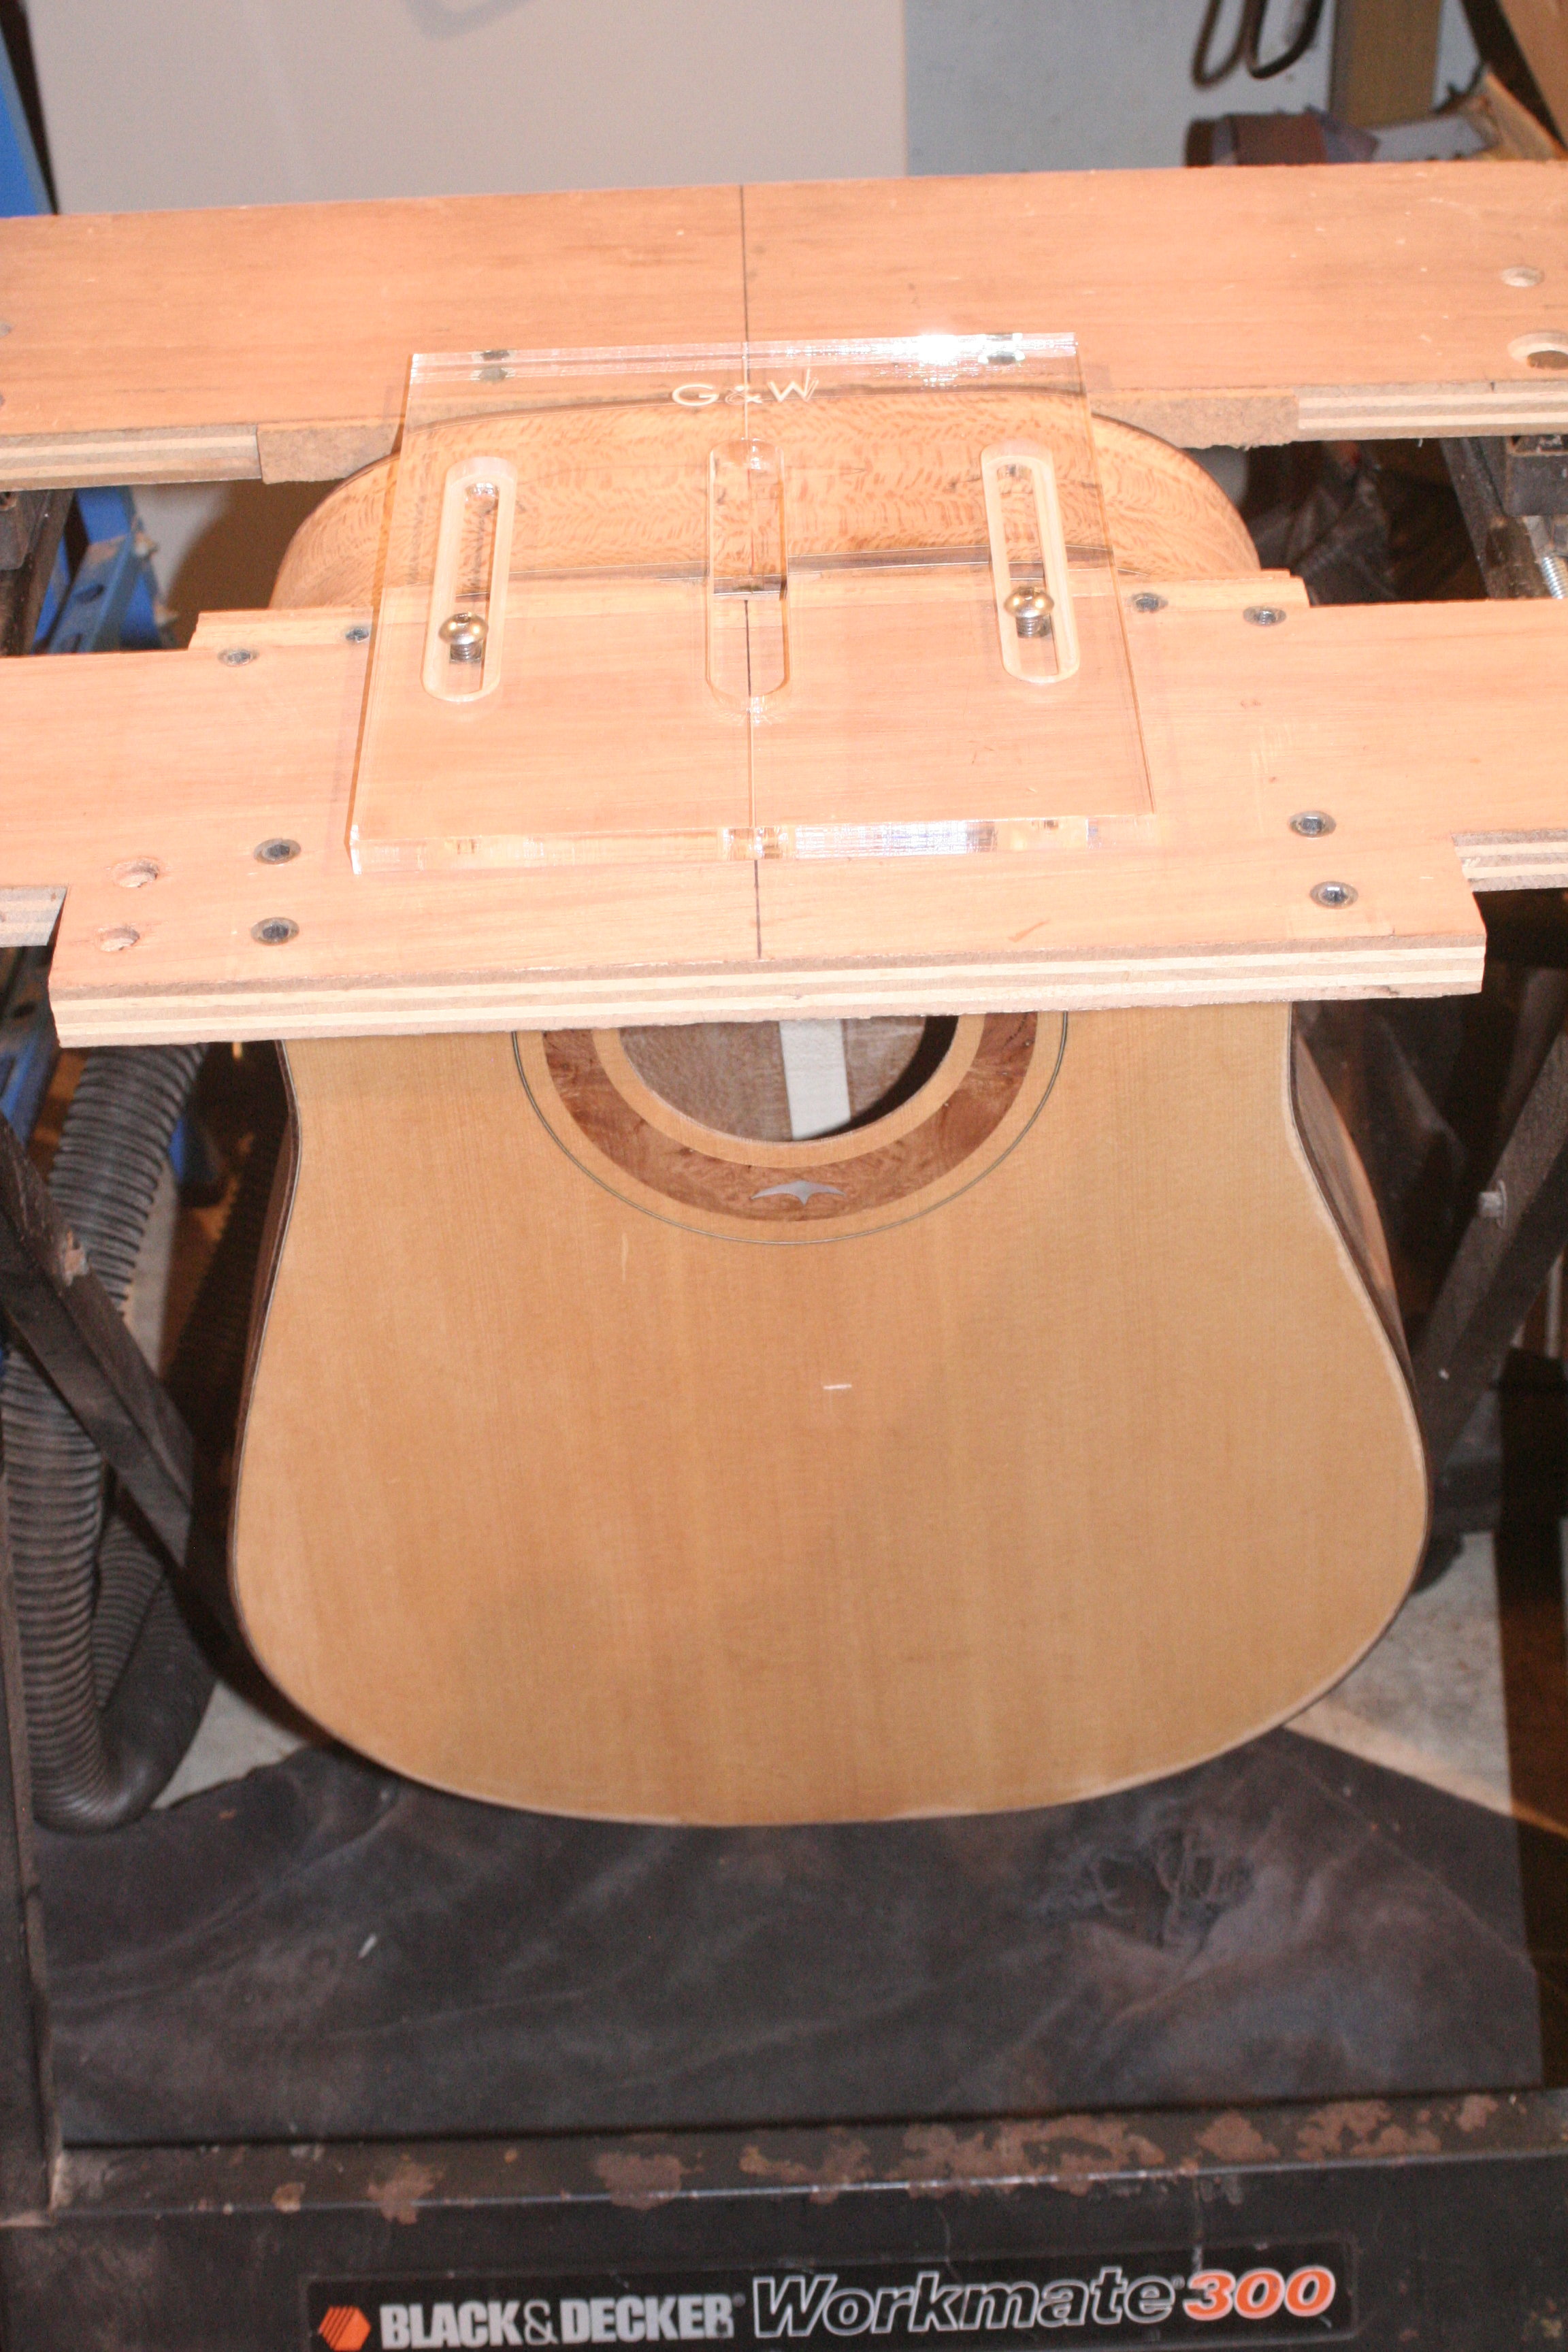
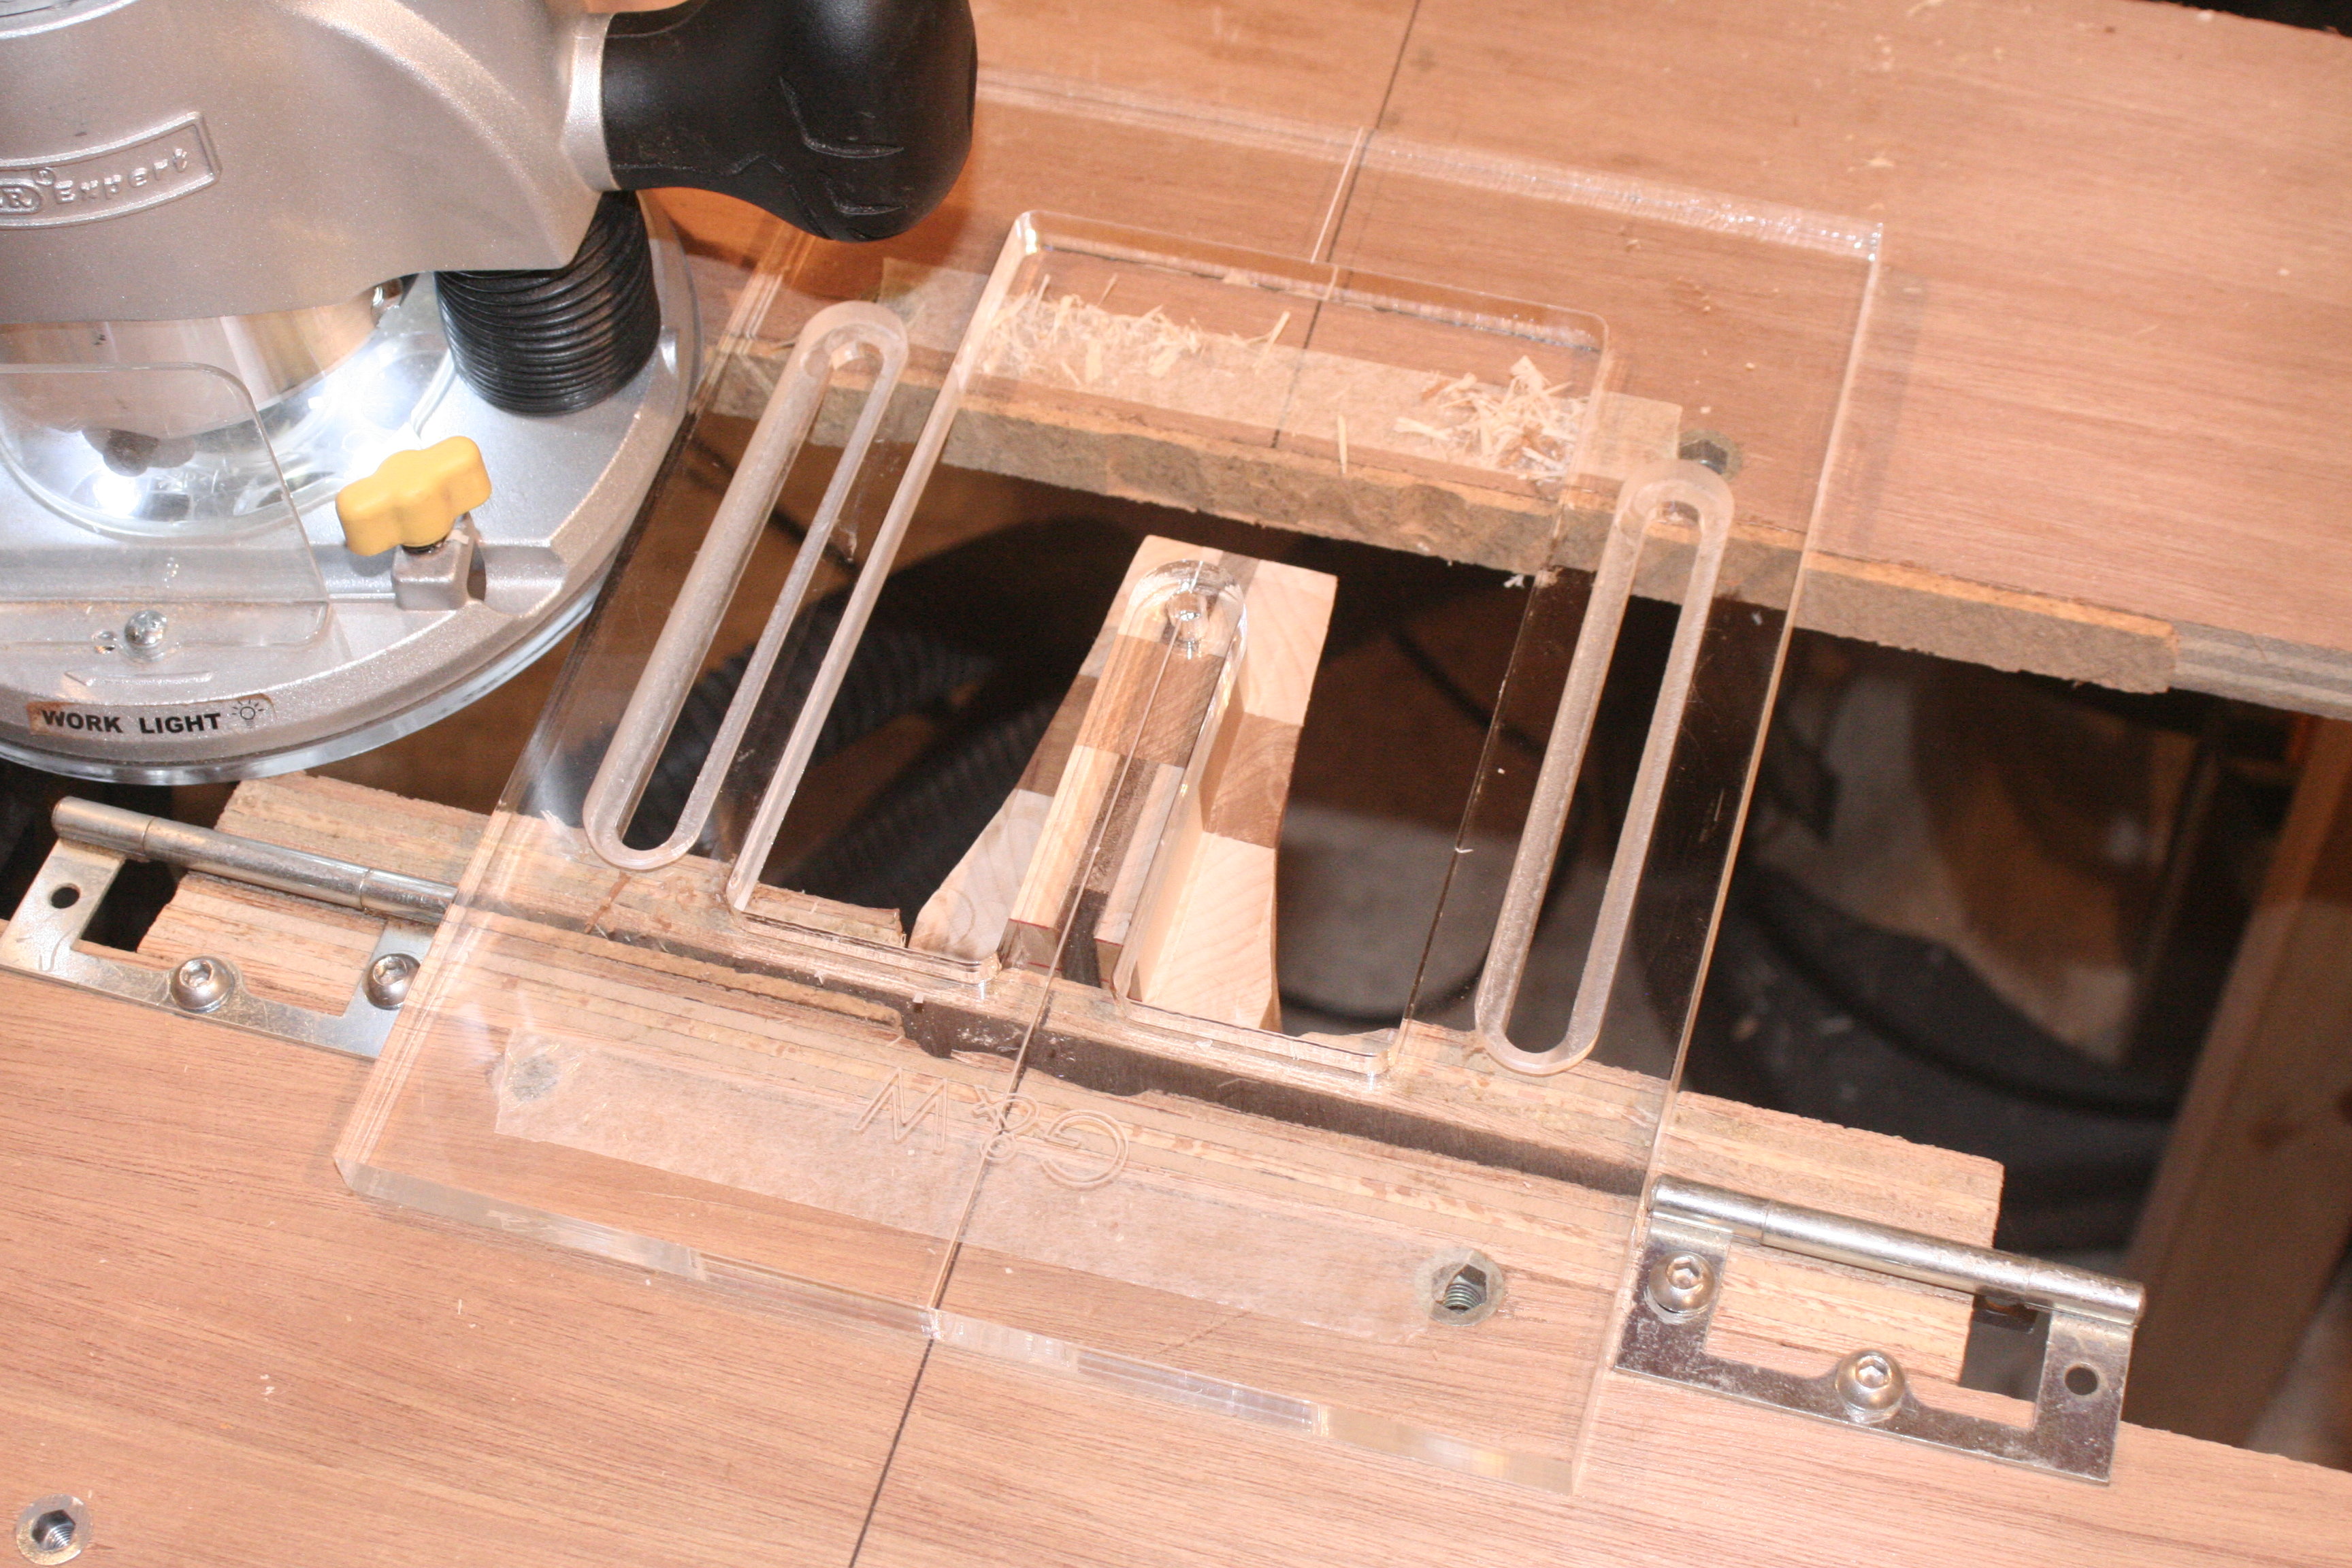
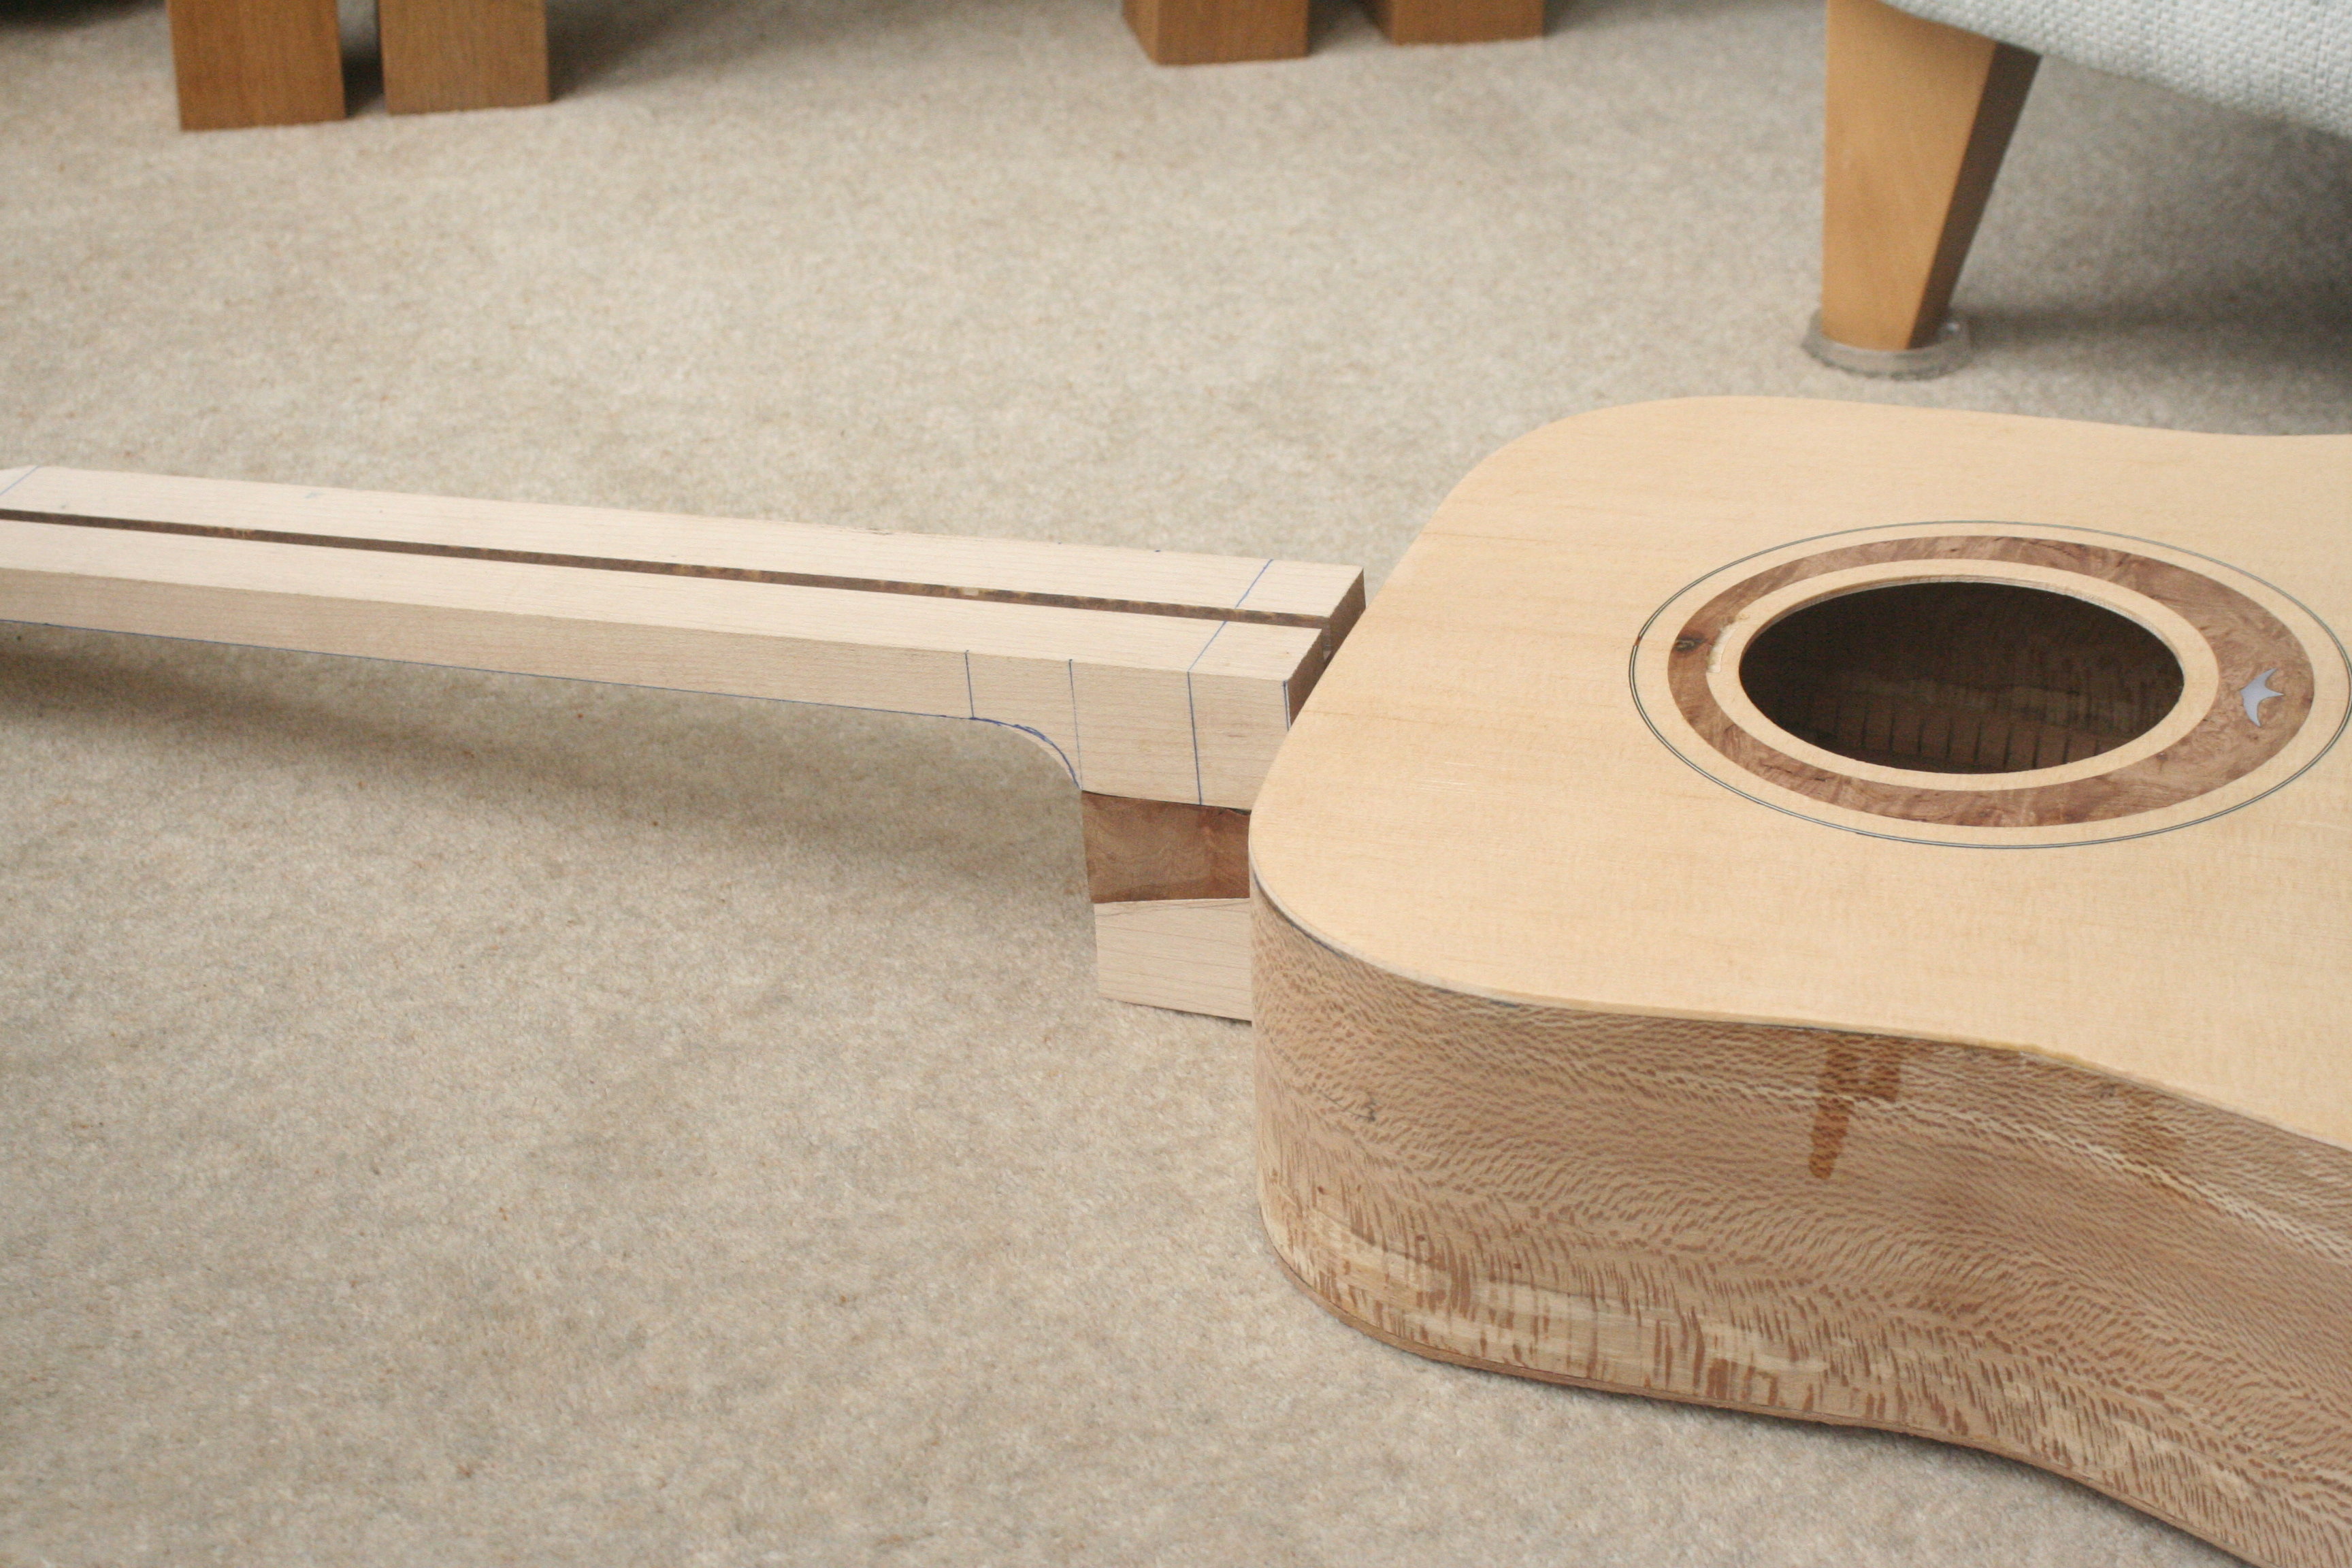
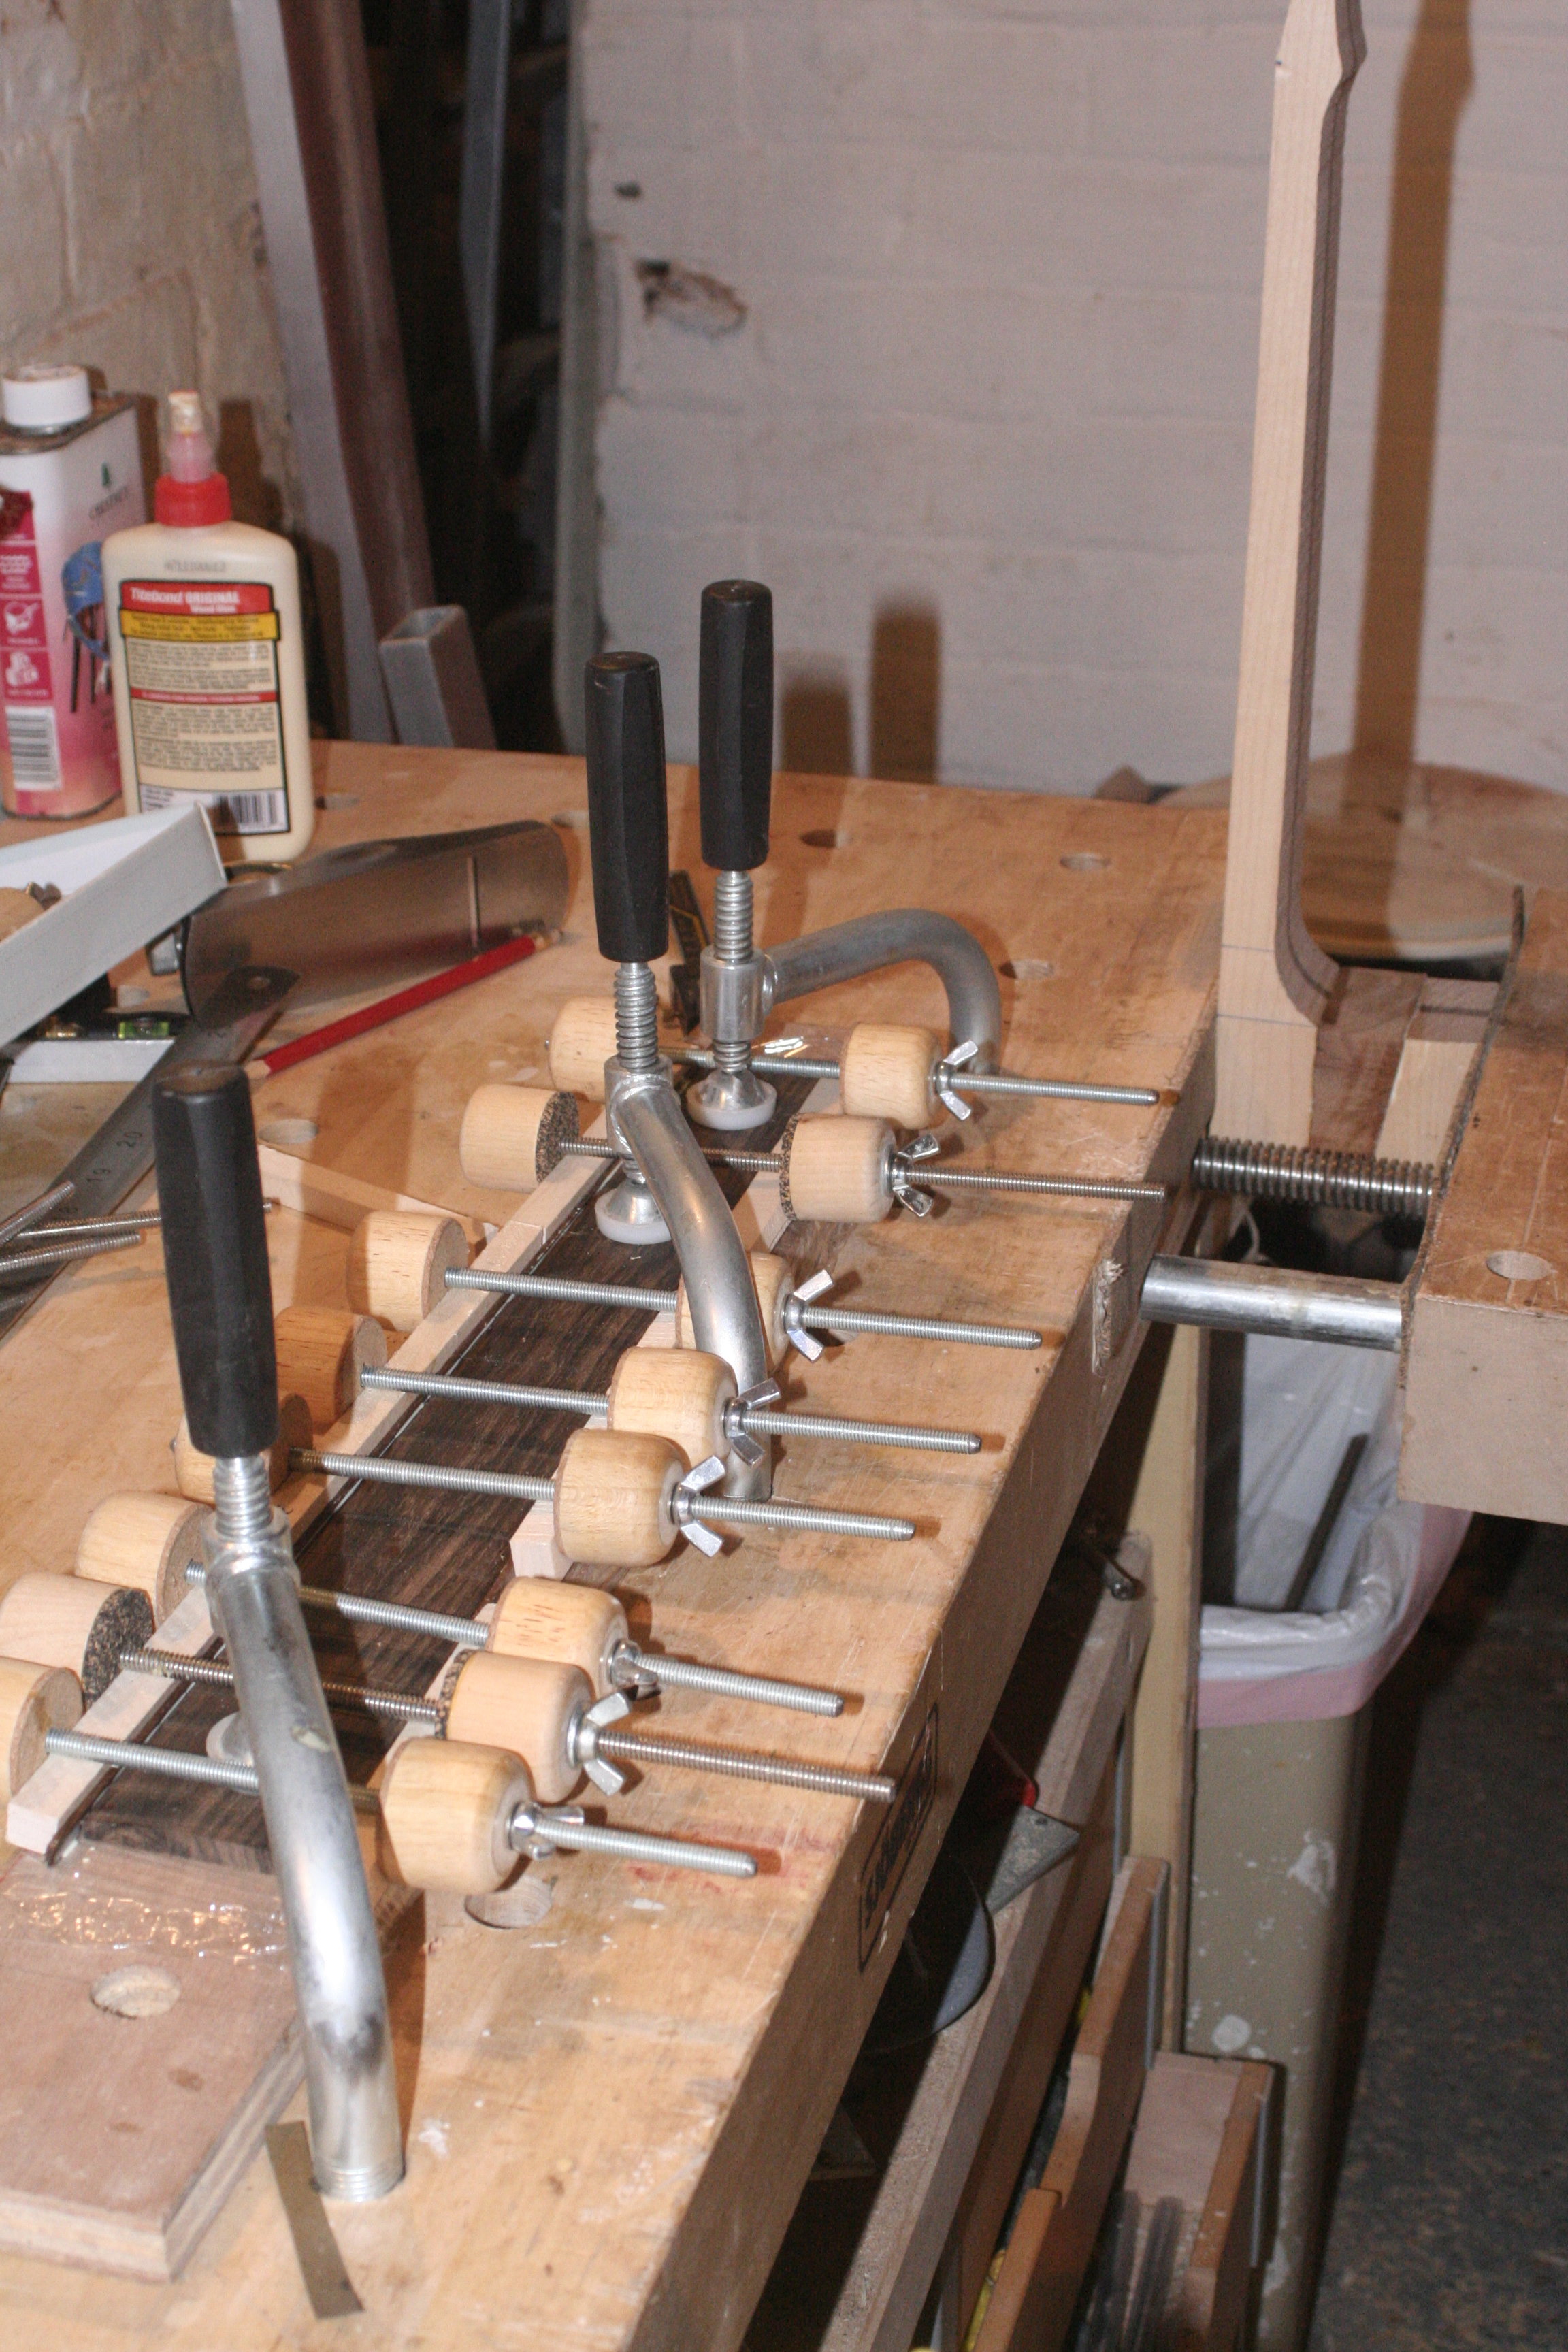
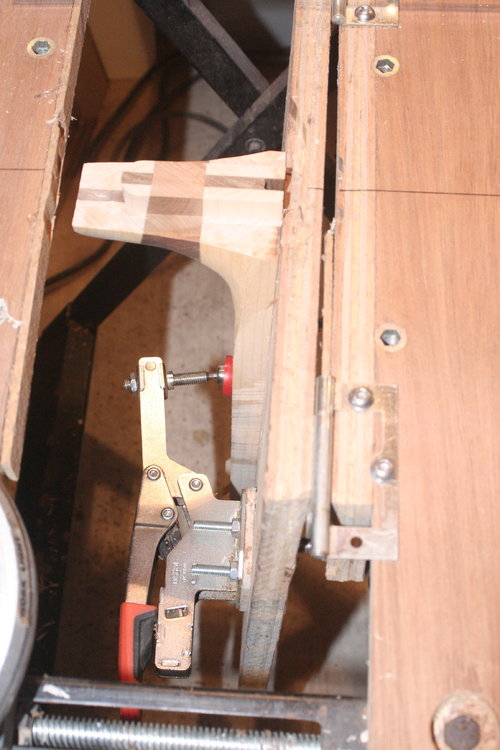
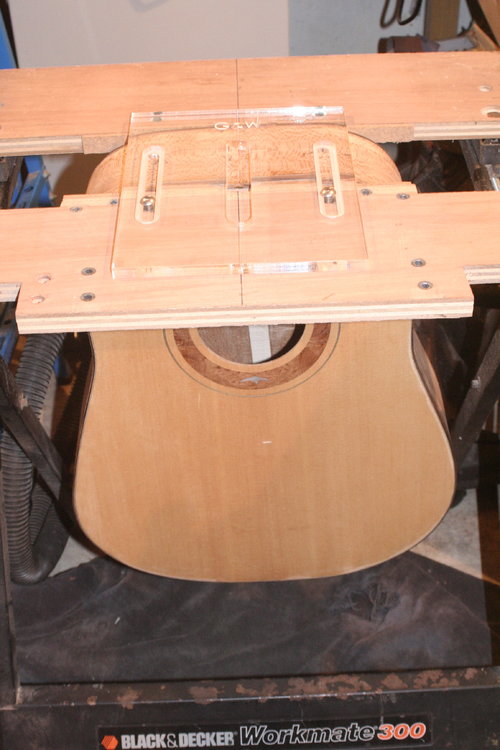
A few more jobs completed. Got the tenon slot cut. I built myself a rough copy of the LMI/O'Brien rig for the last acoustic build, cannibalising an old B&D Workmate. It has a screw adjustment on the hinged leaf the neck is clamped to that is used to set the neck angle: Then the router can be used to cut that angle into the heel: Using a G&W template, I then trim the tenon to size and shape: Next, taking the hinged neck assembly off, the workmate is used to clamp and suspend the body over the concrete floor, careful not to crush at the same time as relying on two thin strips of cork to hold the weight!!!! After using it as a prayer mat, I put a towel on the floor underneath just in case. Then fixed and positioned the mortice template: Result - a joint ready for fine tuning the fit: And something really starting to look like a guitar:


-
Well presently, I am nowhere near where the guitar is but yes, Harry is going to borrow it when I'm back and see if it suits his needs
-
No - only in his dreams I have a lovely and upgraded 335-style I've had a few years and have been looking for a good home for it to go to. I've got a crazy number of guitars for a guy with arthritis in both hands but I am reluctant to let any of them go at all, let alone to someone on ebay buying to make a quick buck on resale So always looking for people I know share the passion and will make good use out of them. And Harry is one of my repeat customers anyway
-
Harry - I'll pm you. I may have the perfect solution for you....
-
Personally, I would go tru-oil. Then you have the option of slurry and buff silky smooth satin or gloss, depending how you apply it. But any suitable finish will transform how it looks. Go for it!
-
Thanks Pete our bassist was well pleased with it and it started a whole family of lightweight basses and electrics
-
Finished pics! A Bitsa Dreadnought for me :)
Andyjr1515 replied to Andyjr1515's topic in Build Diaries
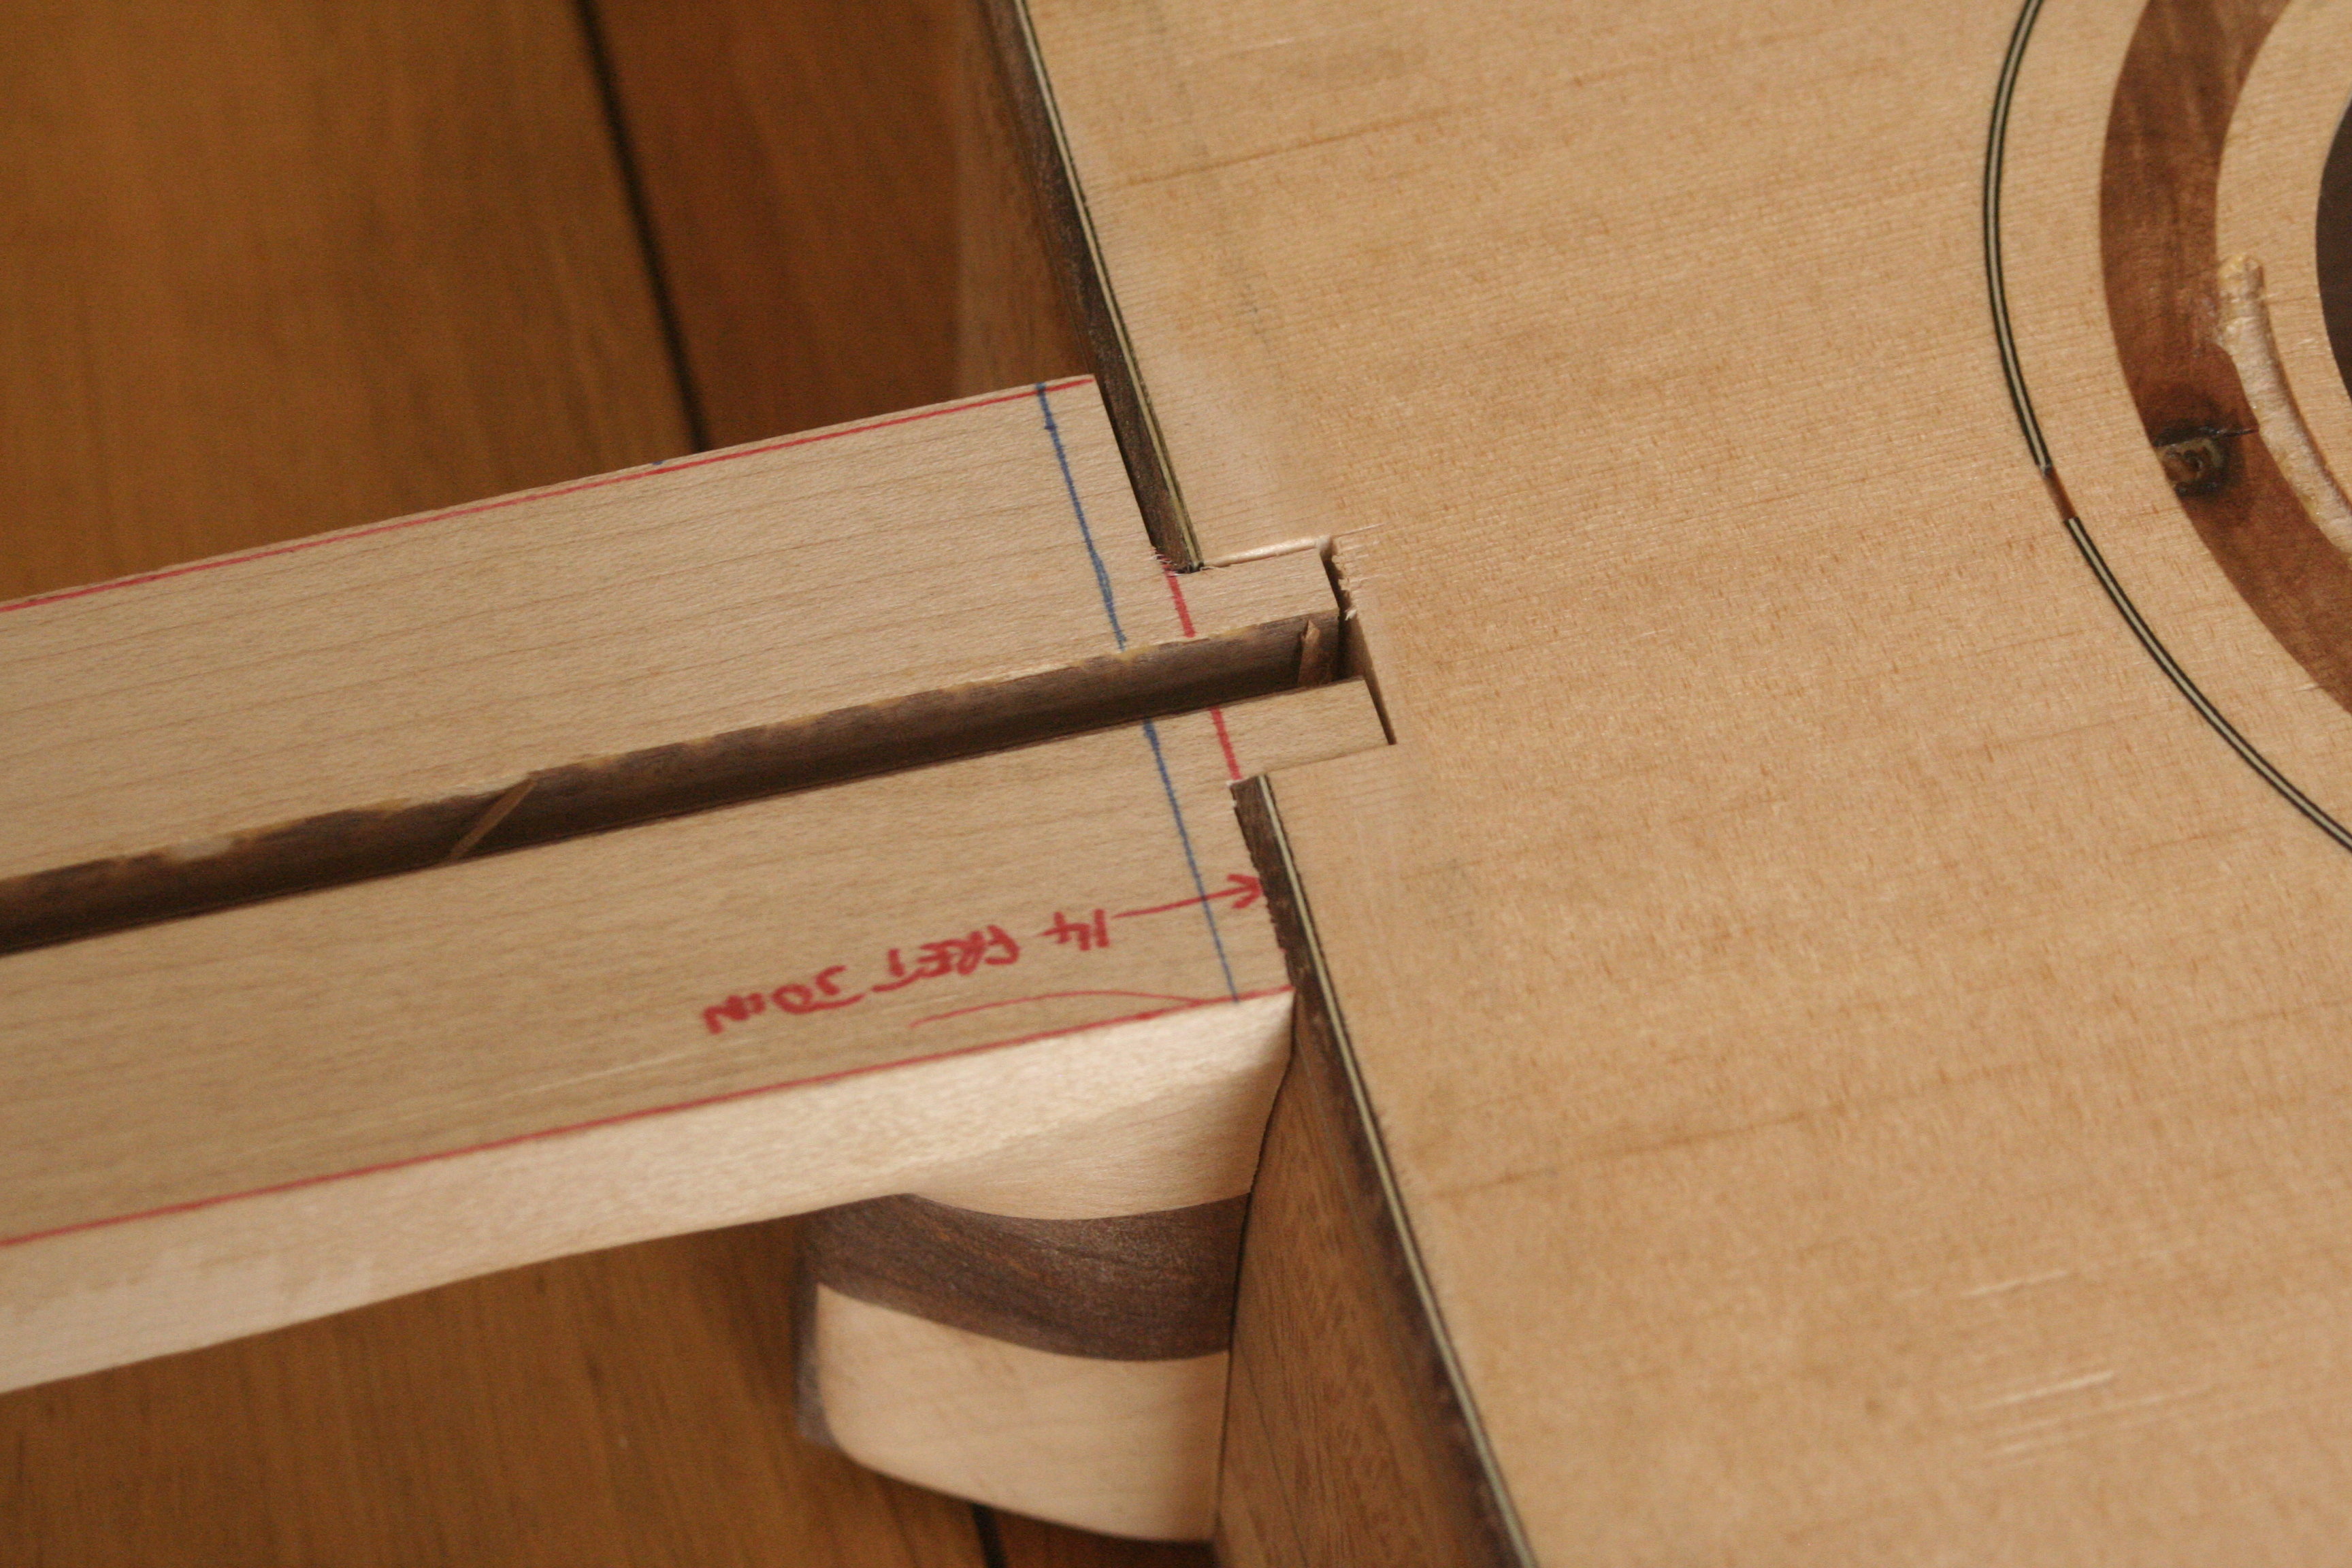
Yes - I know. There's nothing wrong with the ranges of good quality but affordable acoustics starting to appear on the scene that are made affordable by dropping the binding. But as you say... Anyway, I chickened out of doing the binding for the back this afternoon and instead rock-hopped back to the neck heel. Still further shaping to do to make it look a little more elegant but I think it will work OK. This shot has also reminded me that the last job after the rest of the binding is finished, is clamping it somehow without crushing it and routing a flaming great big (and very accurate) slot to fit the neck tenon into. Oh joy...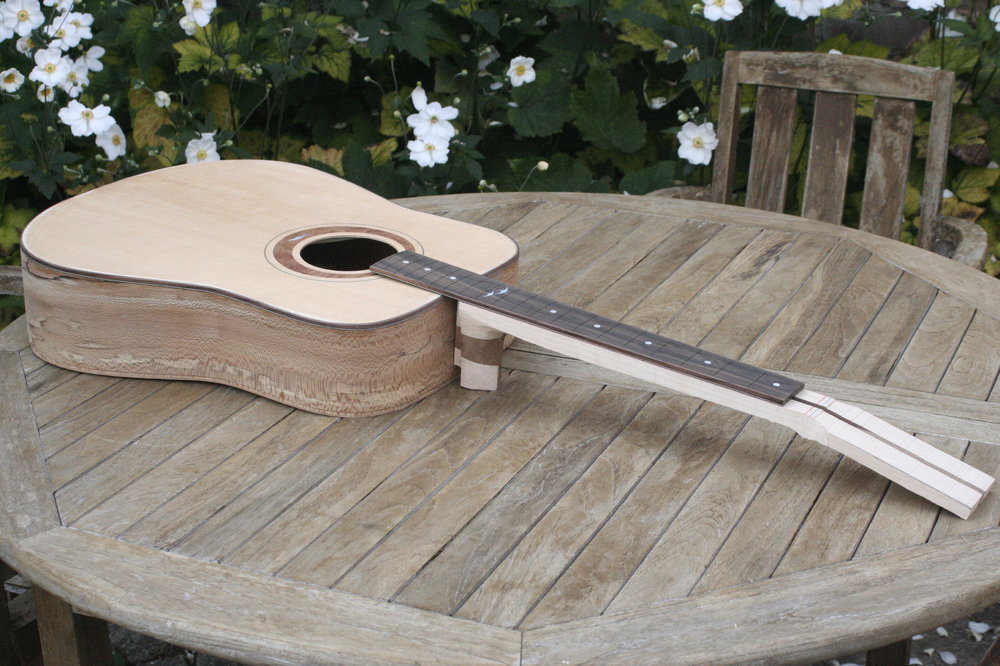
-
(read that as pretty good part time maker)
-
Finished pics! A Bitsa Dreadnought for me :)
Andyjr1515 replied to Andyjr1515's topic in Build Diaries
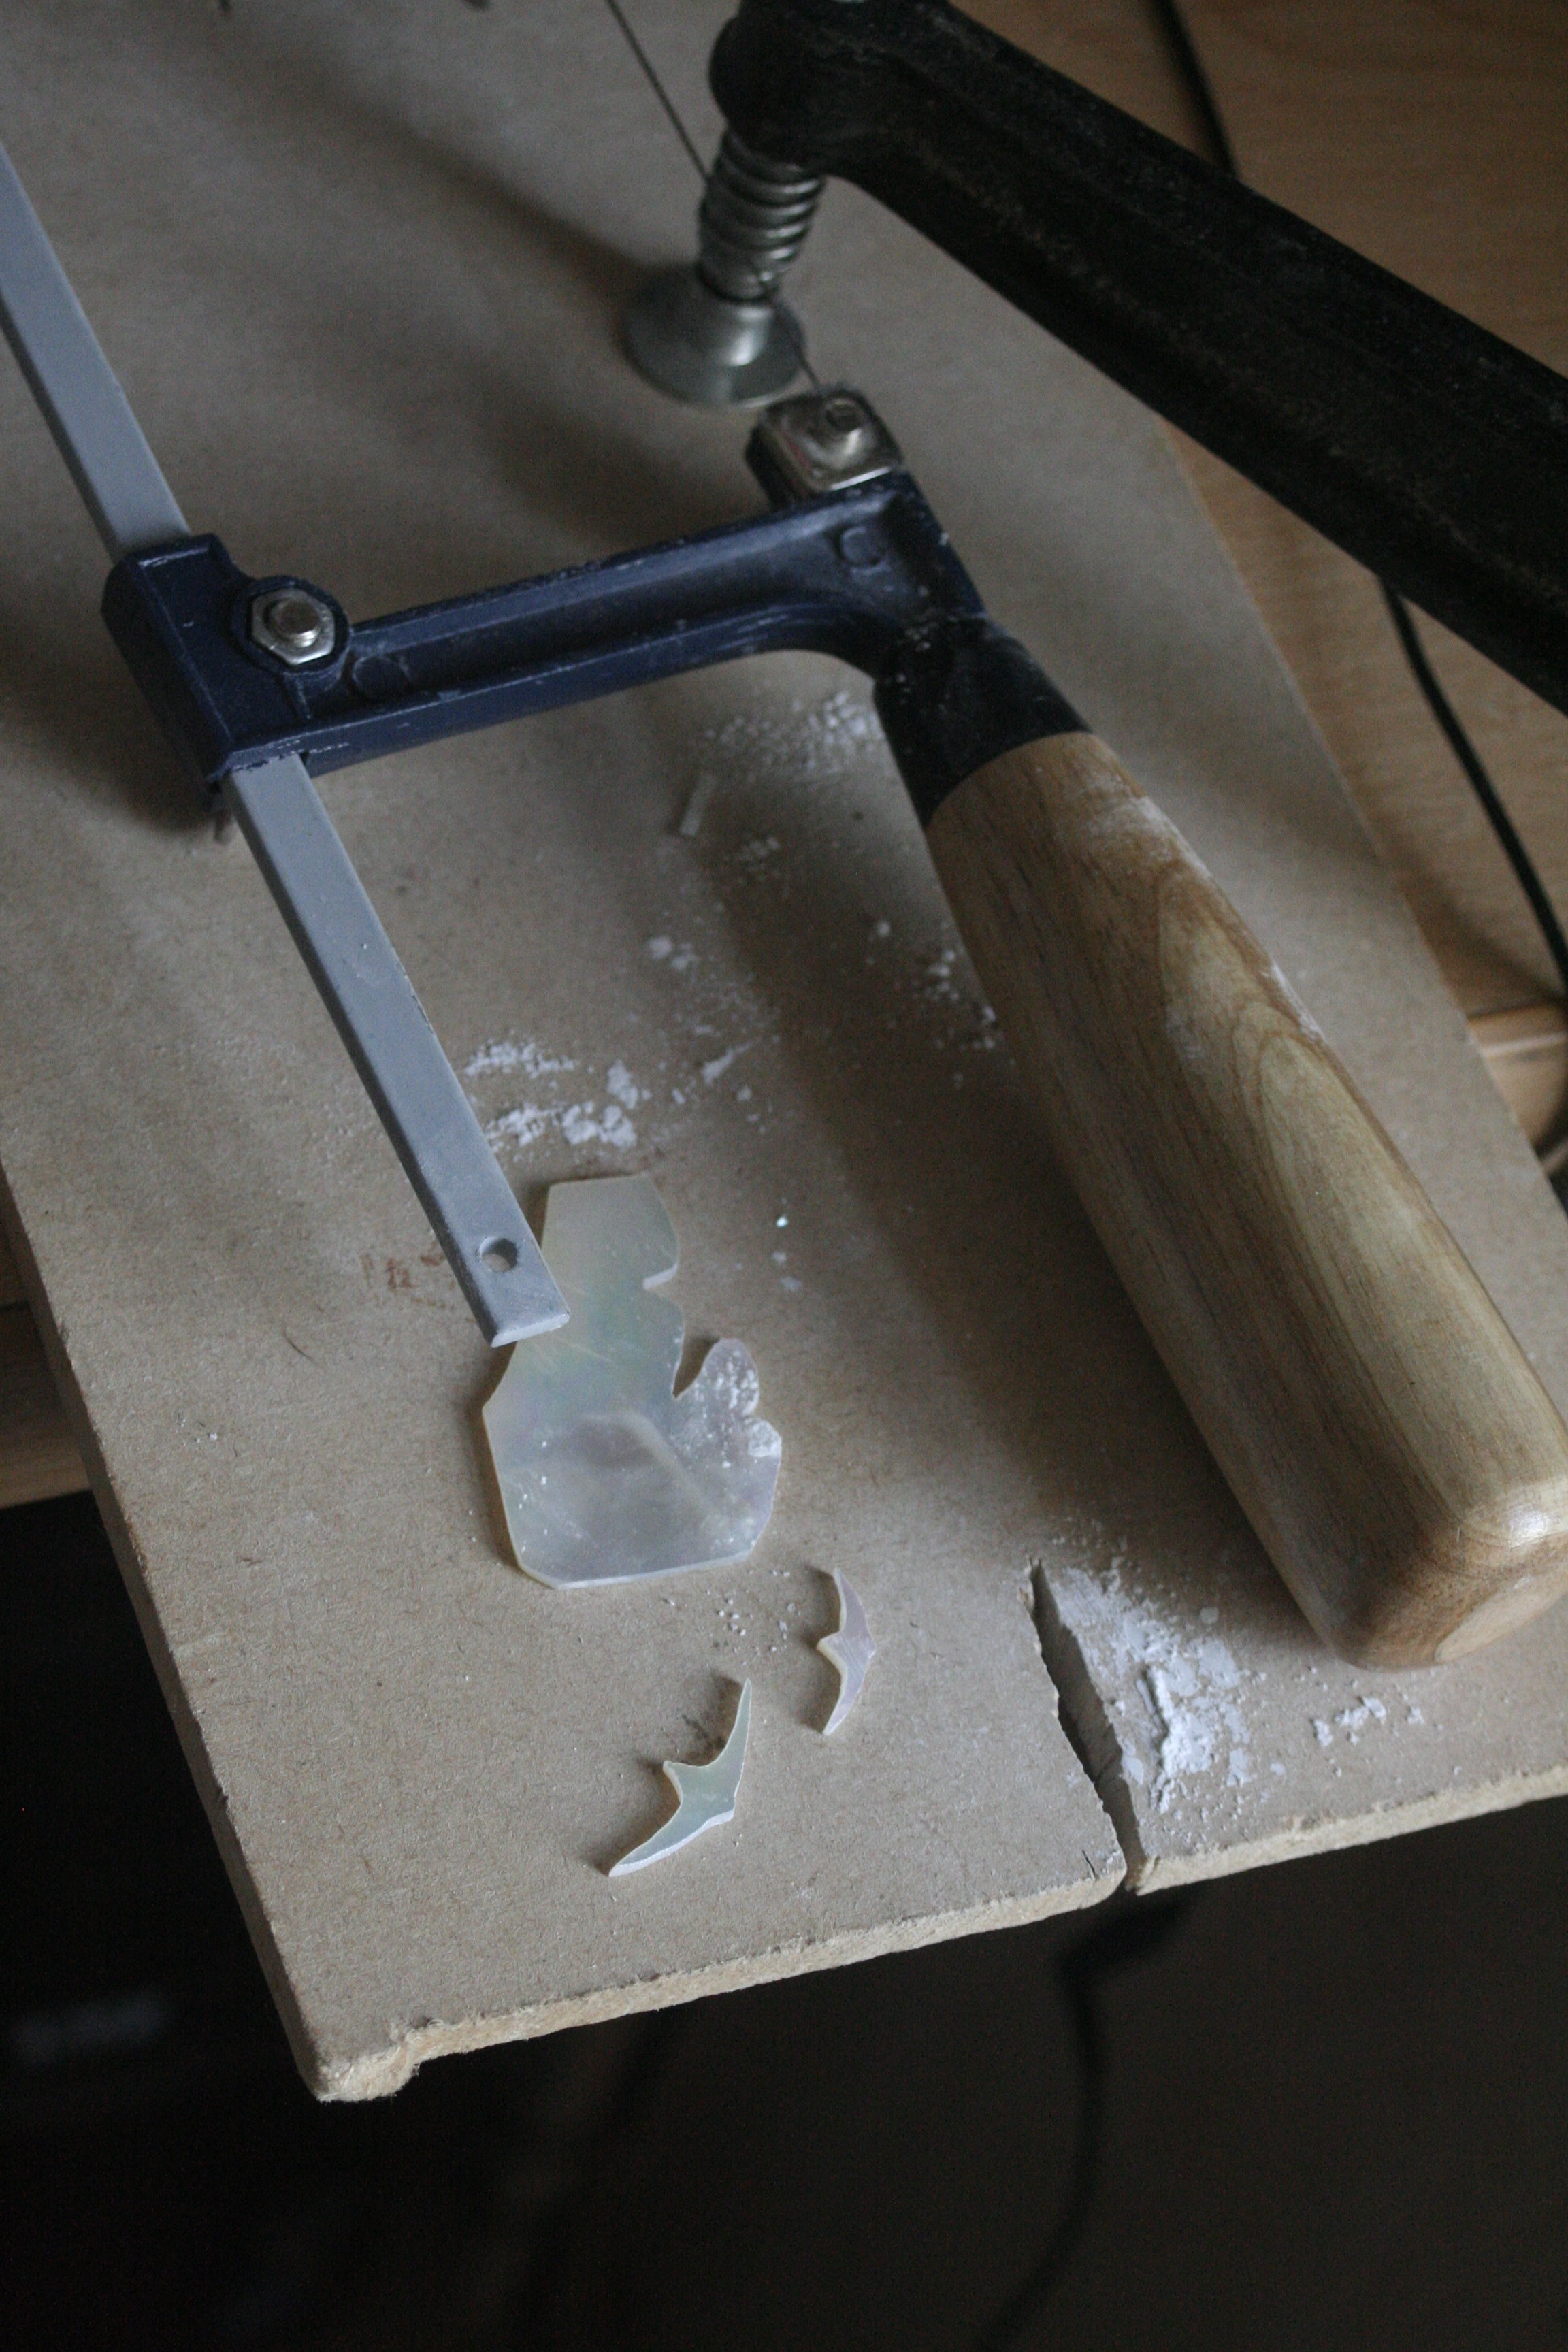
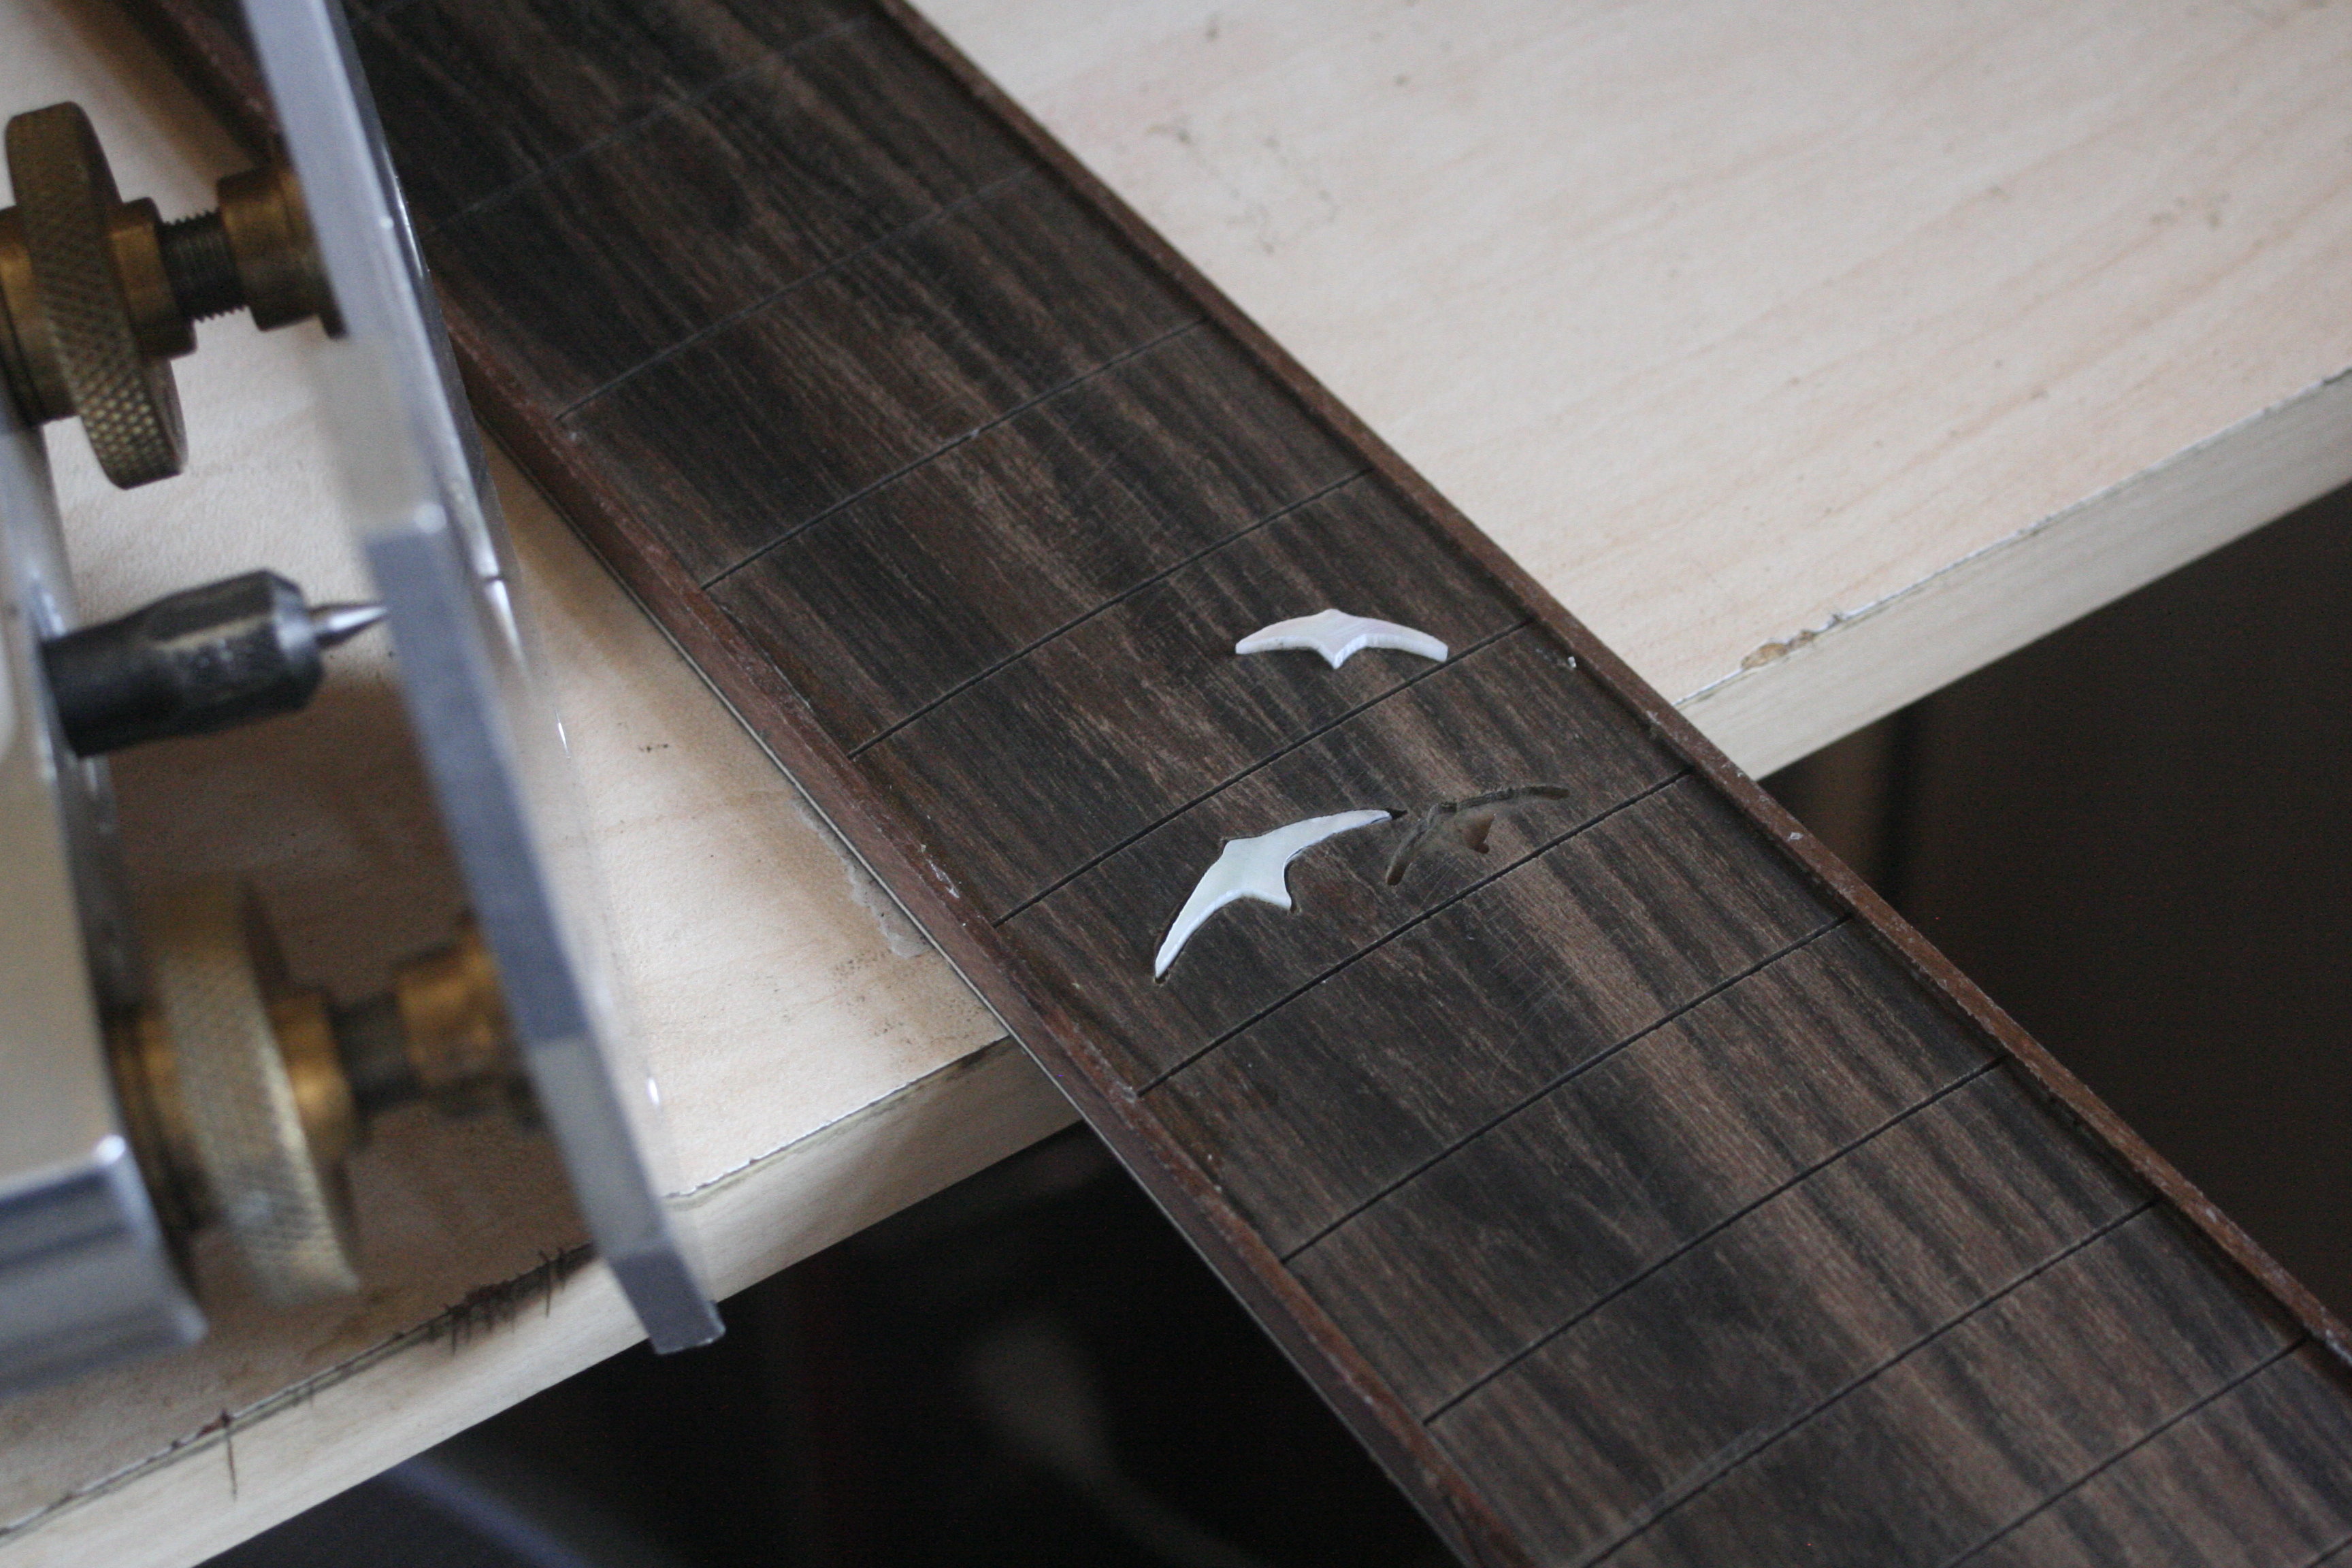
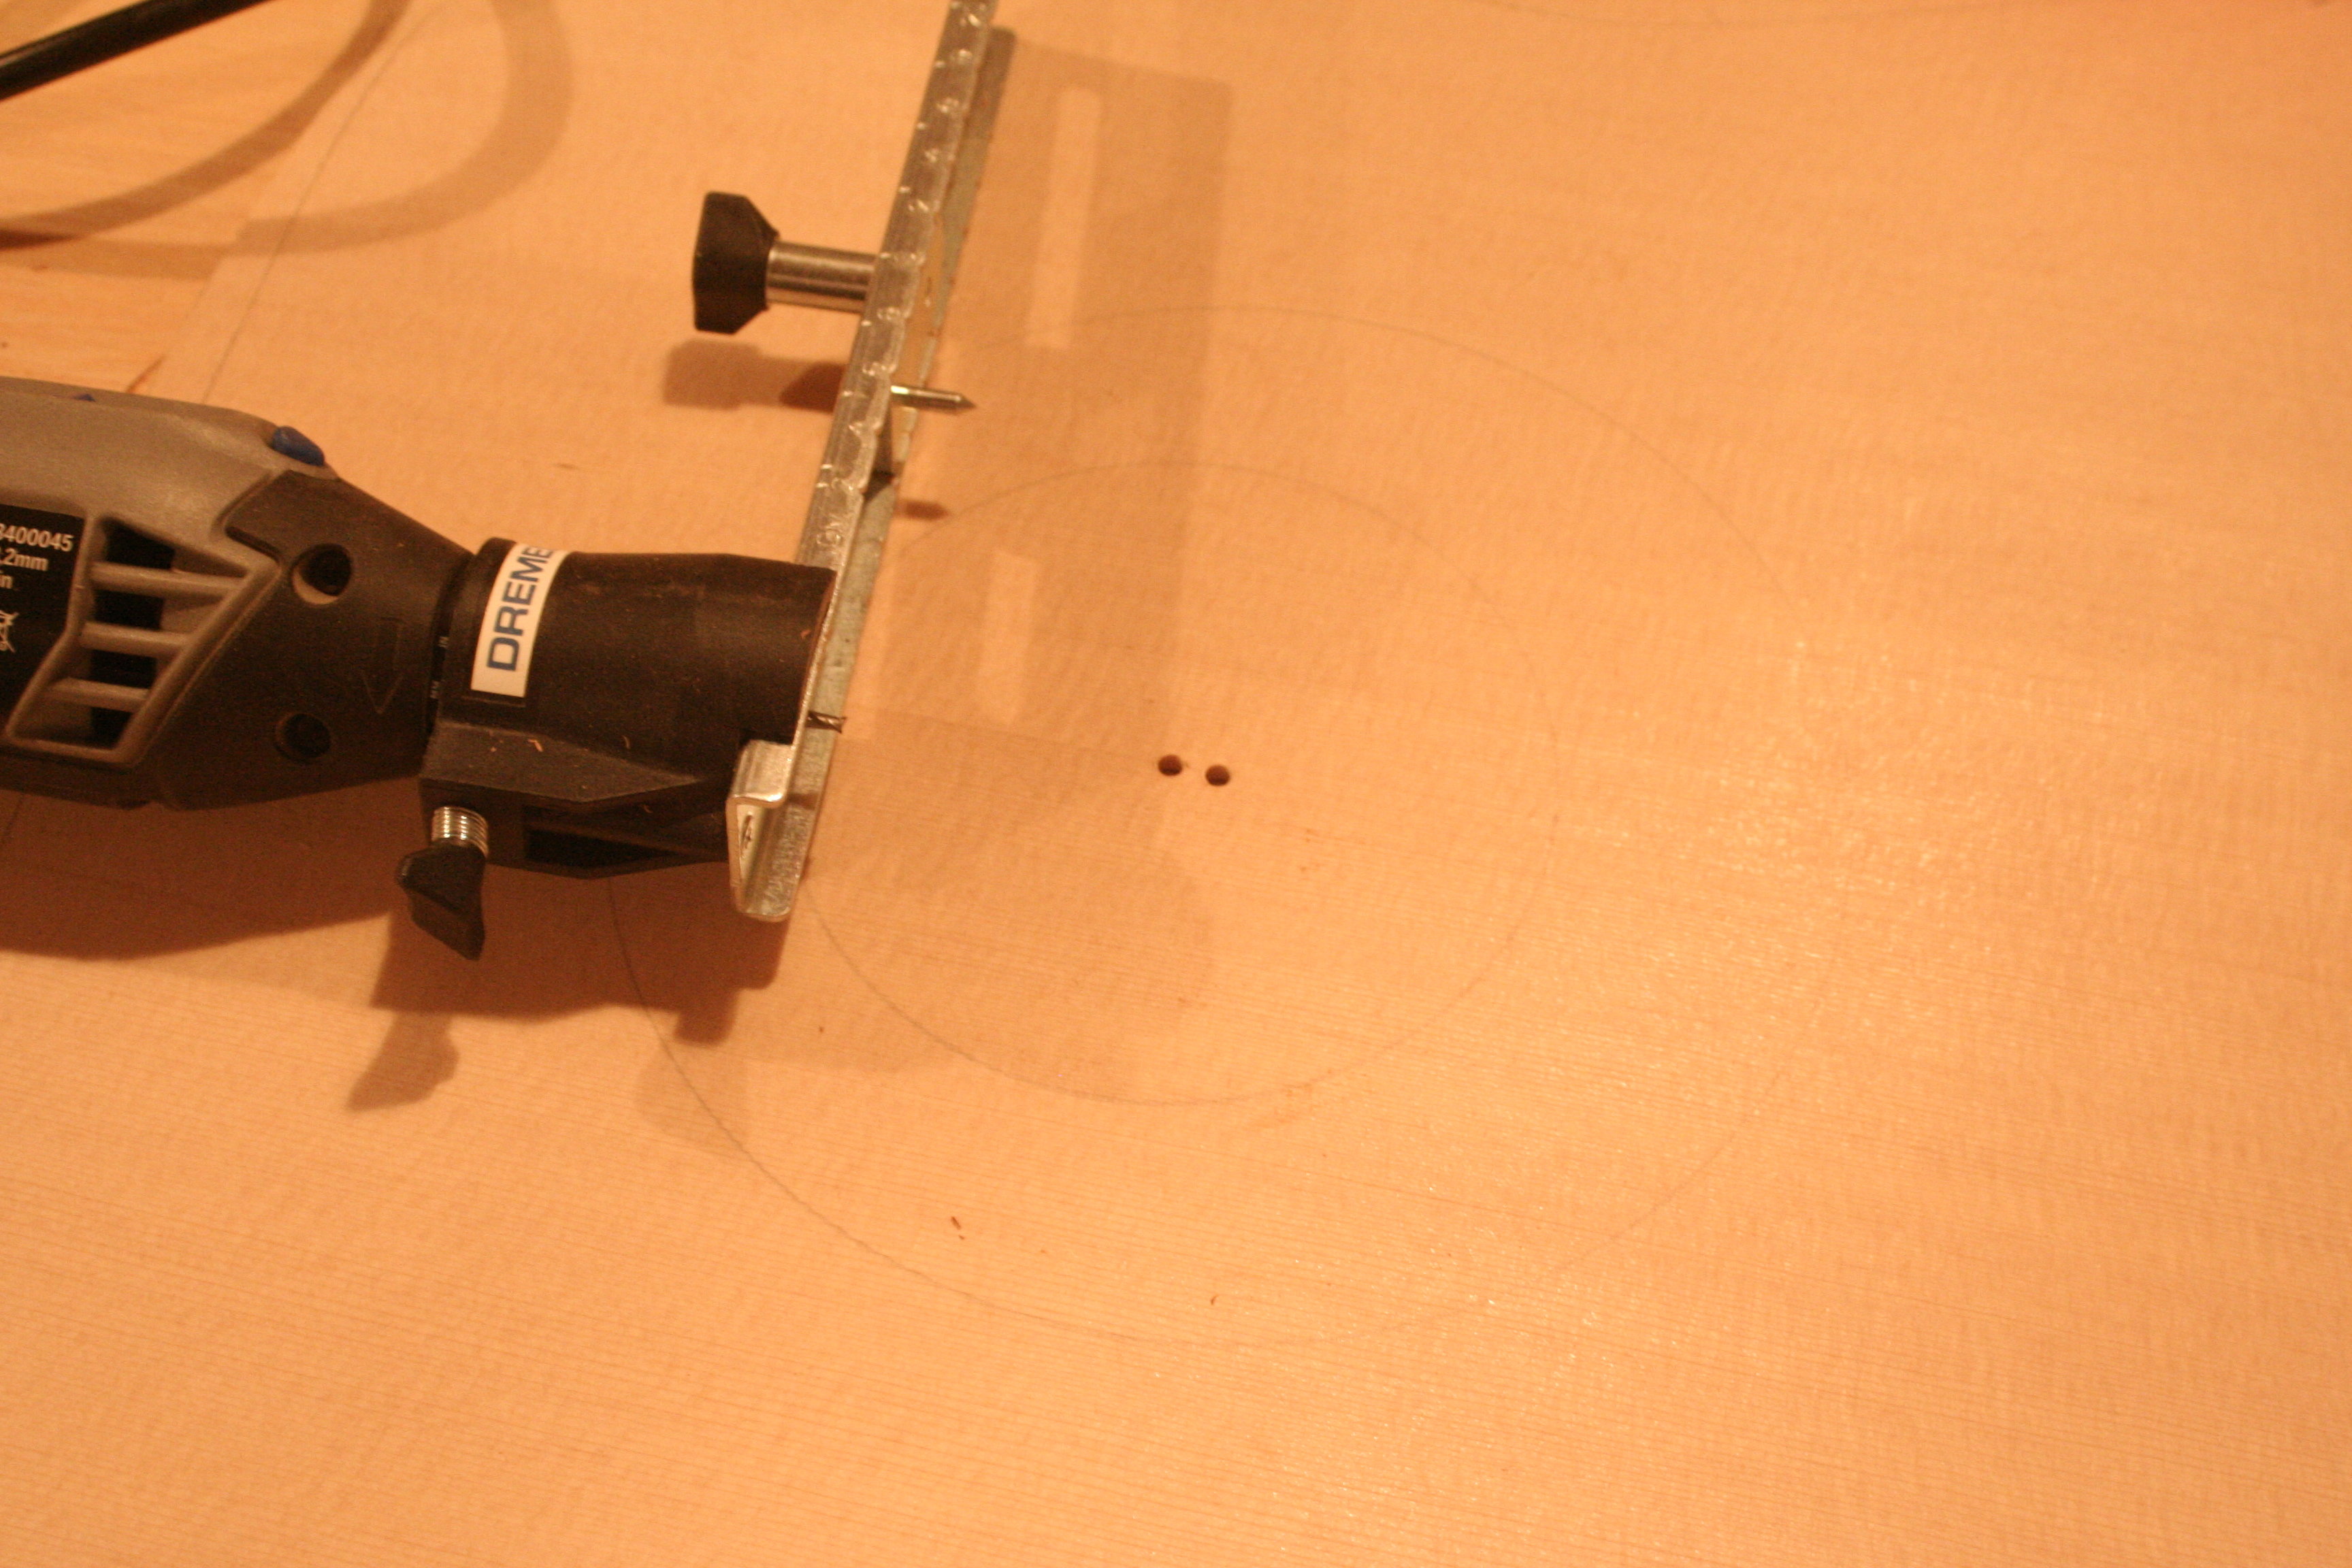
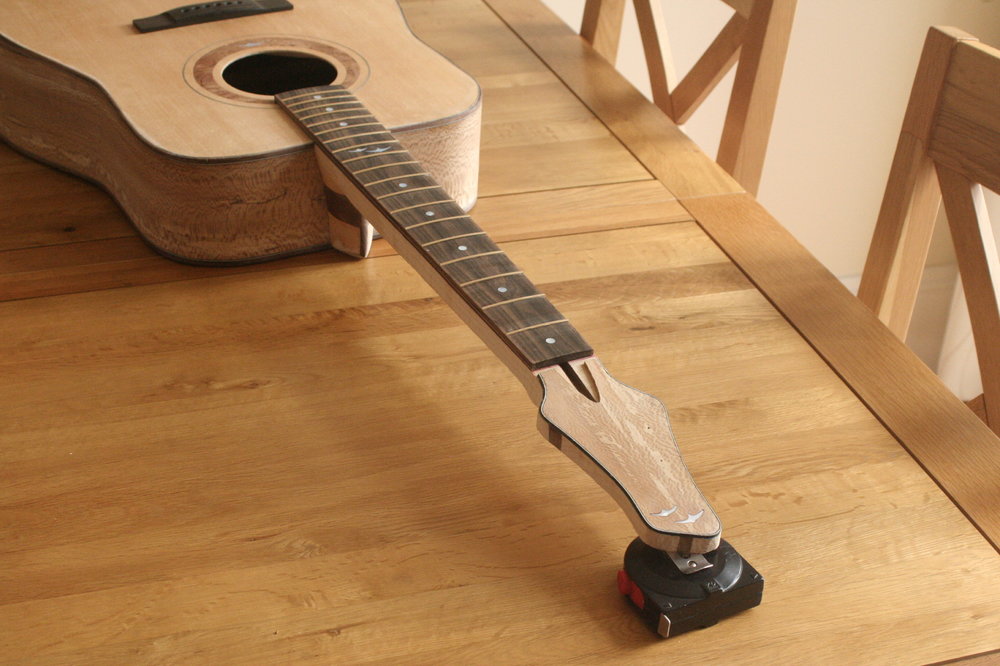
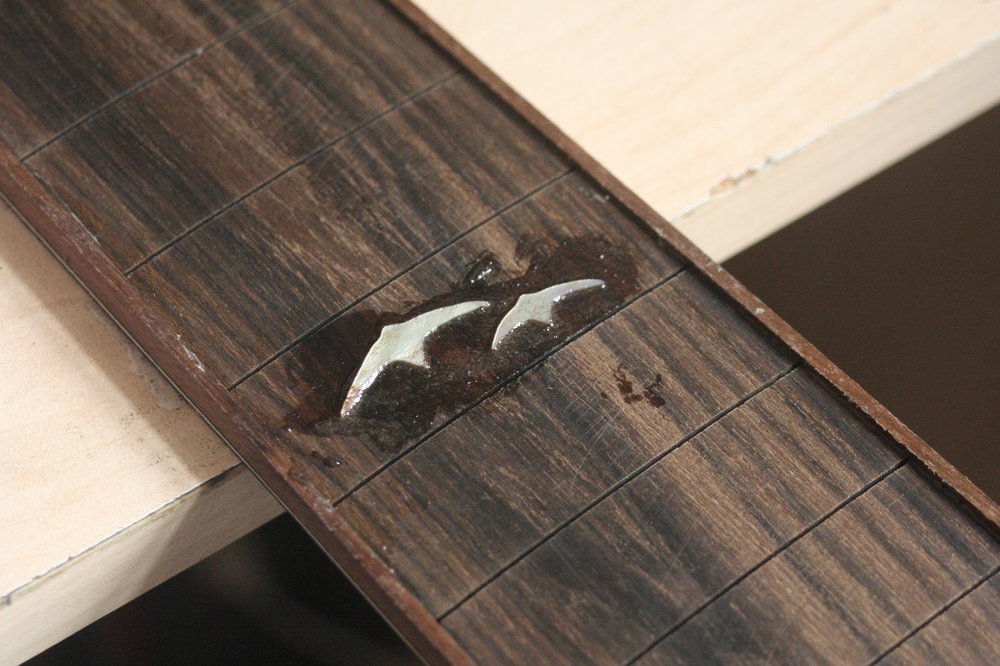
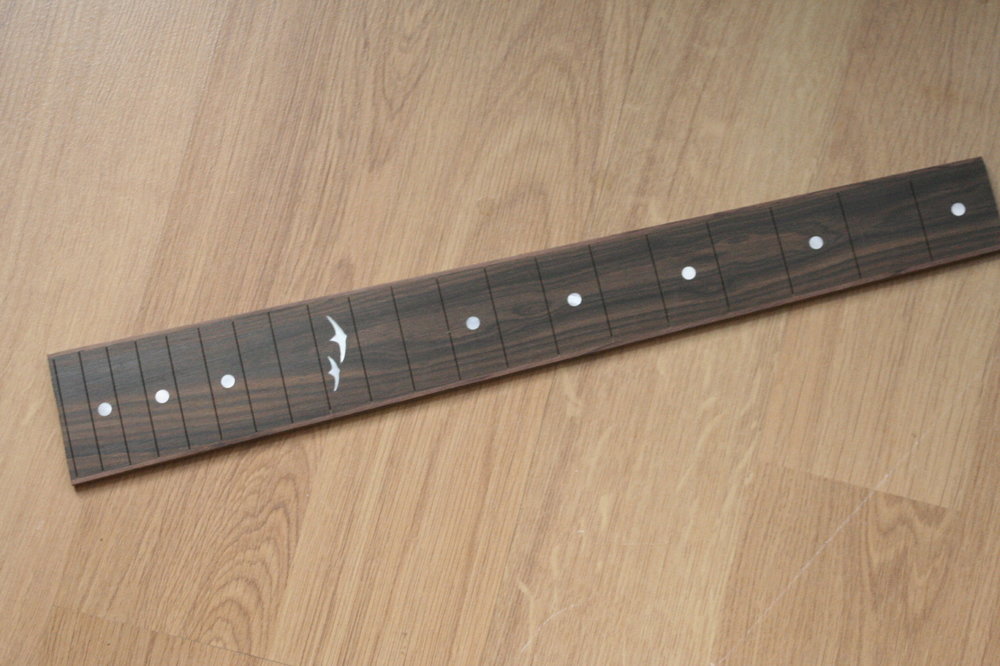
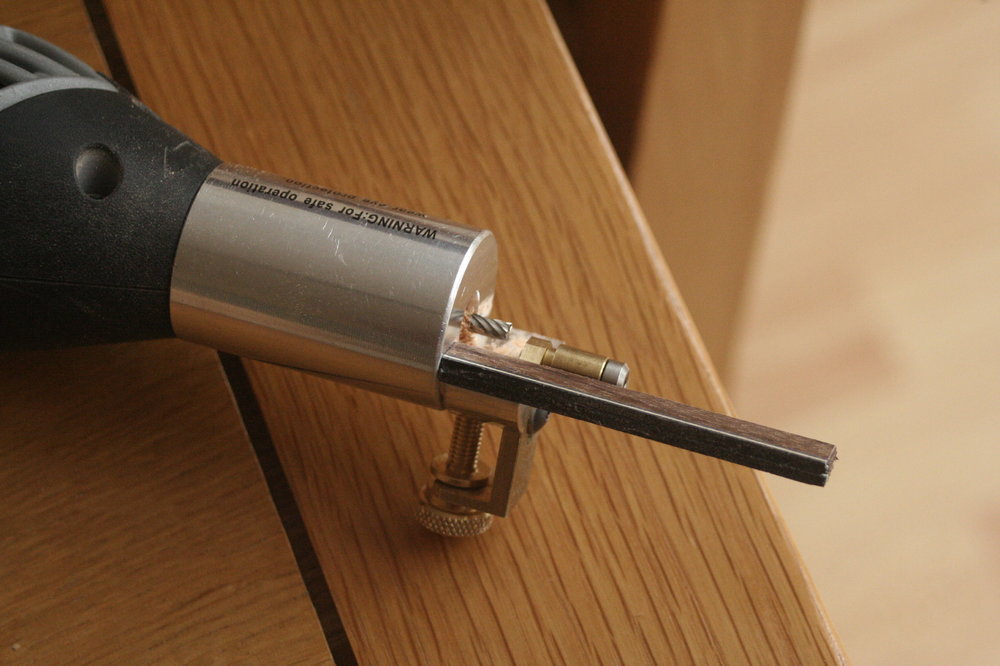
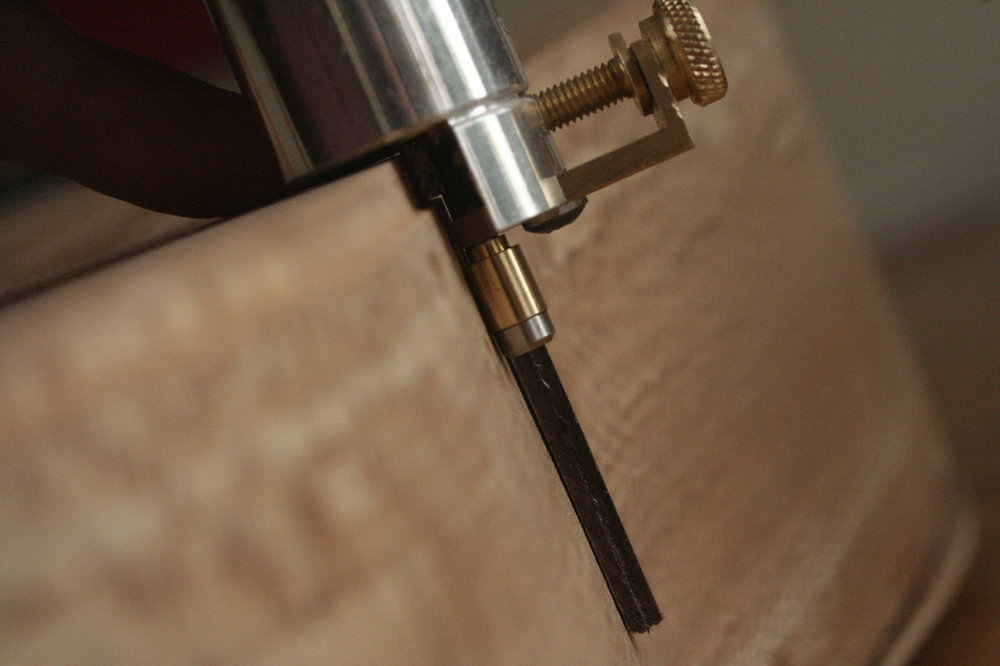
And in the meantime I made a bit of progress with the fretboard. Cut a couple of swifts for the 12th fret: Then used a precision router base on the Dremel with a 1.5mm bit: and installed with epoxy mixed with Macassar dust: Dots fixed either side and sanded smooth with the radius block: And that's all up to date as of this morning

-
Finished pics! A Bitsa Dreadnought for me :)
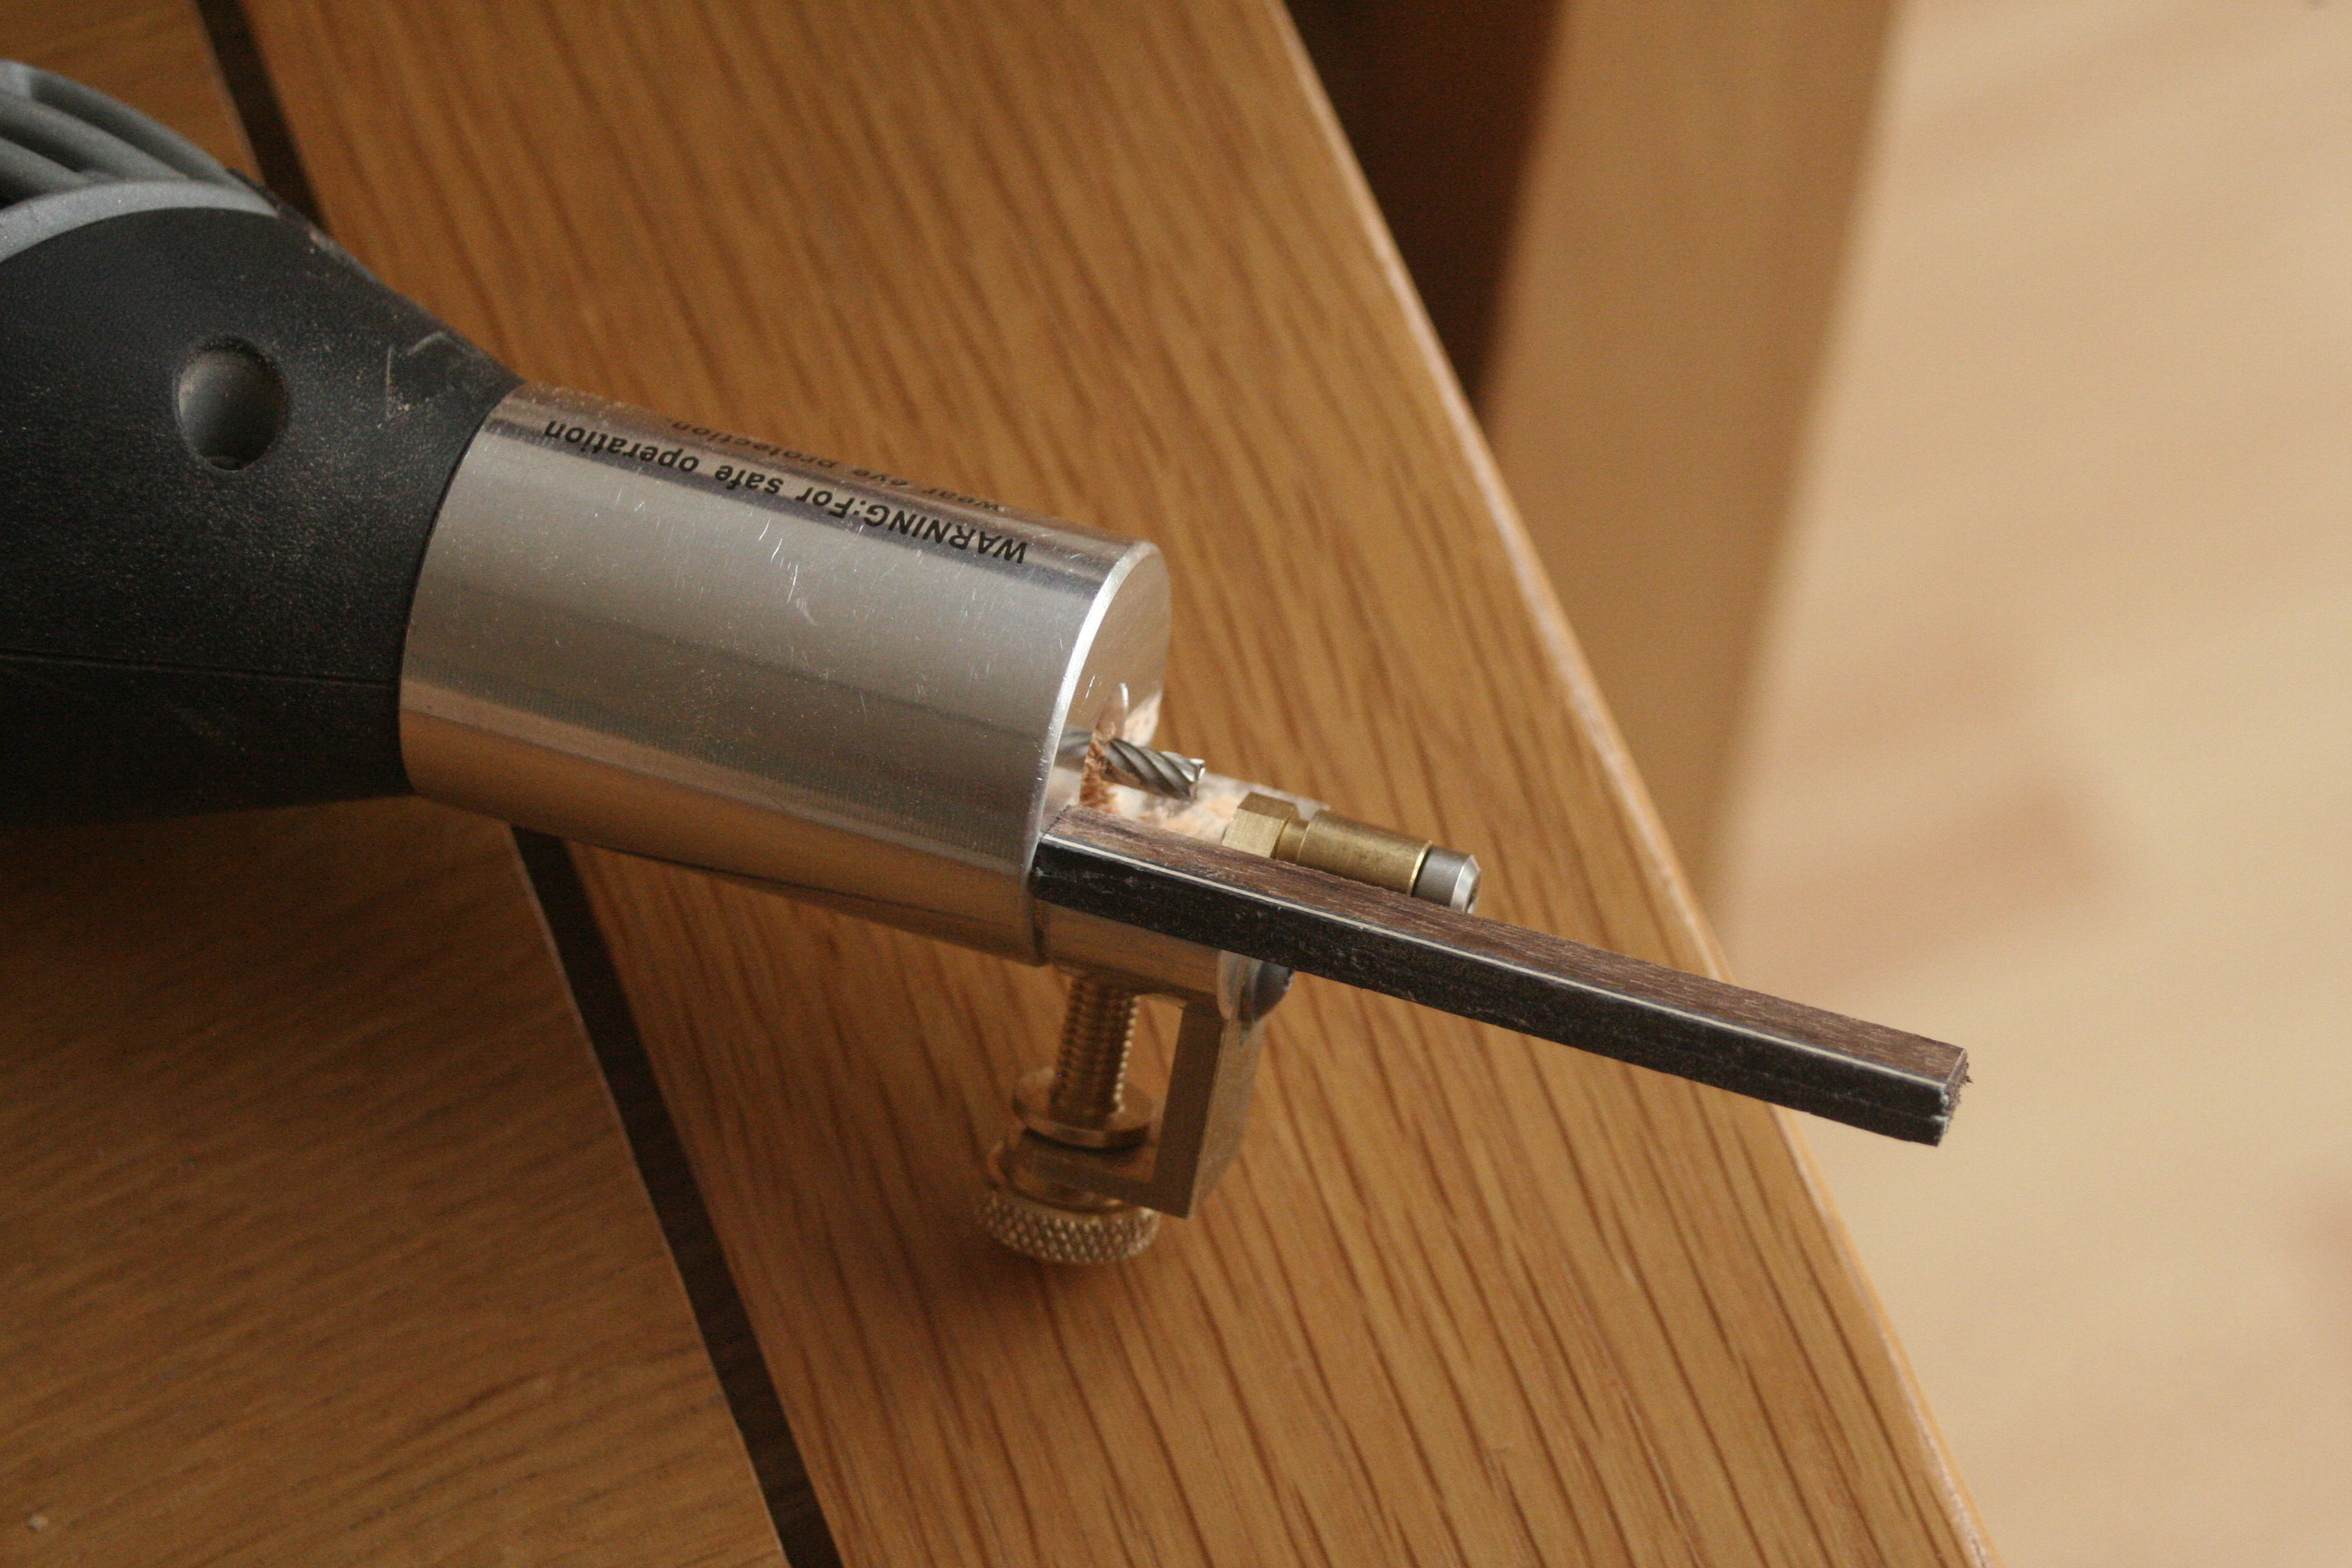
Andyjr1515 replied to Andyjr1515's topic in Build Diaries
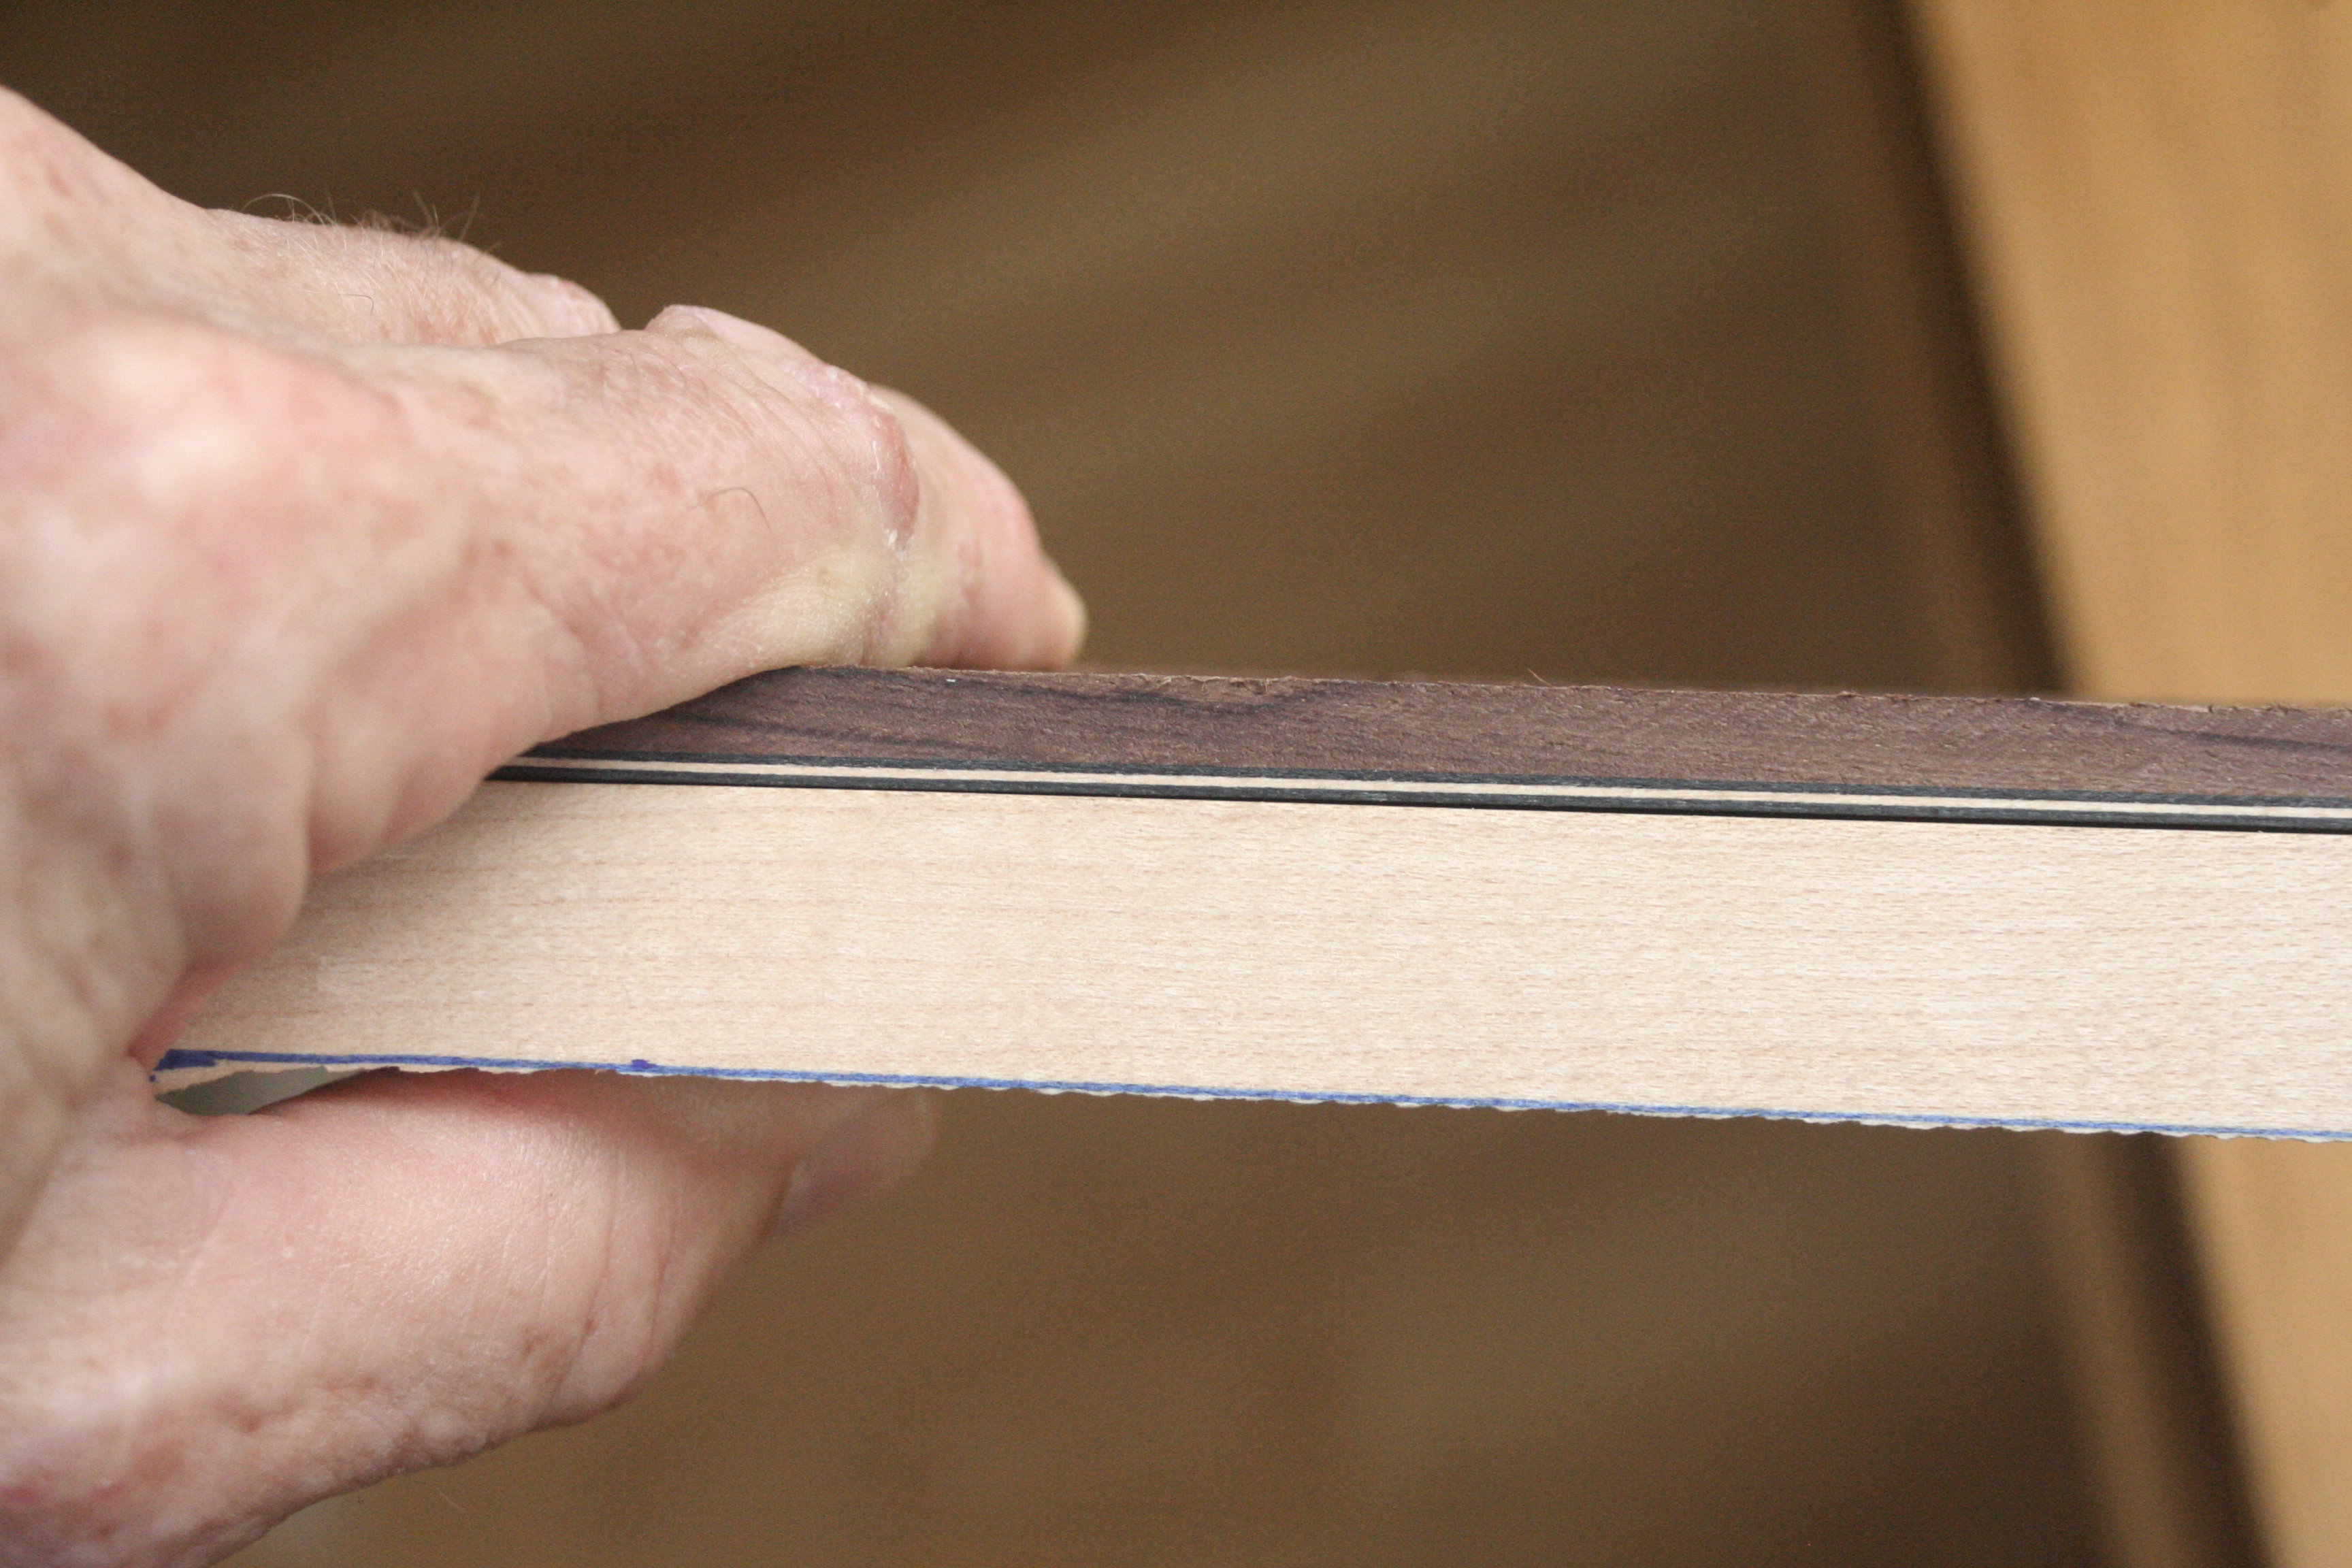
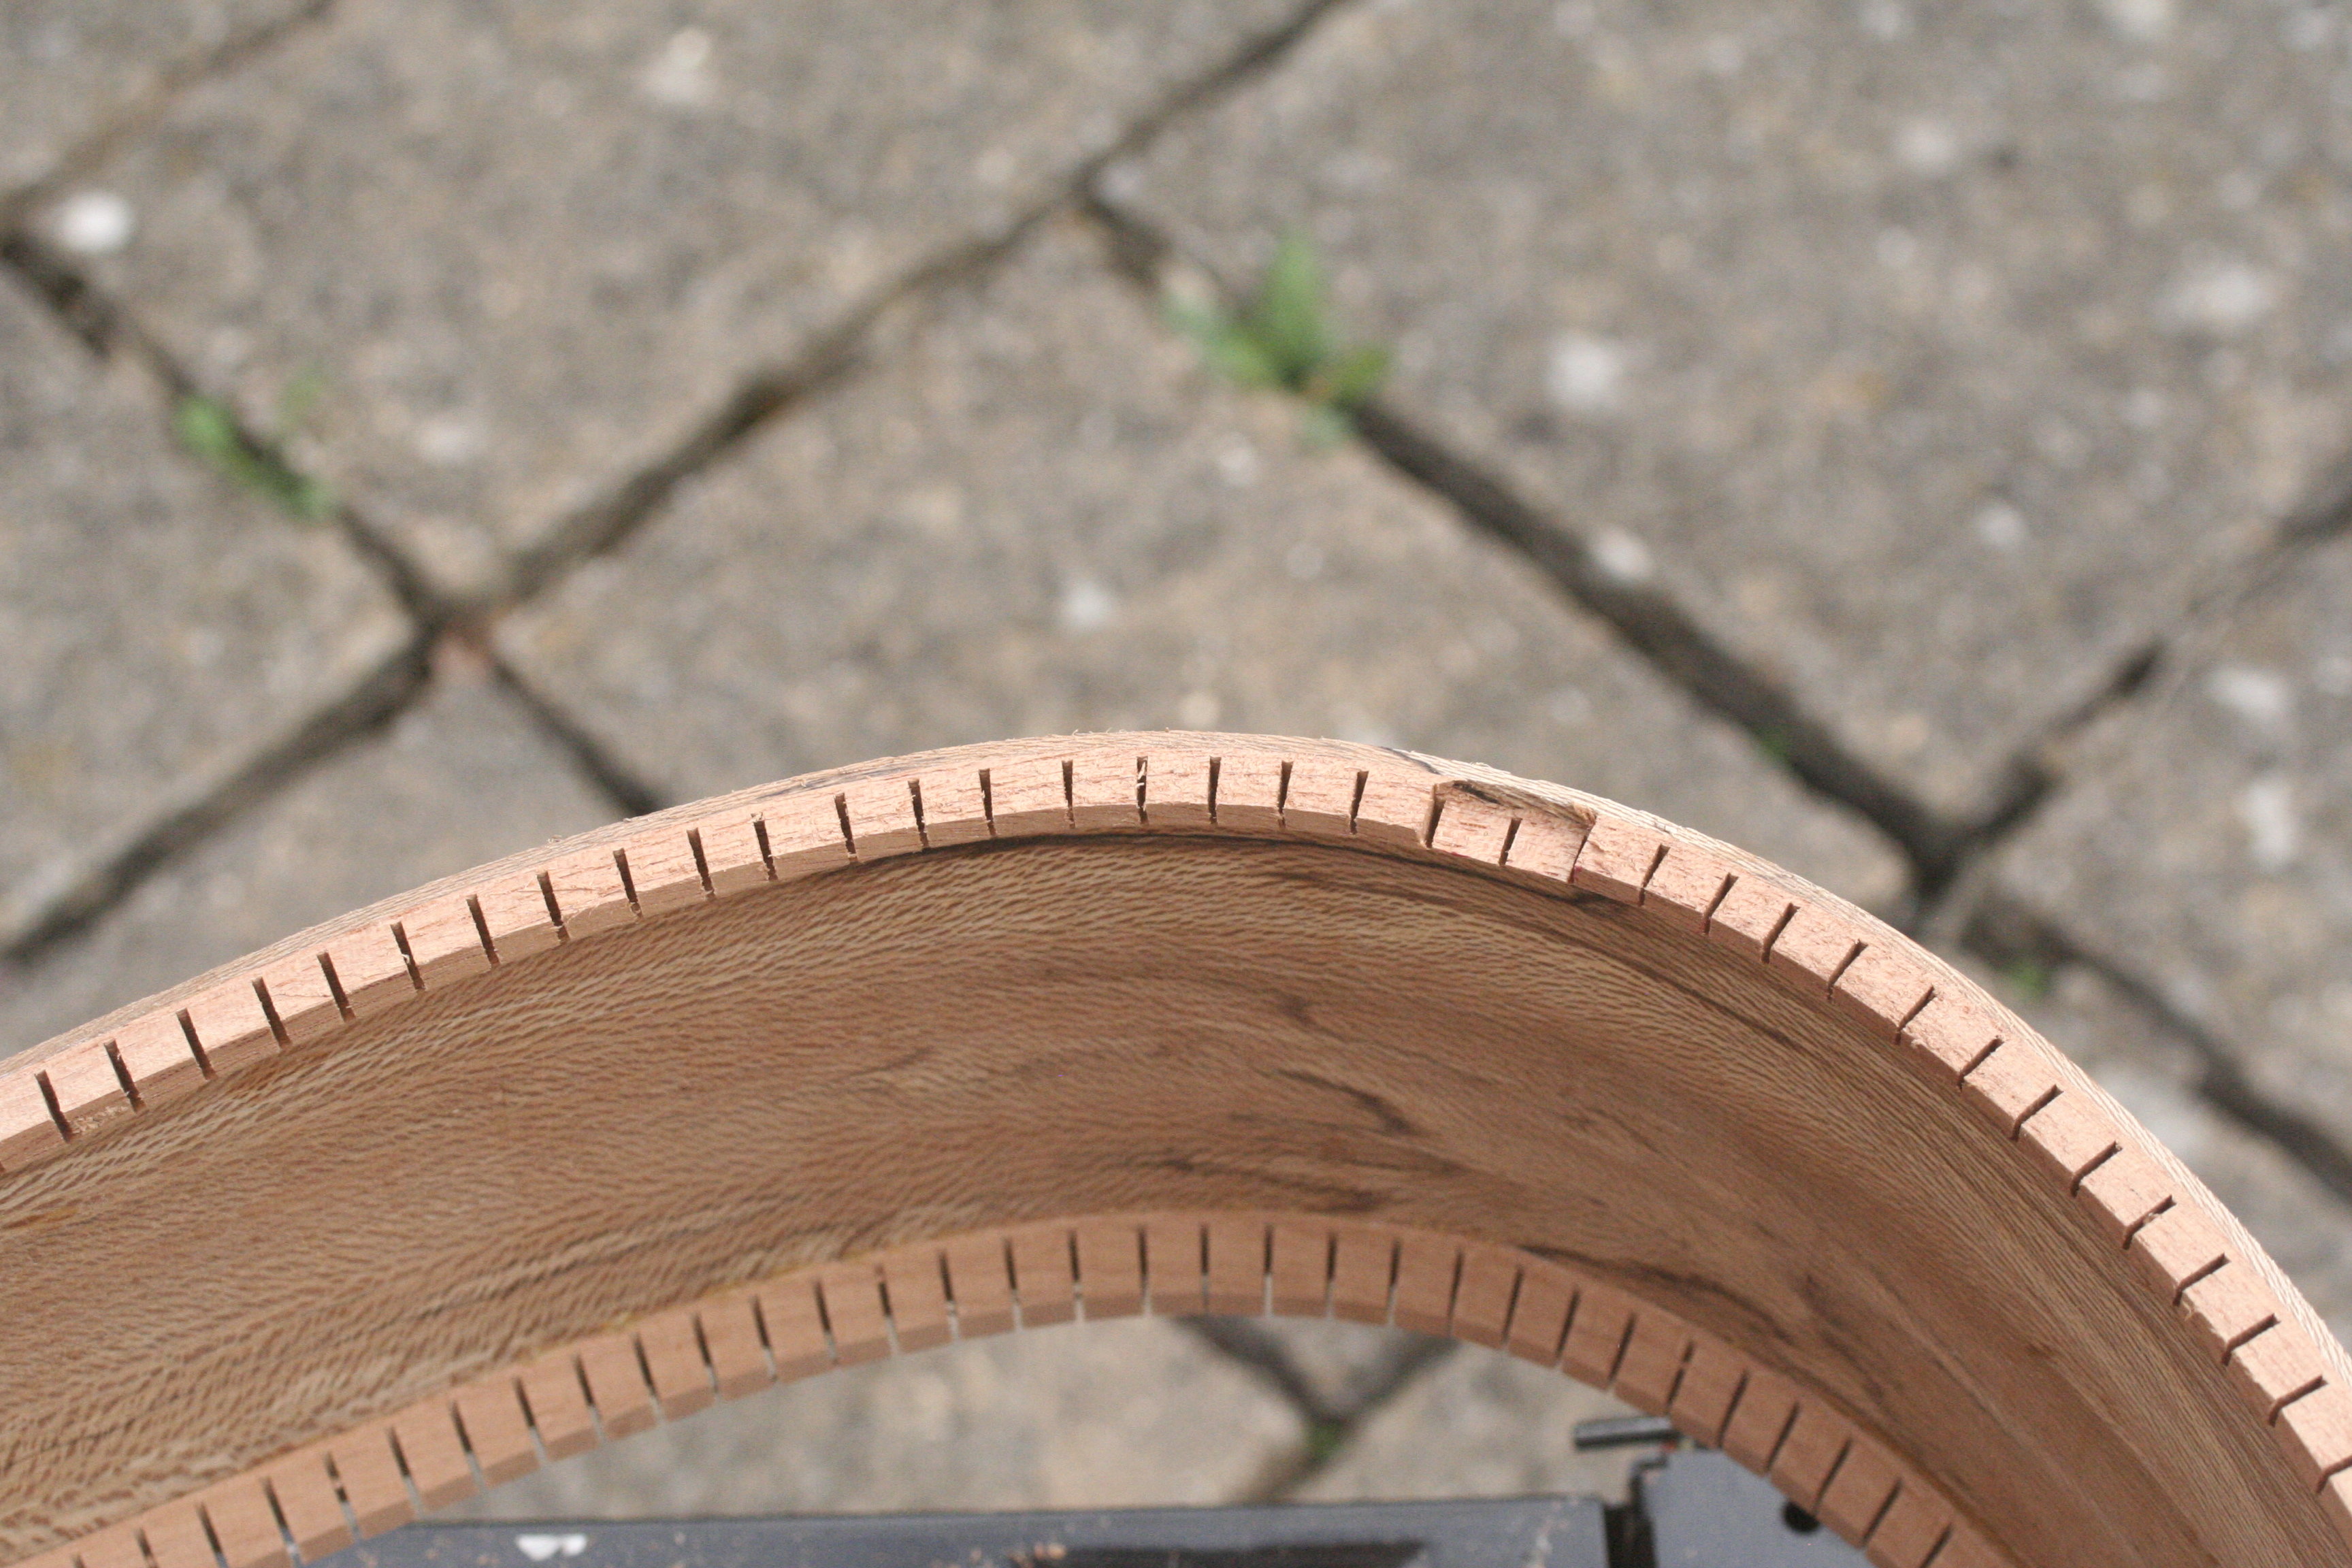
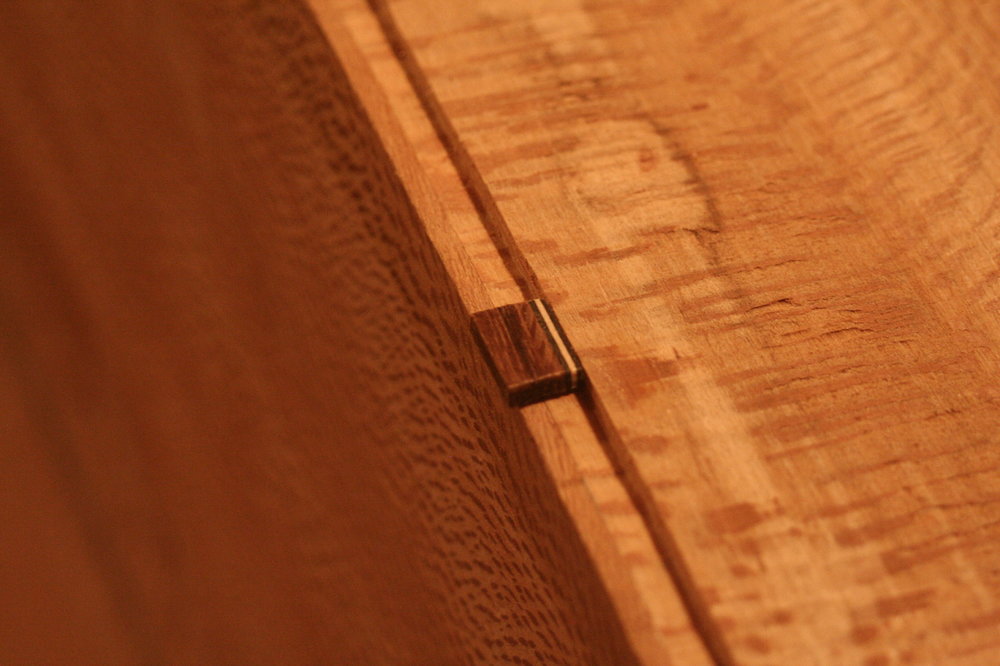
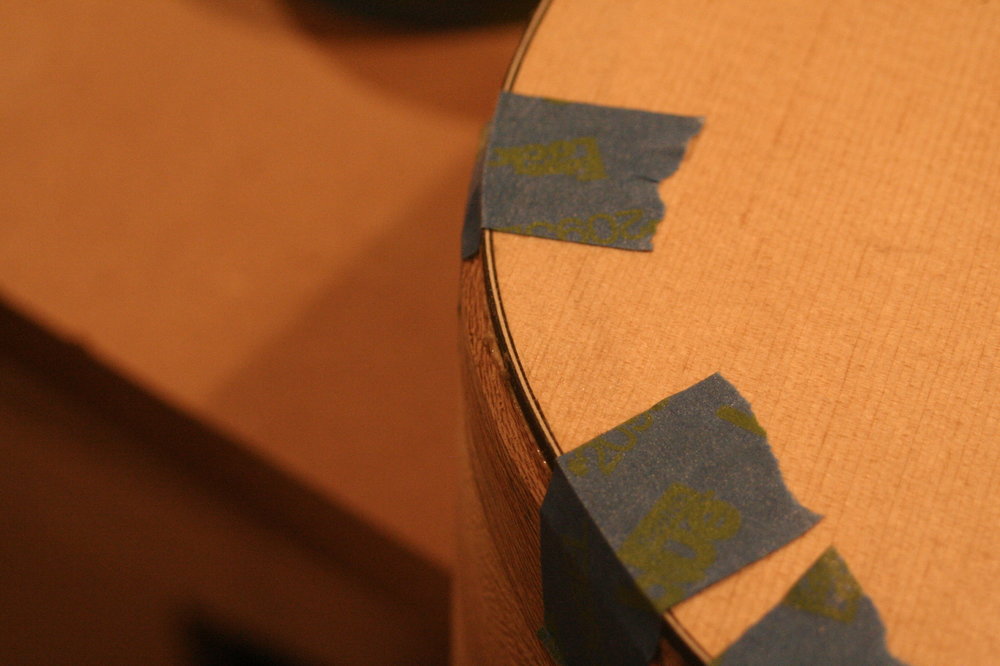
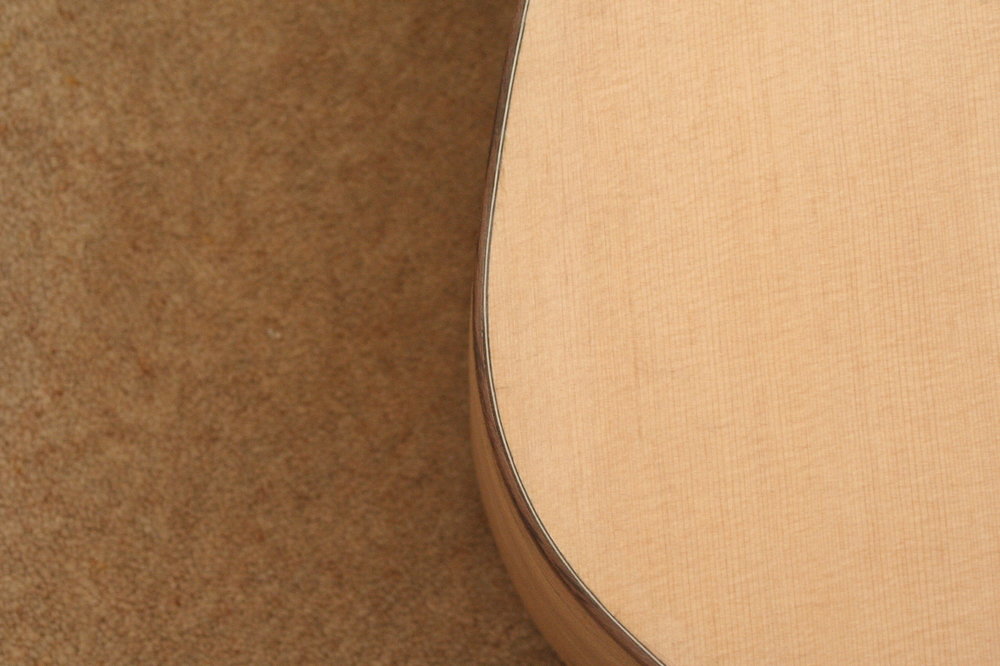
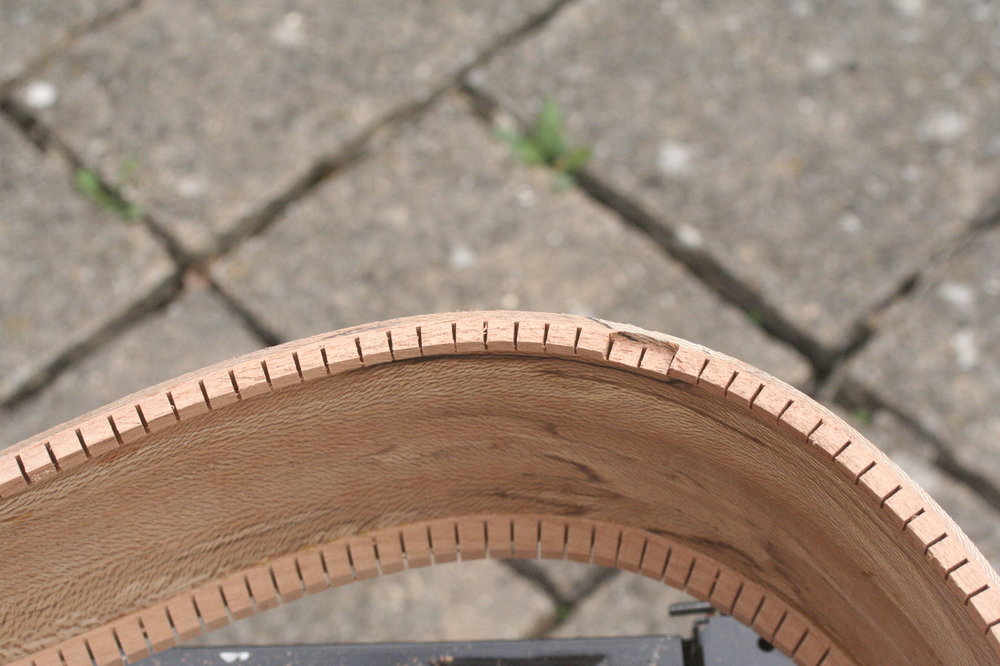
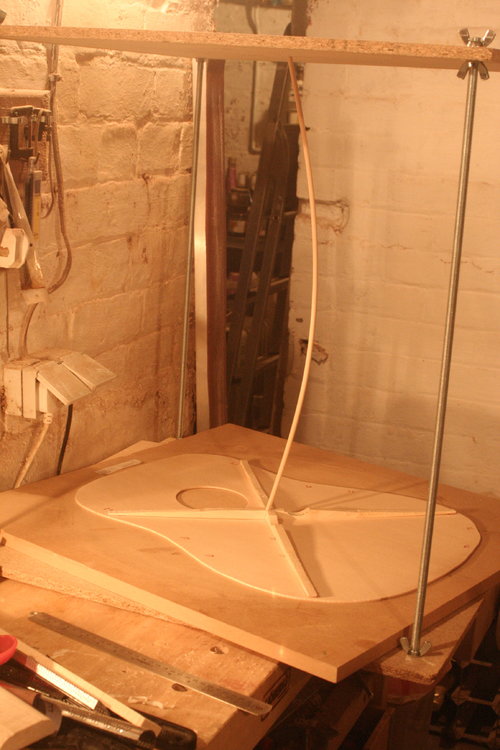
Rather than bore everyone with the same tortuous detail on this thread, I'll just summarise the results. Some of the reasoning and issues are covered in the original thread started on Basschat. The progress end point is the same in both threads Binding - hate it! I use a stewmac Dremel adapter as the 'only affordable least worst option' for cutting the channels - but with a daft but surprisingly effective mod of adding a piece of binding to it to act as a vertical guide: Works like this and helps a lot in getting an even rout: First goes on the inner purfling - this is pretty straightforward: Then cleaned up the remaining channel ready for the binding itself. This needs pre-bending - I use the bending iron and the body mould to hold them in position while they dry: Then glued and held tight with glassfibre reinforced tape and bicycle inner tubes: Results -after a bit of tweaking - are OK but the process, in my view, is too hit-and-miss: So for the binding on the back, I'm going to try a completely different method that I successfully used a few years ago on this Peavey EVH re-body:


-
Finished pics! A Bitsa Dreadnought for me :)
Andyjr1515 replied to Andyjr1515's topic in Build Diaries
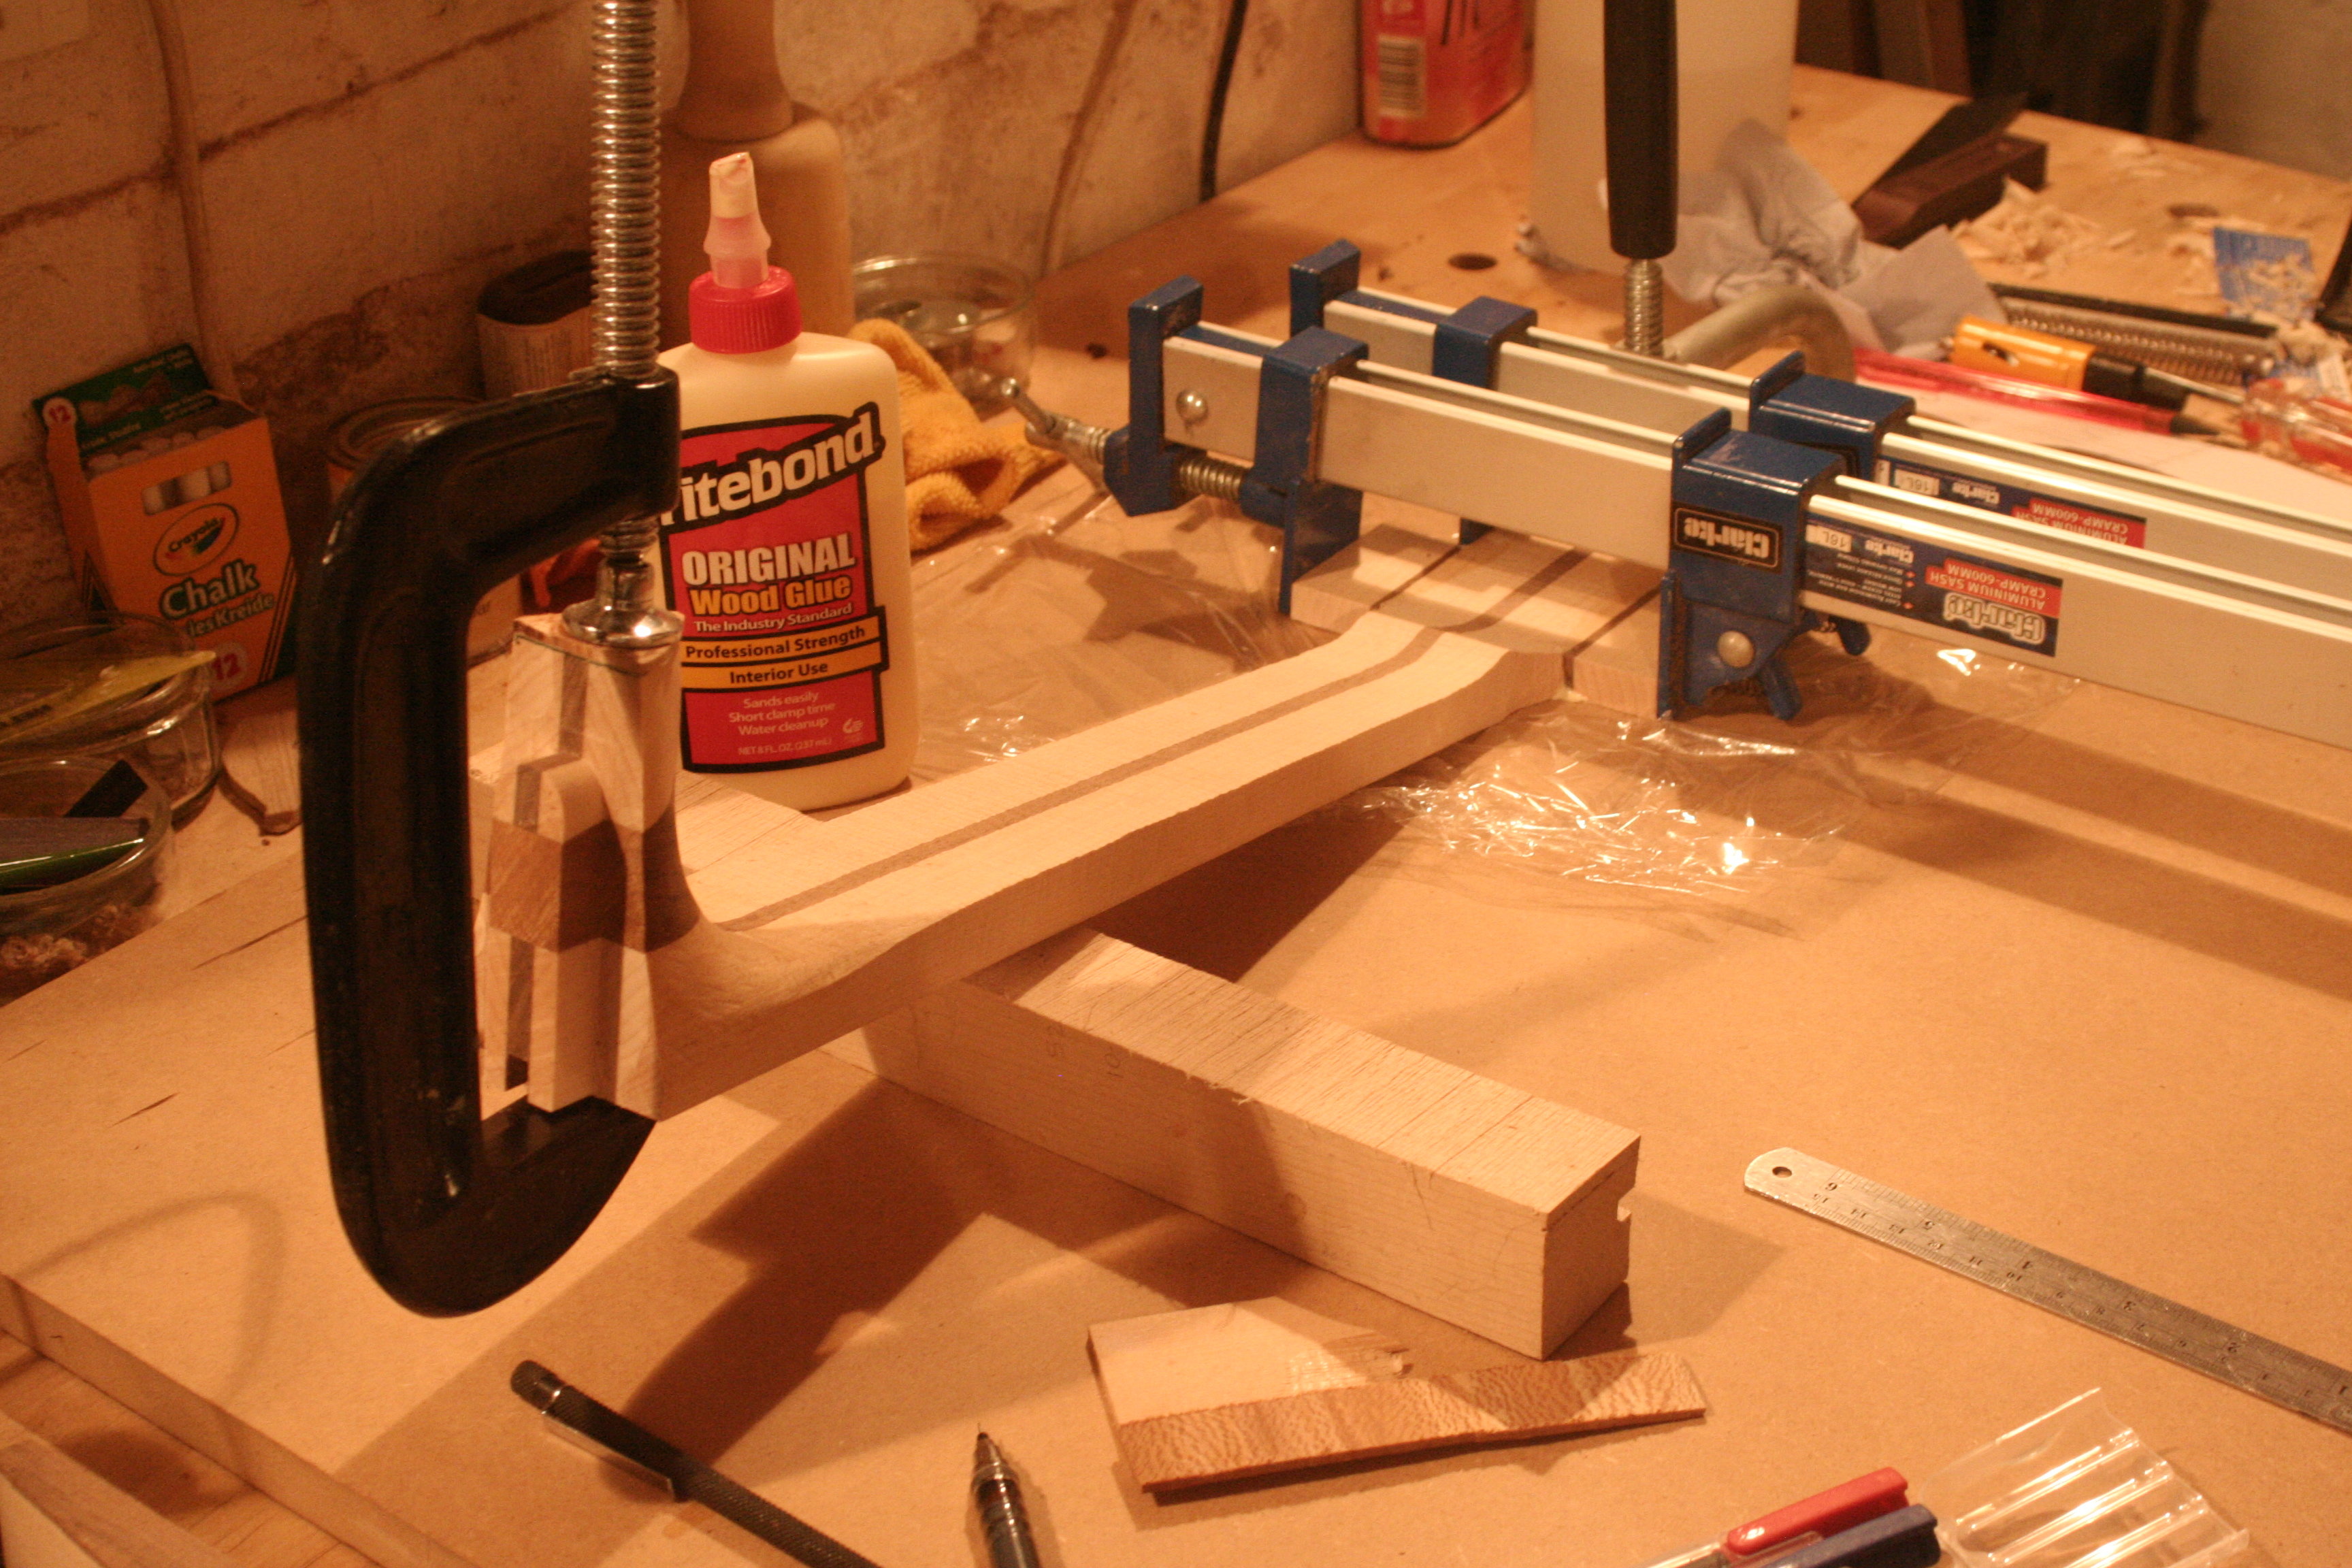
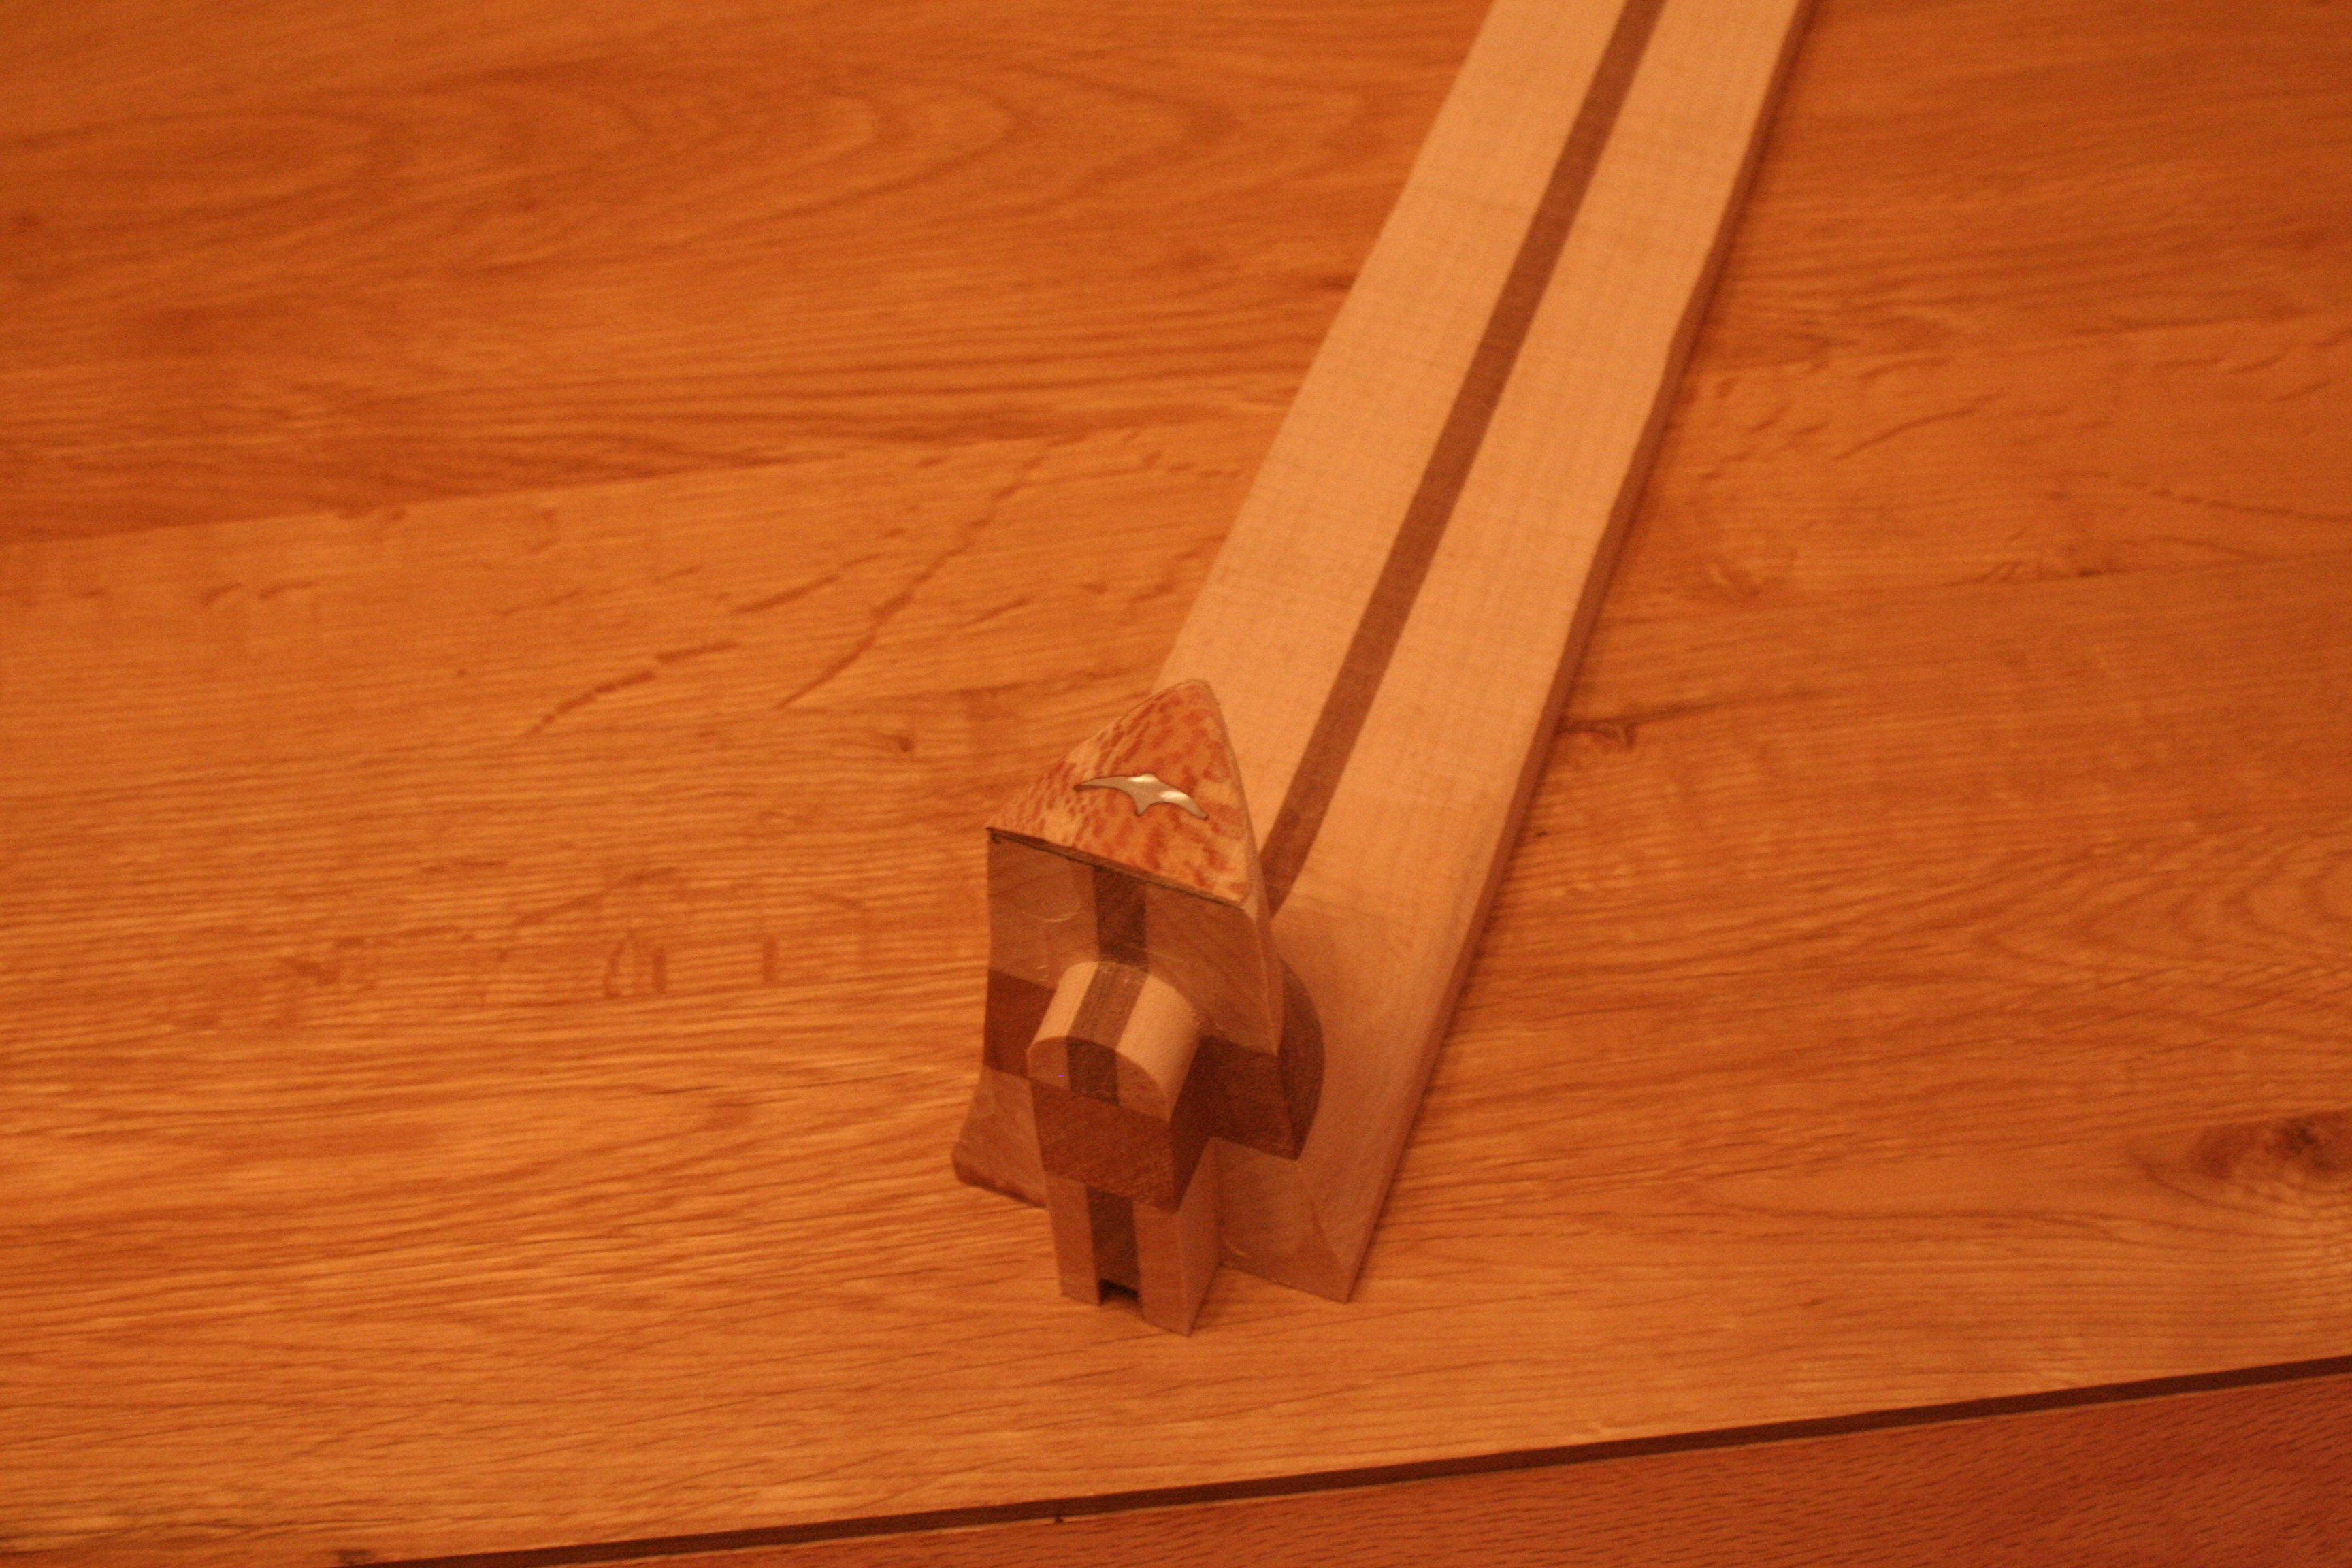
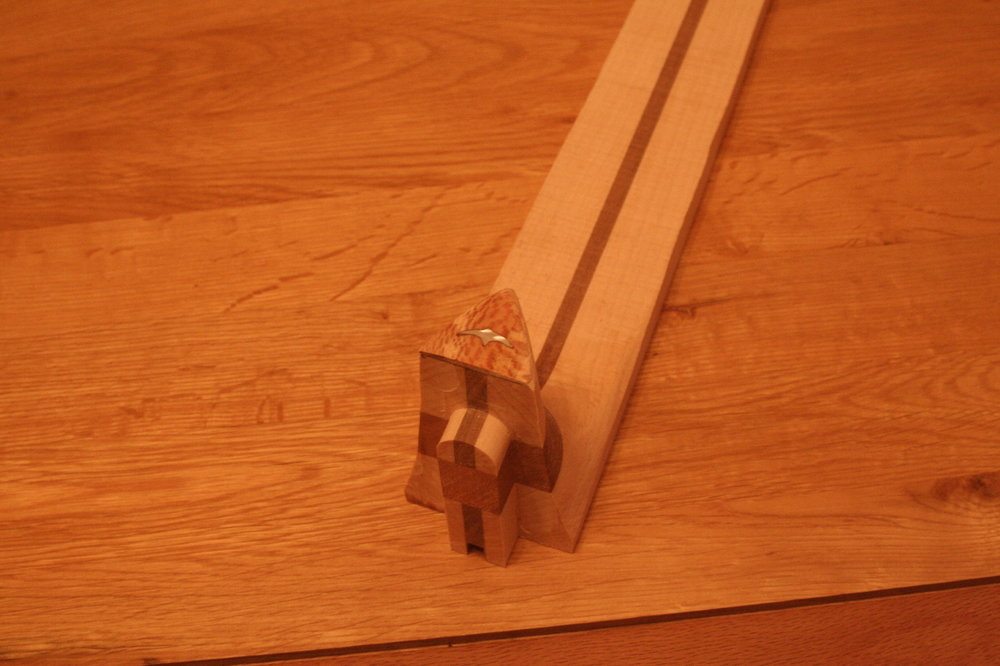
OK The thing I've done before is using decorative banding to bind the fretboard with. It gives me the advantage of looking like a multi-layer veneer demarcation without the faff and risk of wavy lines of trying to do that: The second thing is something I haven't tried before. Because the neck is from an offcut, it isn't deep enough to give me top of body to bottom in two pieces. And three pieces of maple stacked together could look a bit naff! So I've added a lump of decorative wood. To make it look like it was meant to be there, I've angled it. Won't know until I carve it what it is going to look like, but worth a try!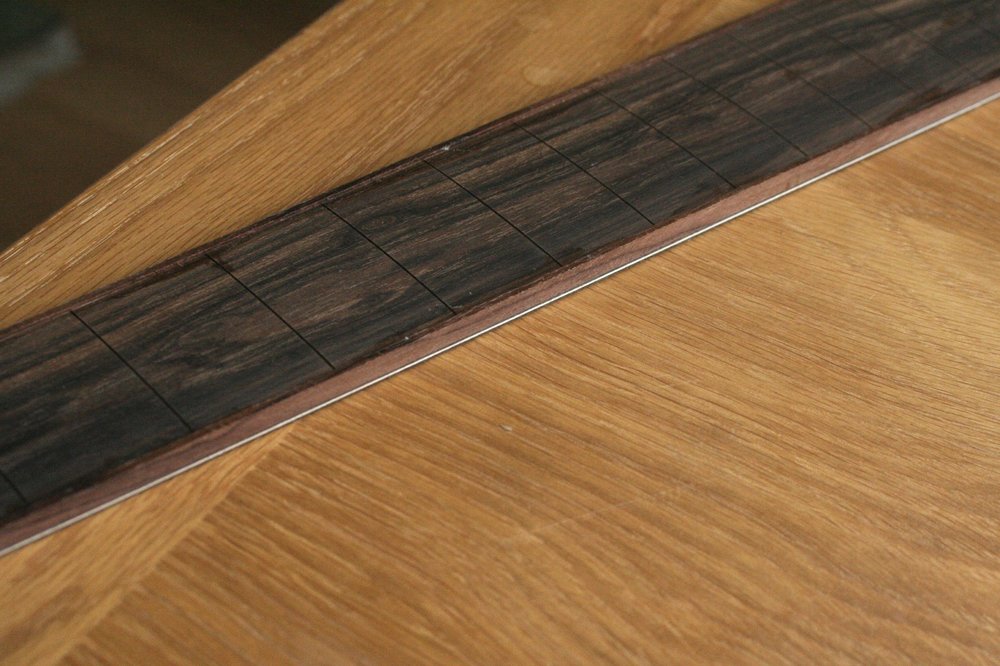


-
Finished pics! A Bitsa Dreadnought for me :)
Andyjr1515 replied to Andyjr1515's topic in Build Diaries
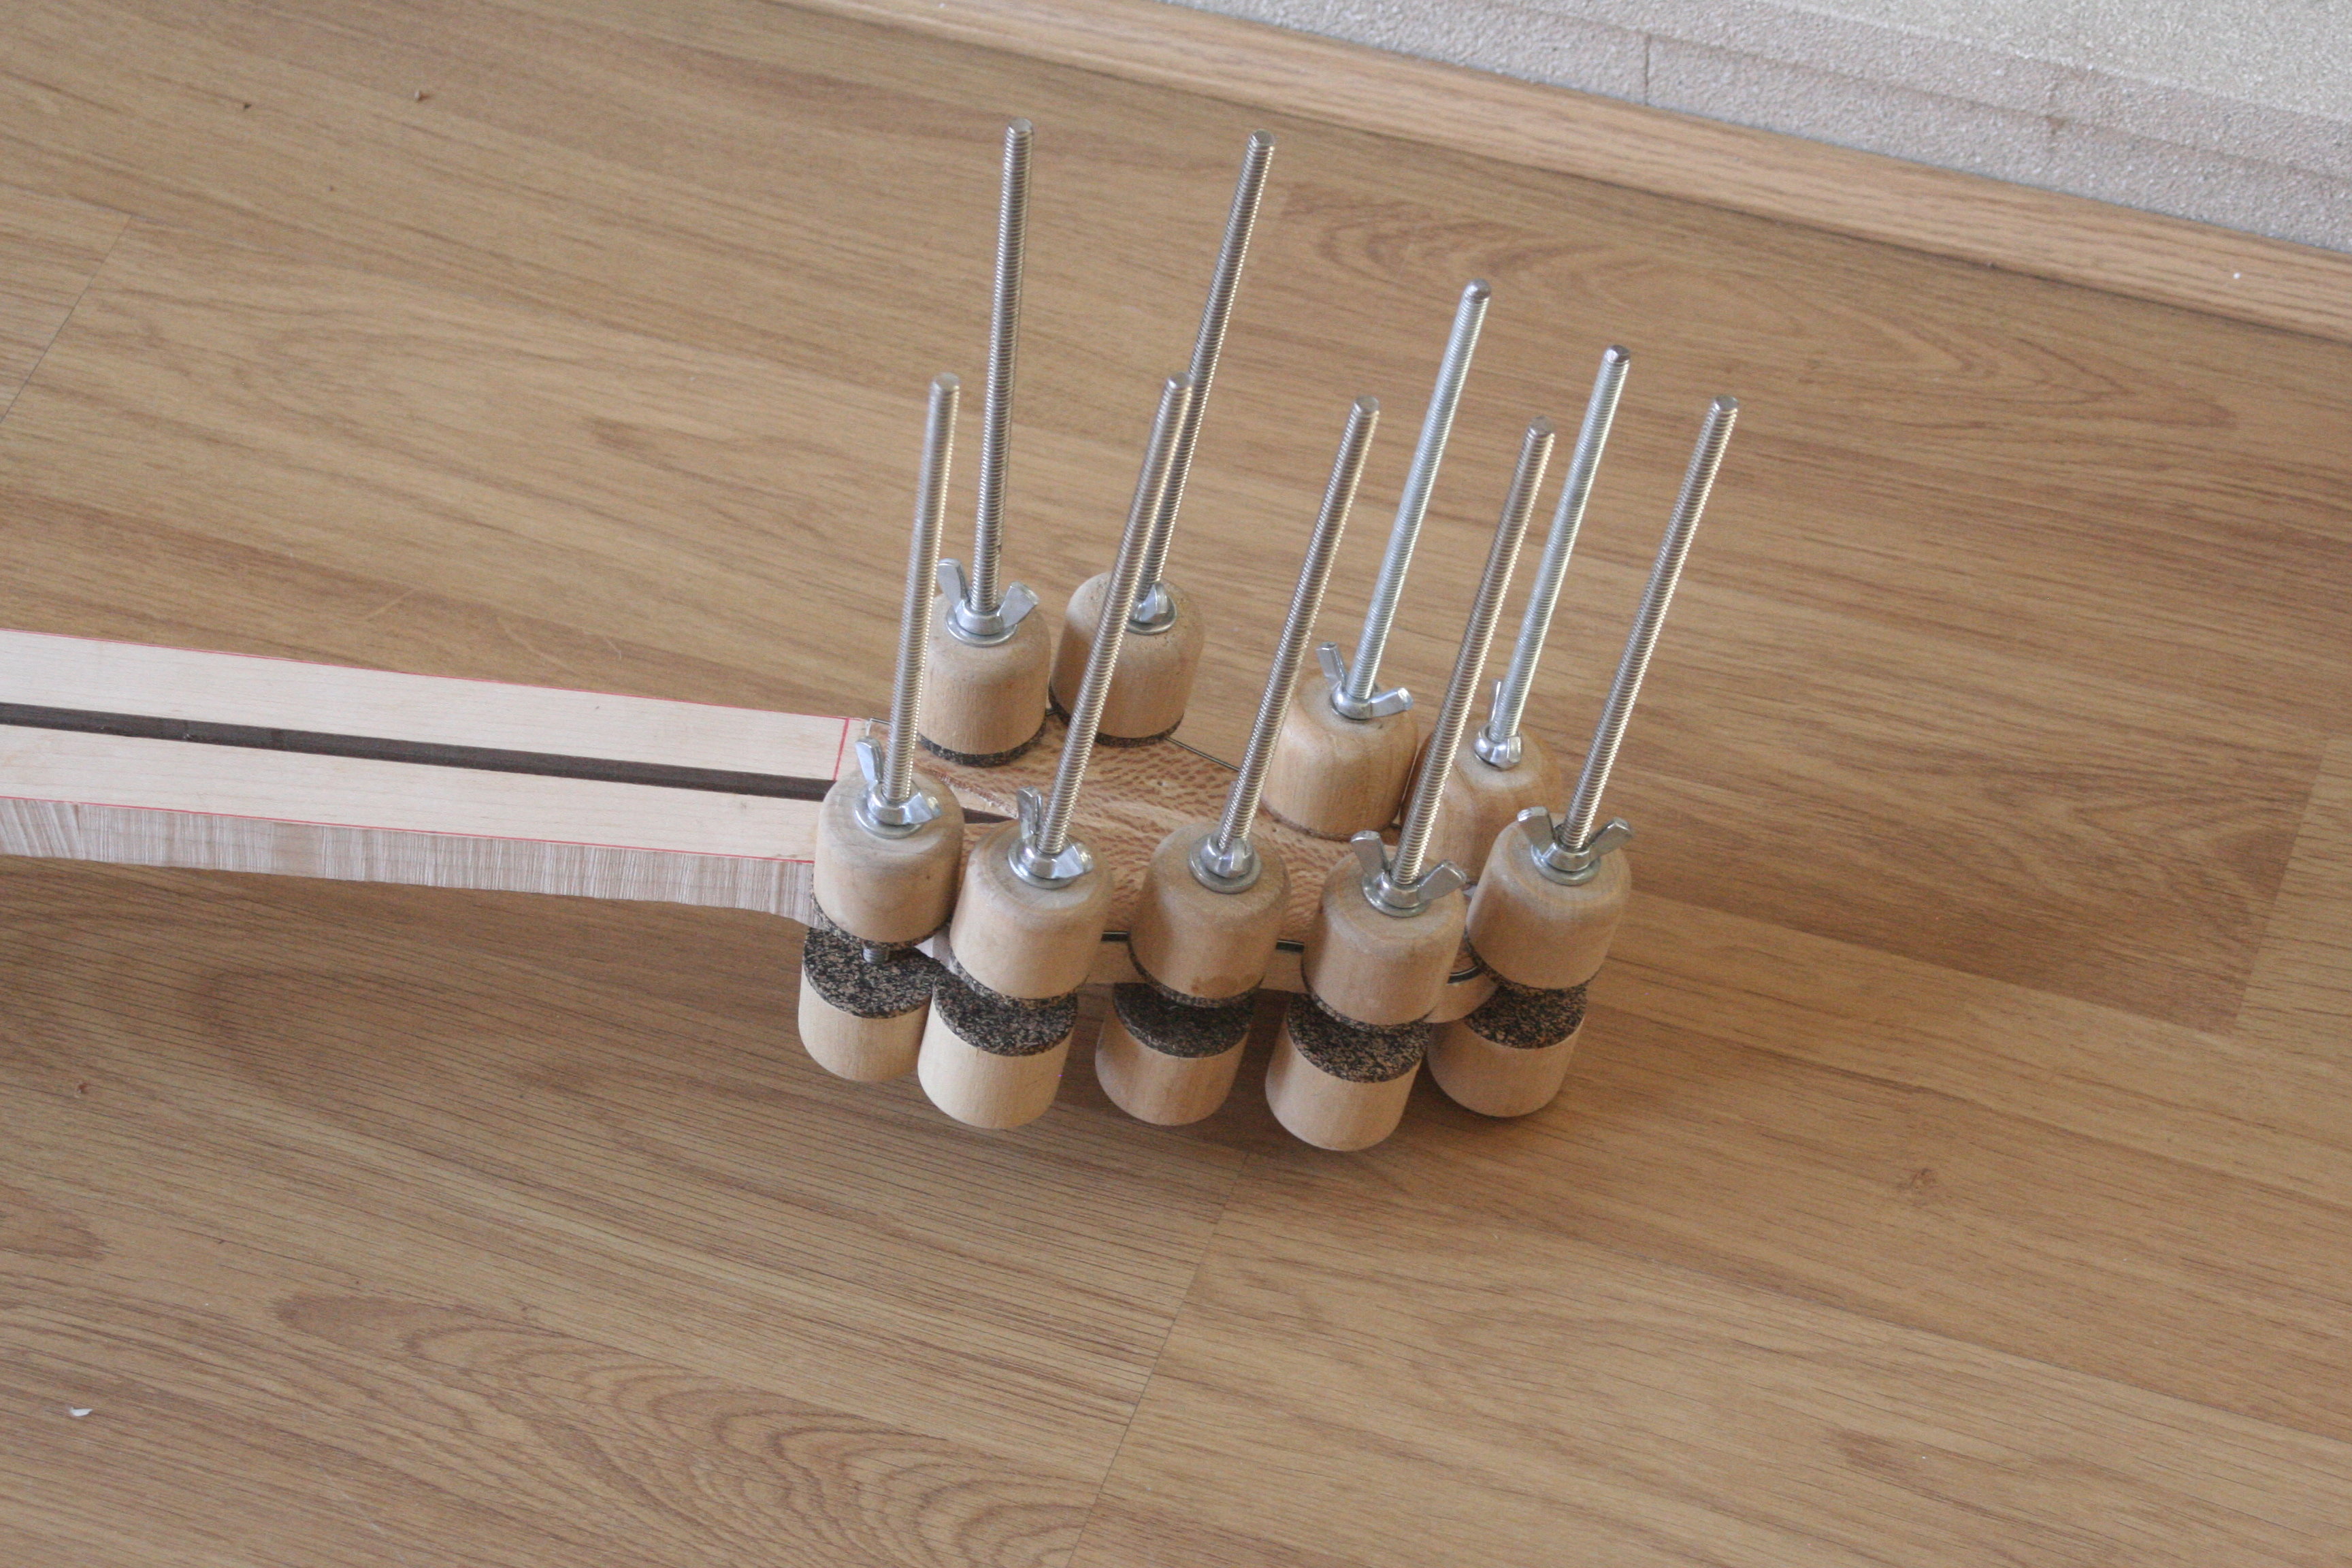
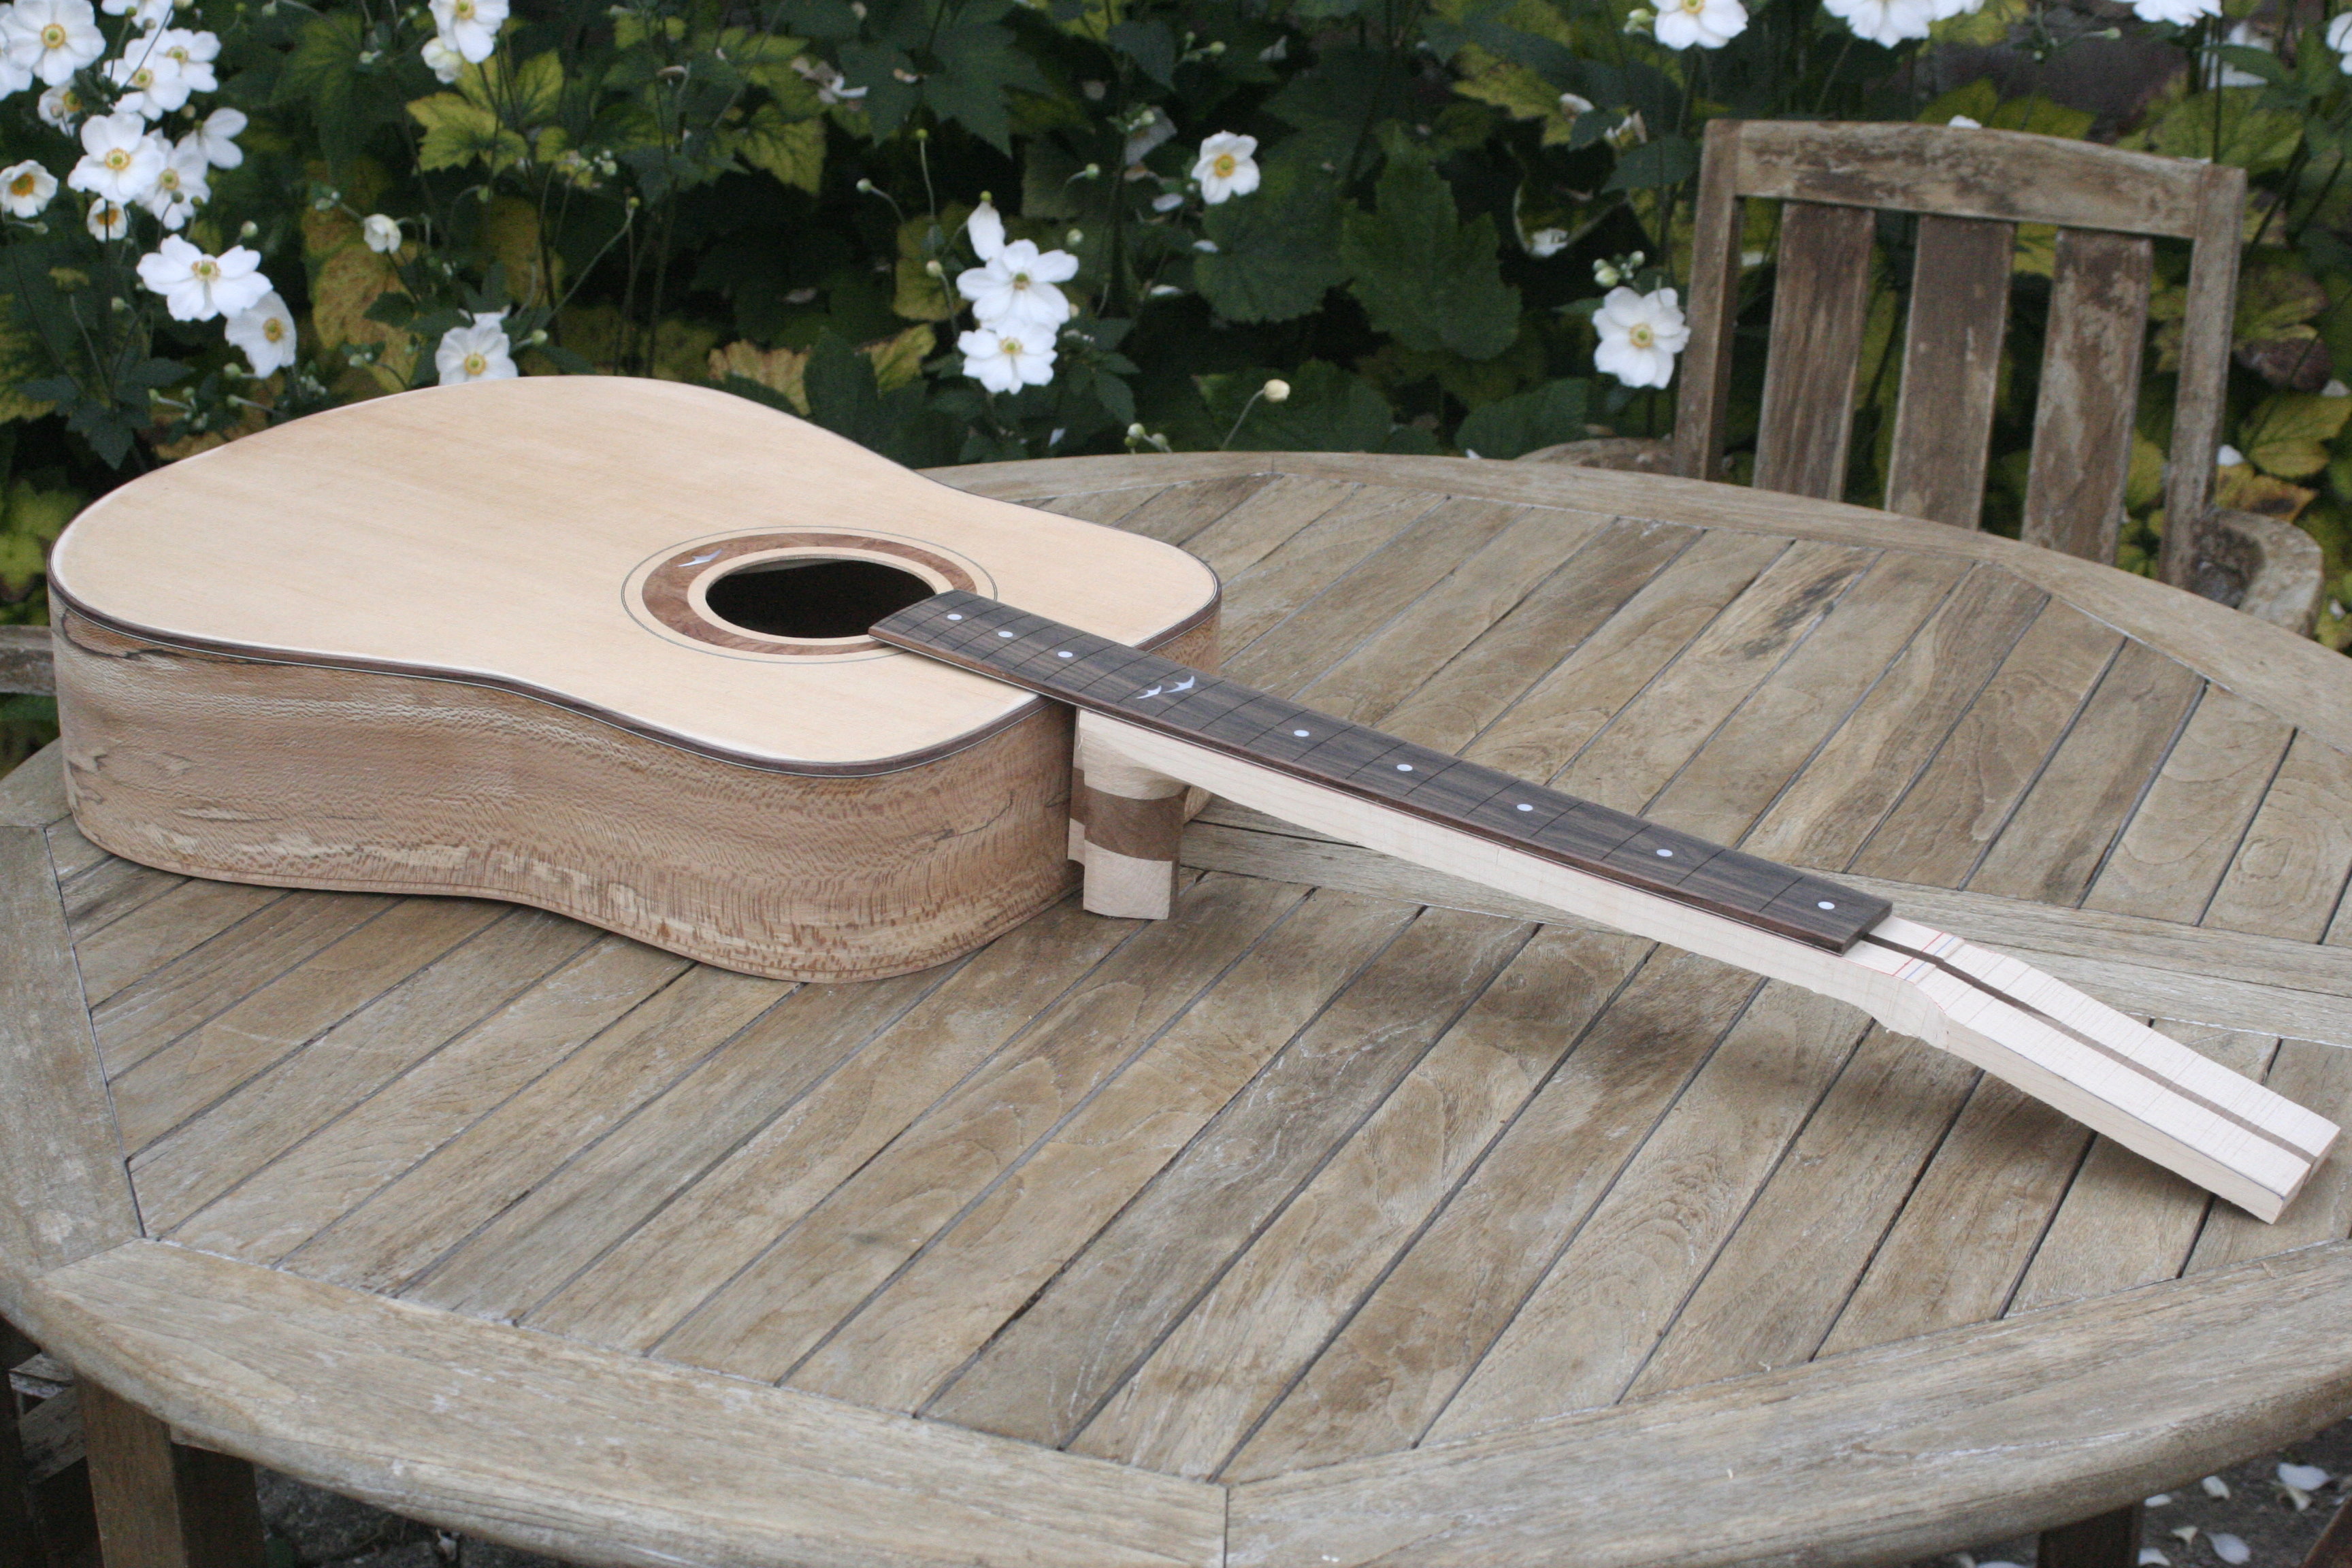
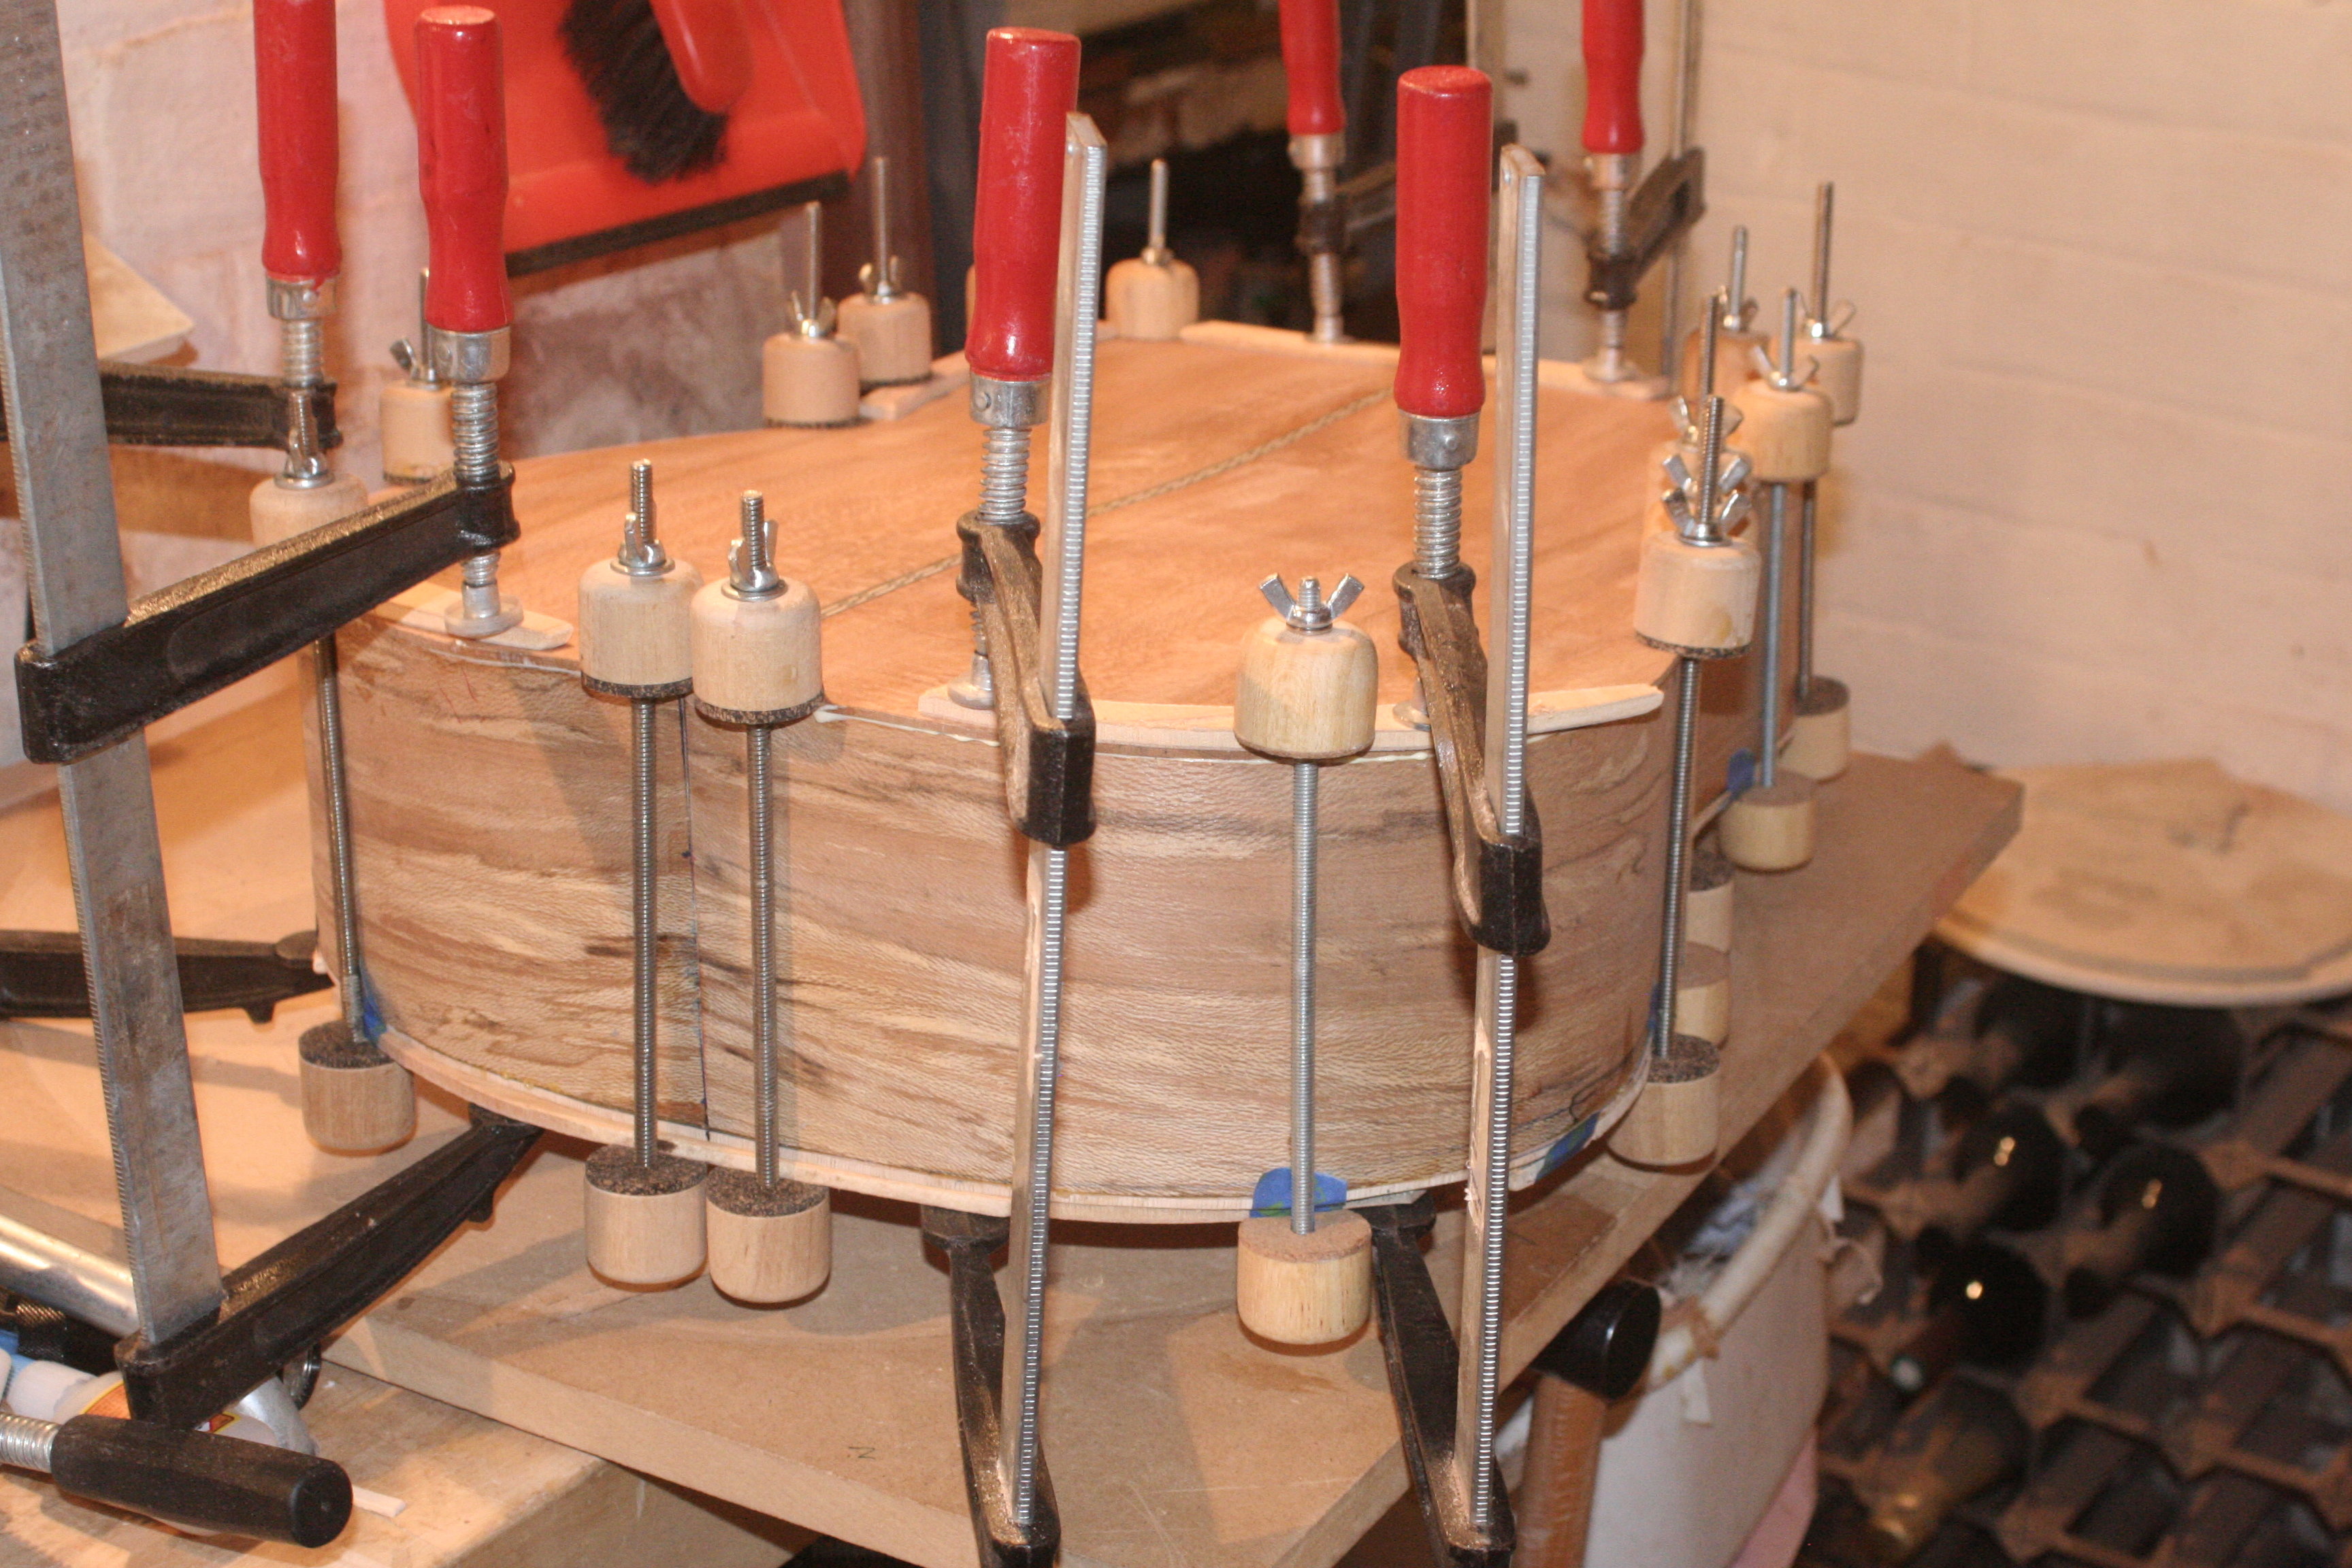
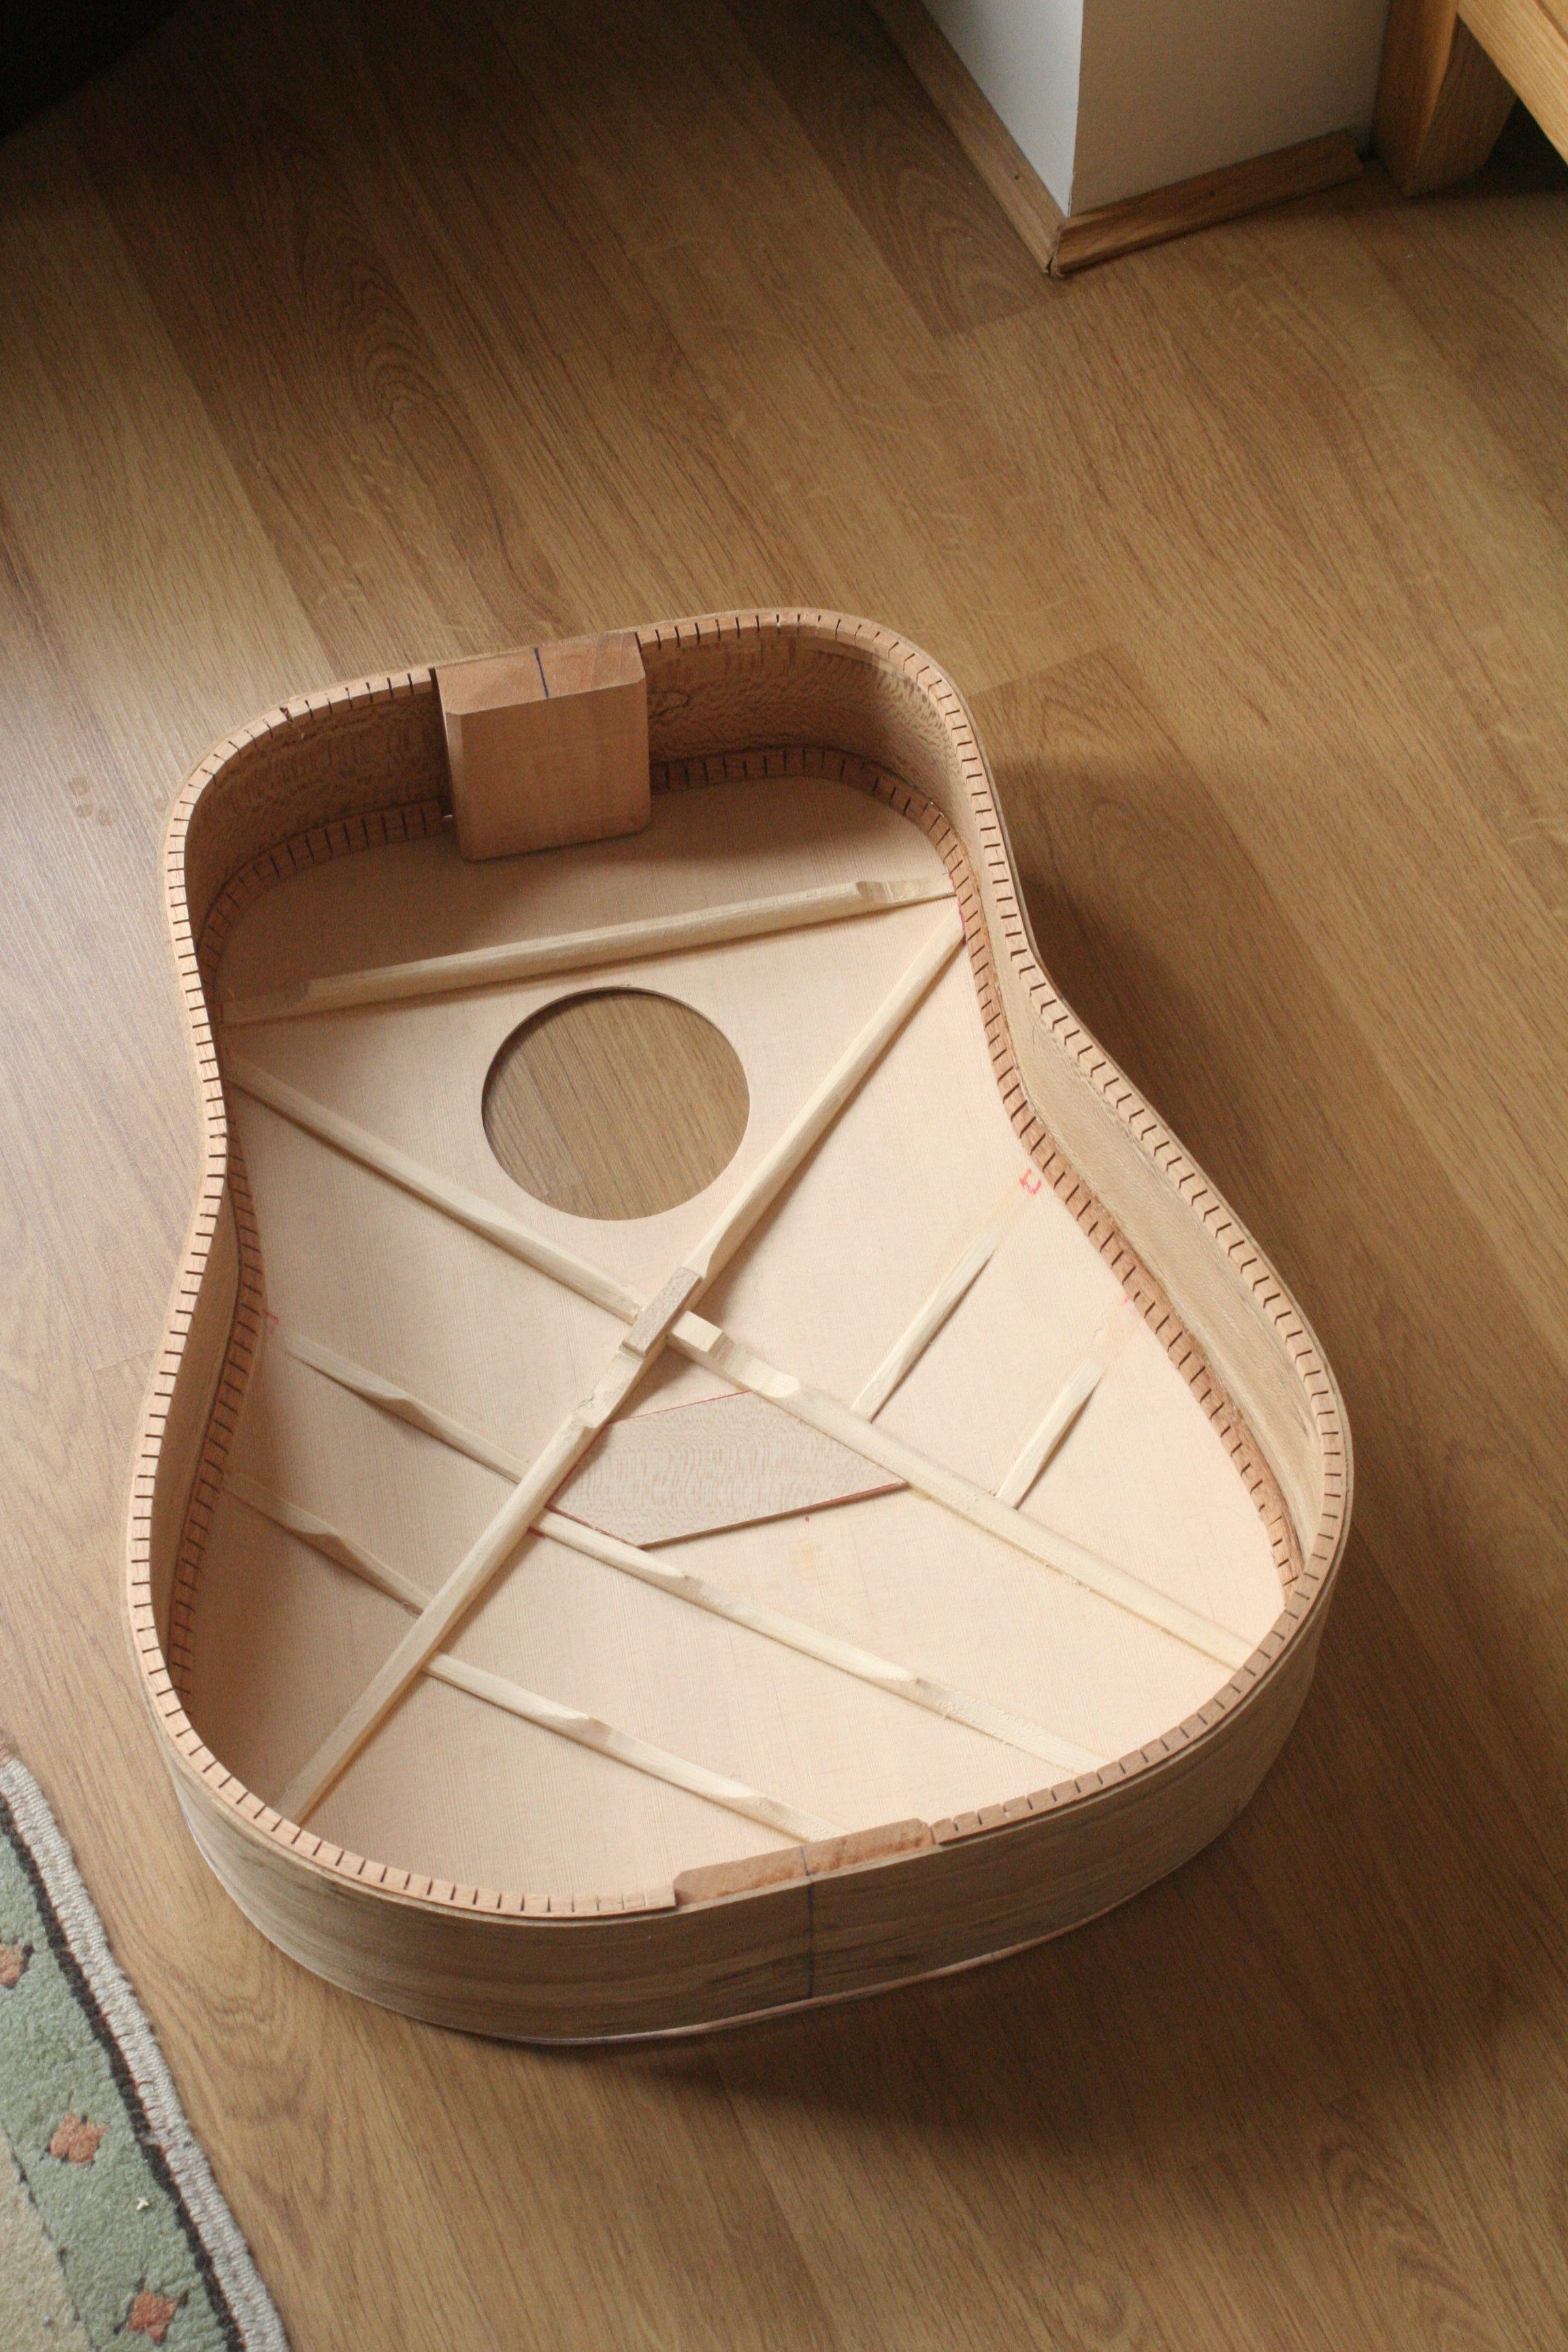
So, pretty much bringing it up to date... Before gluing the top and back on, it's the time to check the fit of things that will be very difficult once the chamber is sealed! Such as where the pre-amp is going to sit: Then, first, the top is glued: The back still has a little to do. The maple cross-grain strips are put on to strengthen the bookmatch join. There is quite a thickness difference in the body between the neck and the tail so I've clamped with a fulcrum strip to help that along while the strips dry: Then the all important label - almost impossible to put it in straight once the back is glued on! The top is now almost final thickness and, being spruce, is susceptible to damage, so I made some ply cauls, chamfered on the bottom edge, to clamp against: And then the back is glued Looks promising: Mind you - having done all that work on the body, the most scary bit is still to do - routing the binding channels and neck mortice slot. Could still end up as BBQ wood, yet!!!! And bringing right up to date with this afternoon, turned my attention to the neck and fretboard. All will be revealed tomorrow: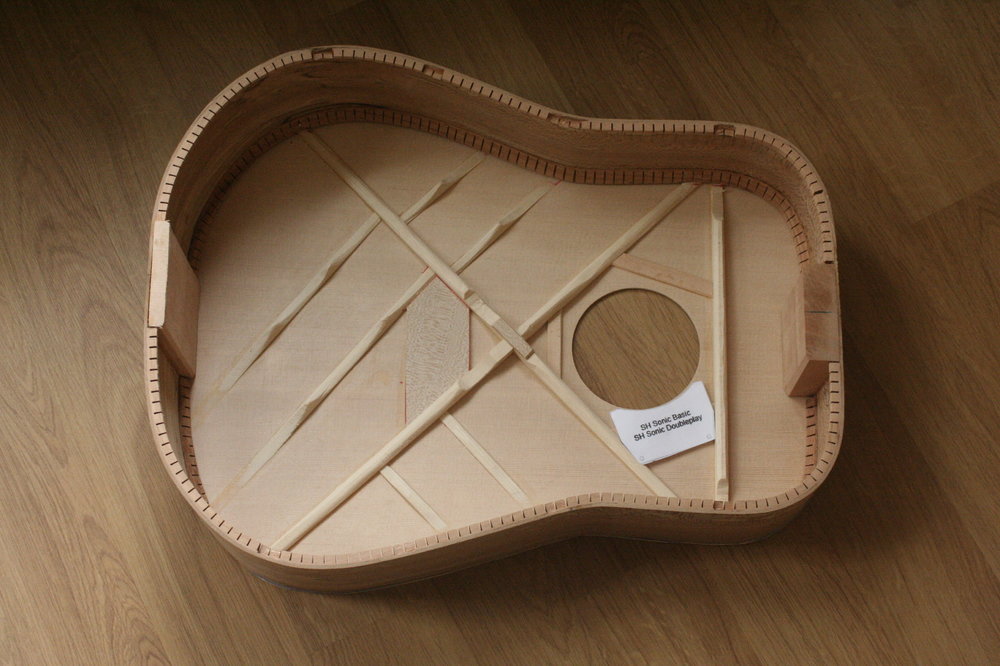


-
Wow! A neck repair on a cello????? Goodness - that takes some skill The partscaster looks pretty darned good too Any further details?
-
Finished pics! A Bitsa Dreadnought for me :)
Andyjr1515 replied to Andyjr1515's topic in Build Diaries
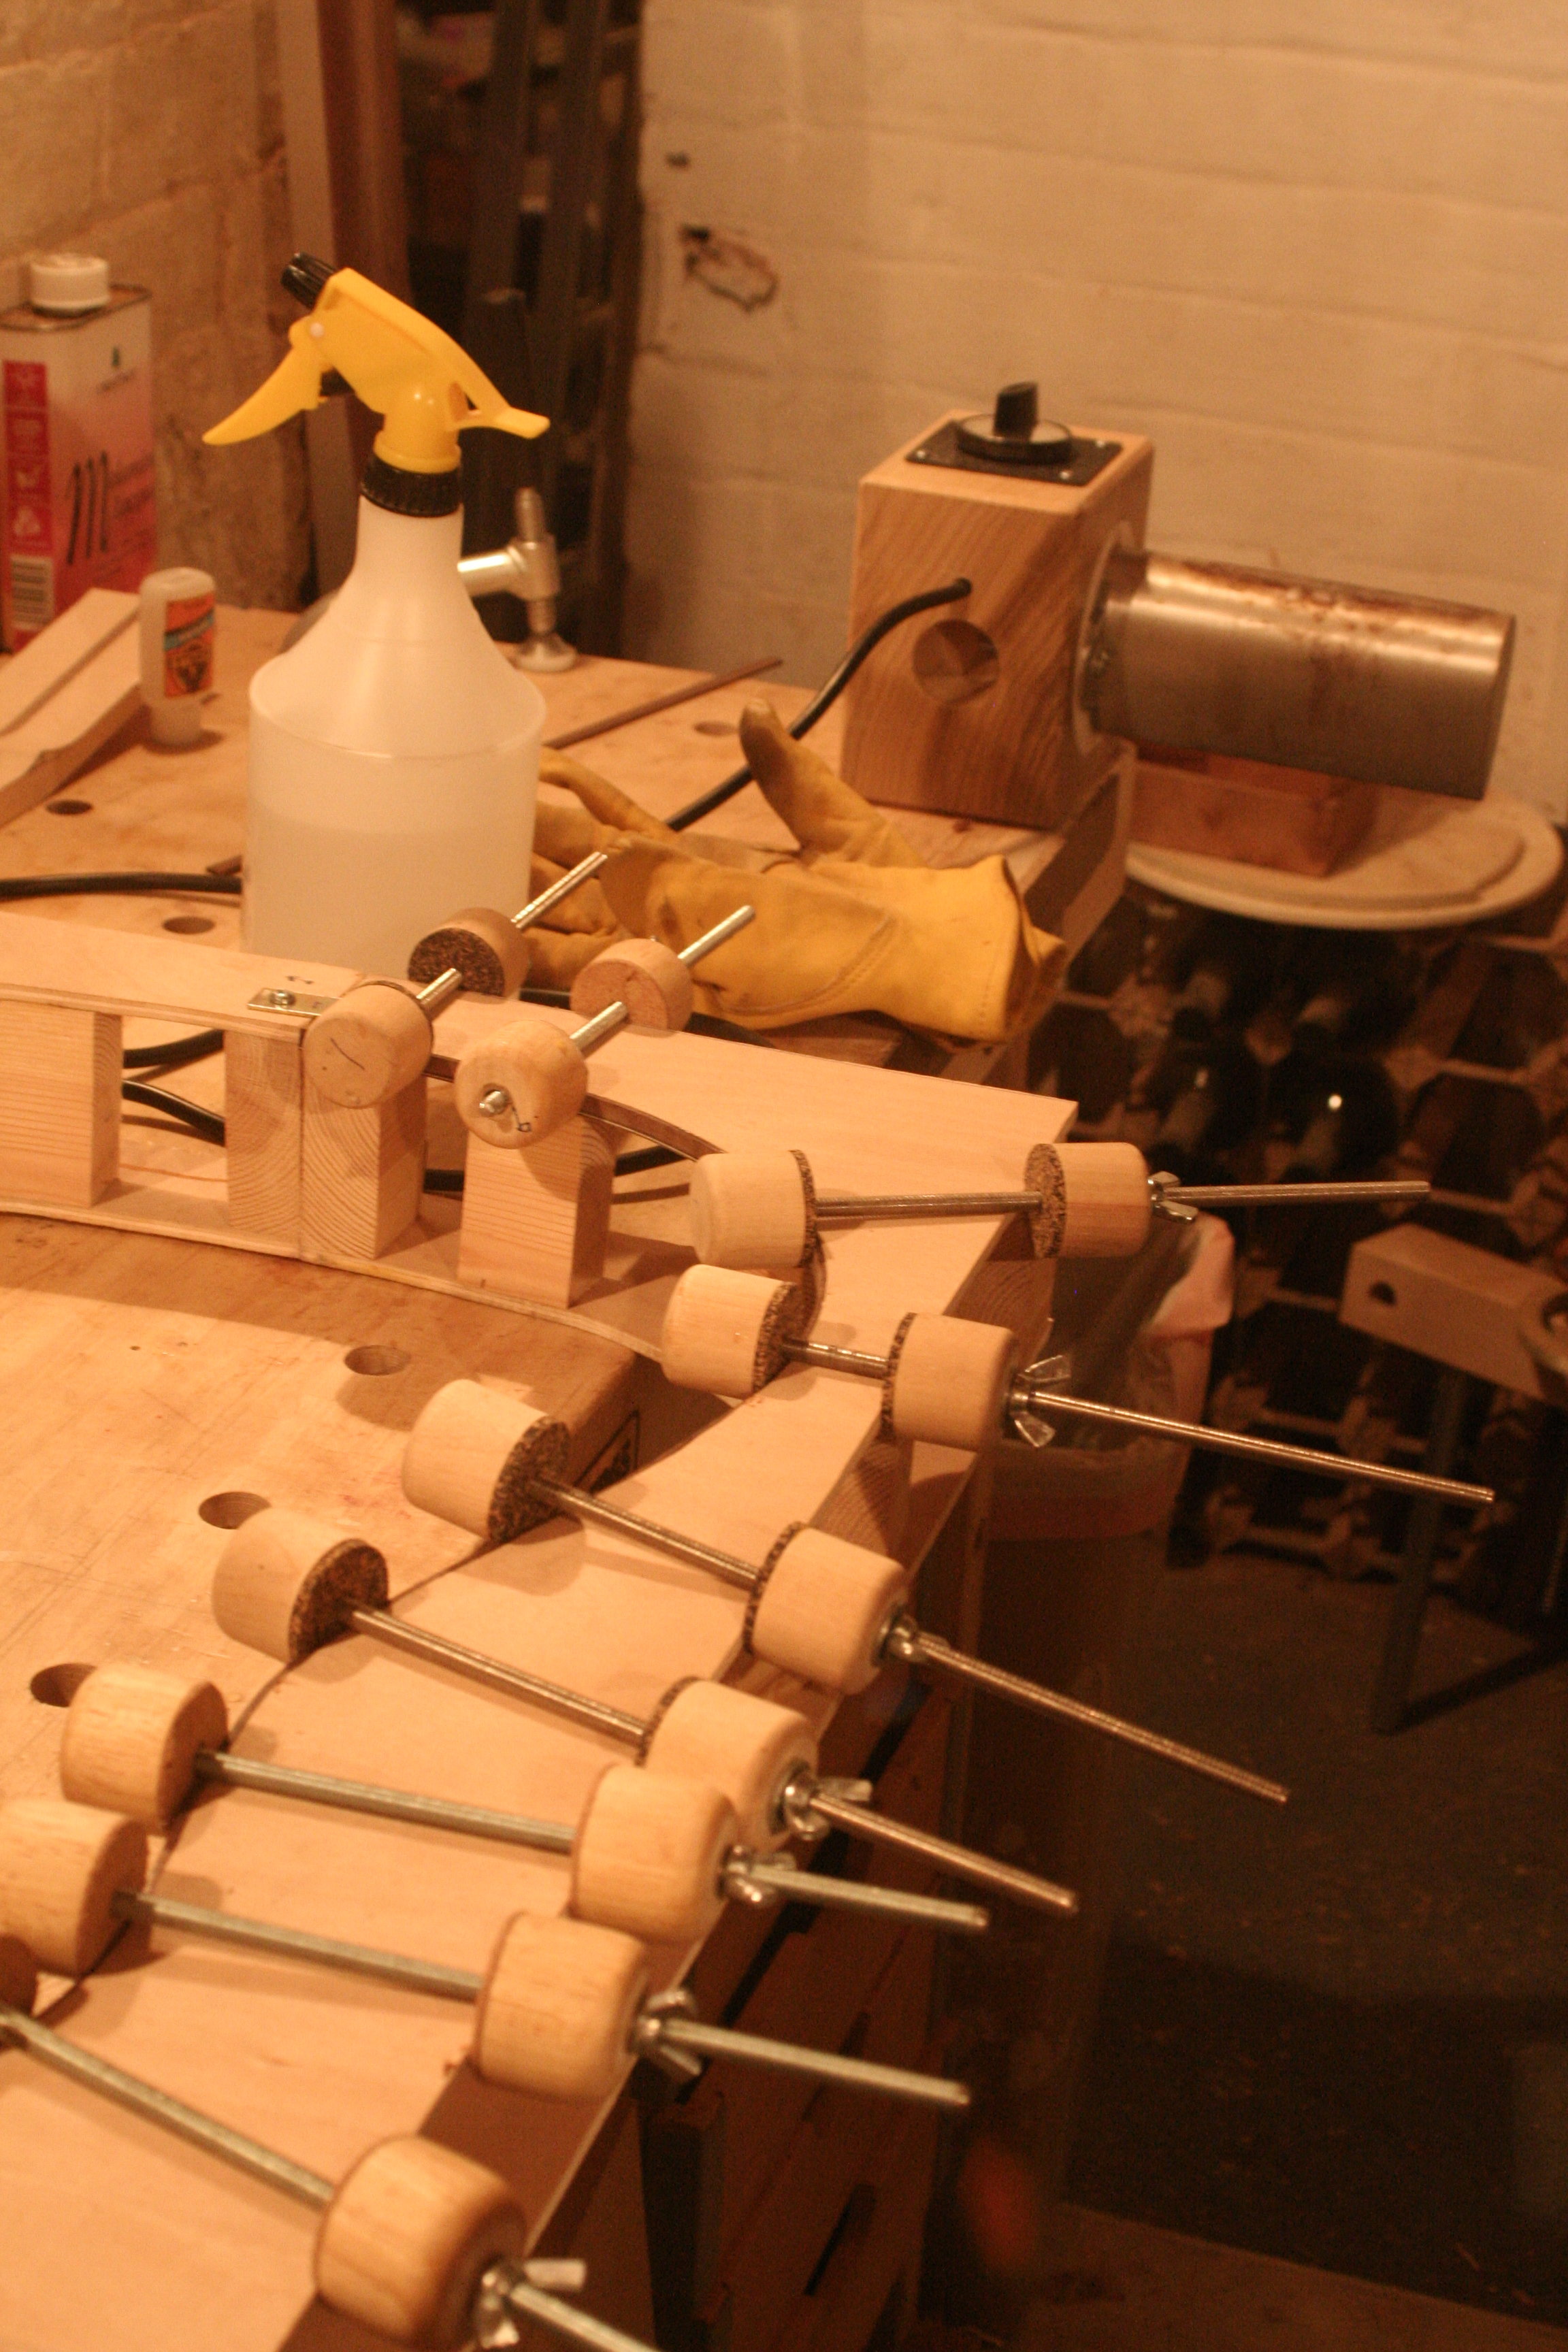
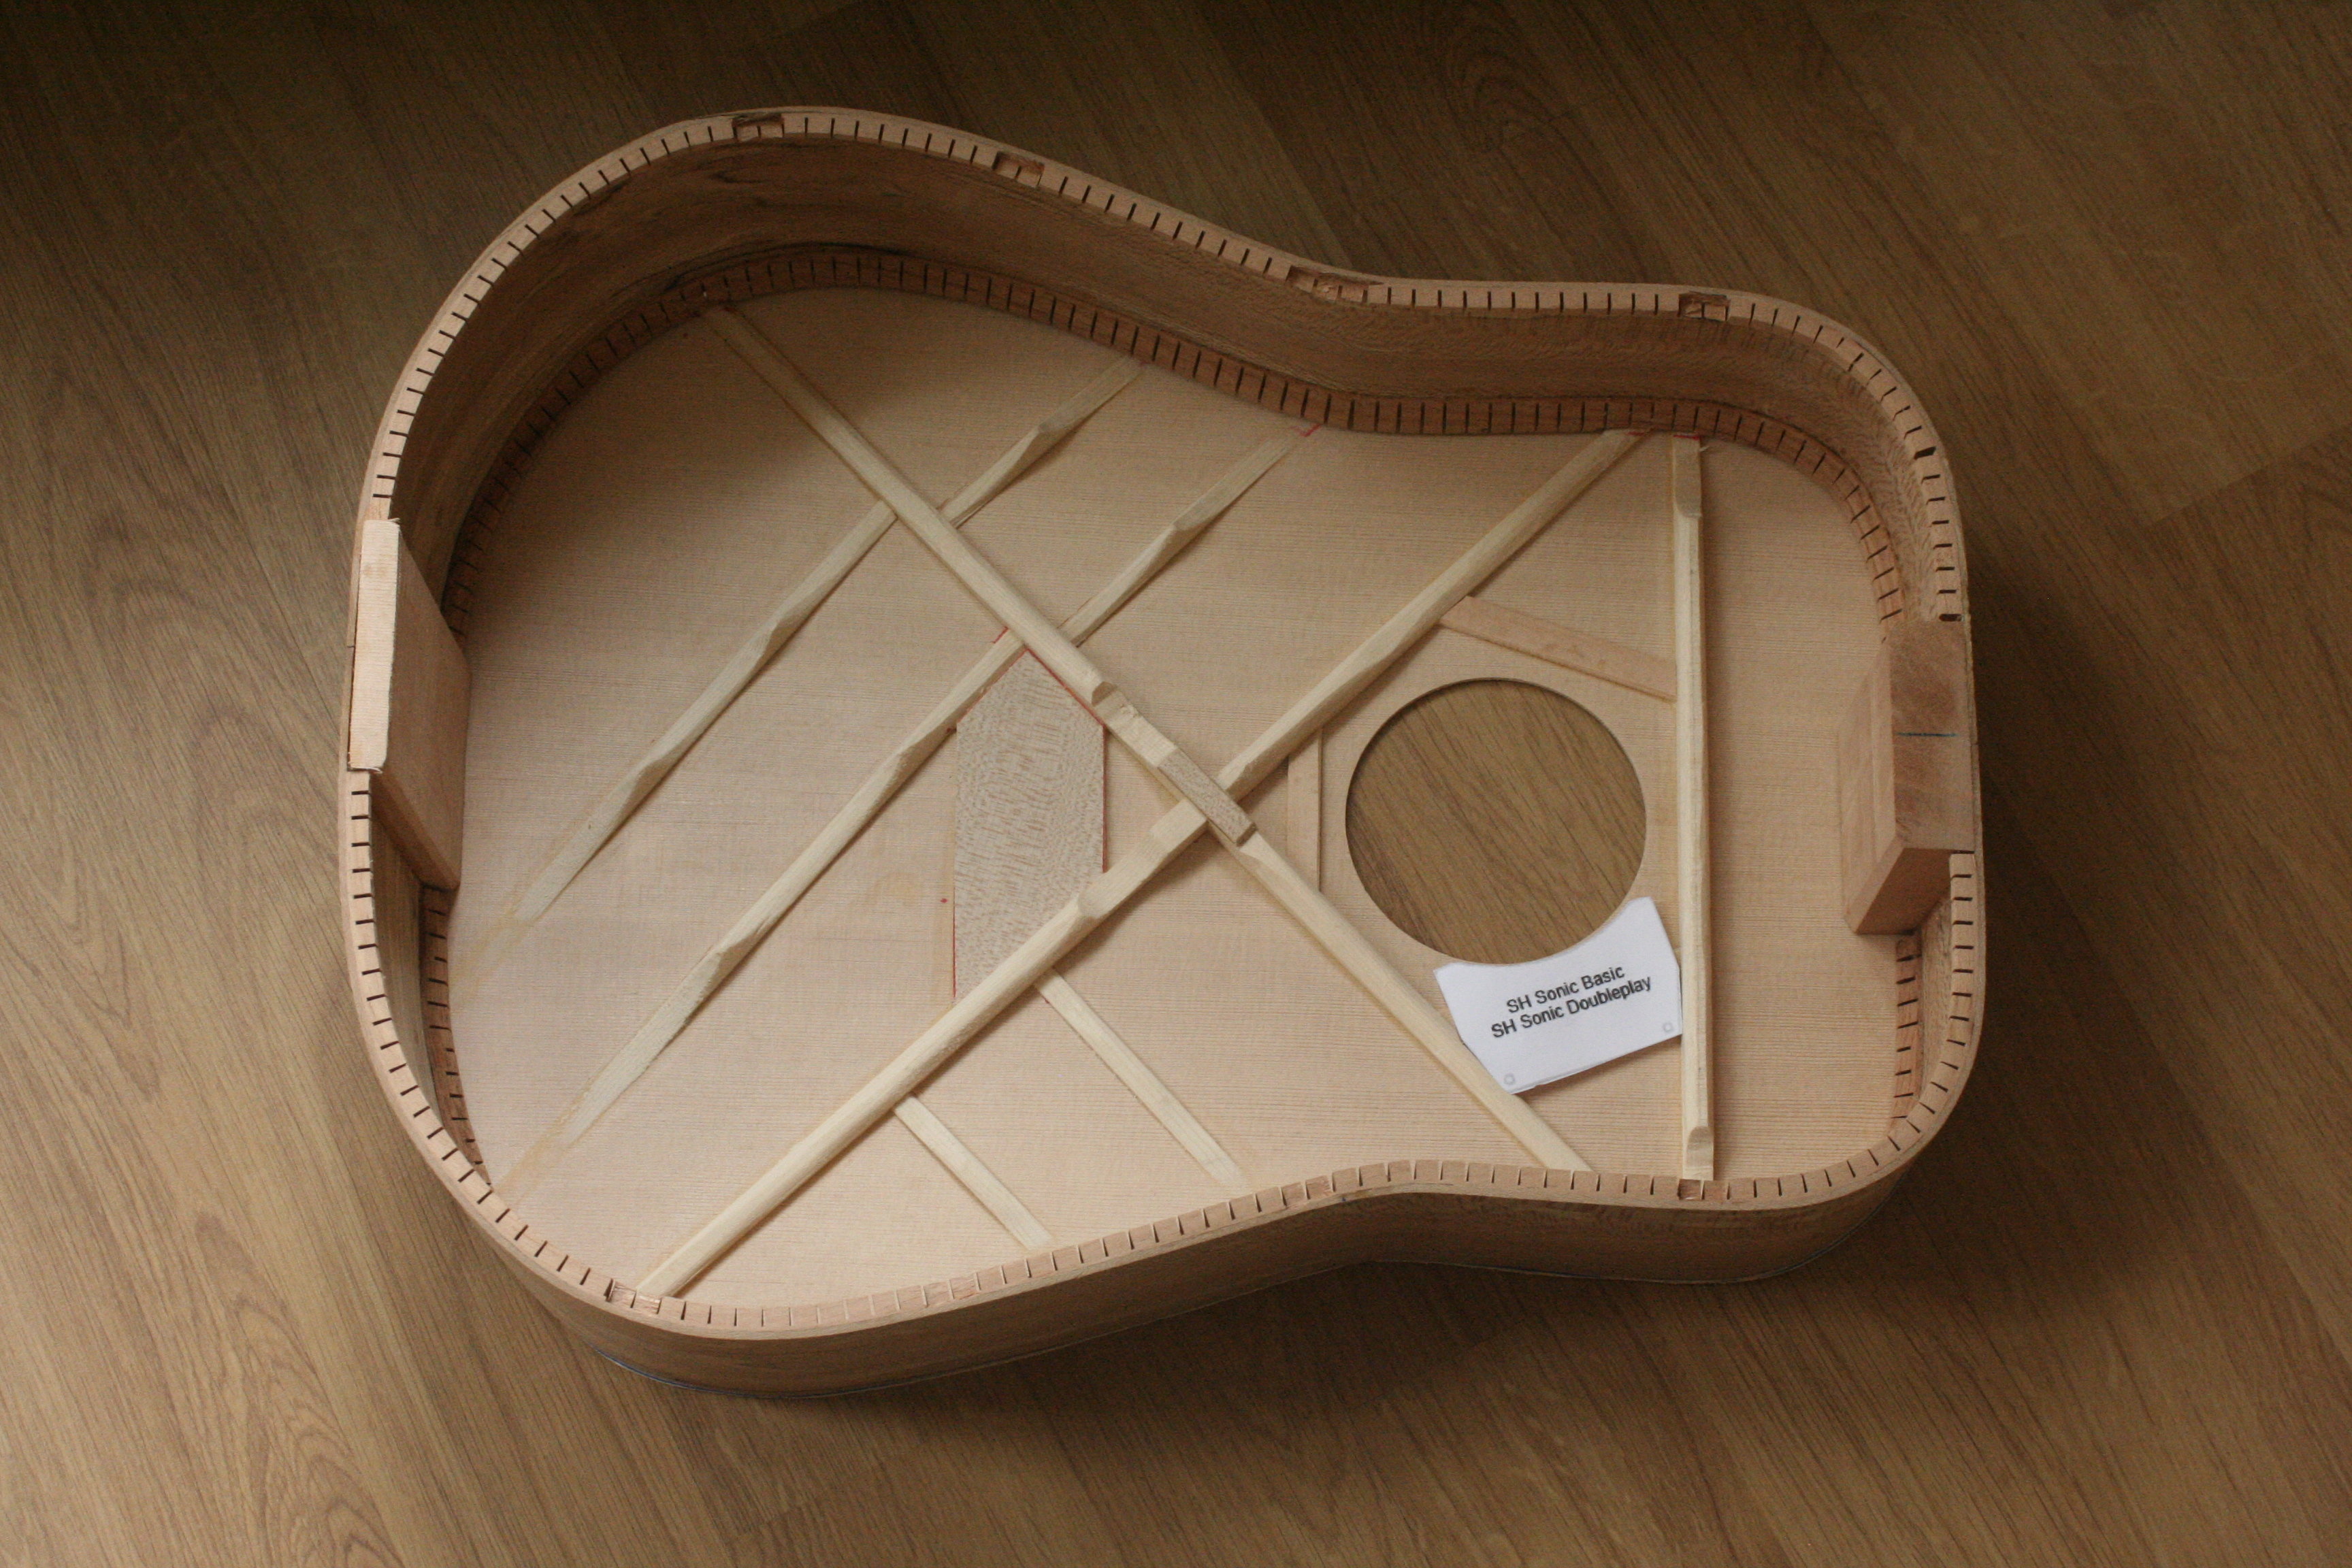
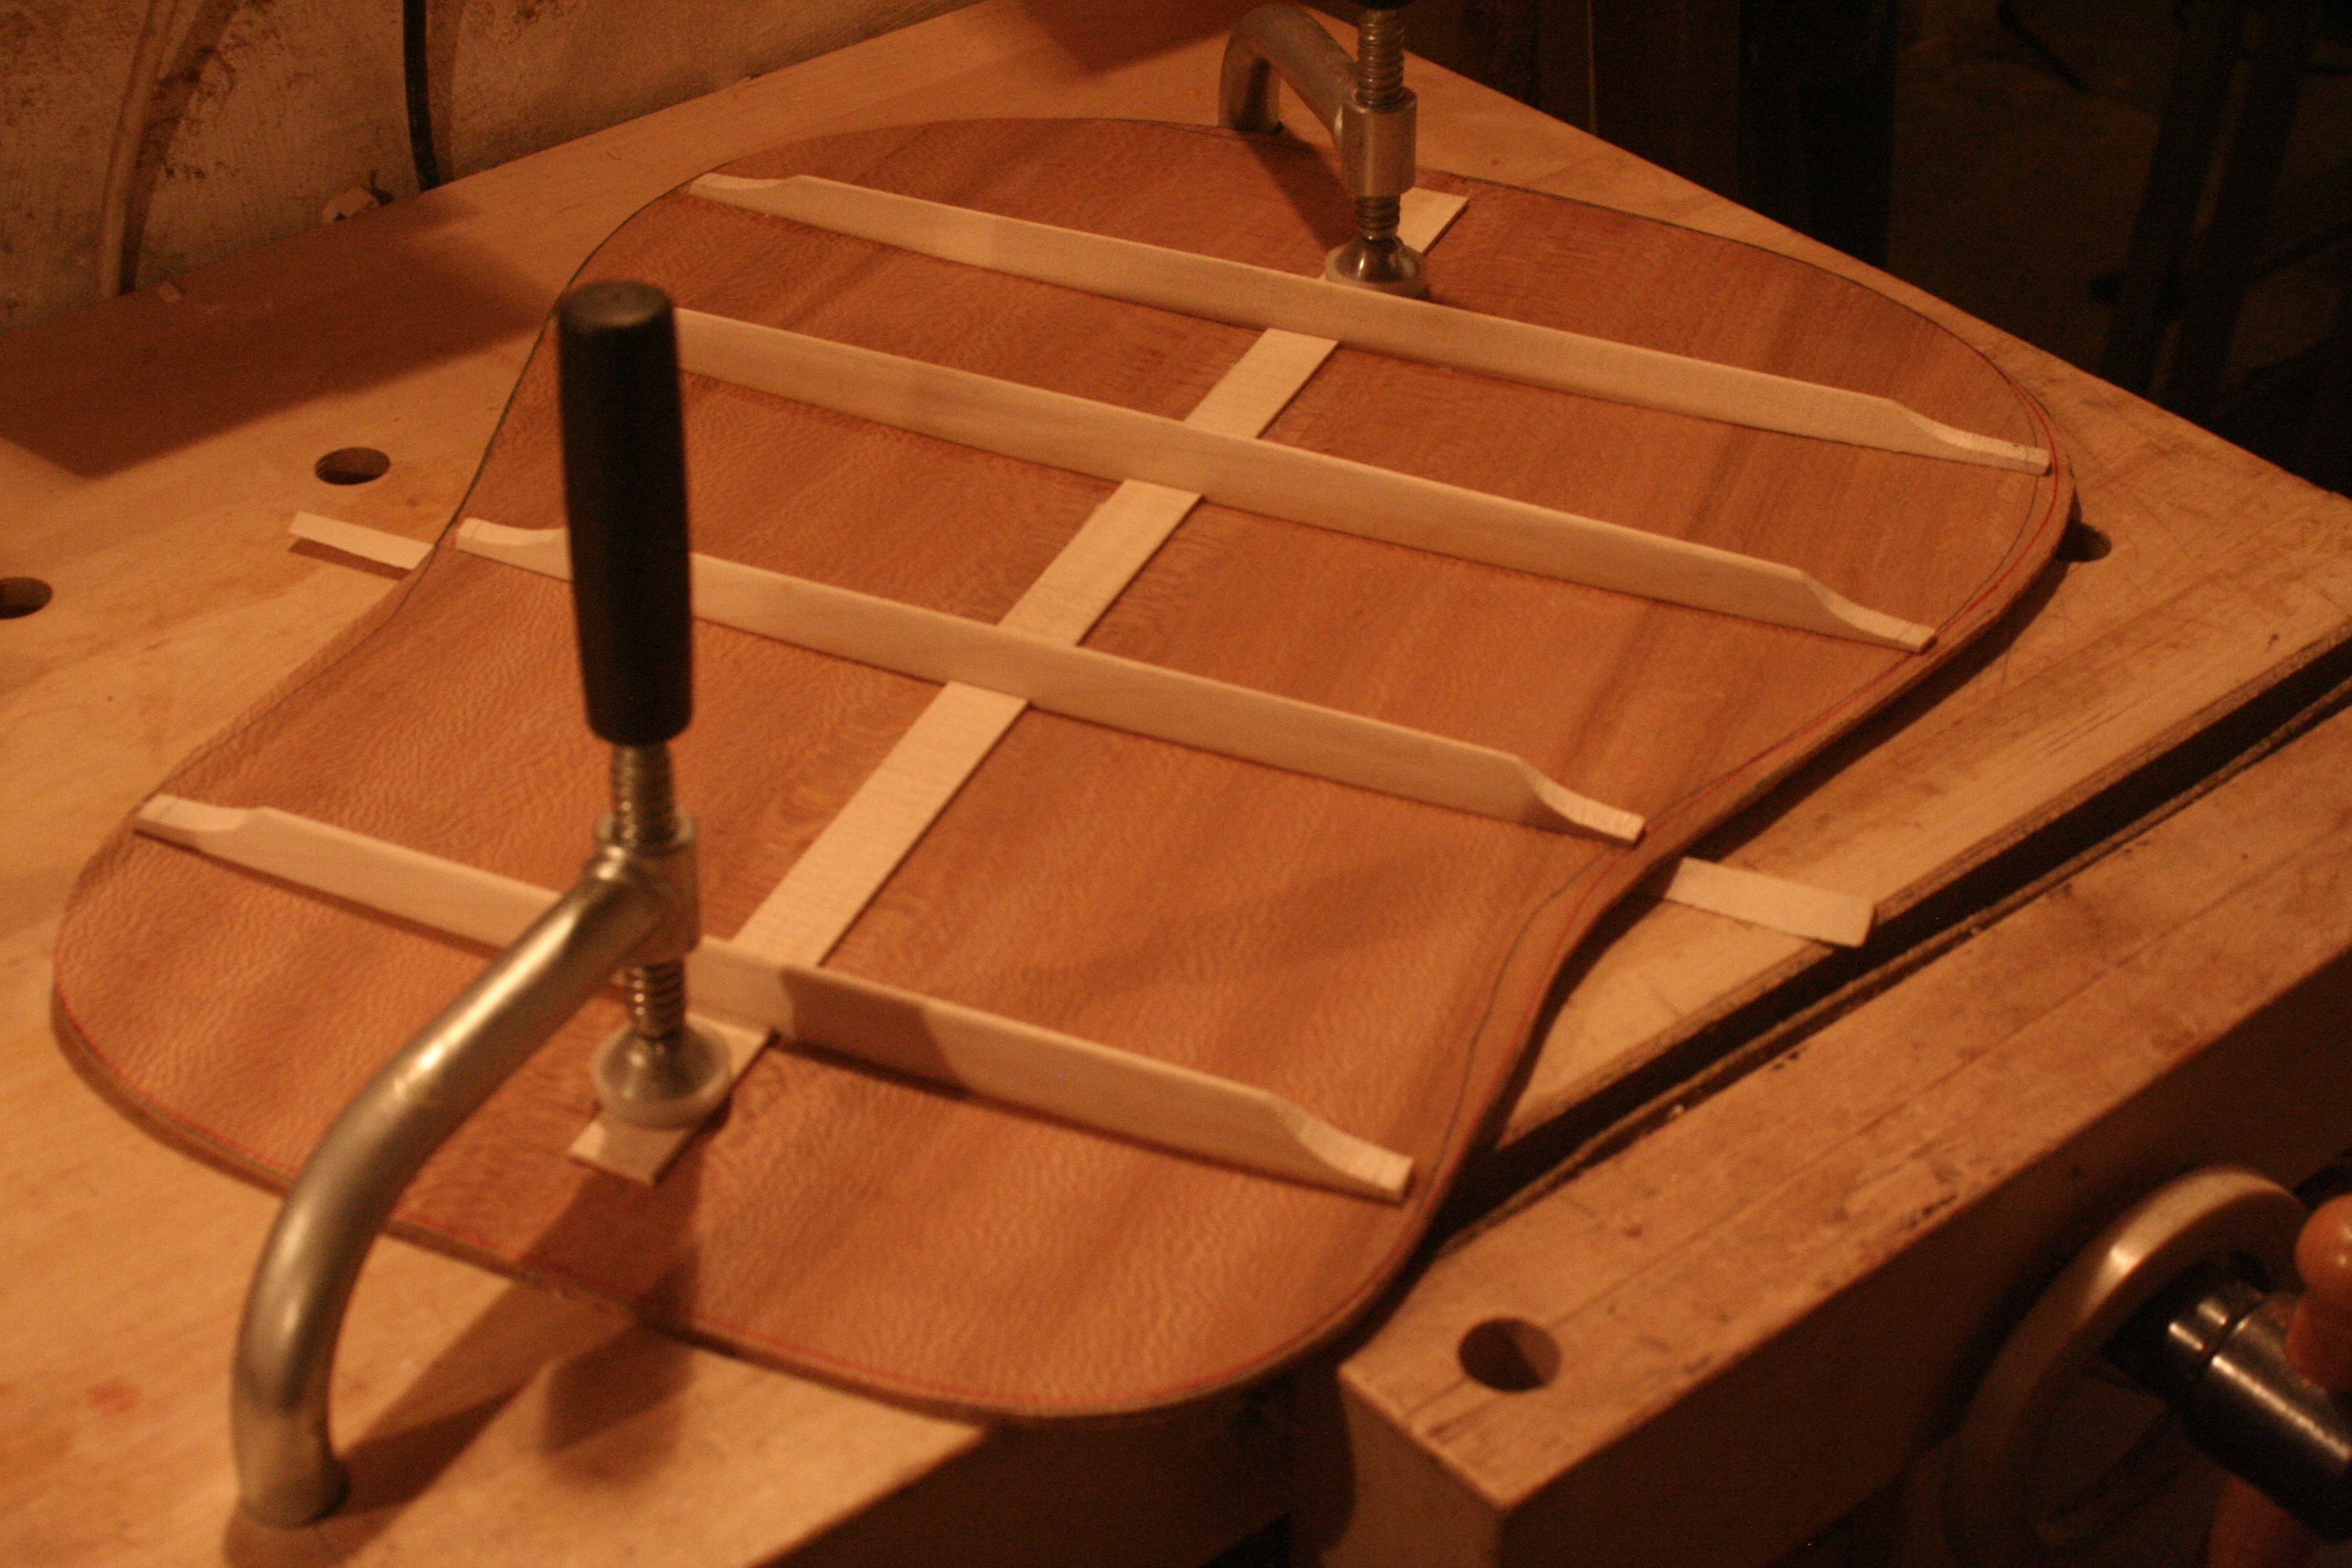
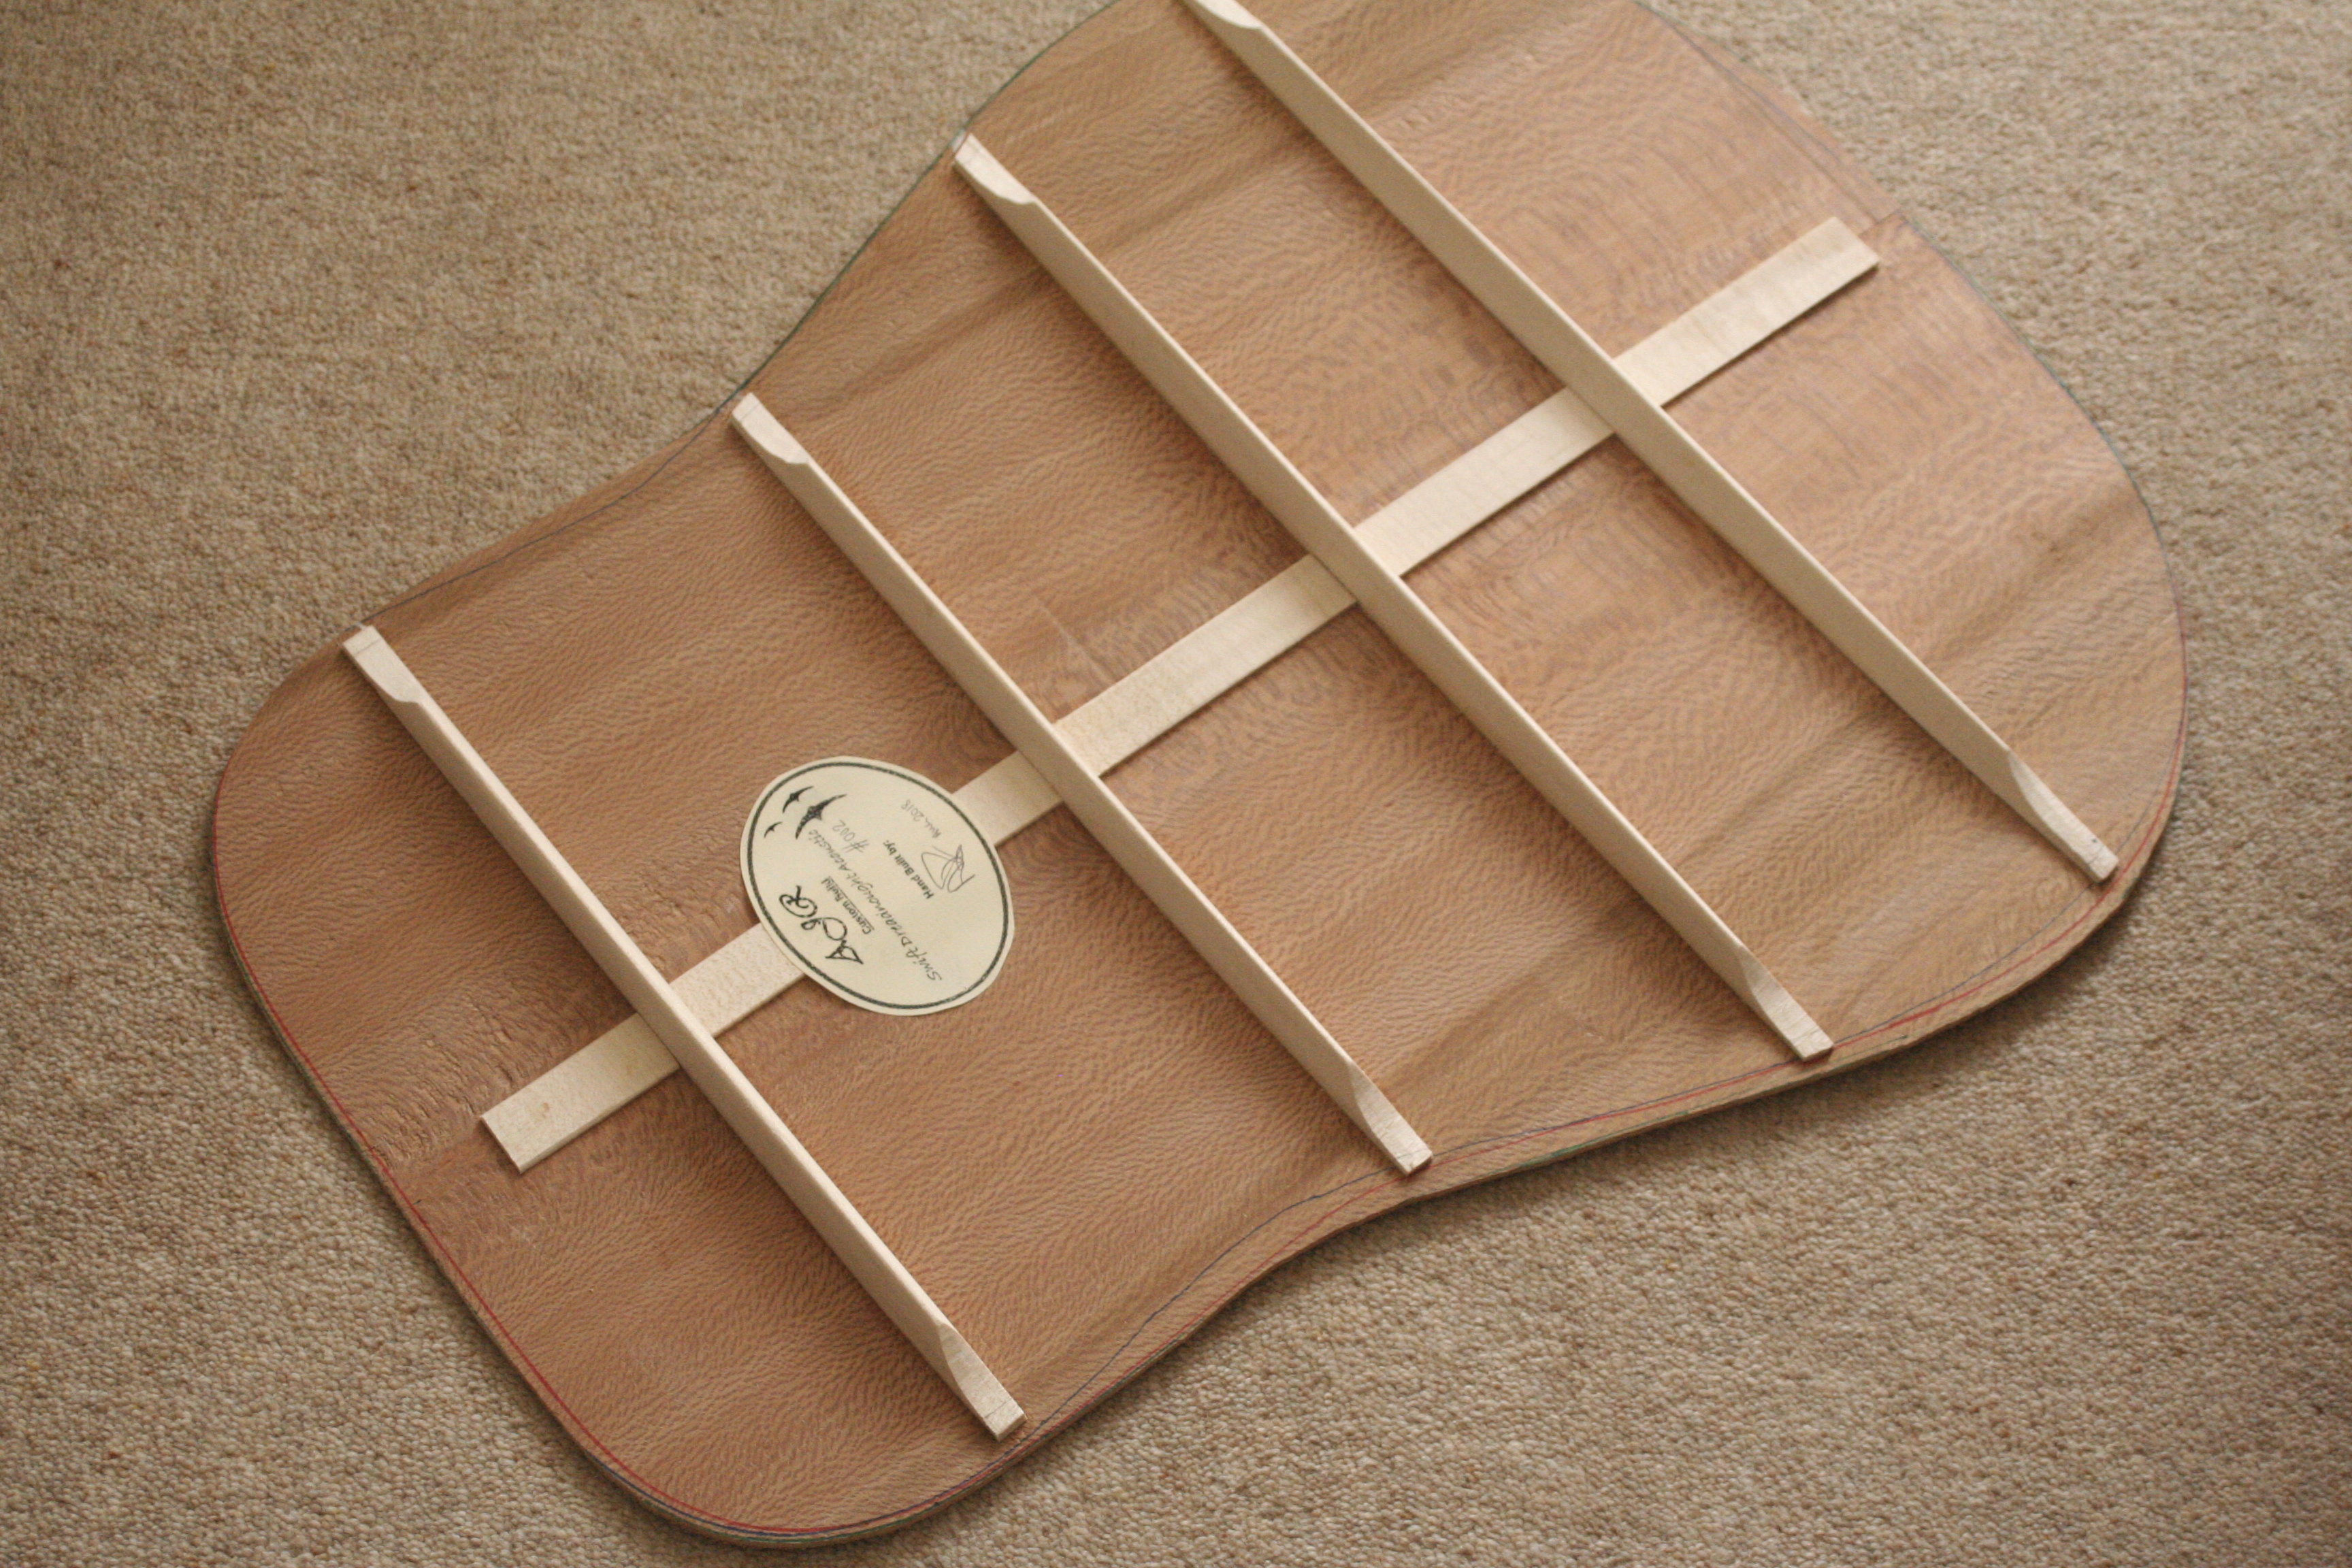
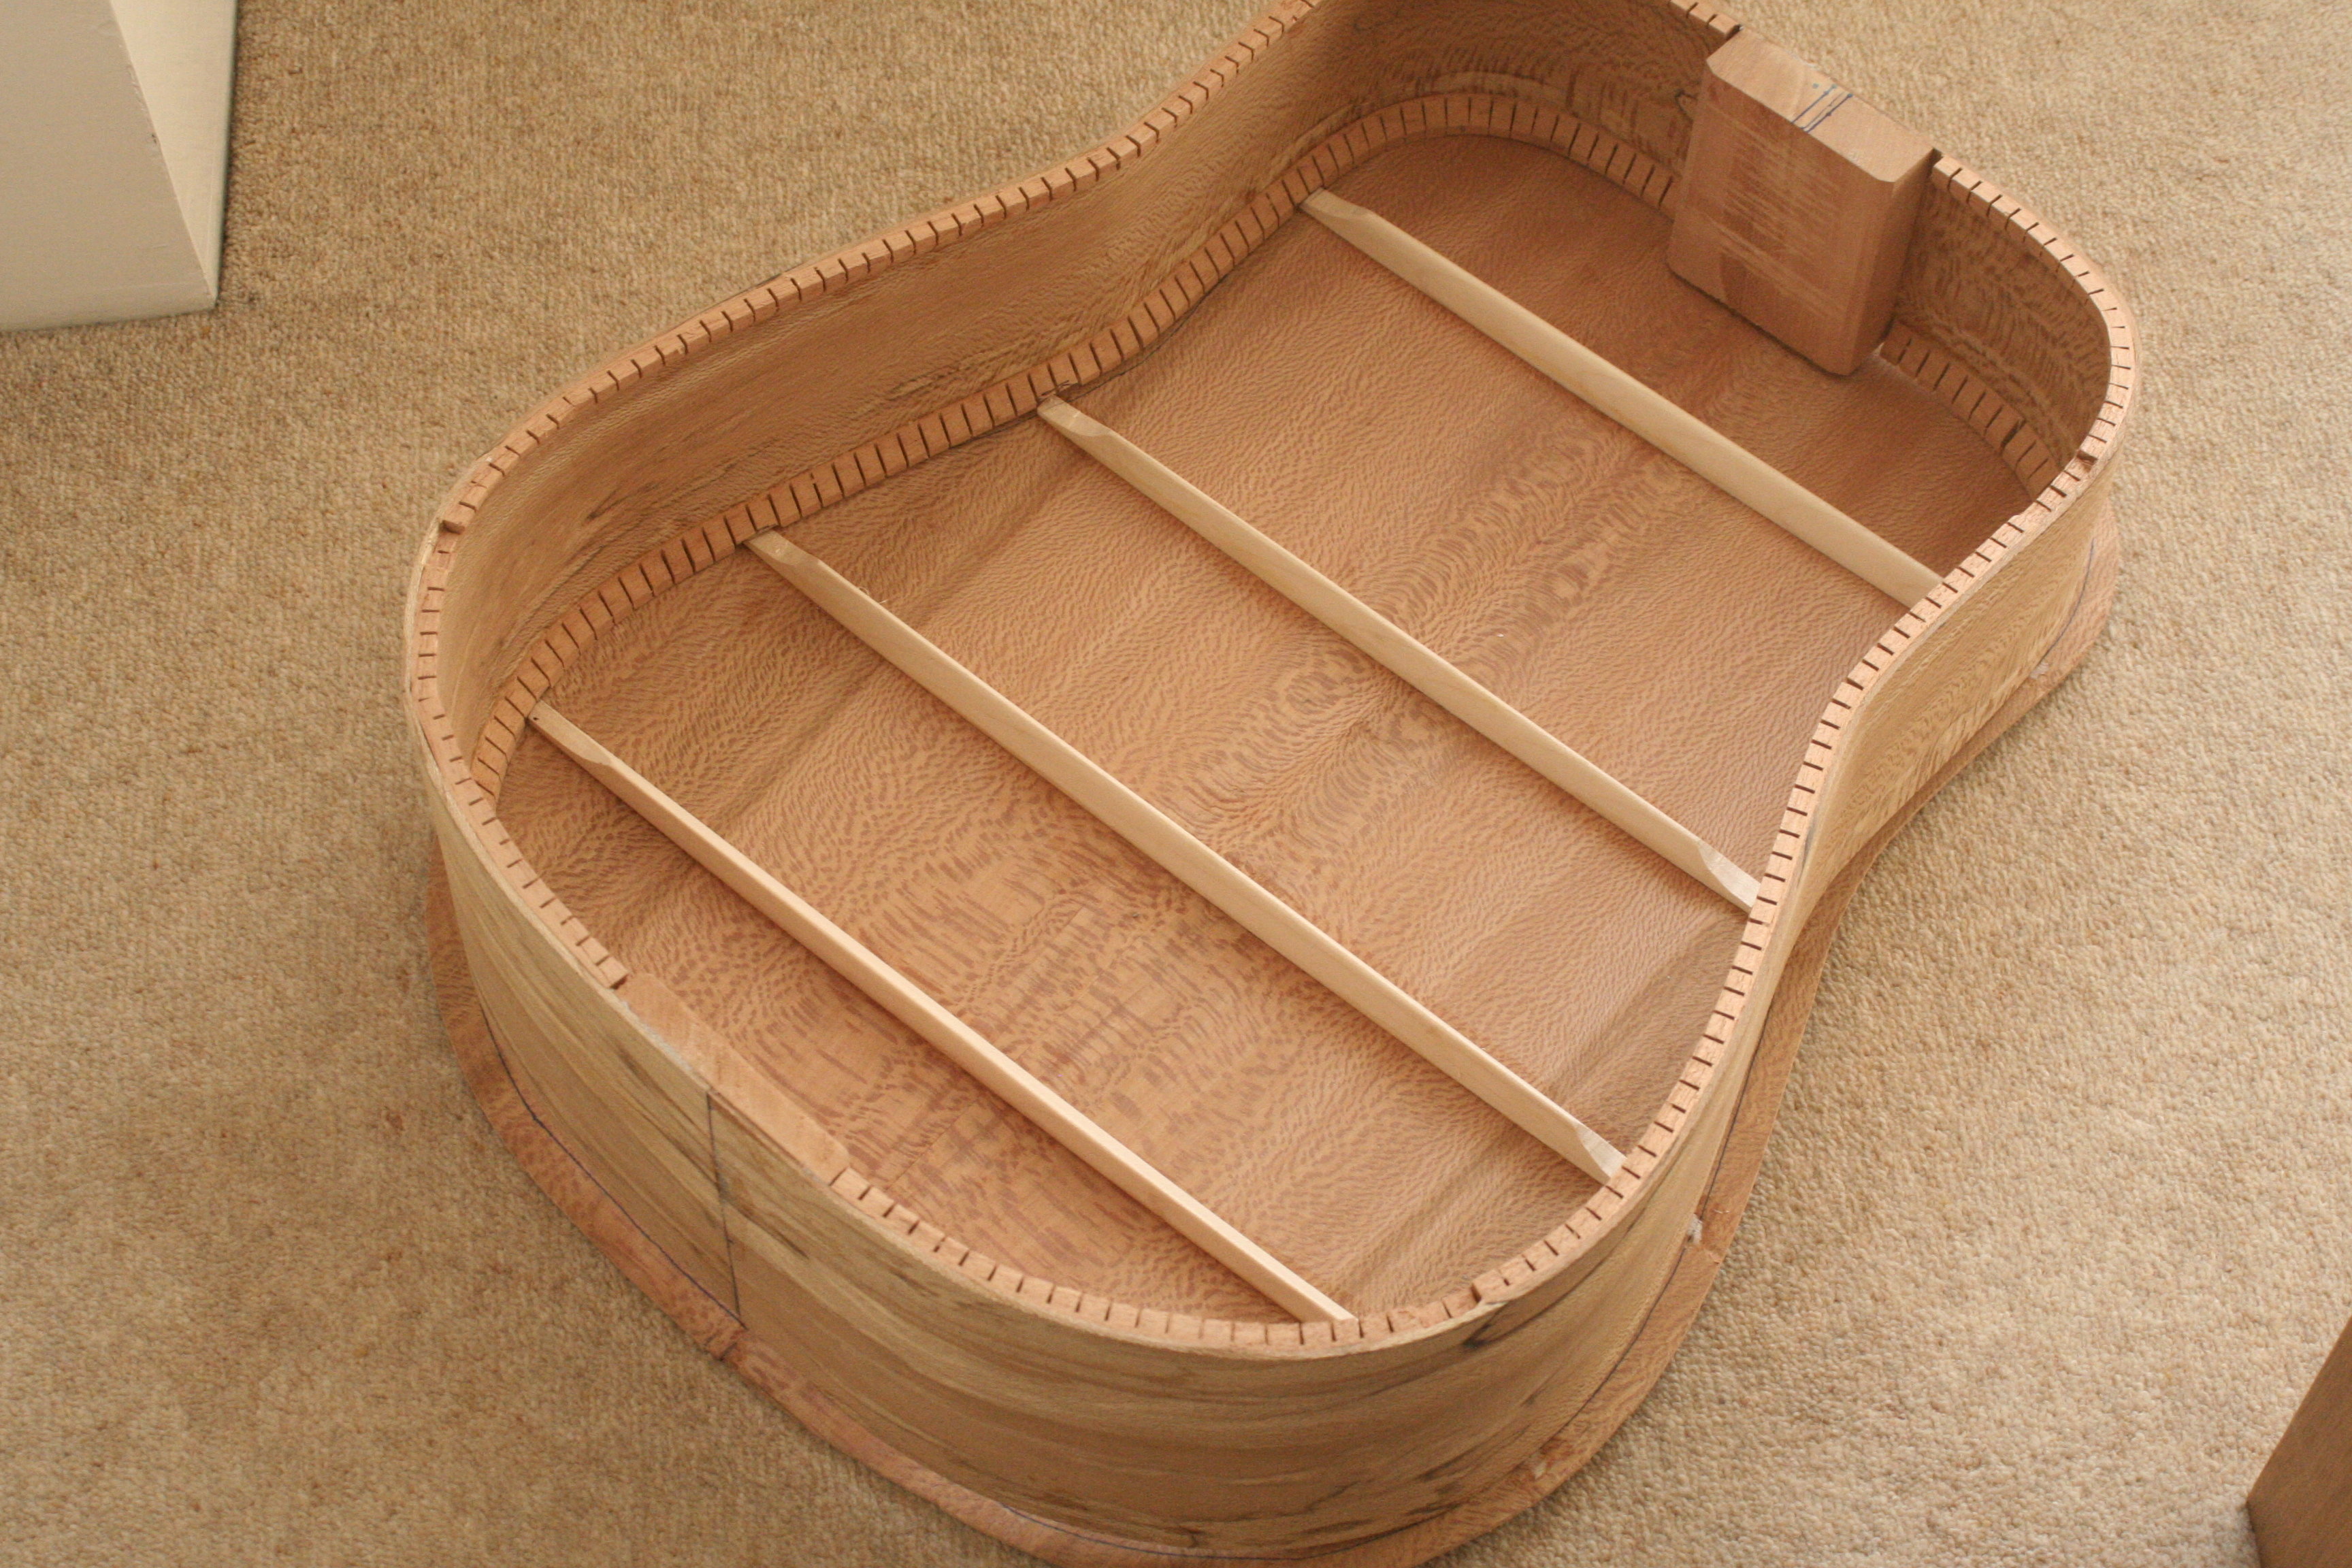
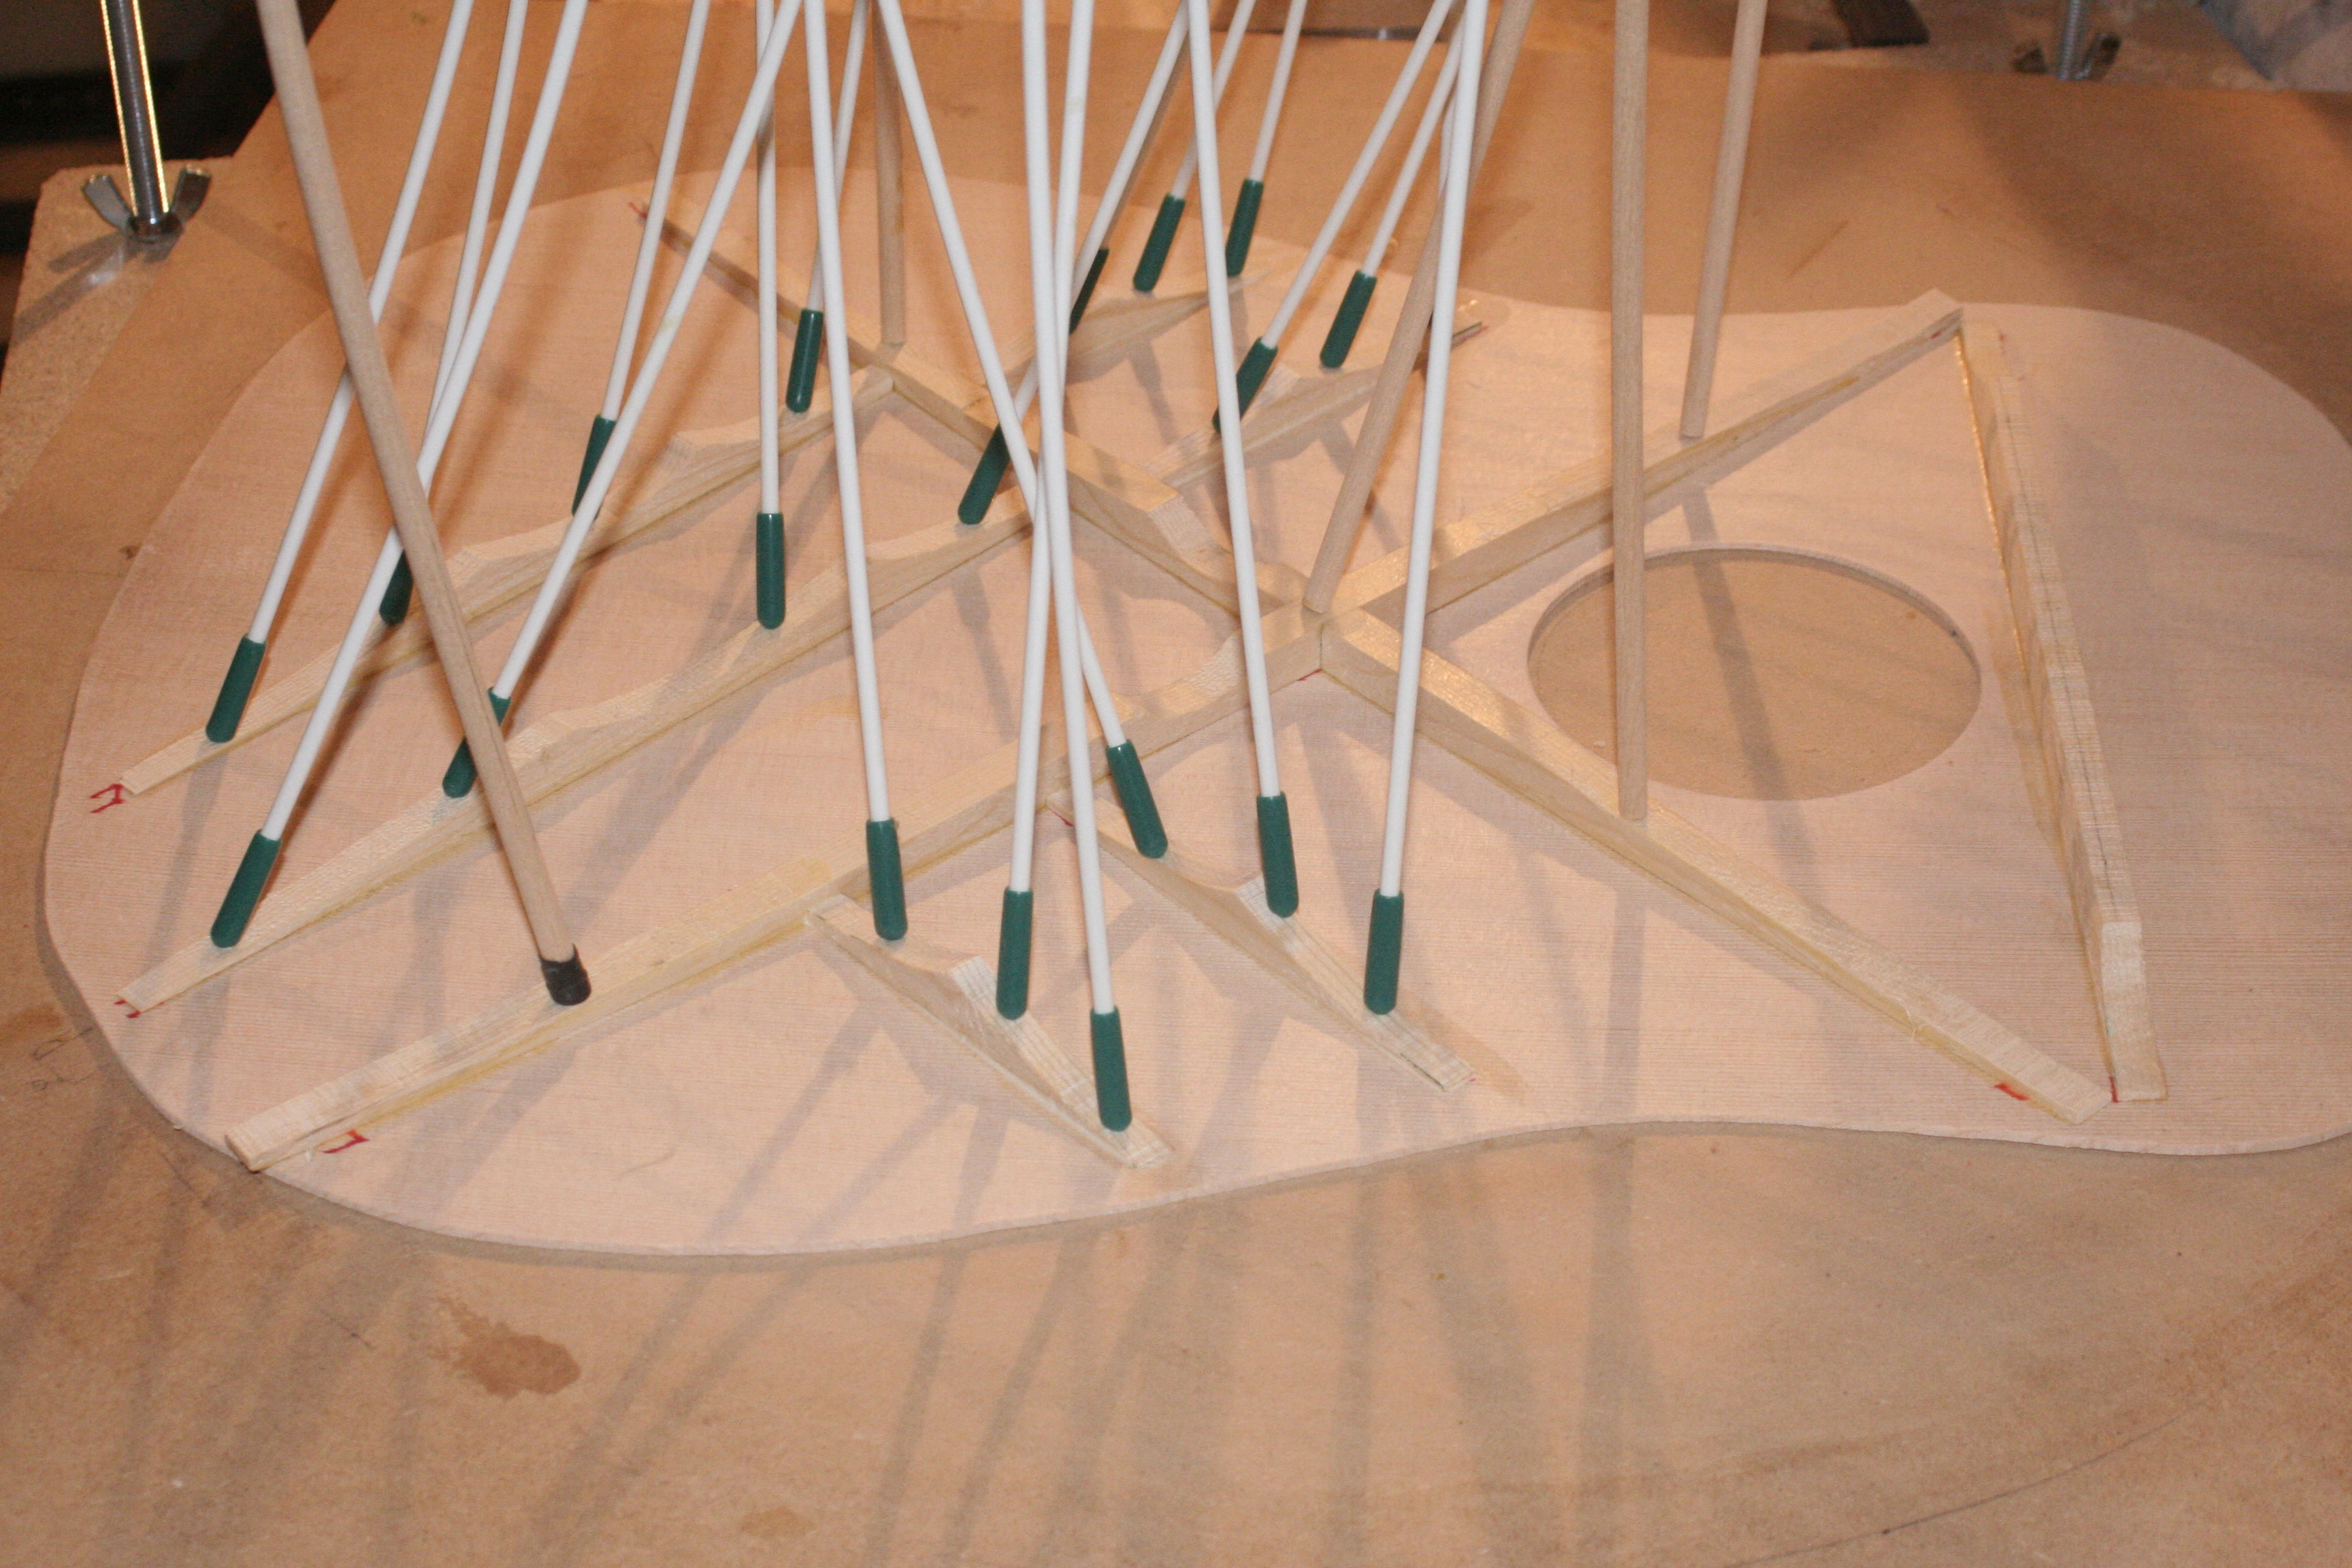
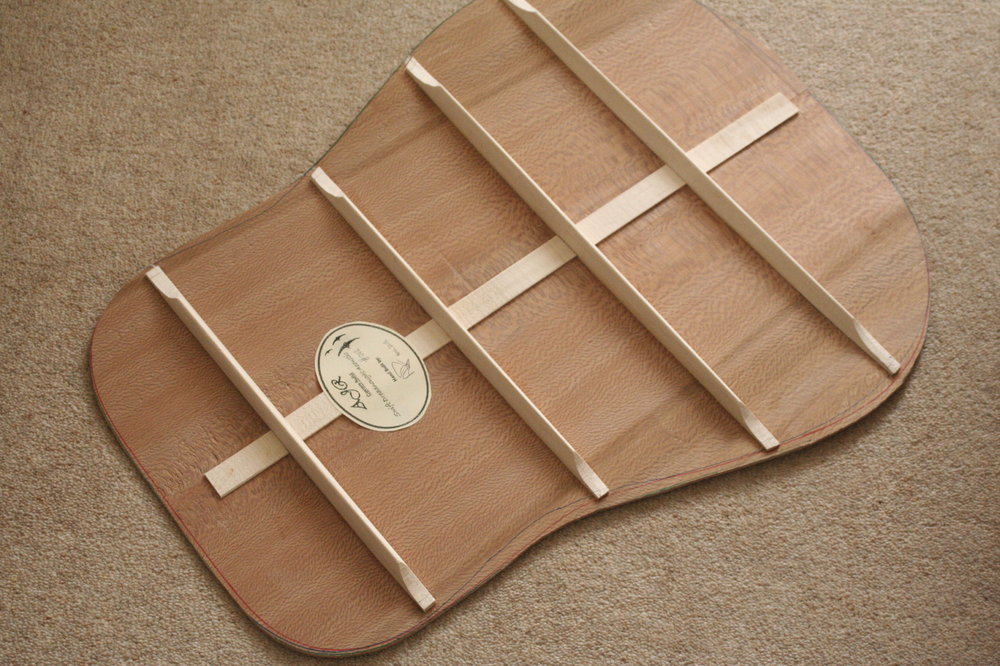
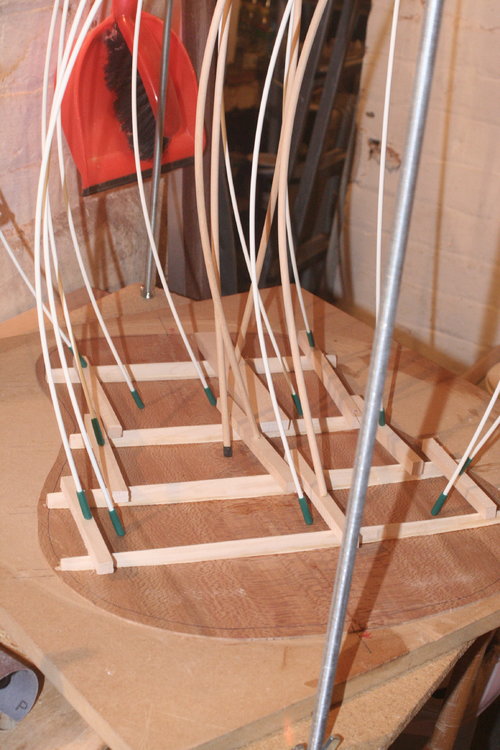
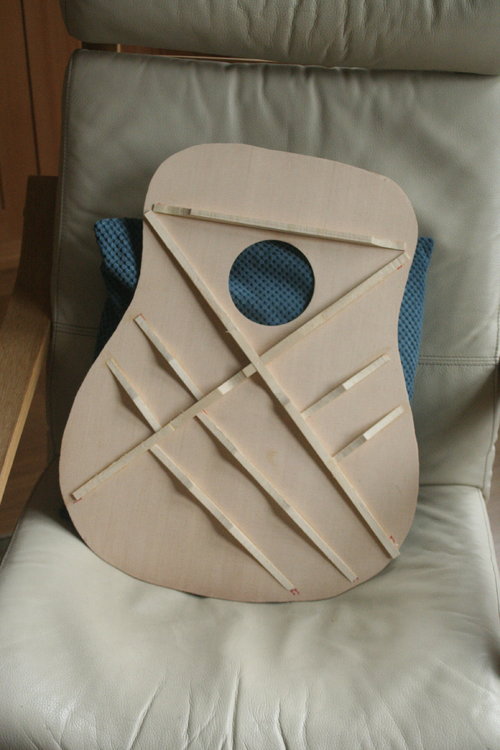
And so to shaping the braces (basically parabola shaped to retain the strength but reduce weight) and tweaking the shape of the braces to get the top to resonate with multiple harmonics at as many of the required frequencies as possible - tap tuning. For anyone interested in this black art (which I only scratch the surface of personally - I know when it's right but I don't know how to get there other than by accident), this is a long but very instructive video. The last 15mins or so has him actually doing the tweaking and by golly you can hear the difference at the end!: https://youtu.be/Ei5-DkVTrEE Mine has ended pretty much where his began (then again, he sells his guitars for many thousands of pounds) but is certainly more resonant that when I started with a number of distinctly different notes, with at least two harmonics, ringing out when various parts of the top is tapped. On this dry fit, you can see that some of the non-structural braces disappear to nothing - and where that happens matters!: The straight brace at the top and the long cross braces are structural and will extend into the kerfed strip, which needs cutting away: As will be seen later - the outside join will actually be cut away! So the glue joint of the kerfed strip itself has to be a good one - but remember, the top and back are curved. So they need sanding at an angle to provide a good gluing surface and tight internal join: While I can see both sides (ie, before the top is glued on), I need to similarly prepare the back. First a purfling strip is set into the join line: That is scraped smooth and then the back braces are put on. The back has a 15 foot radius spheroidal curve so has its own radius dish. The bottoms are radiused to fit the 15' dish in the same way the top braces were radiused to fit the 25' dish: I pre-shape the parabola so use spruce offcut strip to act as the pressure beams for the go-bar struts to press the back into its proper shape in the dish: And then the dry-fit tweaking of the back join is done in the same was the top was: Thread is ALMOST up to date. Next post is gluing the top and back onto the sides which is where I've just got to.


-
Finished pics! A Bitsa Dreadnought for me :)
Andyjr1515 replied to Andyjr1515's topic in Build Diaries
Excellent -
Finished pics! A Bitsa Dreadnought for me :)
Andyjr1515 replied to Andyjr1515's topic in Build Diaries
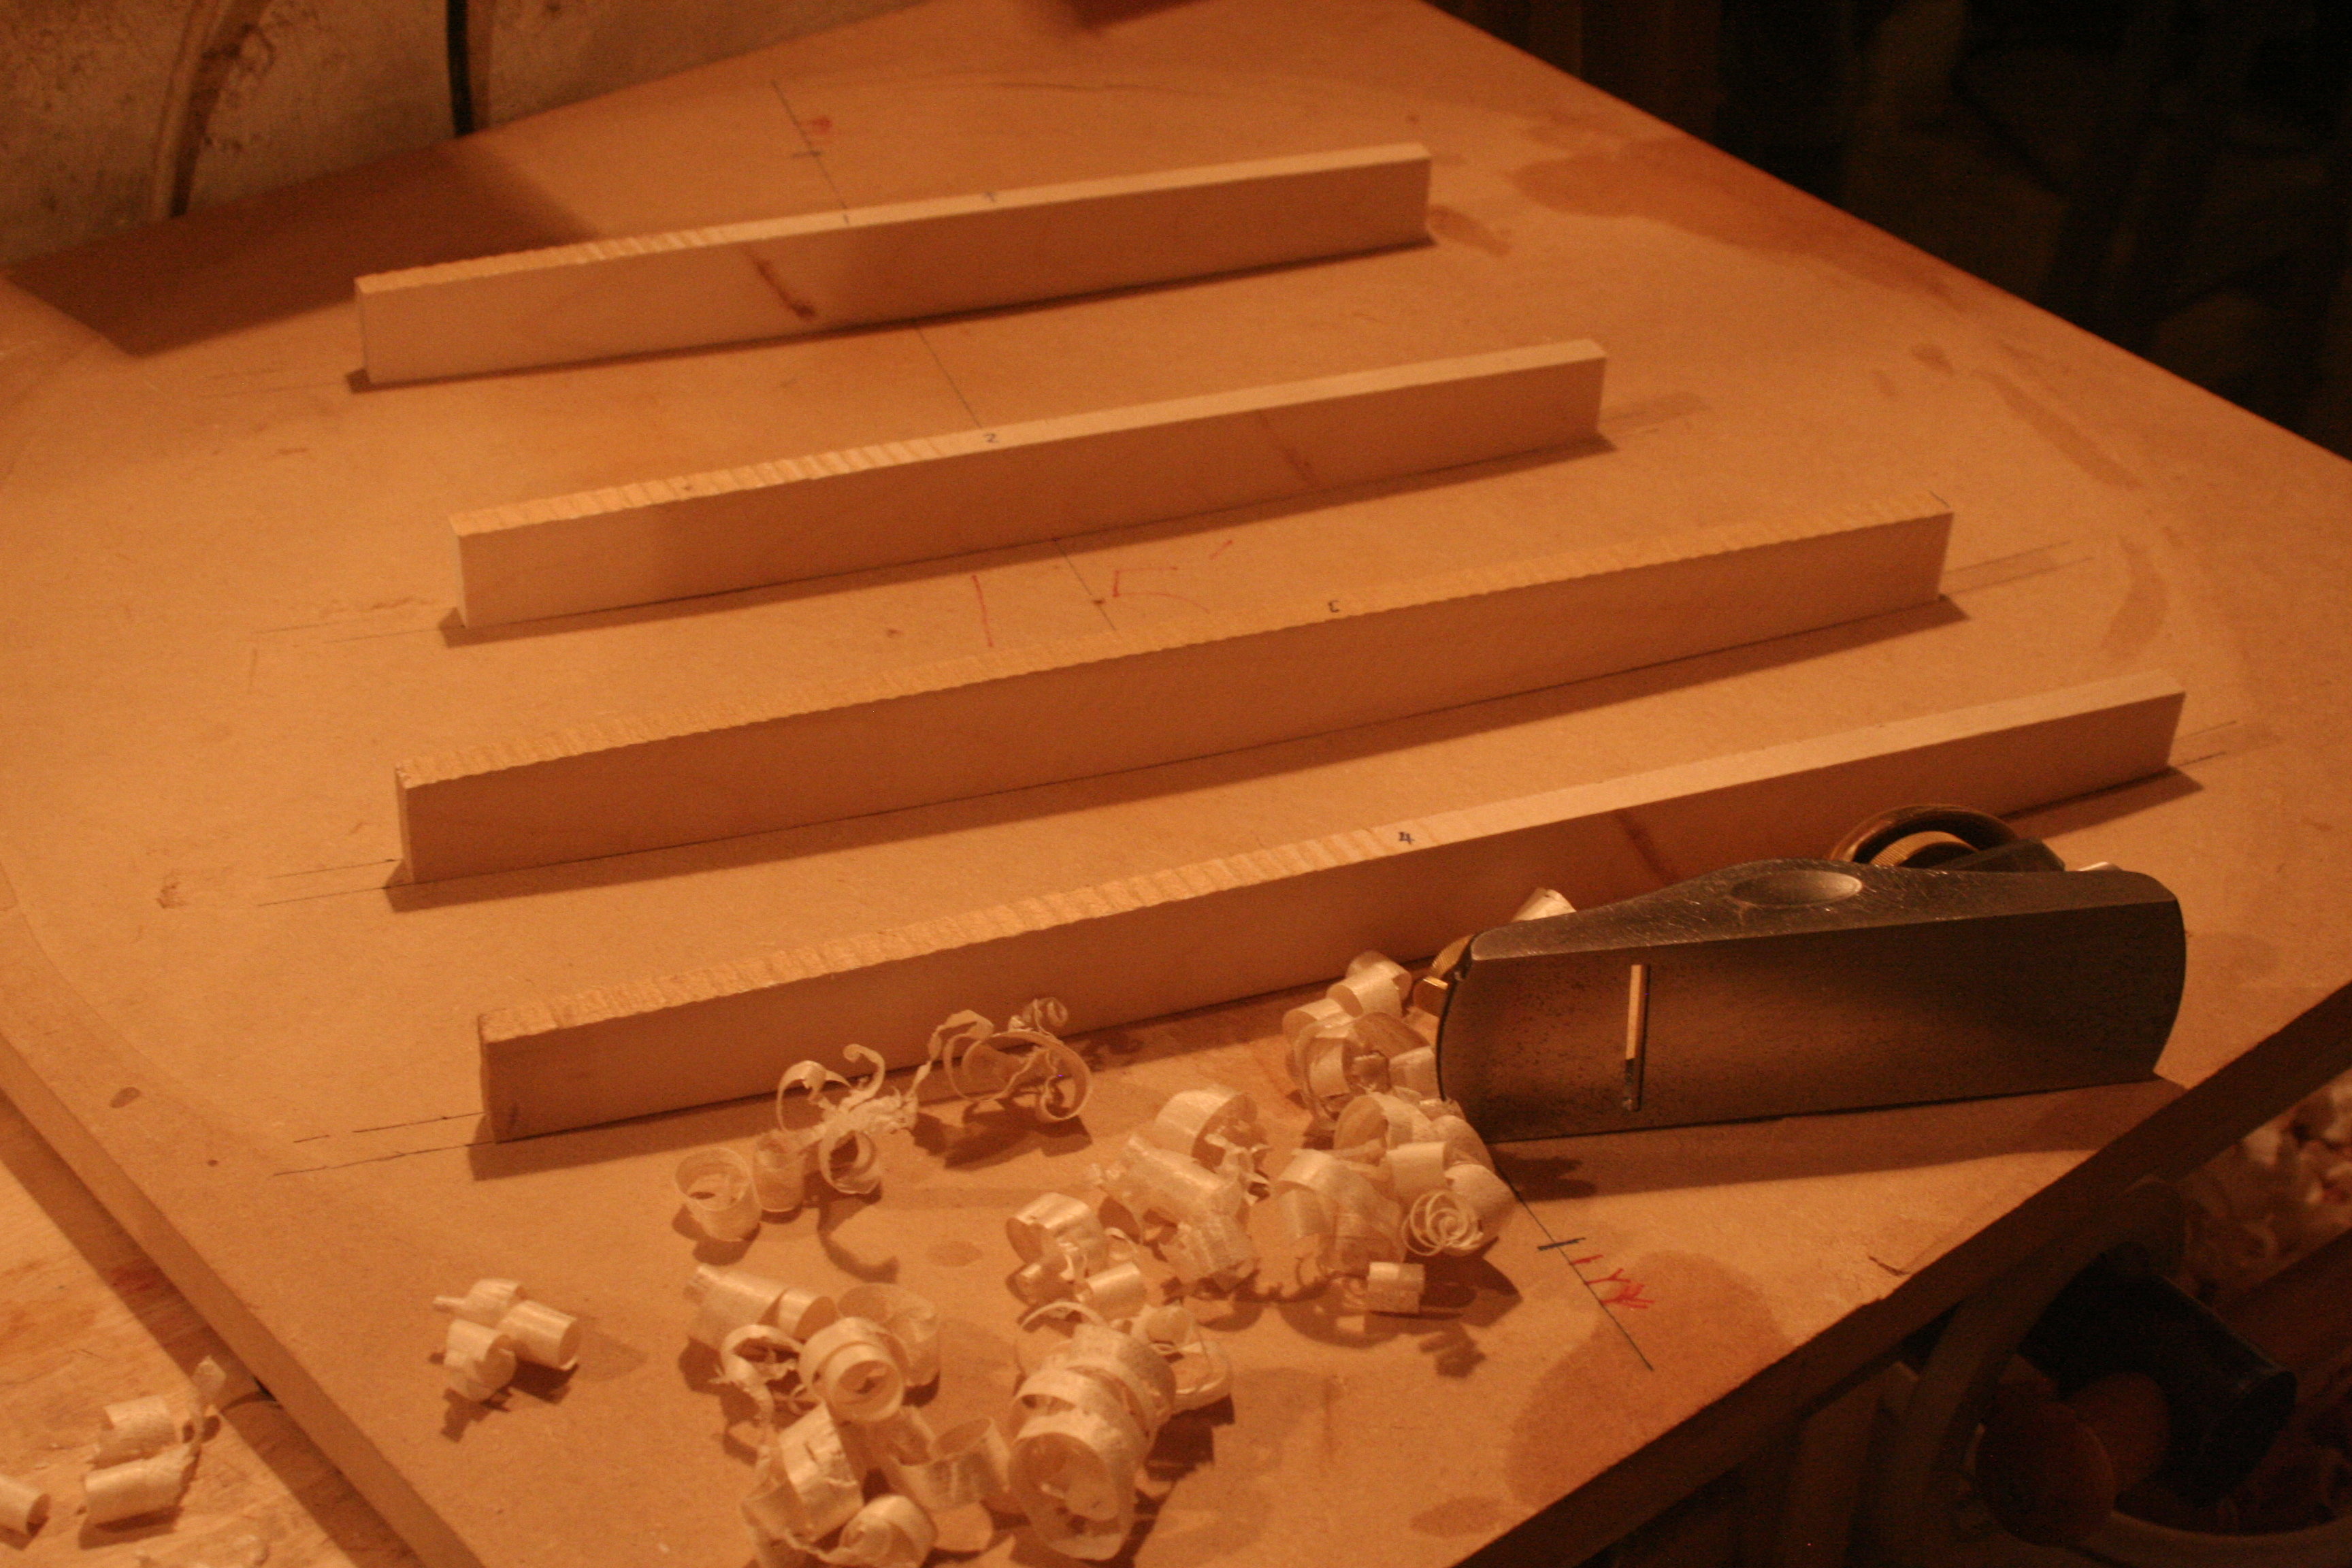
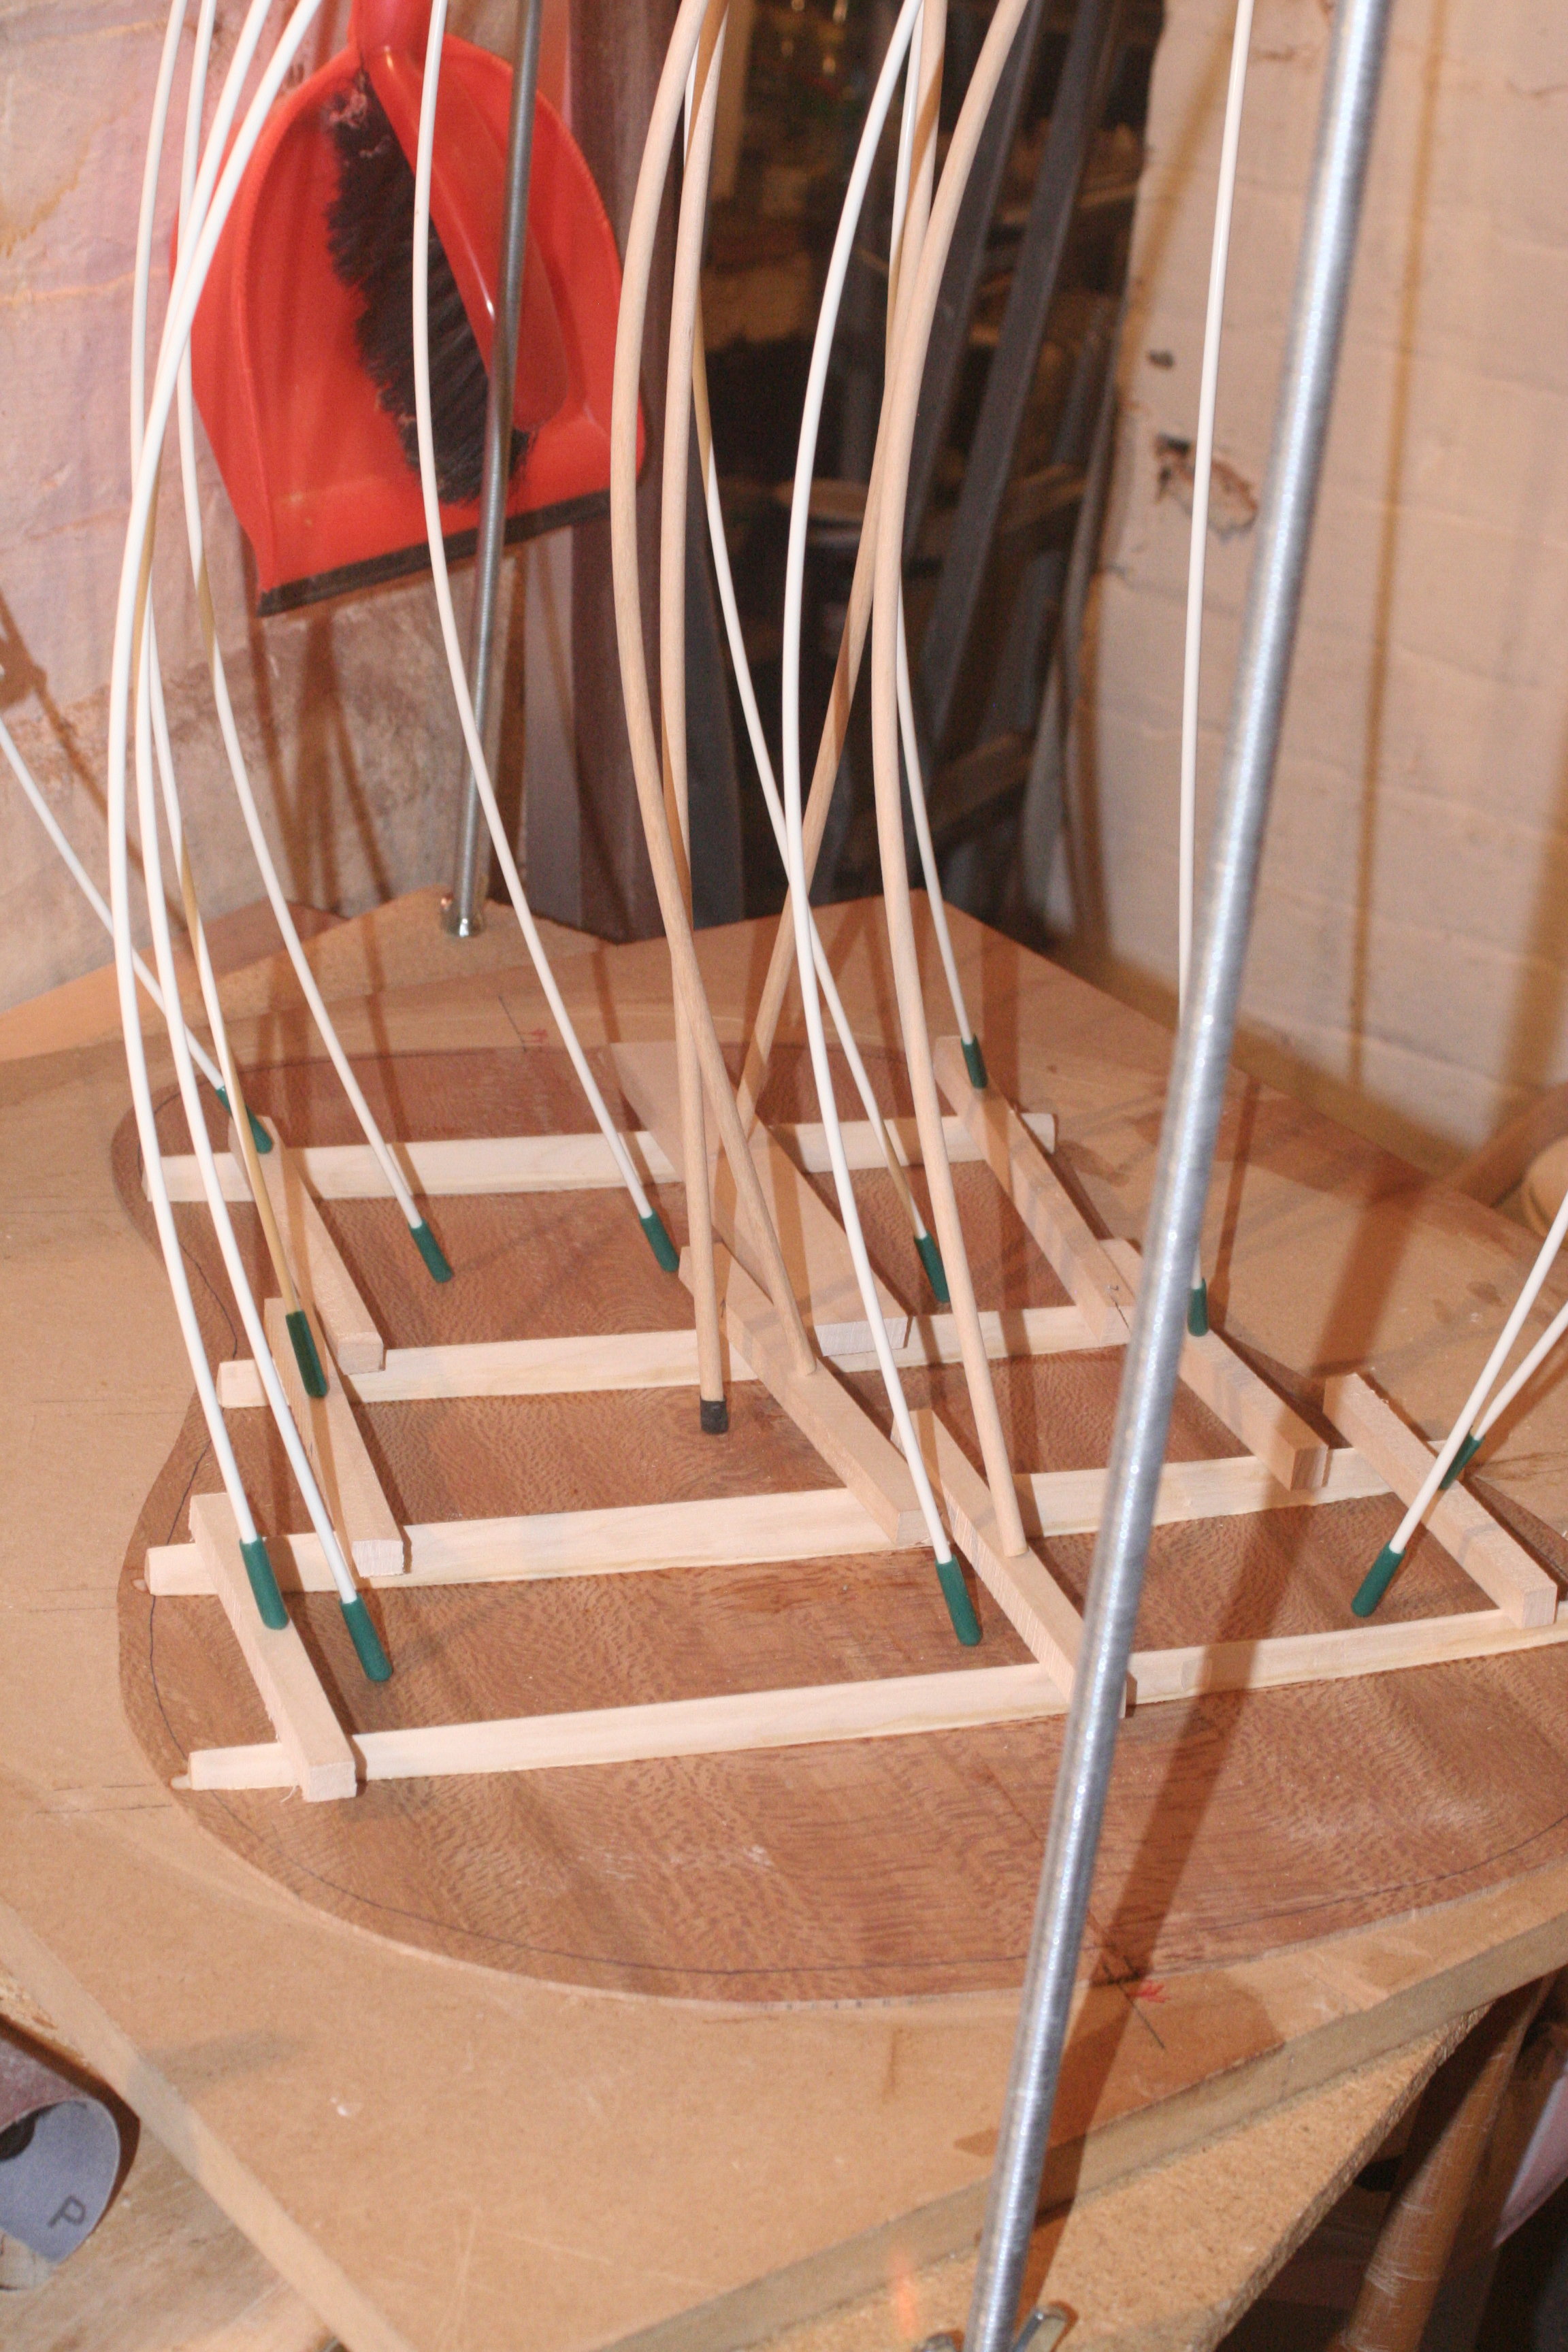
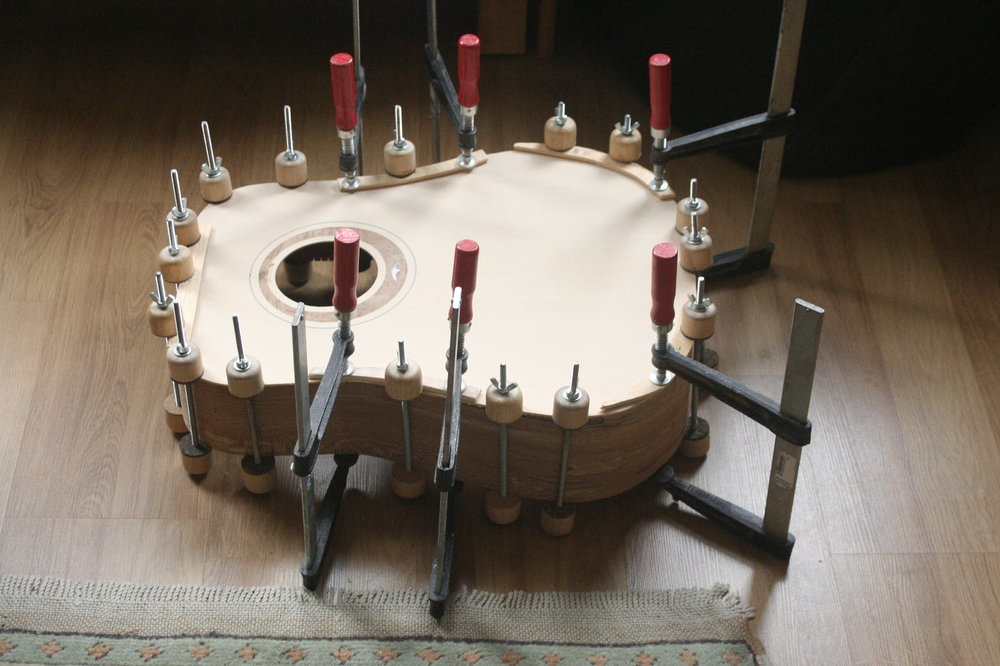
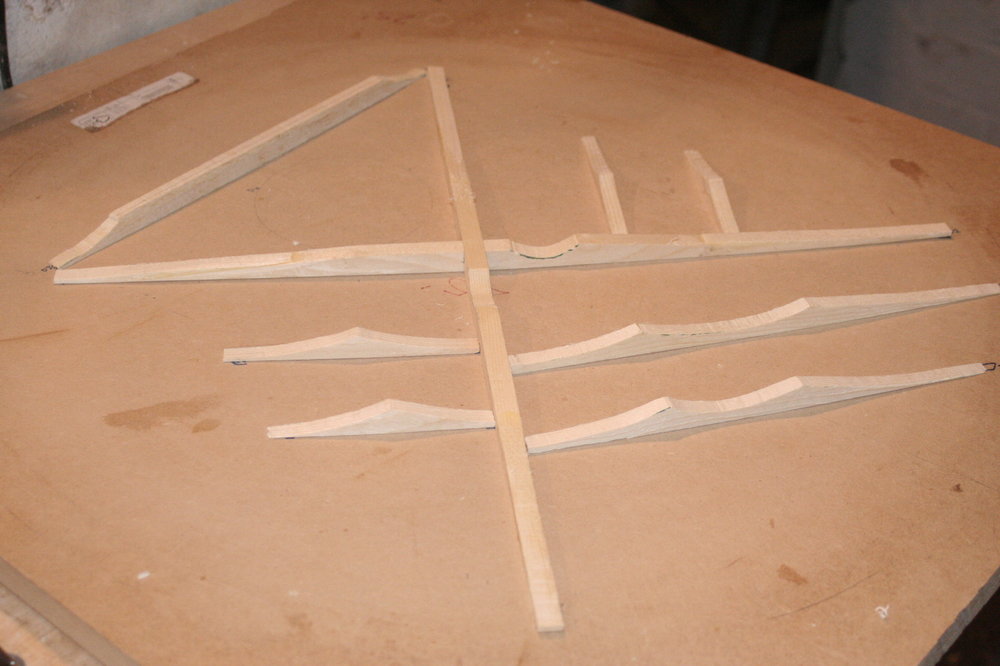
And so, to braces. The top is not flat but is dished with a radius of c. 25 feet (I didn't know that before making one but this is pretty universal!) Curving the bottom of the main braces and pressing those down into a radius dish produces that shape. First was to cut out the brace basic shapes: Then to radius the bottoms so they fit snugly in their respective positions in the radius dish: Then to glue them to the top, you have to hold the braces down, pressing the top down into the dish until the glue has fully set. To do that, generally builders use a 'go-bar deck' - two squares of MDF or chipboard, secured by threaded rods: ..and then dowels or fibreglass rods used to press the braces and top into the radius dish: And when it's set, the braces hold the top in the 25' radius spheroidal shape: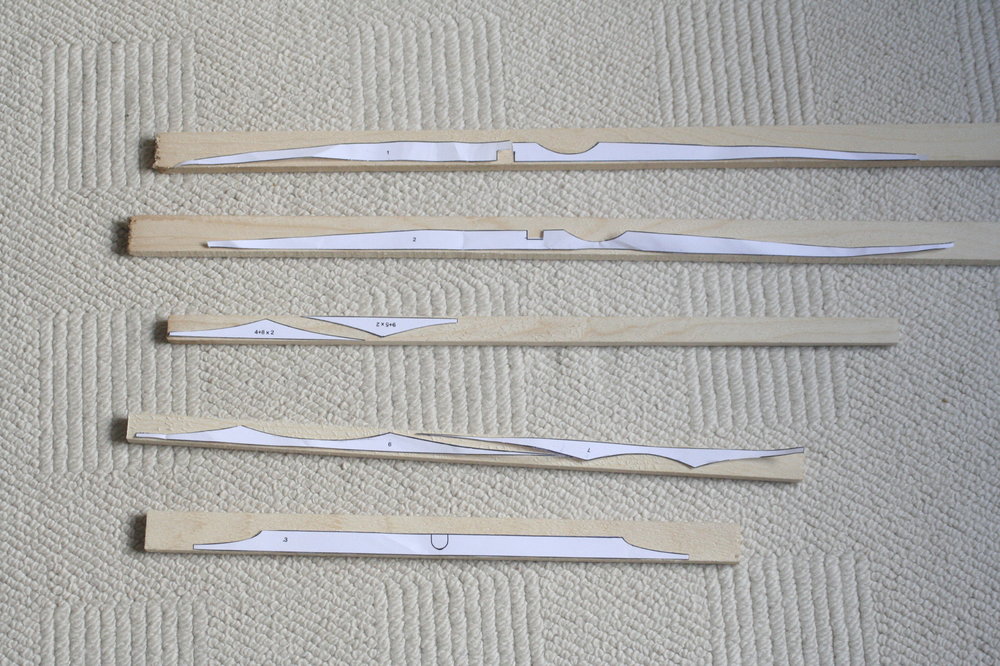


-
Finished pics! A Bitsa Dreadnought for me :)
Andyjr1515 replied to Andyjr1515's topic in Build Diaries
Thanks I do many bits at a lower level too, many of which you've probably seen I'm pretty sure many of us would like to see some of your work (hint hint!). I certainly would -
Finished pics! A Bitsa Dreadnought for me :)
Andyjr1515 replied to Andyjr1515's topic in Build Diaries
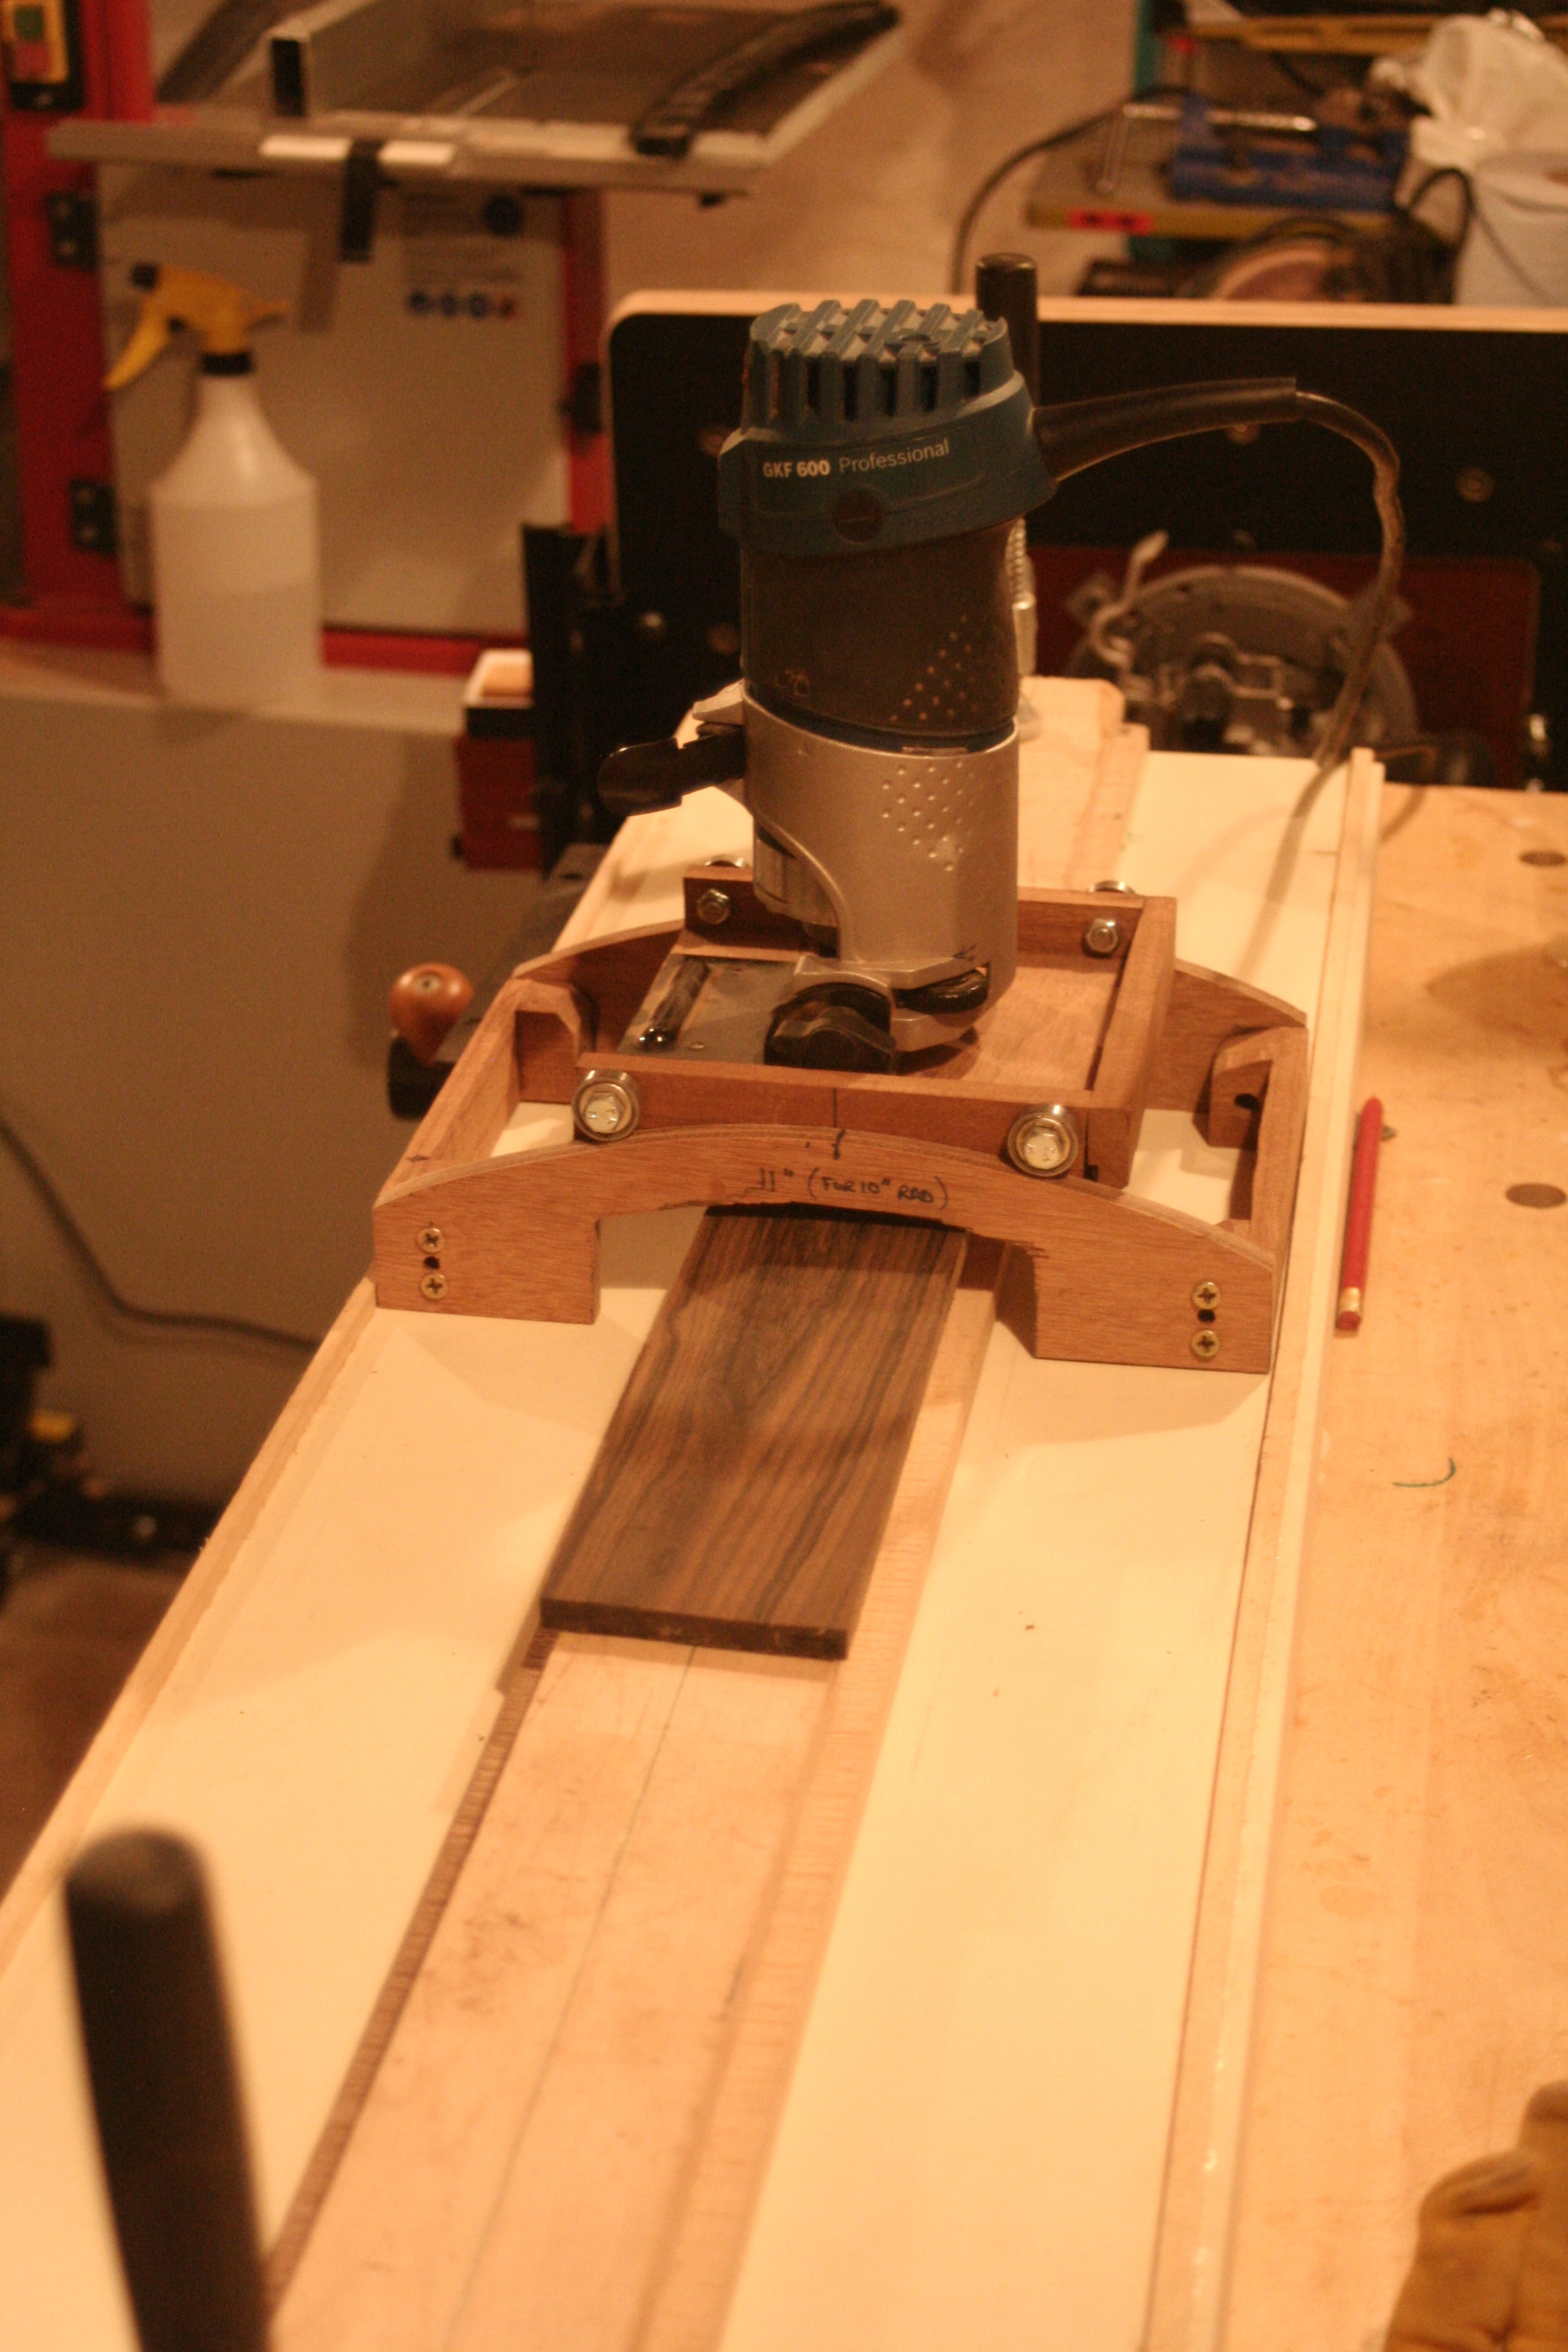
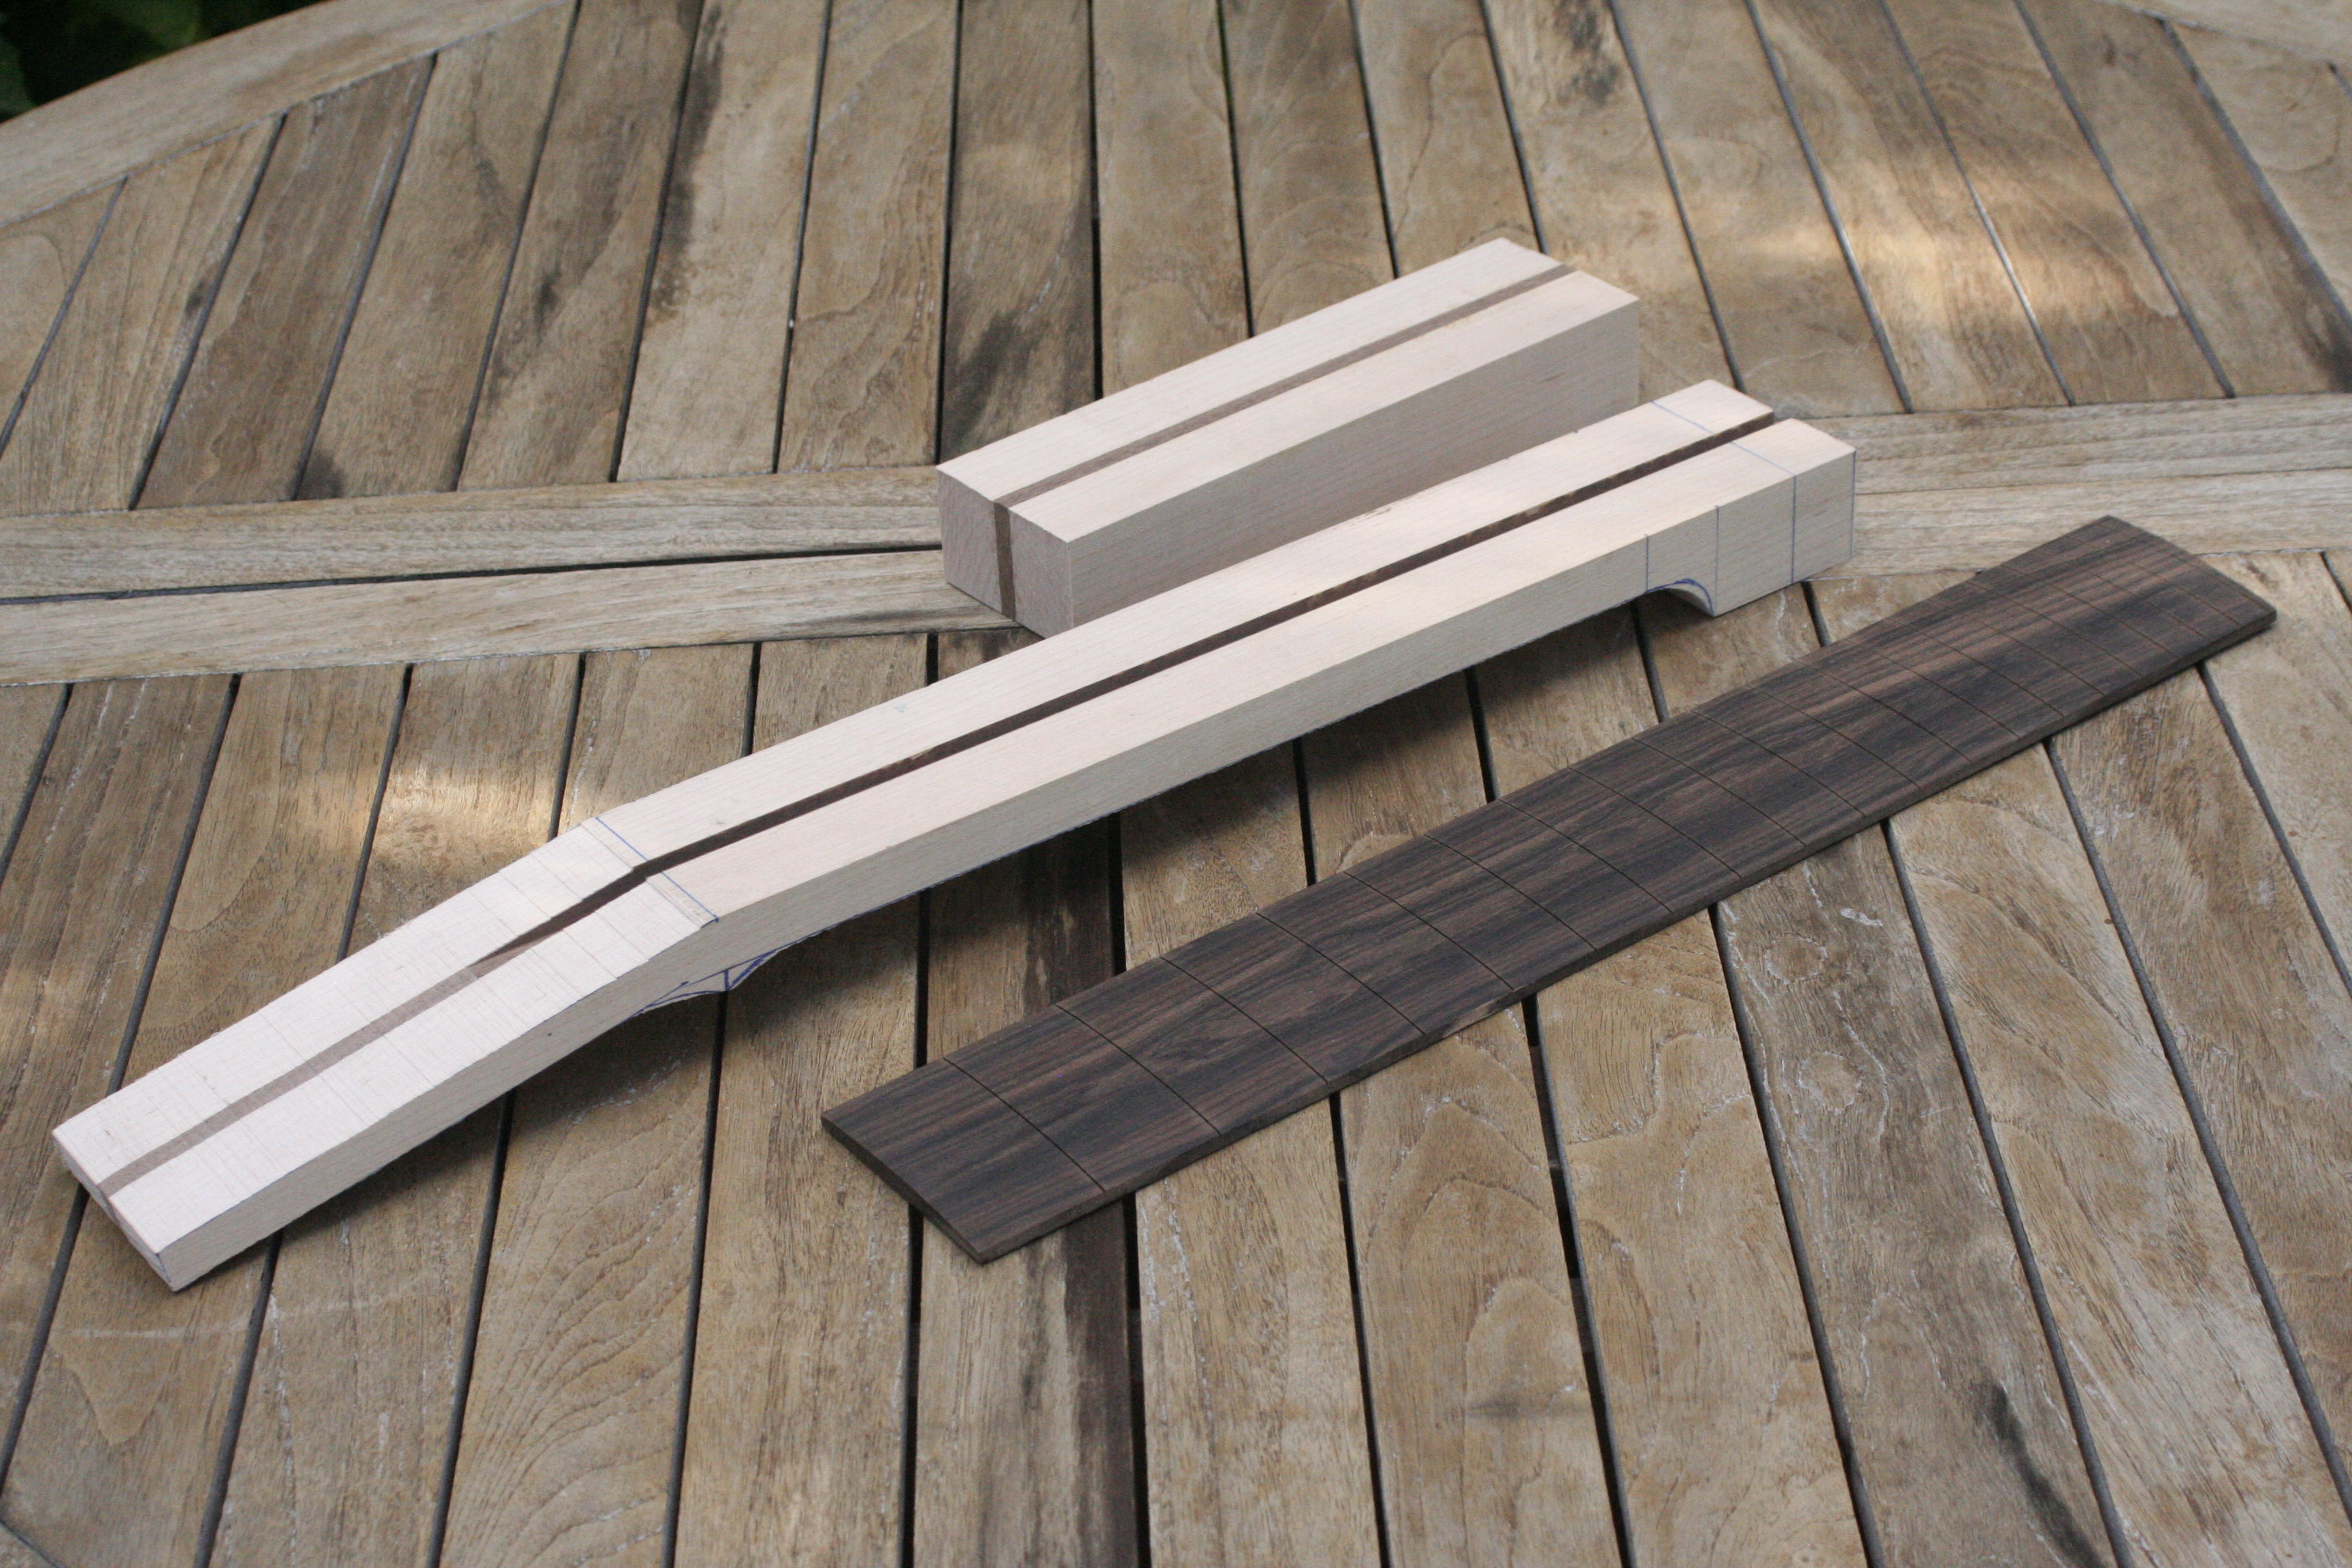
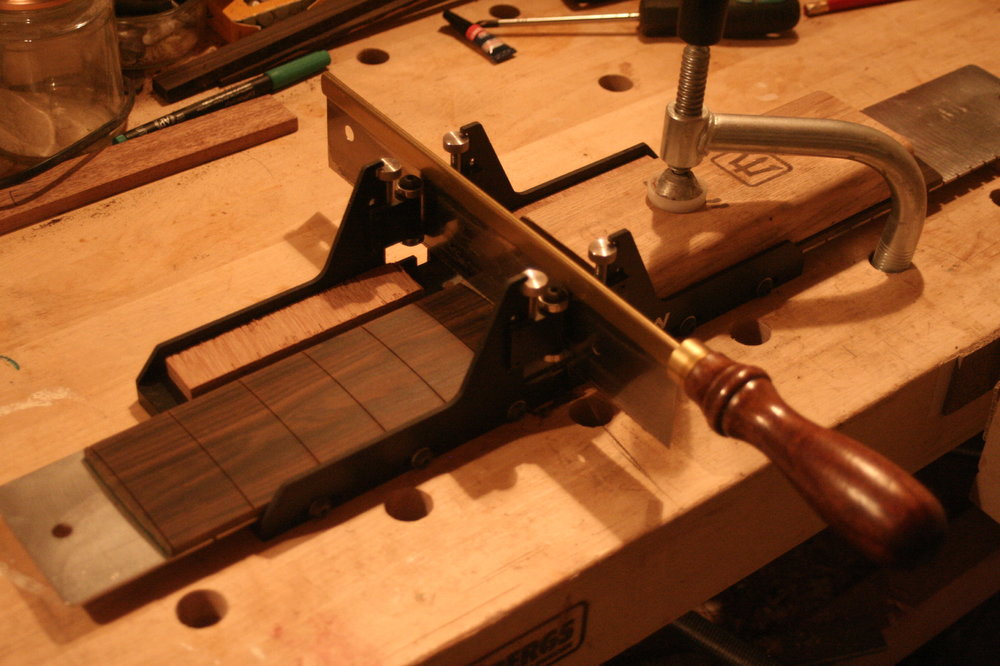
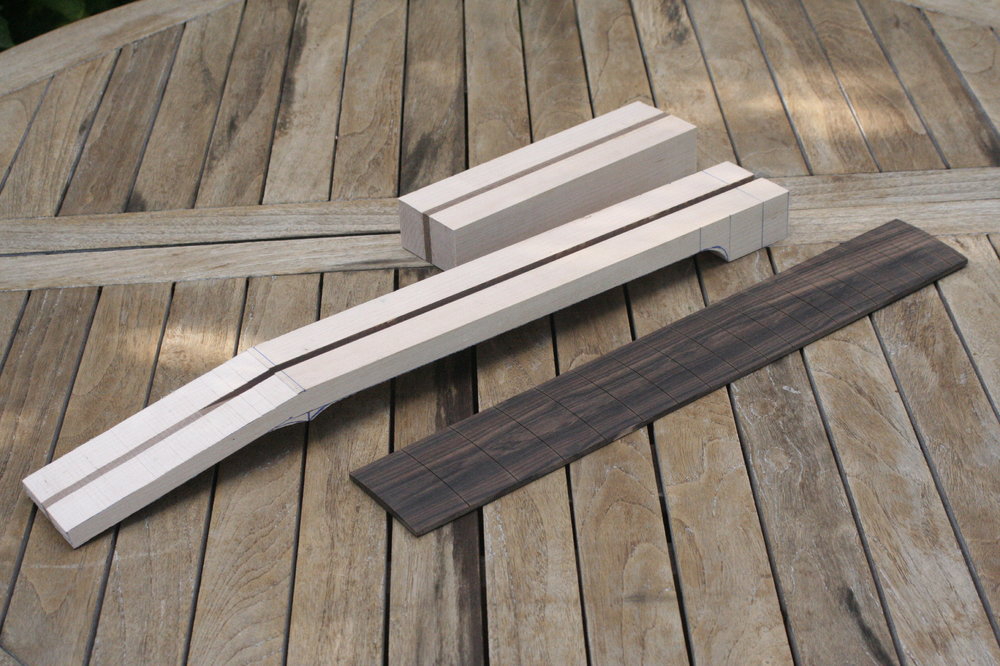
Partly because this is a 'bitsa' build, the sequence is a little bit haphazard - and probably so is this thread. Before I go onto bracing and the black magic of tap tuning, a quick update of the fretboard above. It is Macassar Ebony and is actually an offcut from the lightweight (5 1/4 lbs) 'Nyhavn Swift' I built recently for my sister-in-law: As such it is ONLY just long enough! The plan calls for 25 3/8" but my fret-slot template is 25 1/2" - so that's the scale I'm going with First I radiused the blank on my slightly dodgy home-made radiusing jig: Then slotted the frets using a G&W mitre box: I've actually got a choice of two offcuts for the neck - a mahogany /walnut/mahogany blank from my first dreadnought build but also this maple/walnut/maple offcut left over from my last bass build. I've never tried a maple neck on an acoustic so I thought I'd go for that: The heel - and the offcut of the offcut - isn't quite deep enough for a two piece heel - so I might set in a piece of angled decorative wood and make a 3-piece look like it was supposed to look like that Clearly, there's a lot more to do here, but next post will be back to the body build which - so far - is progressing nicely.

-
Finished pics! A Bitsa Dreadnought for me :)
Andyjr1515 replied to Andyjr1515's topic in Build Diaries
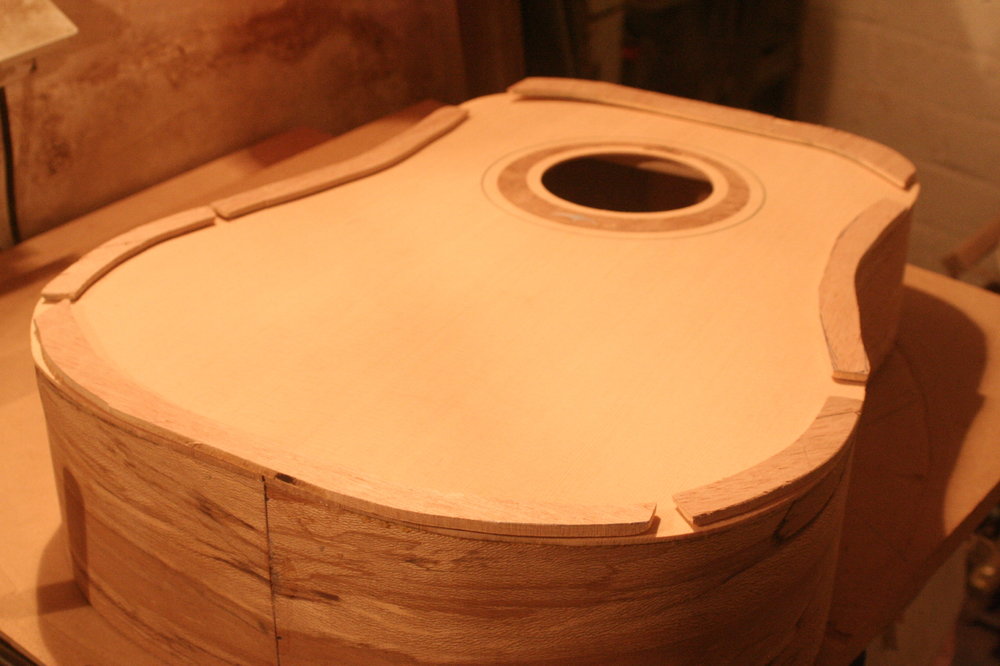
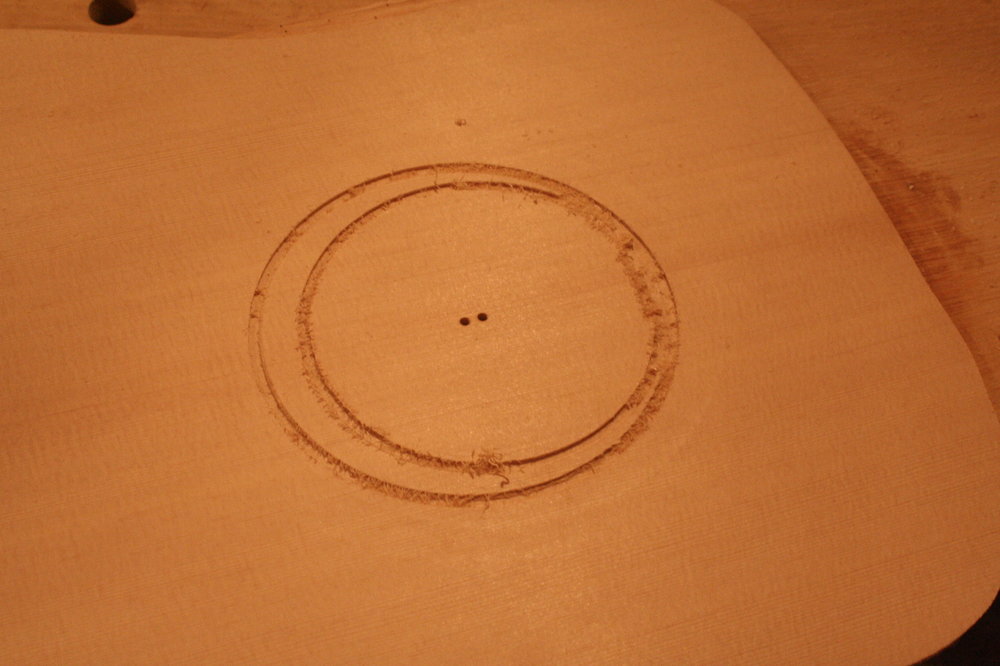
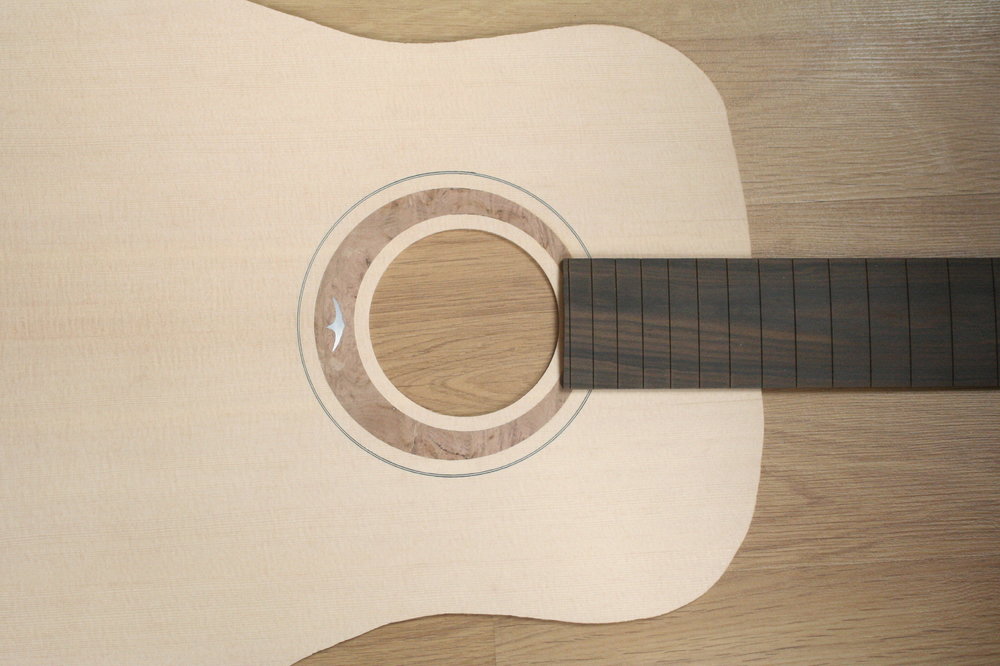
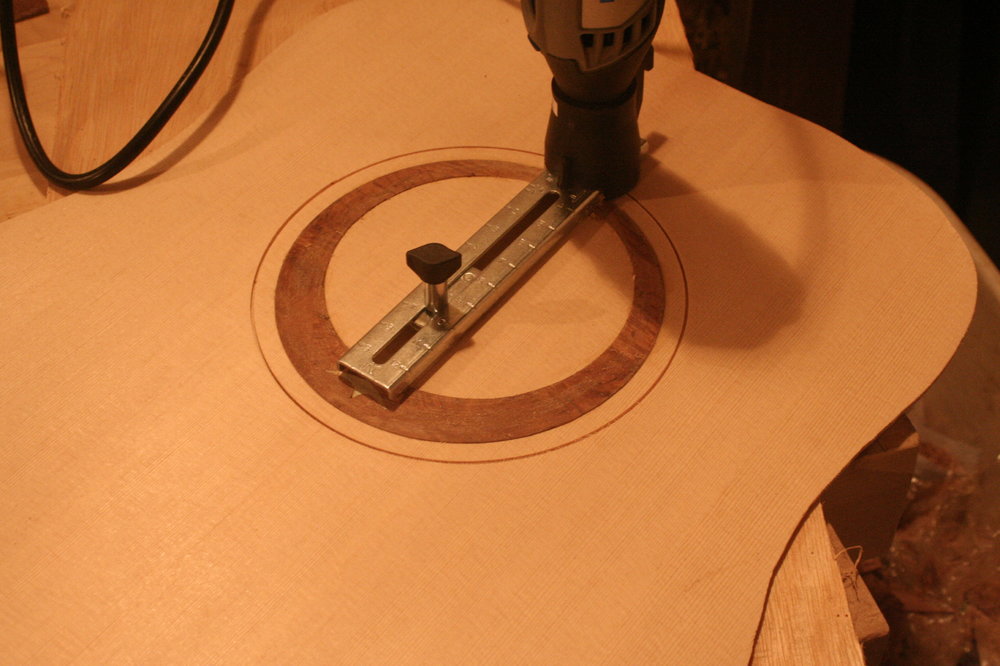
Next - out came the Dremel radius jig and a couple of offset holes drilled in line with those used to cut out the rosette: Which gave me the accurate outline. Golden rule - the top of the rosette is covered by the fretboard so best always to put joins and first cuts there. Note my whoopsy ref forgetting about the width of the router bit!: Then careful routing inside the lines - a tidy up of the edges using a razor blade, a trial fit, then the glue in the rosette. Then an additional rout to fit a purfling strip into: And finally the centre of the hole is routed out and we have a finished top ready for fitting the braces to : Here you also have a sneak preview of the radiused and slotted fingerboard - I'll cover that next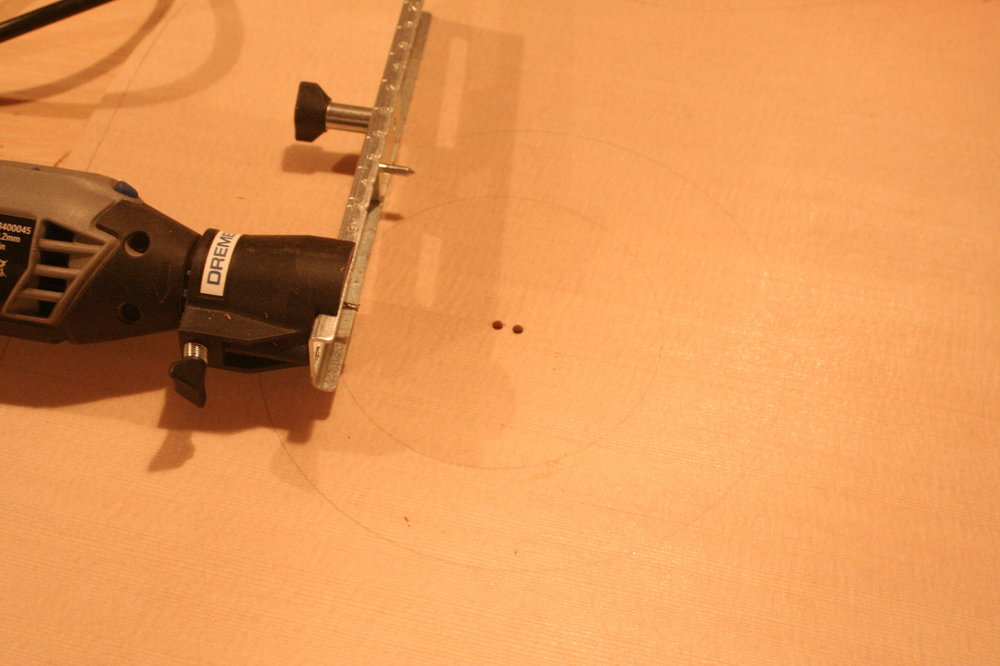
-
They are excellent players. Most Yamahas are.
-
I've played a couple of moderately fanned ones and to be honest, 5 minutes and you completely forgot about it even with the more complicated chord shapes. It does the same as on a bass in that it will tend to balance the volume and tone of the strings so the trebles are less jangly and the bass strings are less boomy. I'm not fully certain about the very extreme multi-scales but I think it is broadly a sound concept (if you excuse the pun). It worked brilliantly well, by the way on the piccolo bass I designed and built for our band's bassist - and that is basically a 4 string electric guitar. It's pitched the same as the bottom four strings of an electric, it has electric guitar strings (albeit jazz ones), it has an electric guitar SD Cool Rails pickup and it goes from 26" to 25" scale length, so pretty covers scales similar to PRS and Fender strat, etc.. (at 25" and 25.5" respectively):
-
Finished pics! A Bitsa Dreadnought for me :)
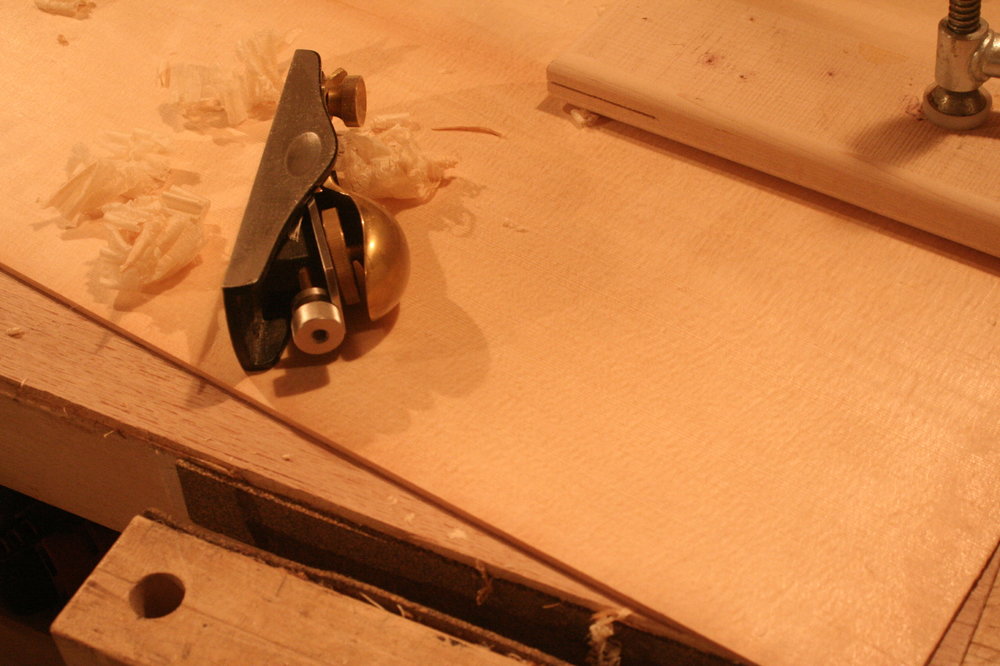
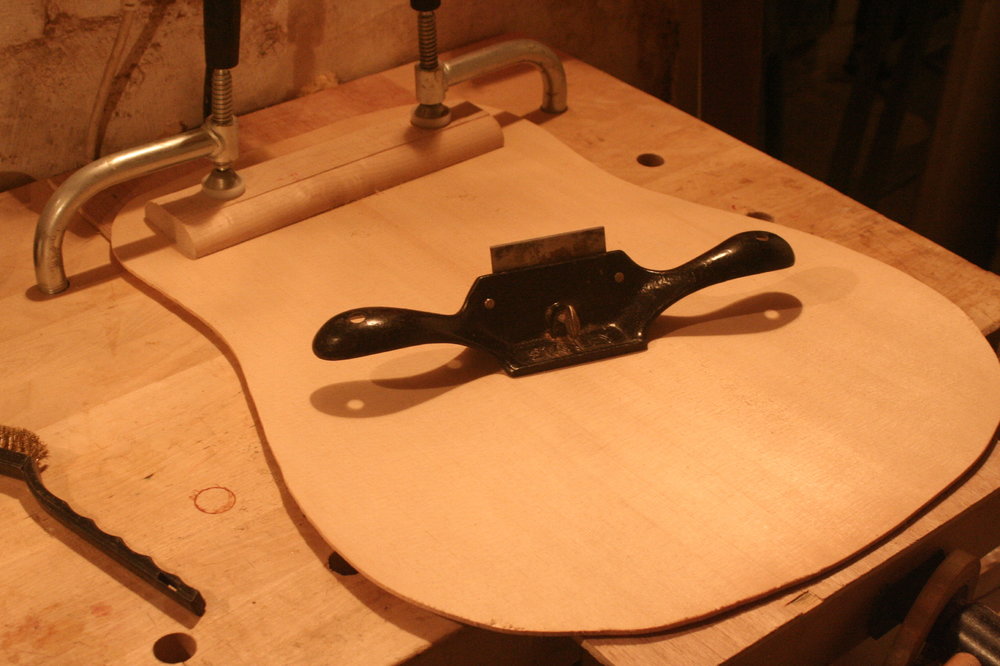
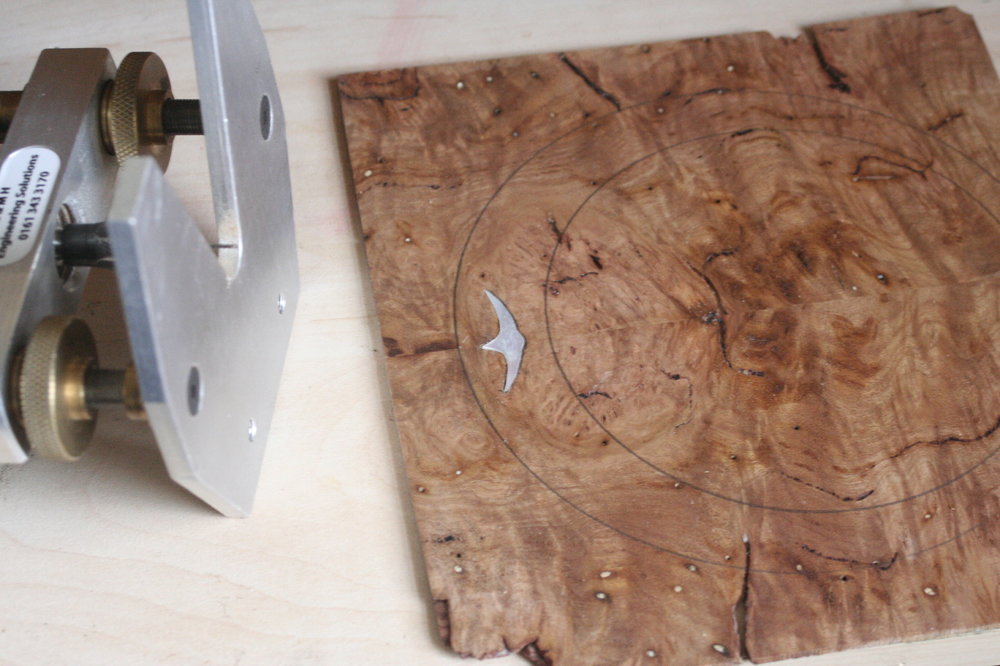
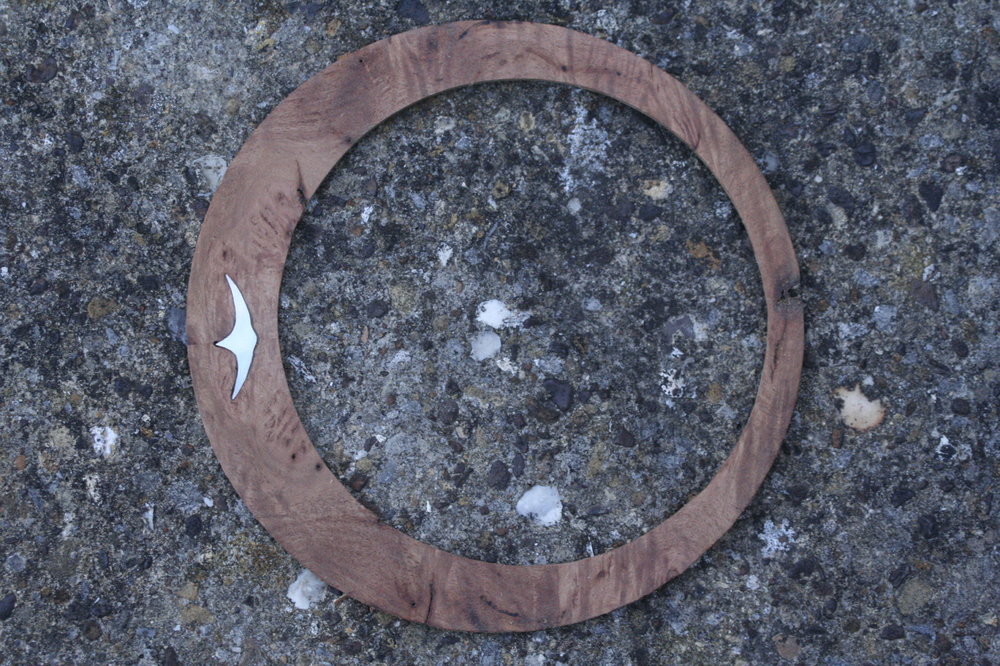
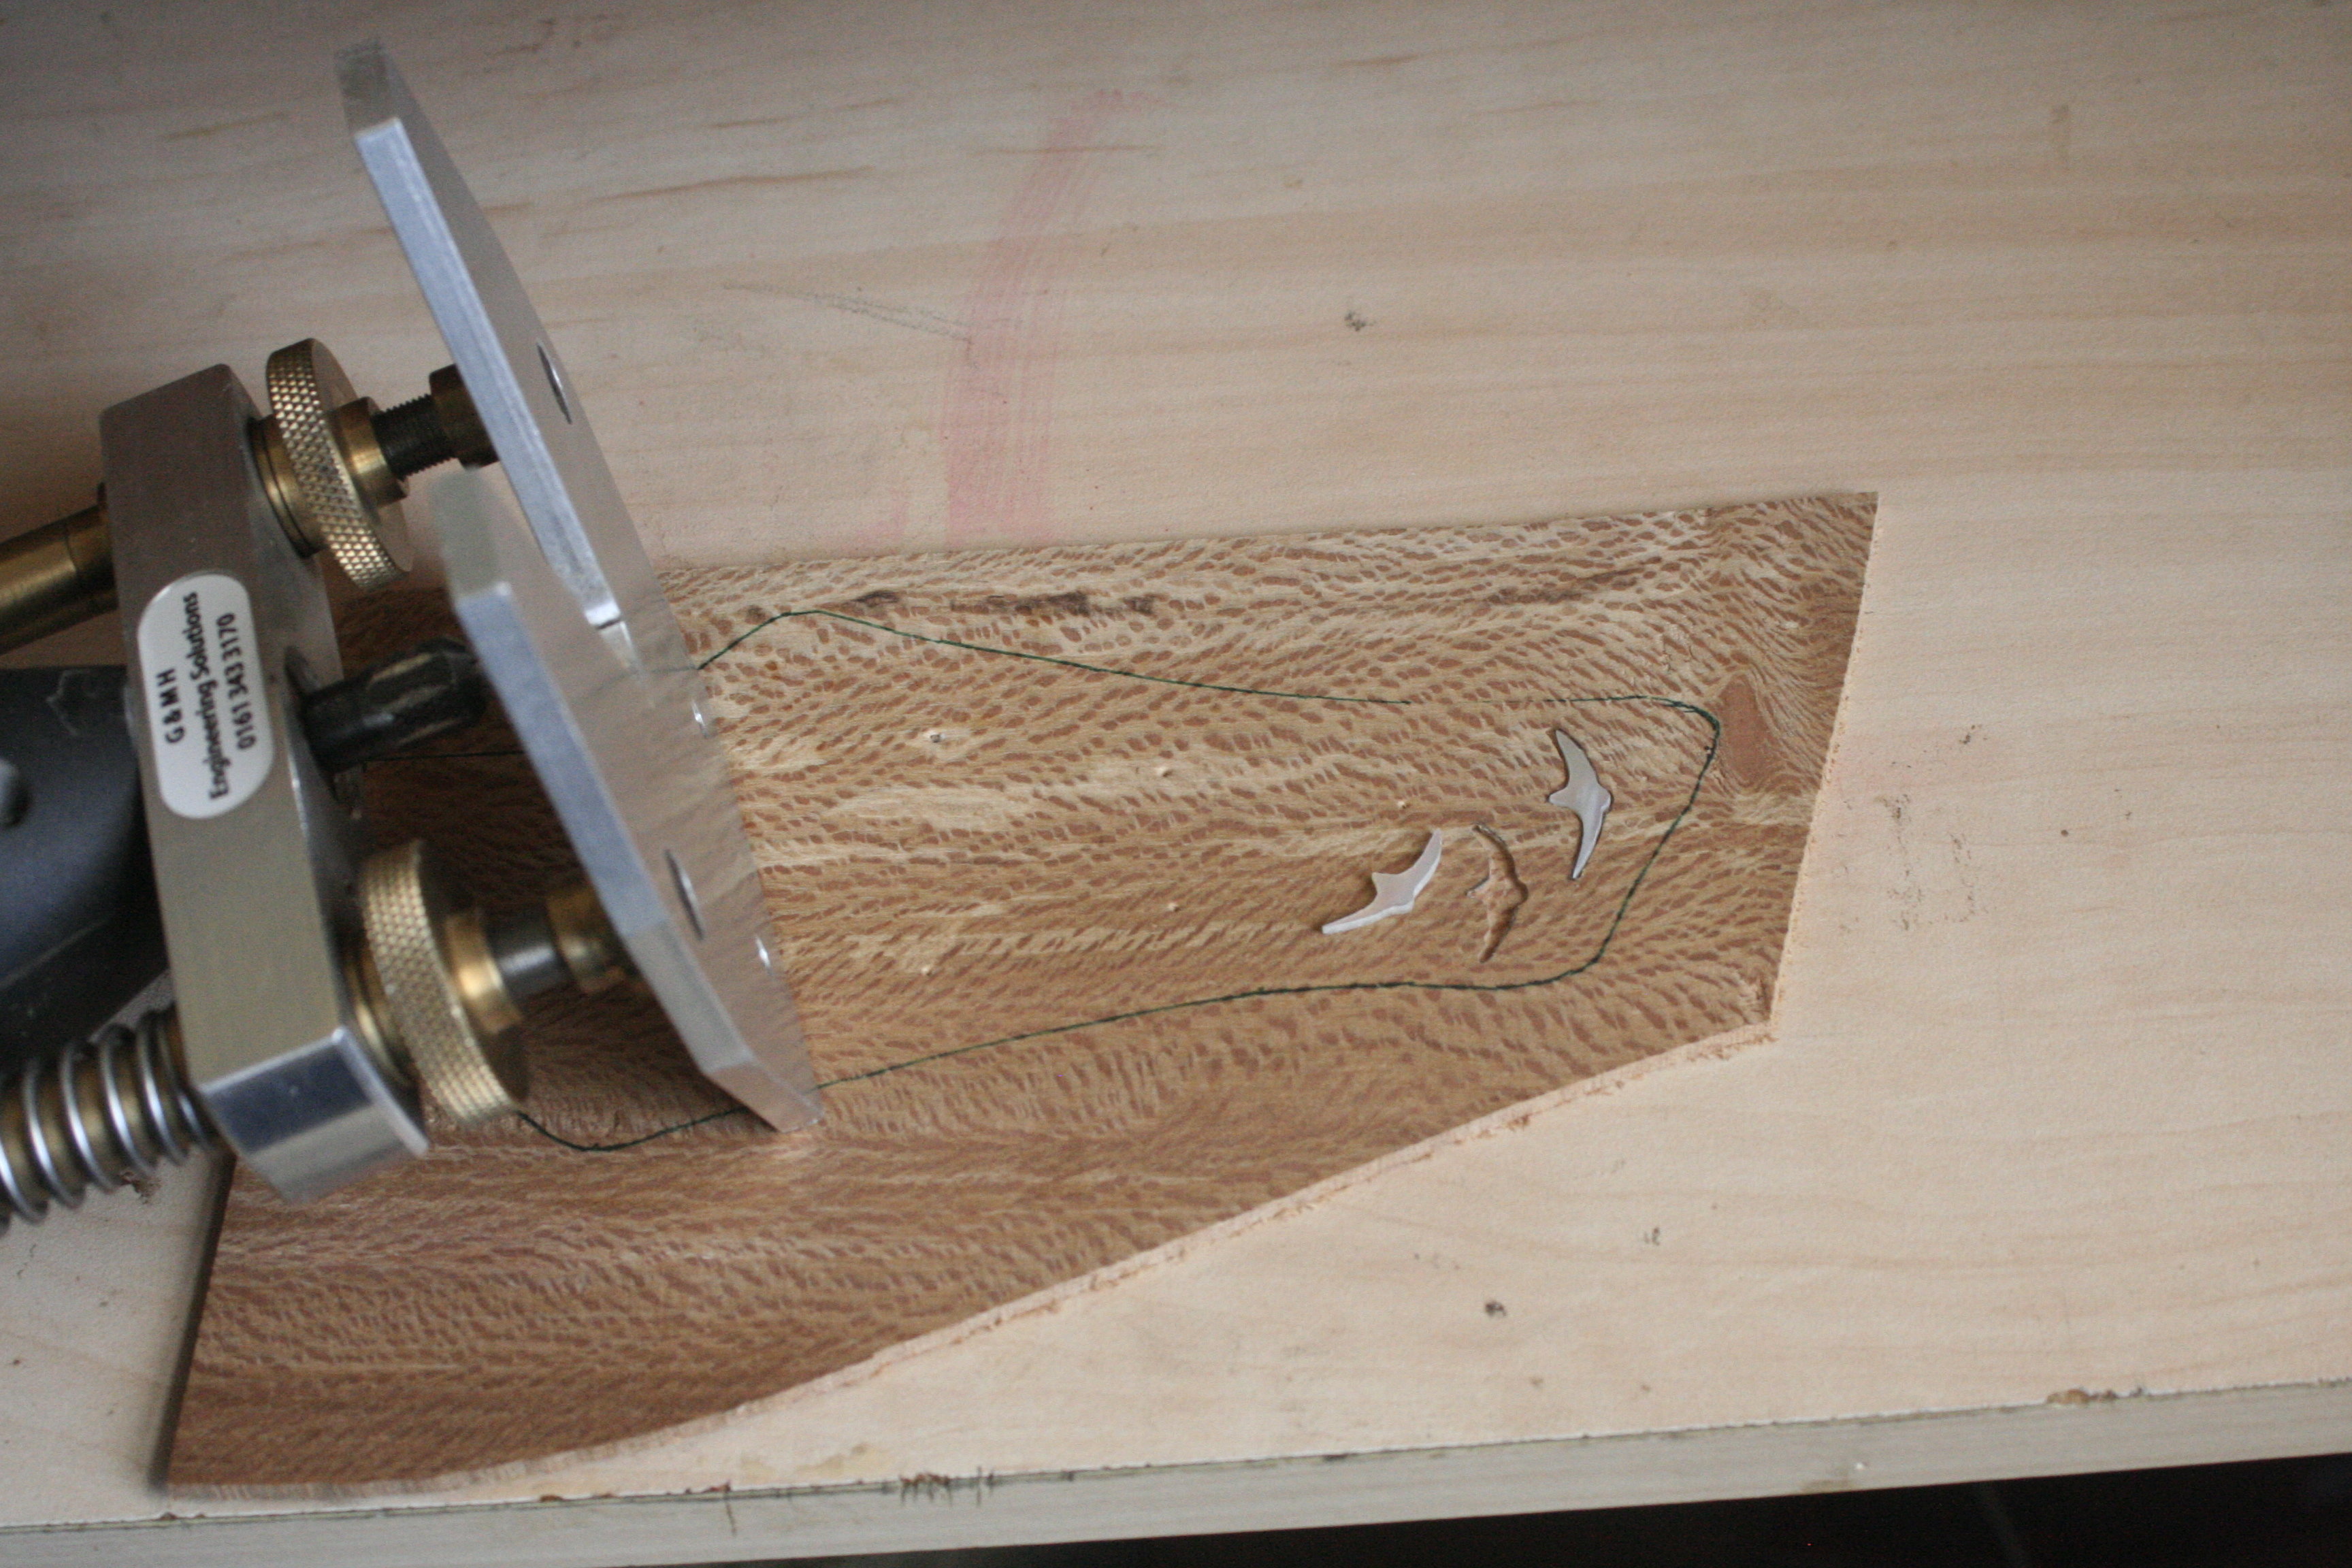
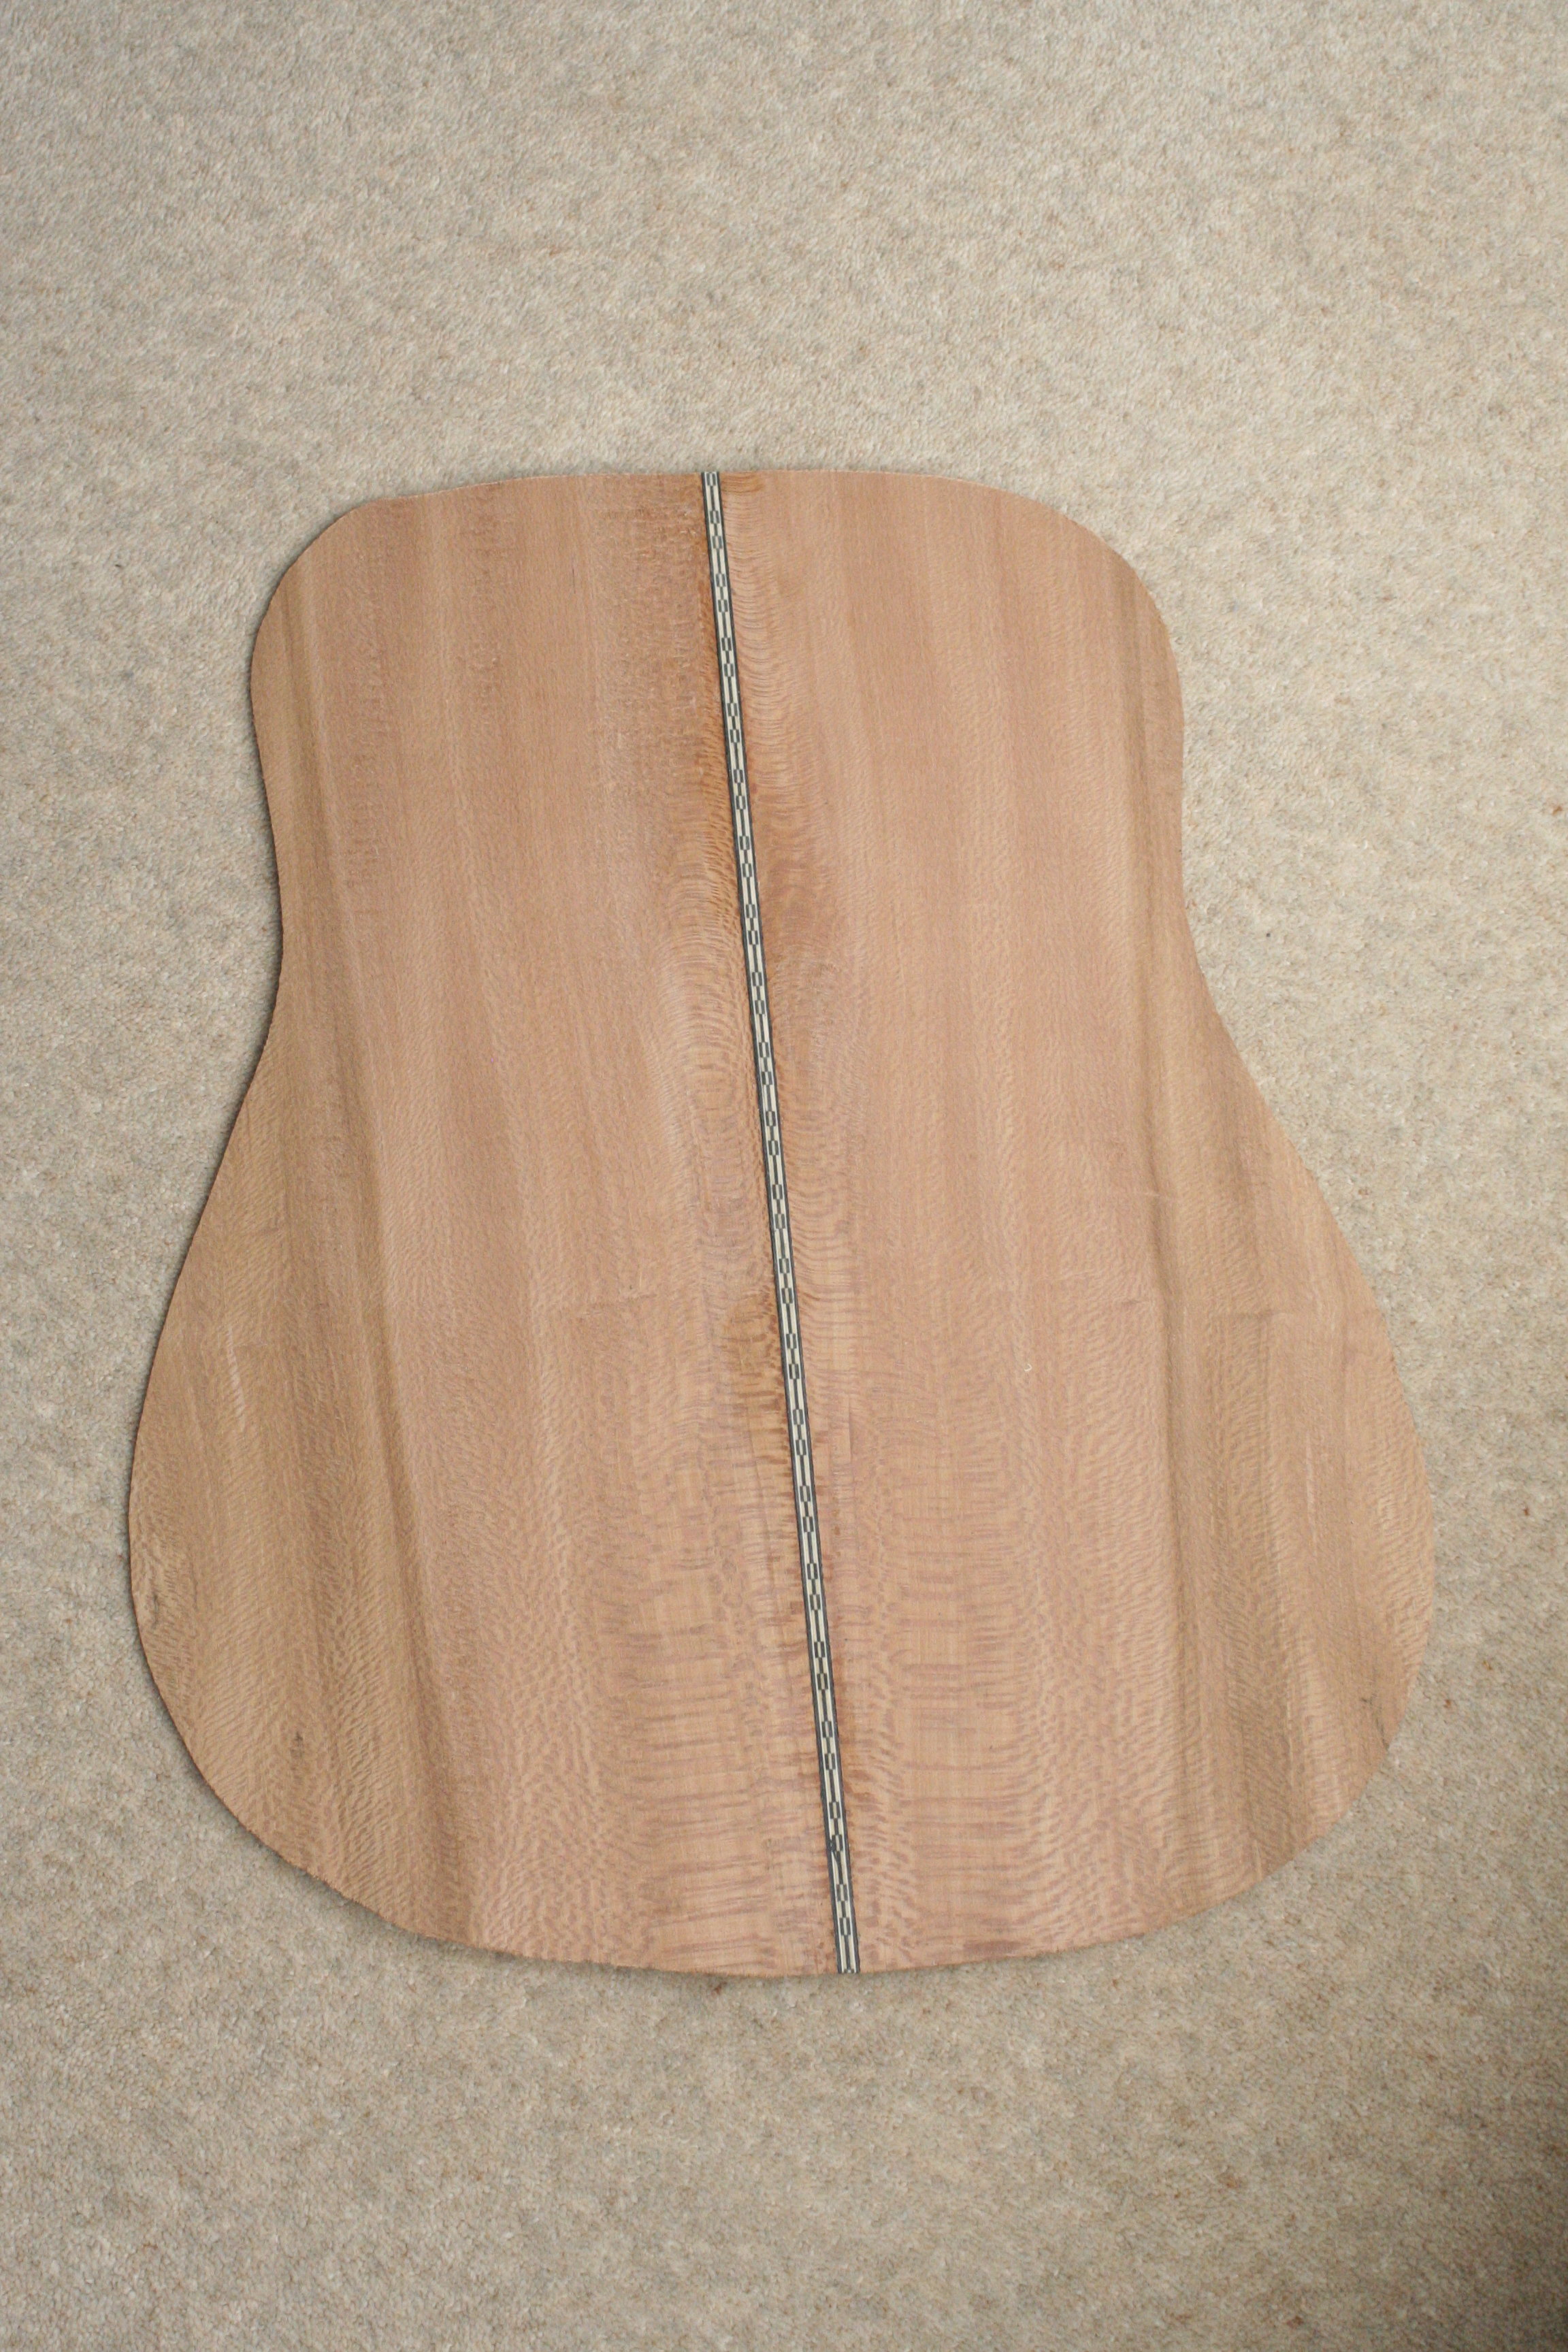
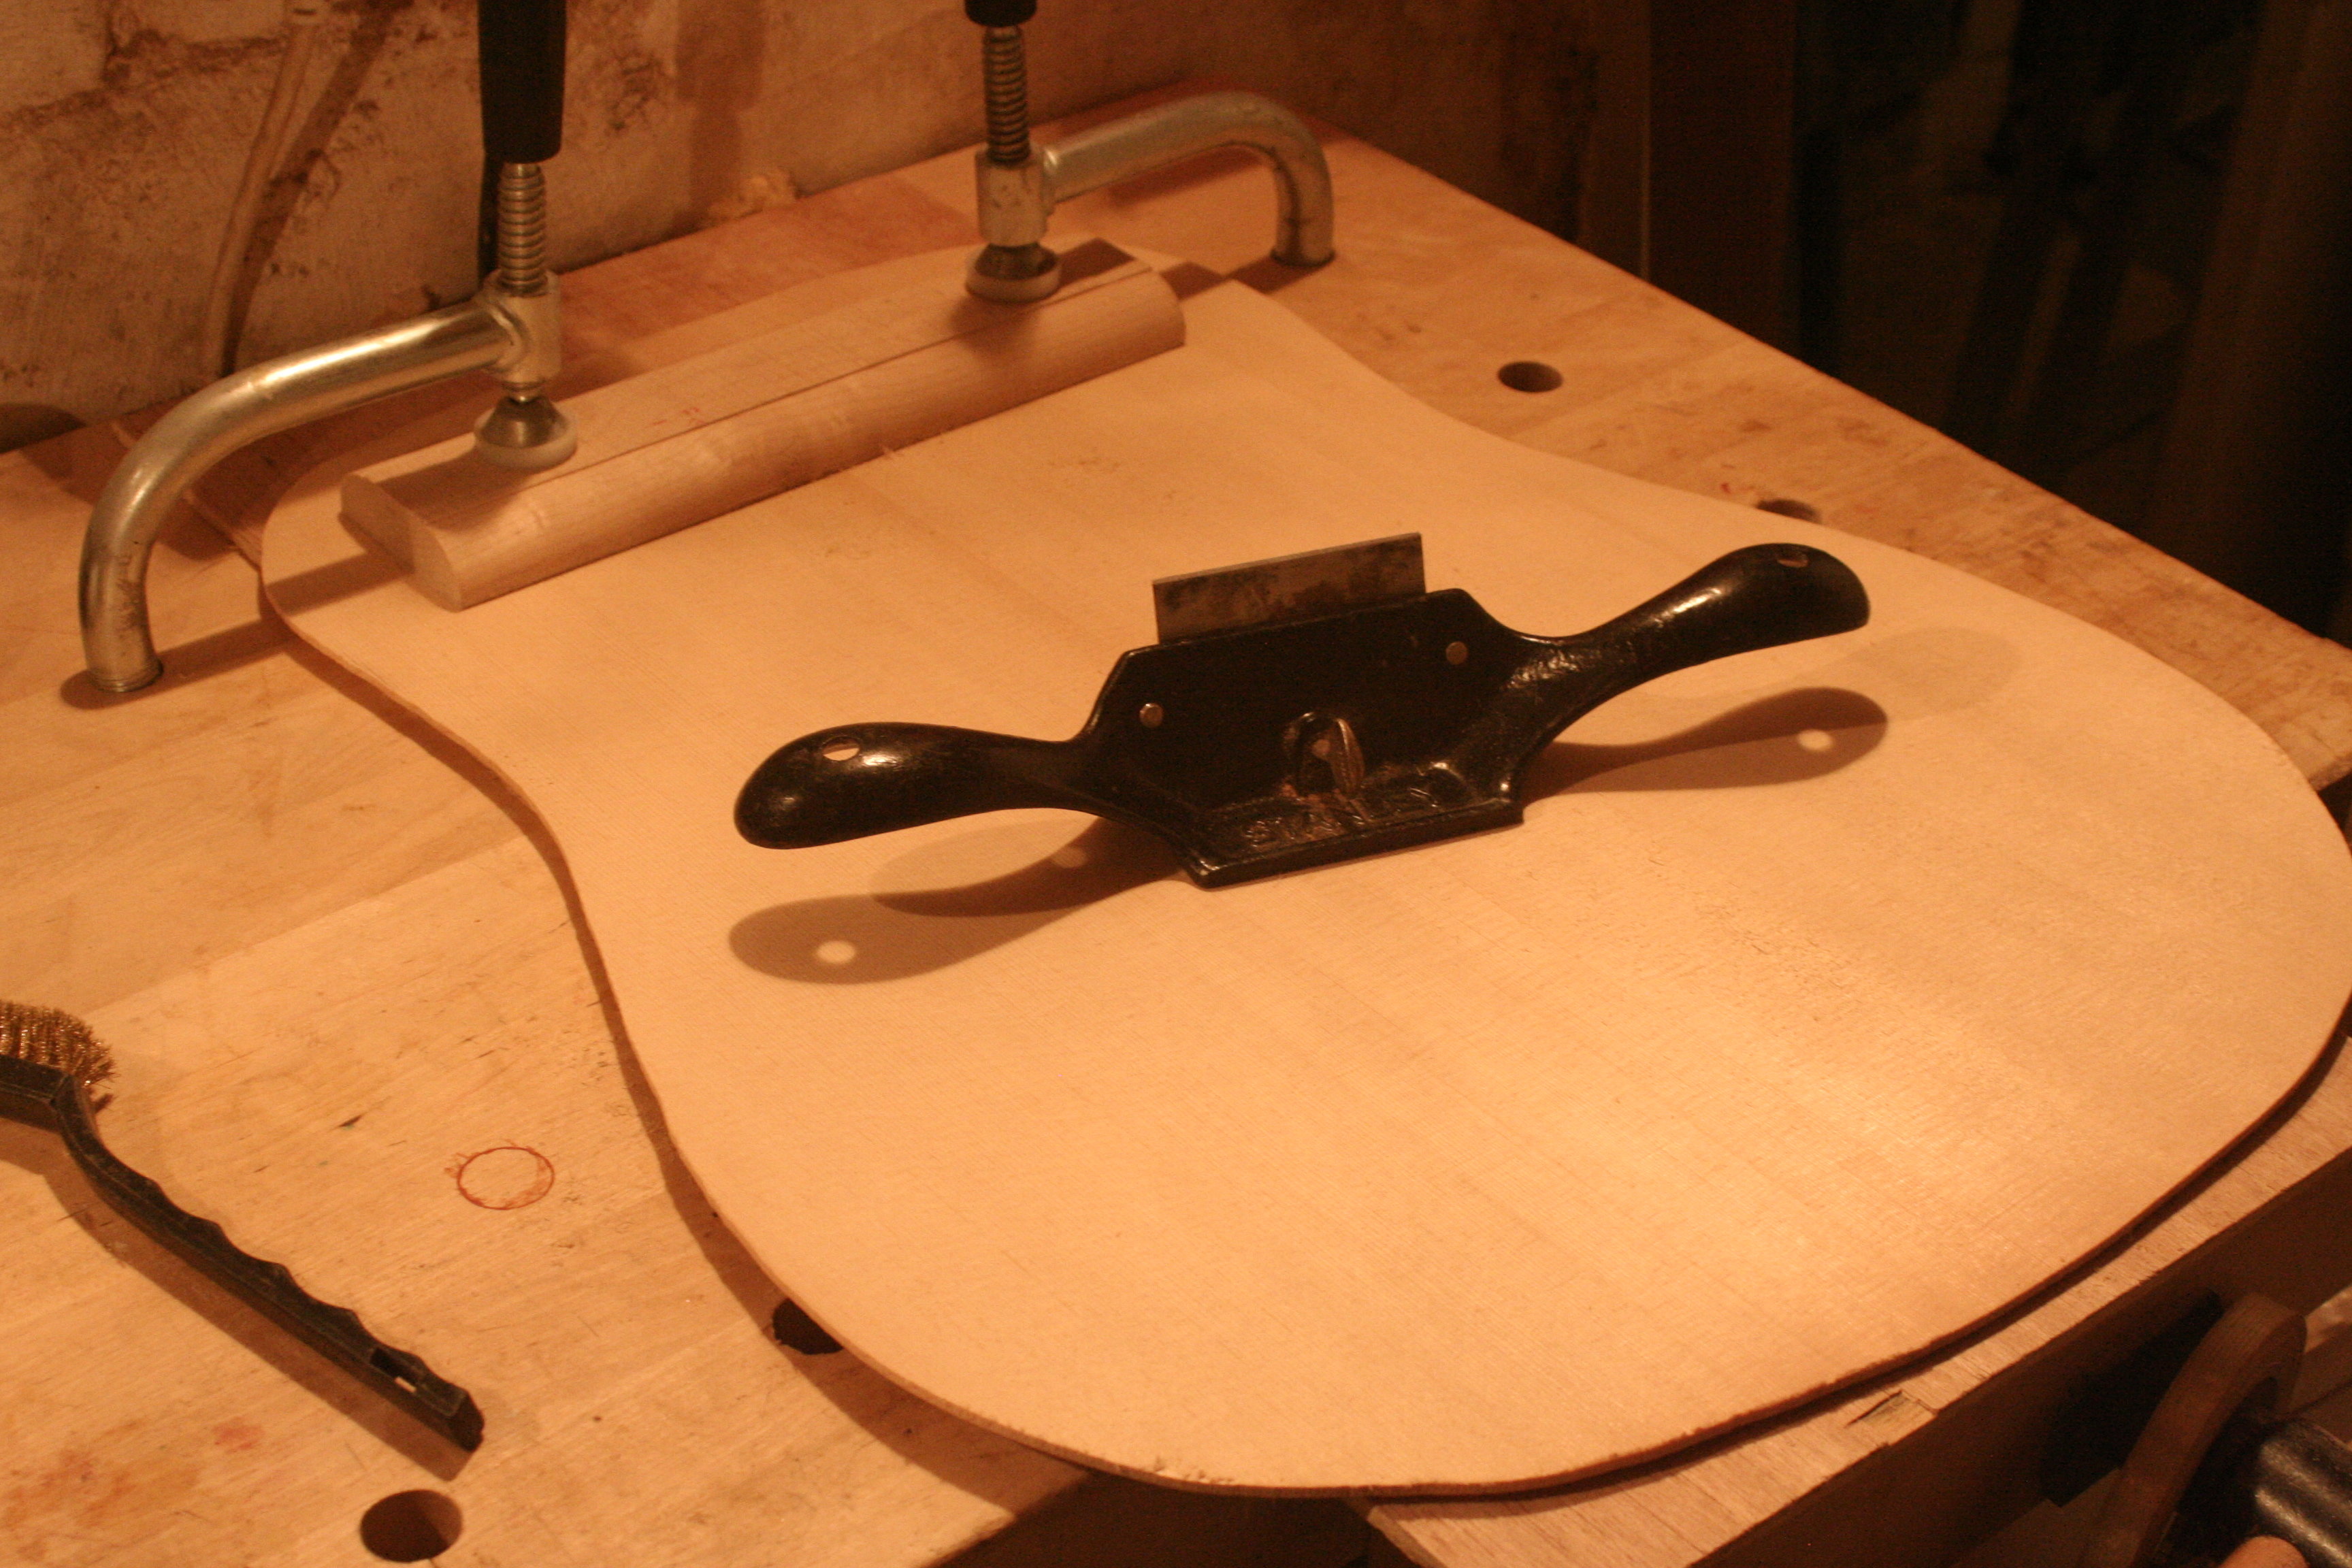
Andyjr1515 replied to Andyjr1515's topic in Build Diaries
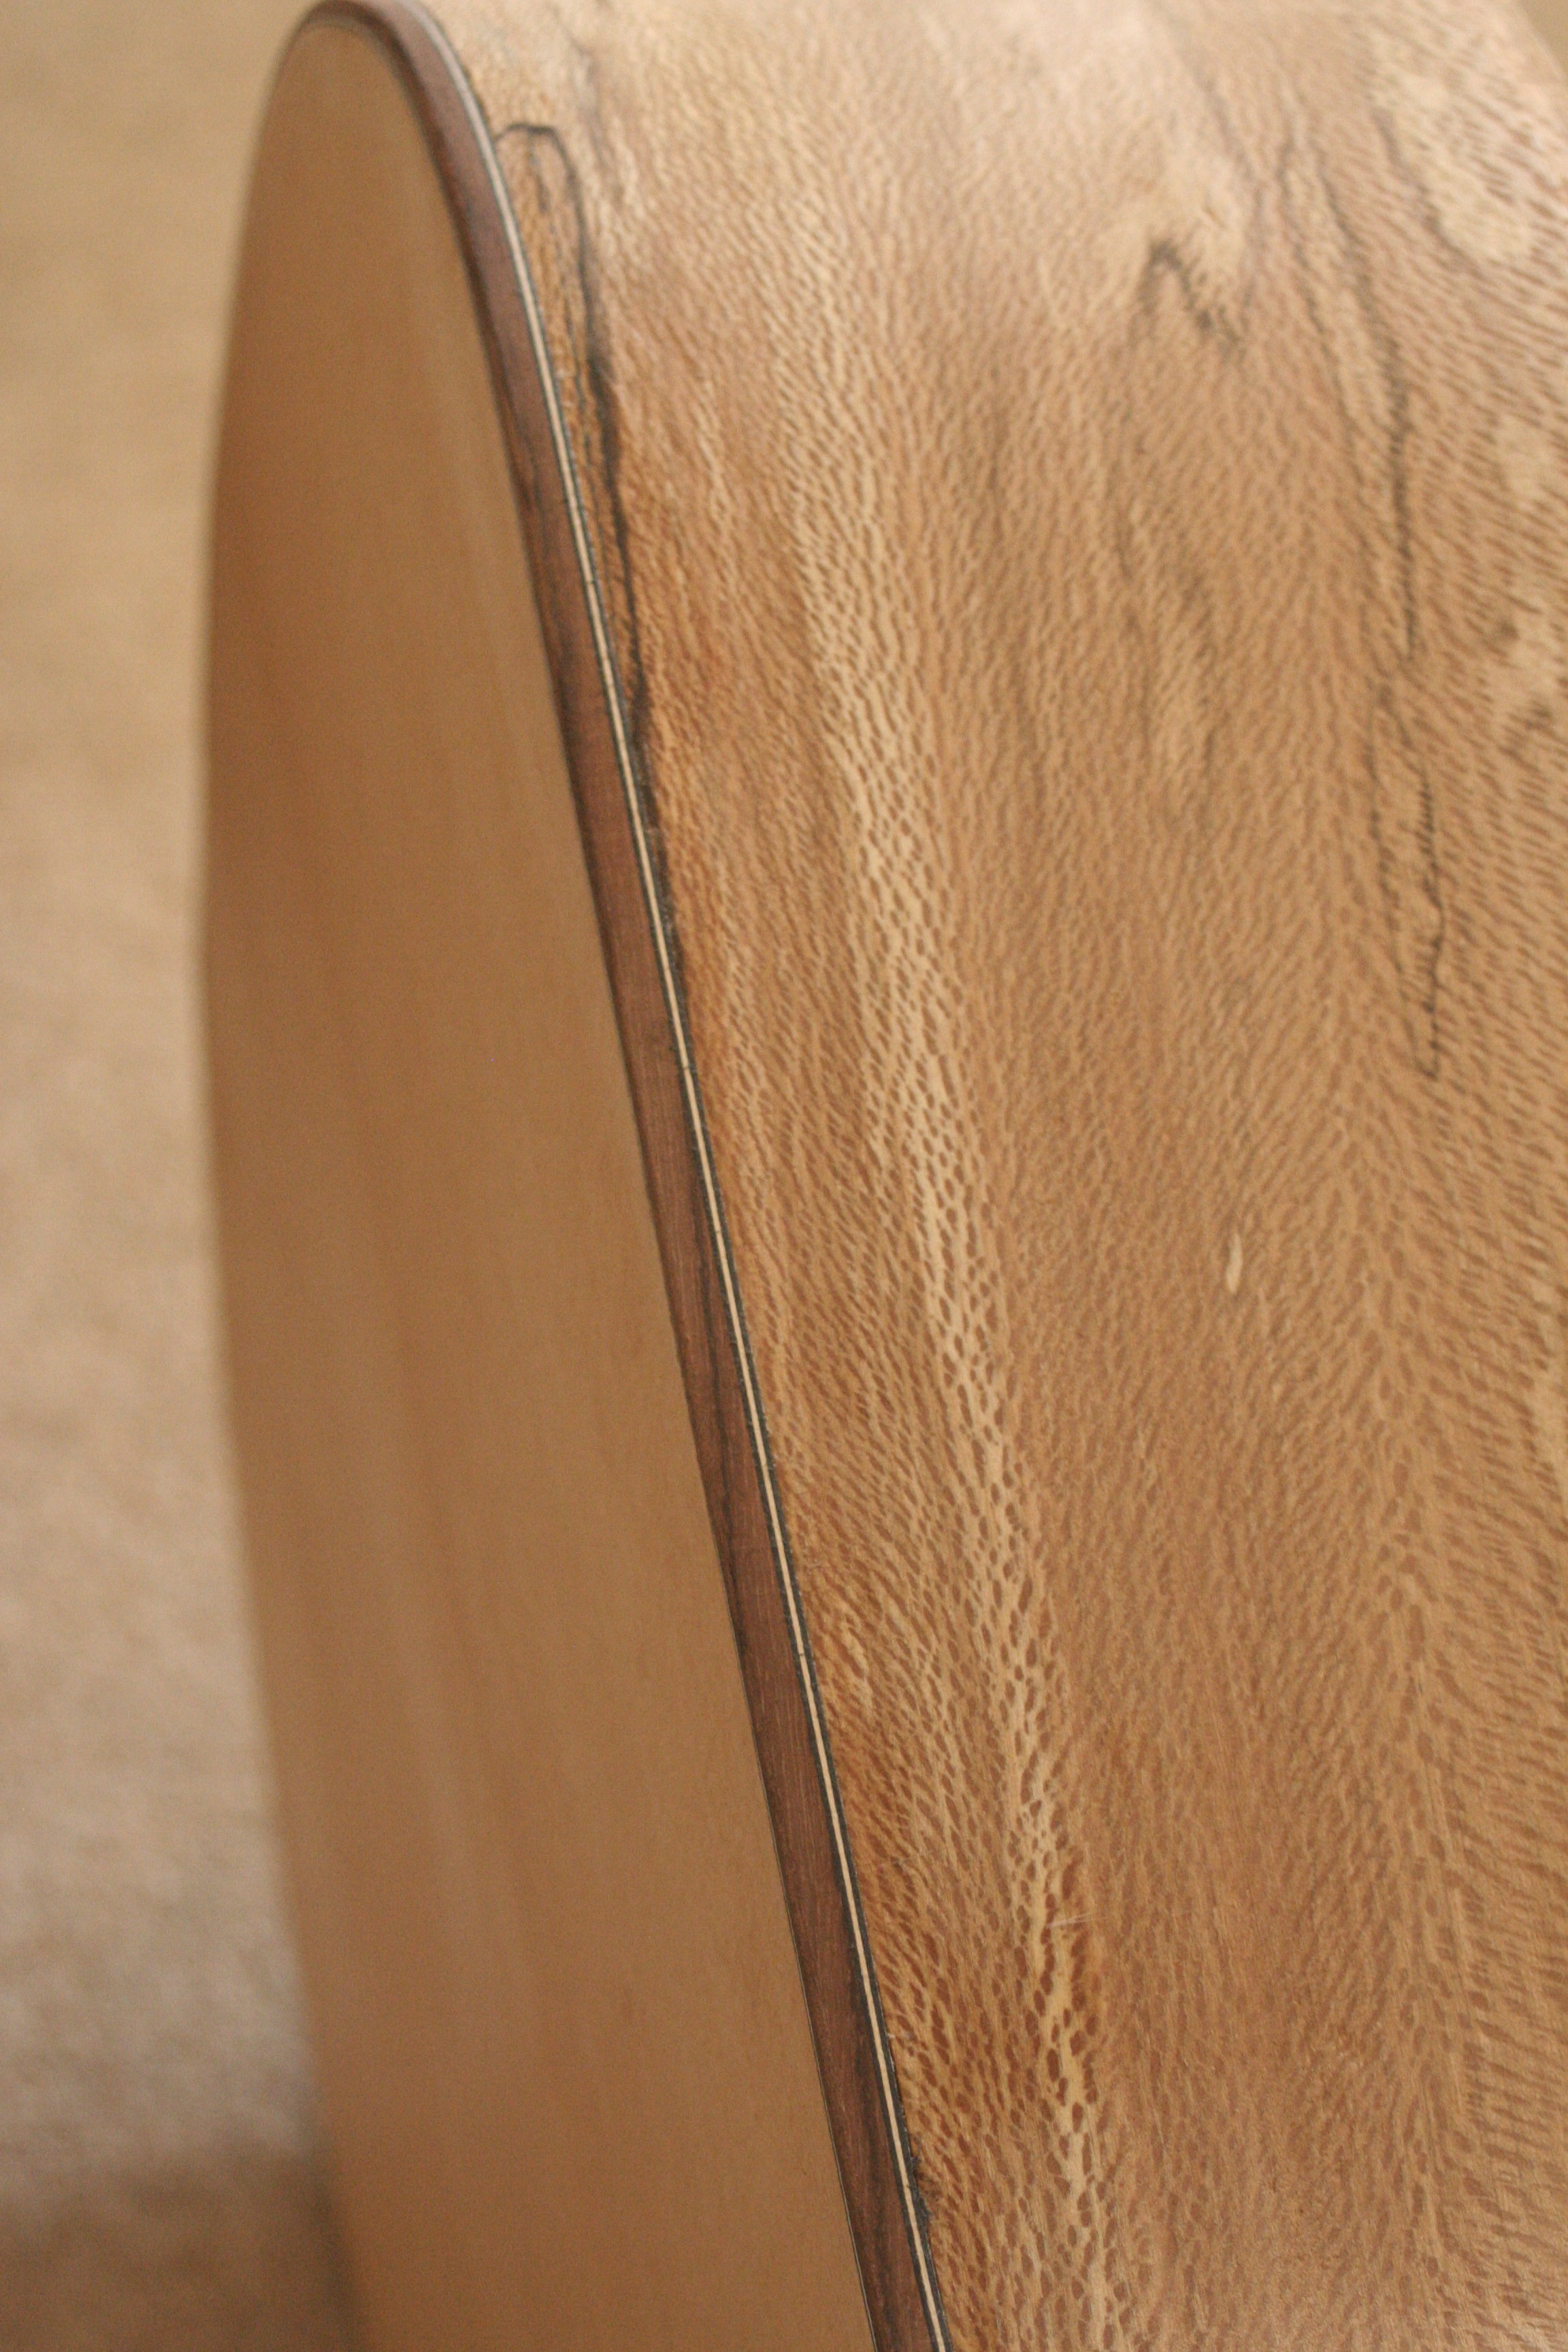
Next came joining the two sides of the top: Then bringing it down from 5-6mm to just below 3mm. I'm getting better at sharpening plane blades!: Then once I was getting close I put my old Stanley No.80 scraper plane into use for the first time: In the meantime I joined a nice piece of wood given to me by a Tasmanian friend. And yes - it comes from Tasmania! (I think it's a type of Eucalyptus). Mother of pearl cut and installed and swift added, then the two circles cut off centre: