
Si600
-
Posts
163 -
Joined
-
Last visited
-
Days Won
11
Content Type
Profiles
Forums
Events
Shop
Everything posted by Si600
-
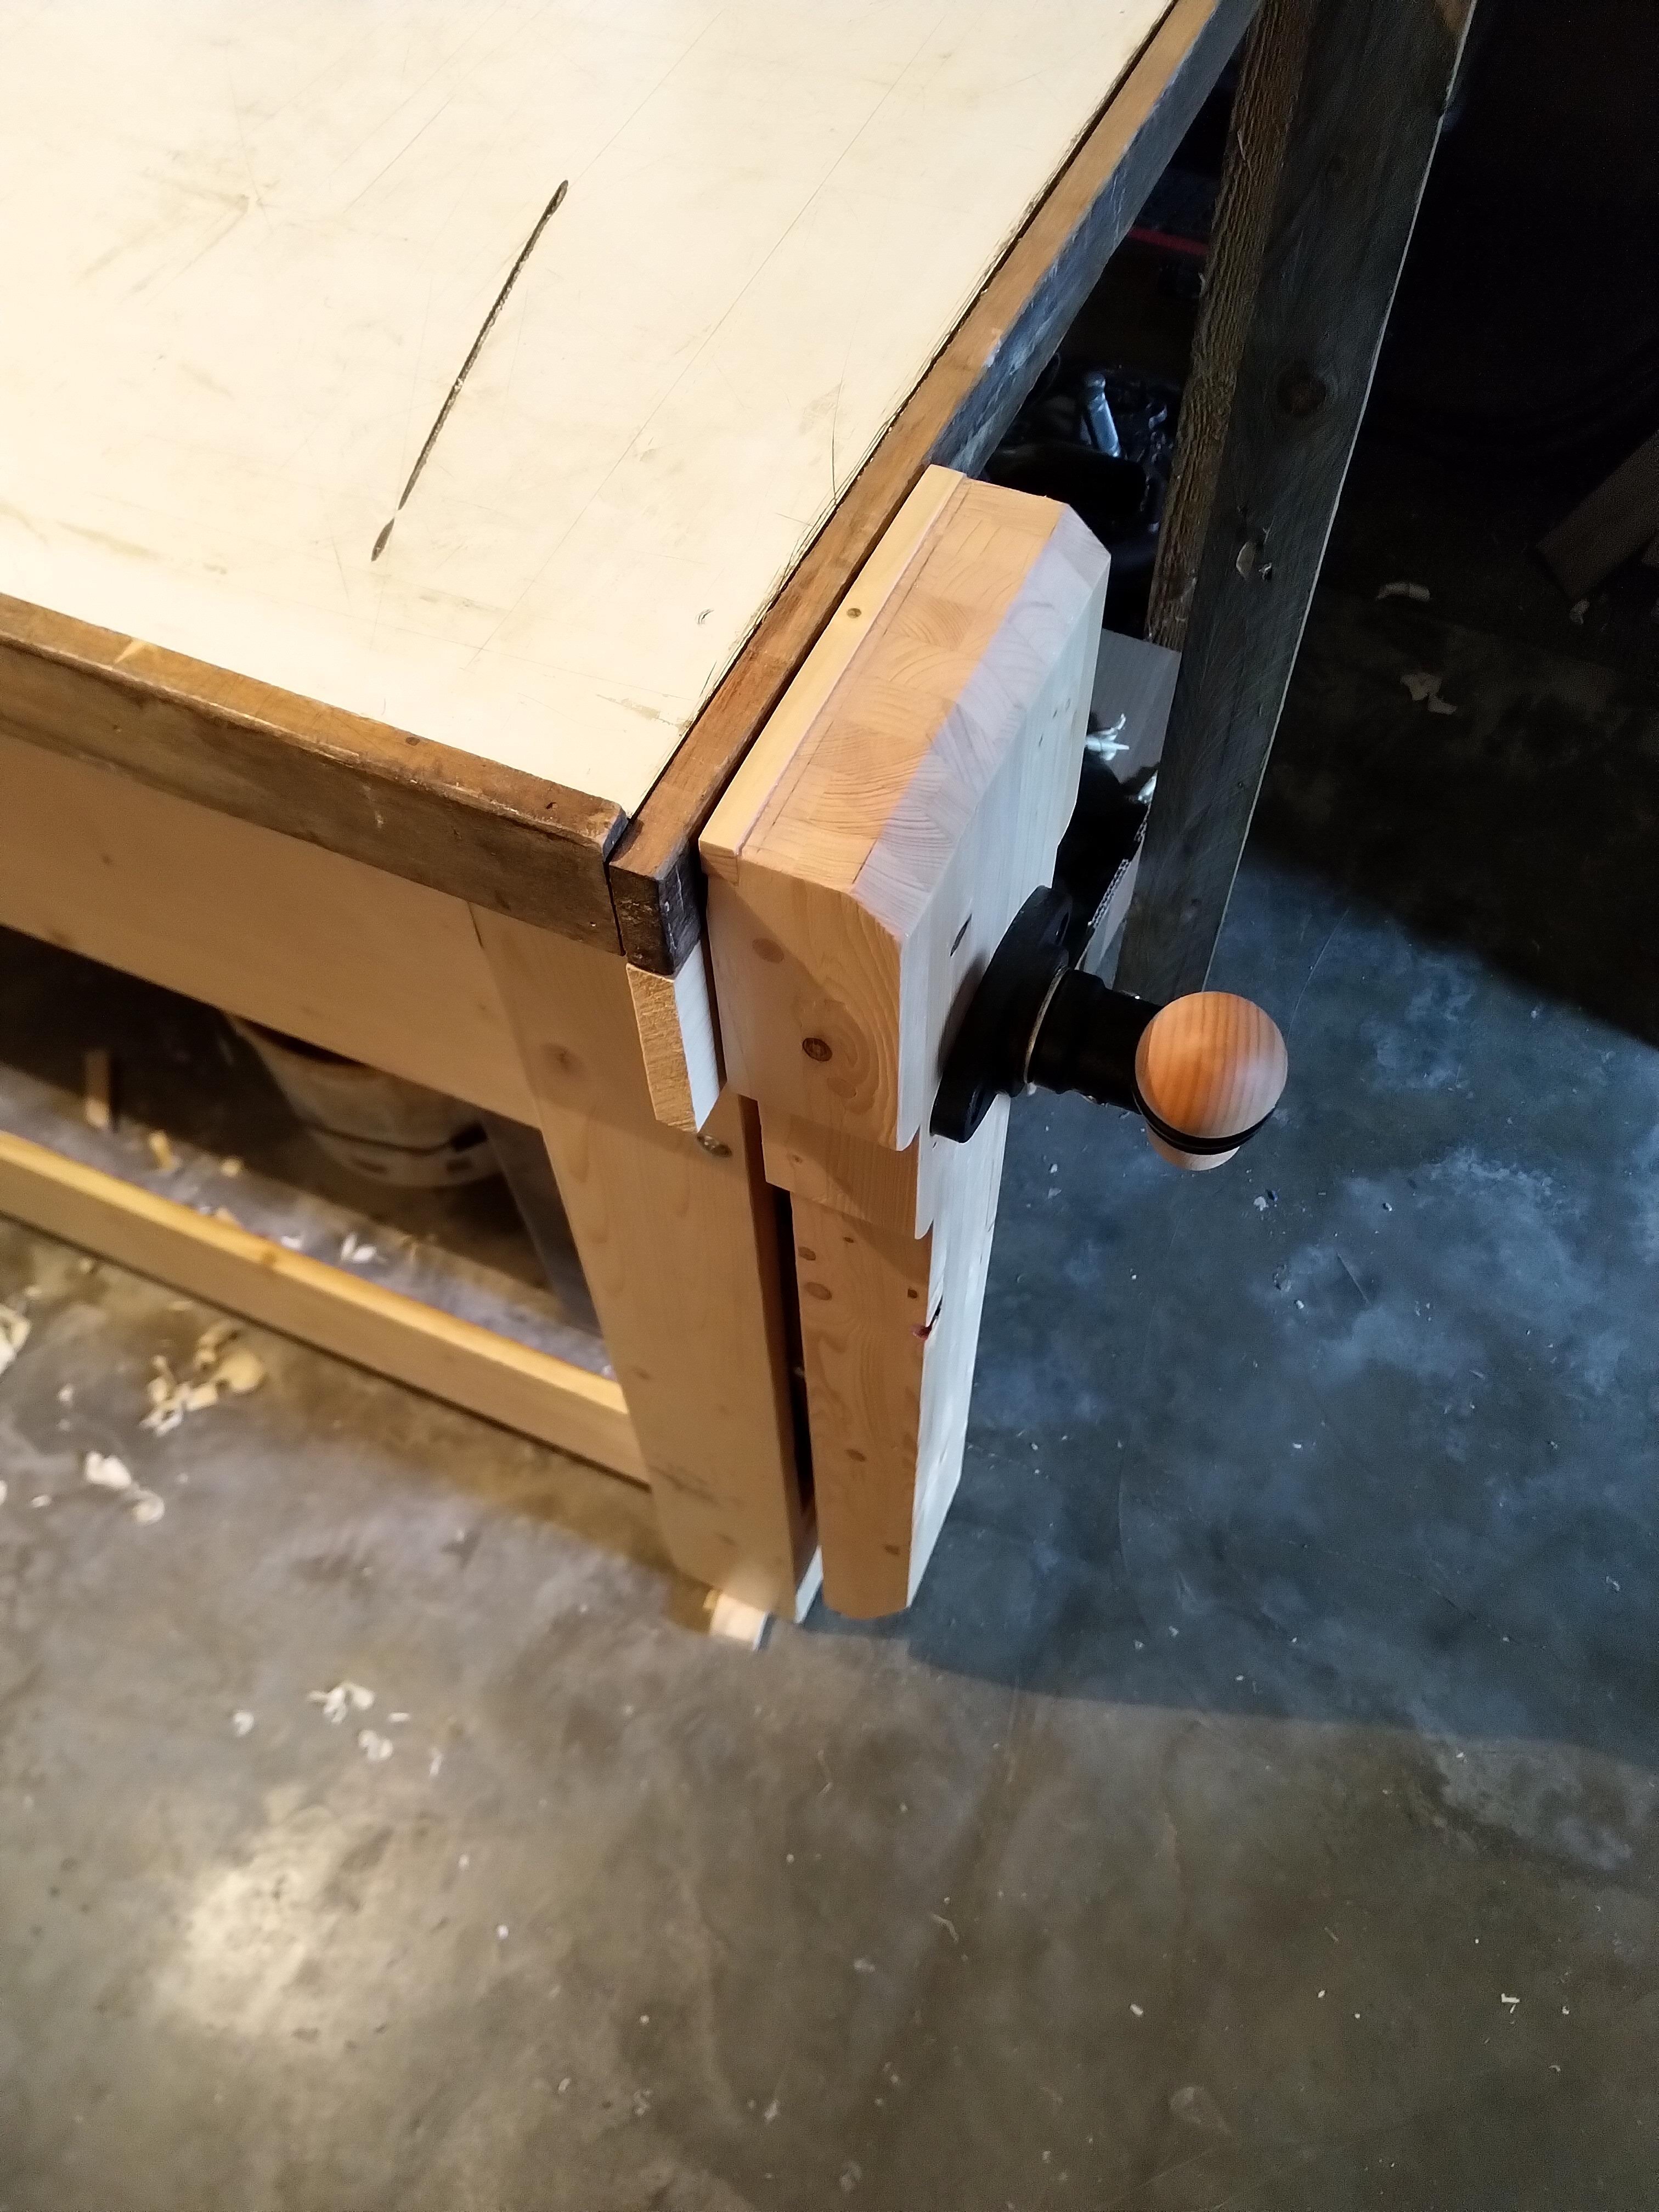
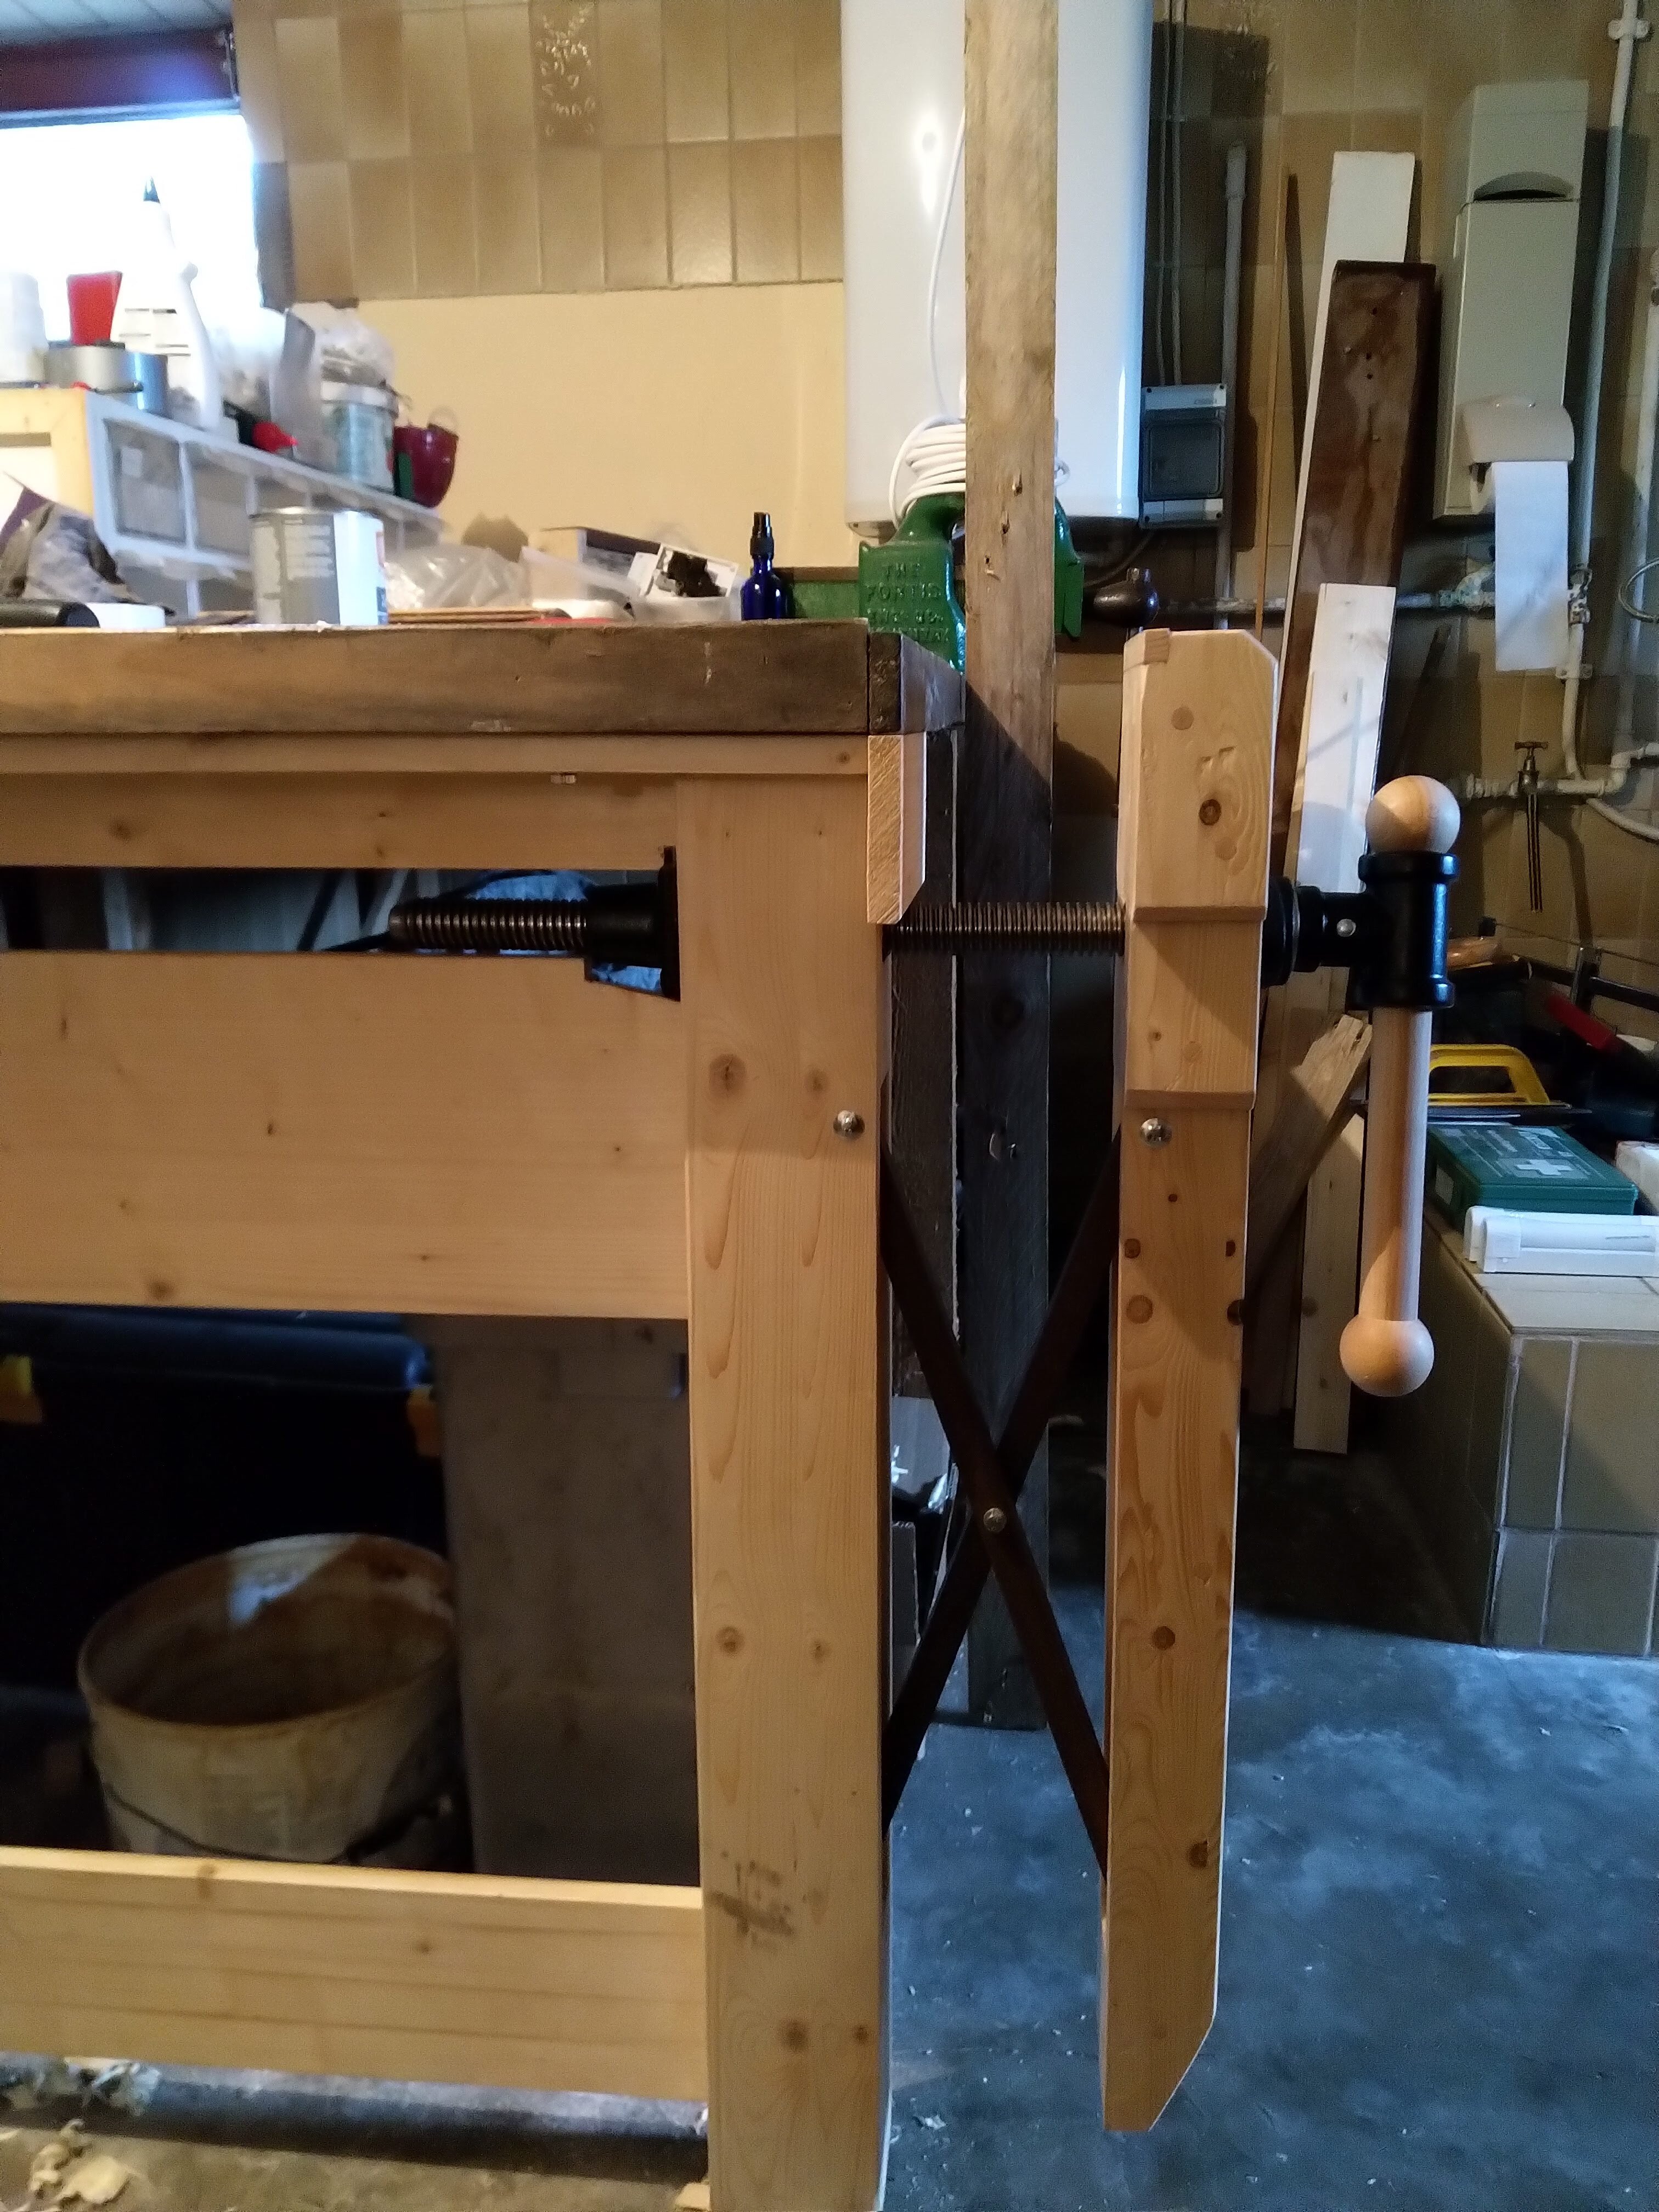
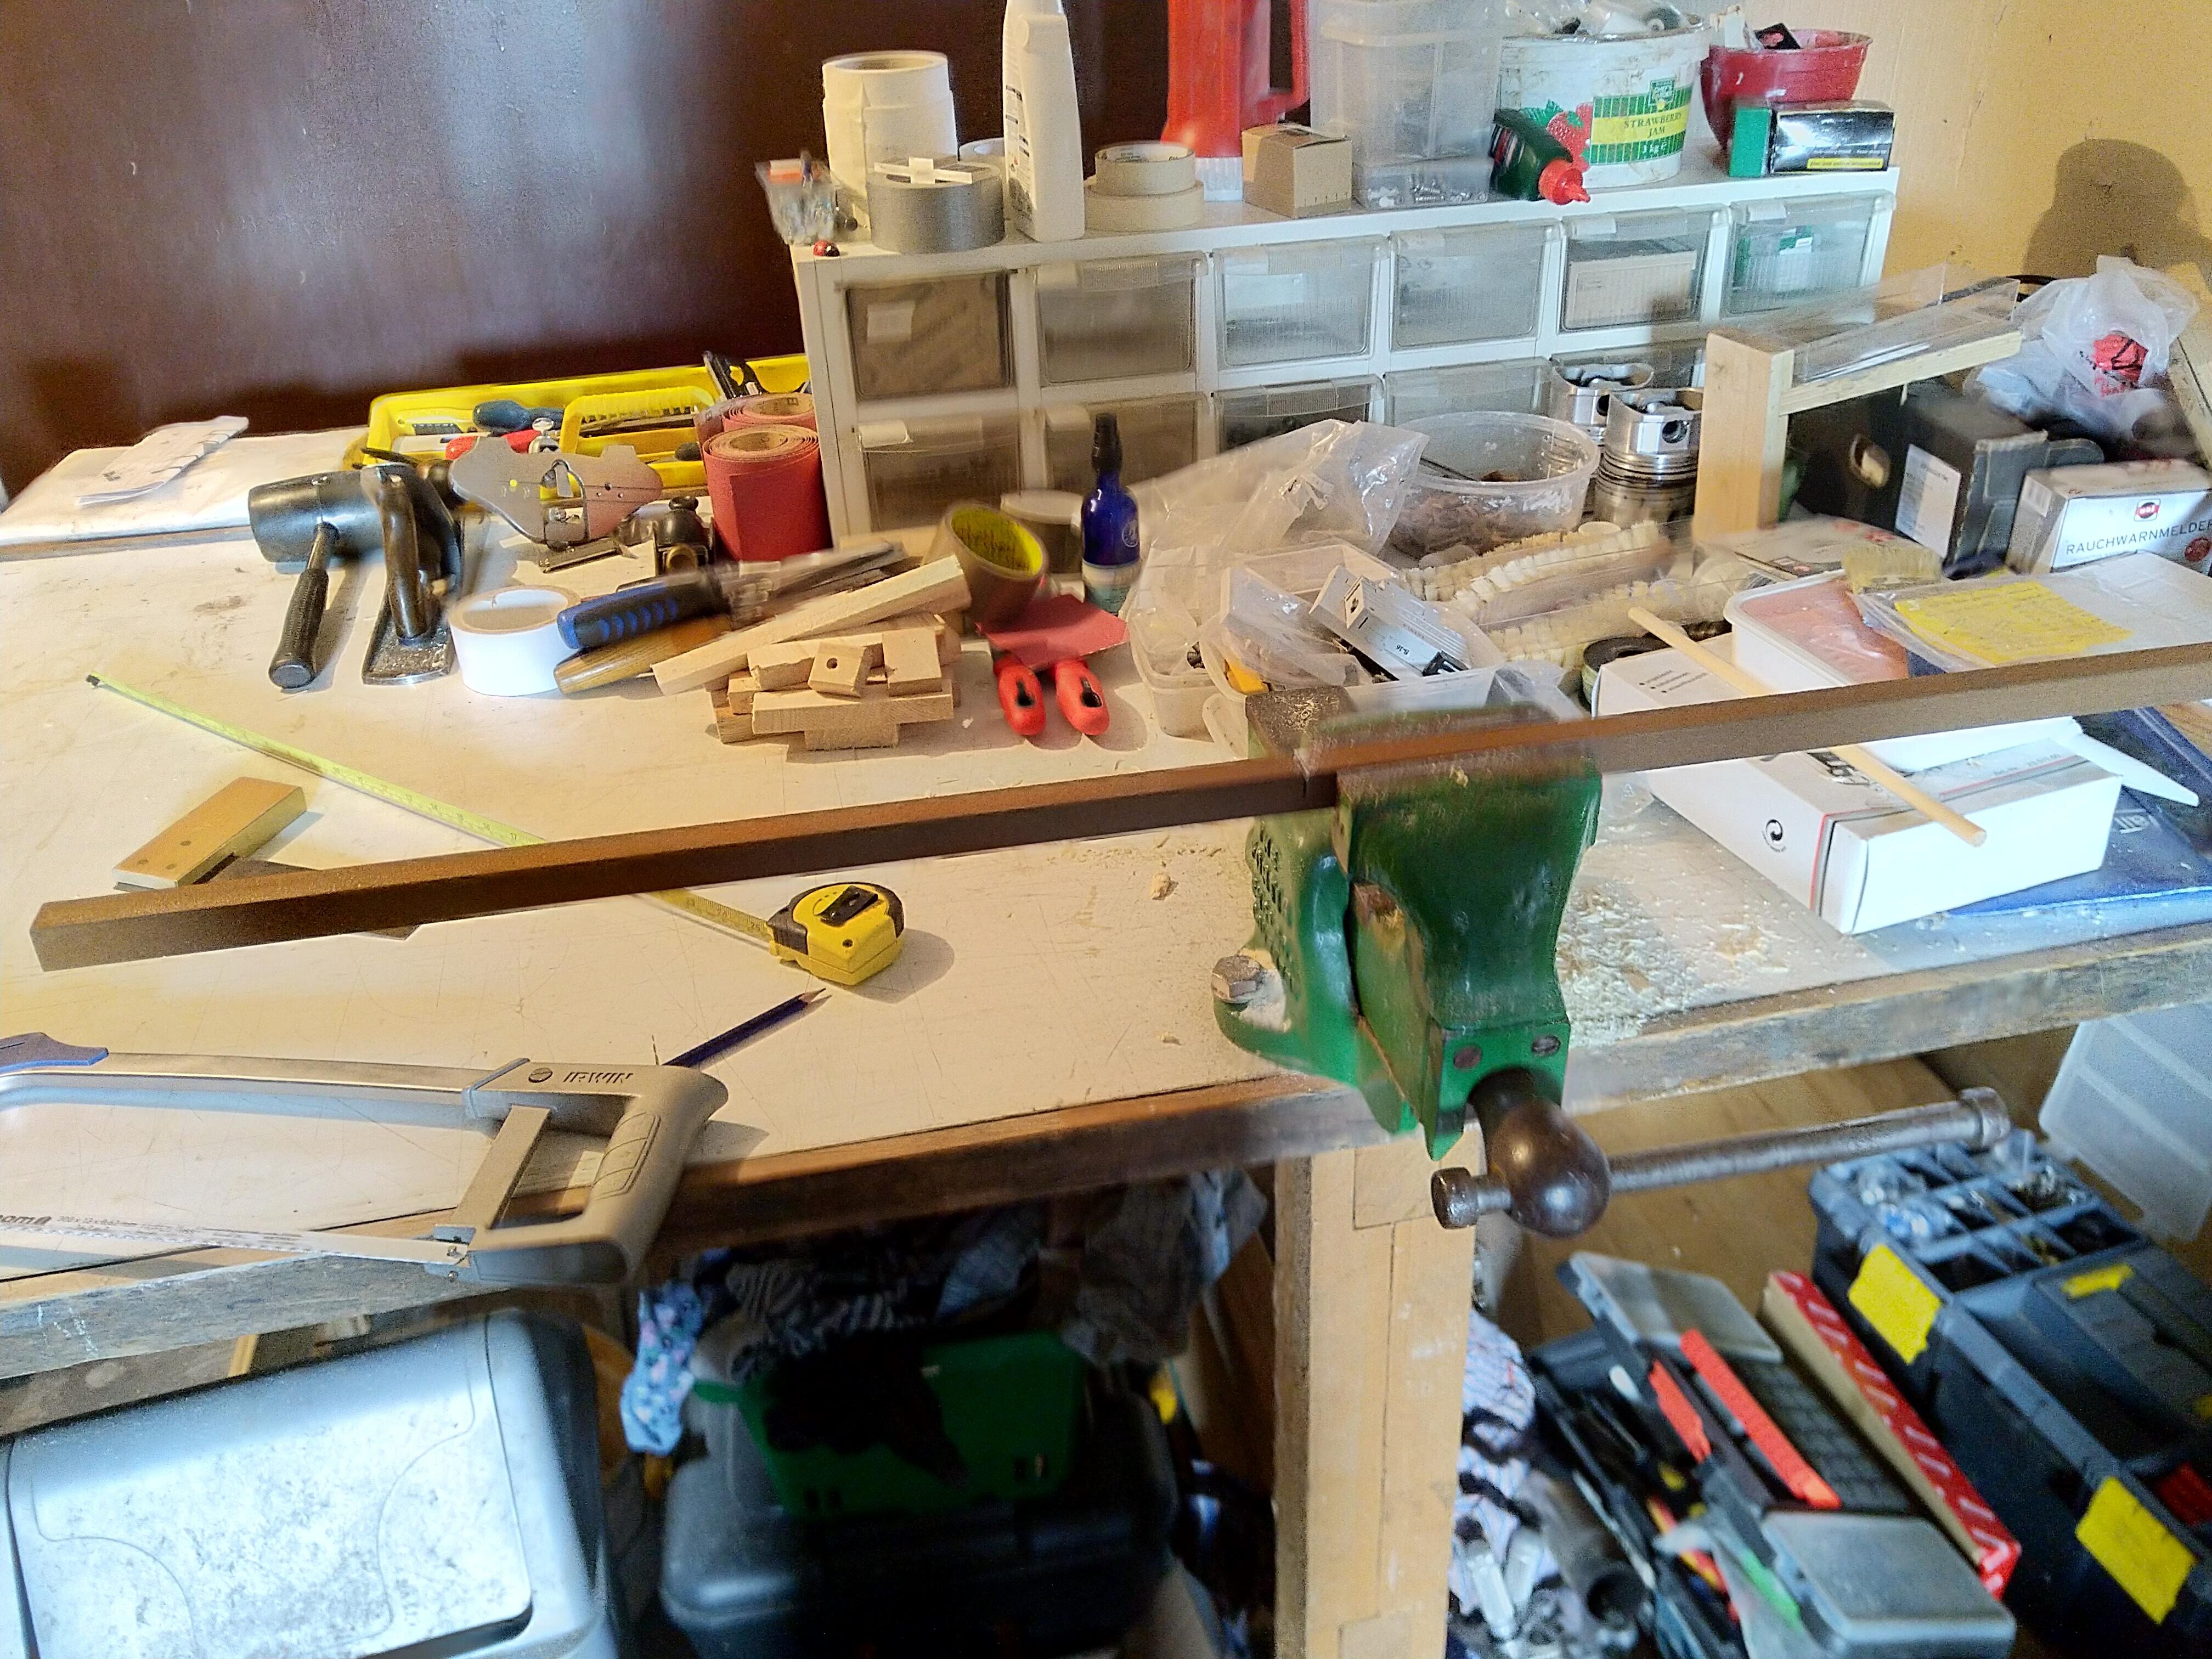
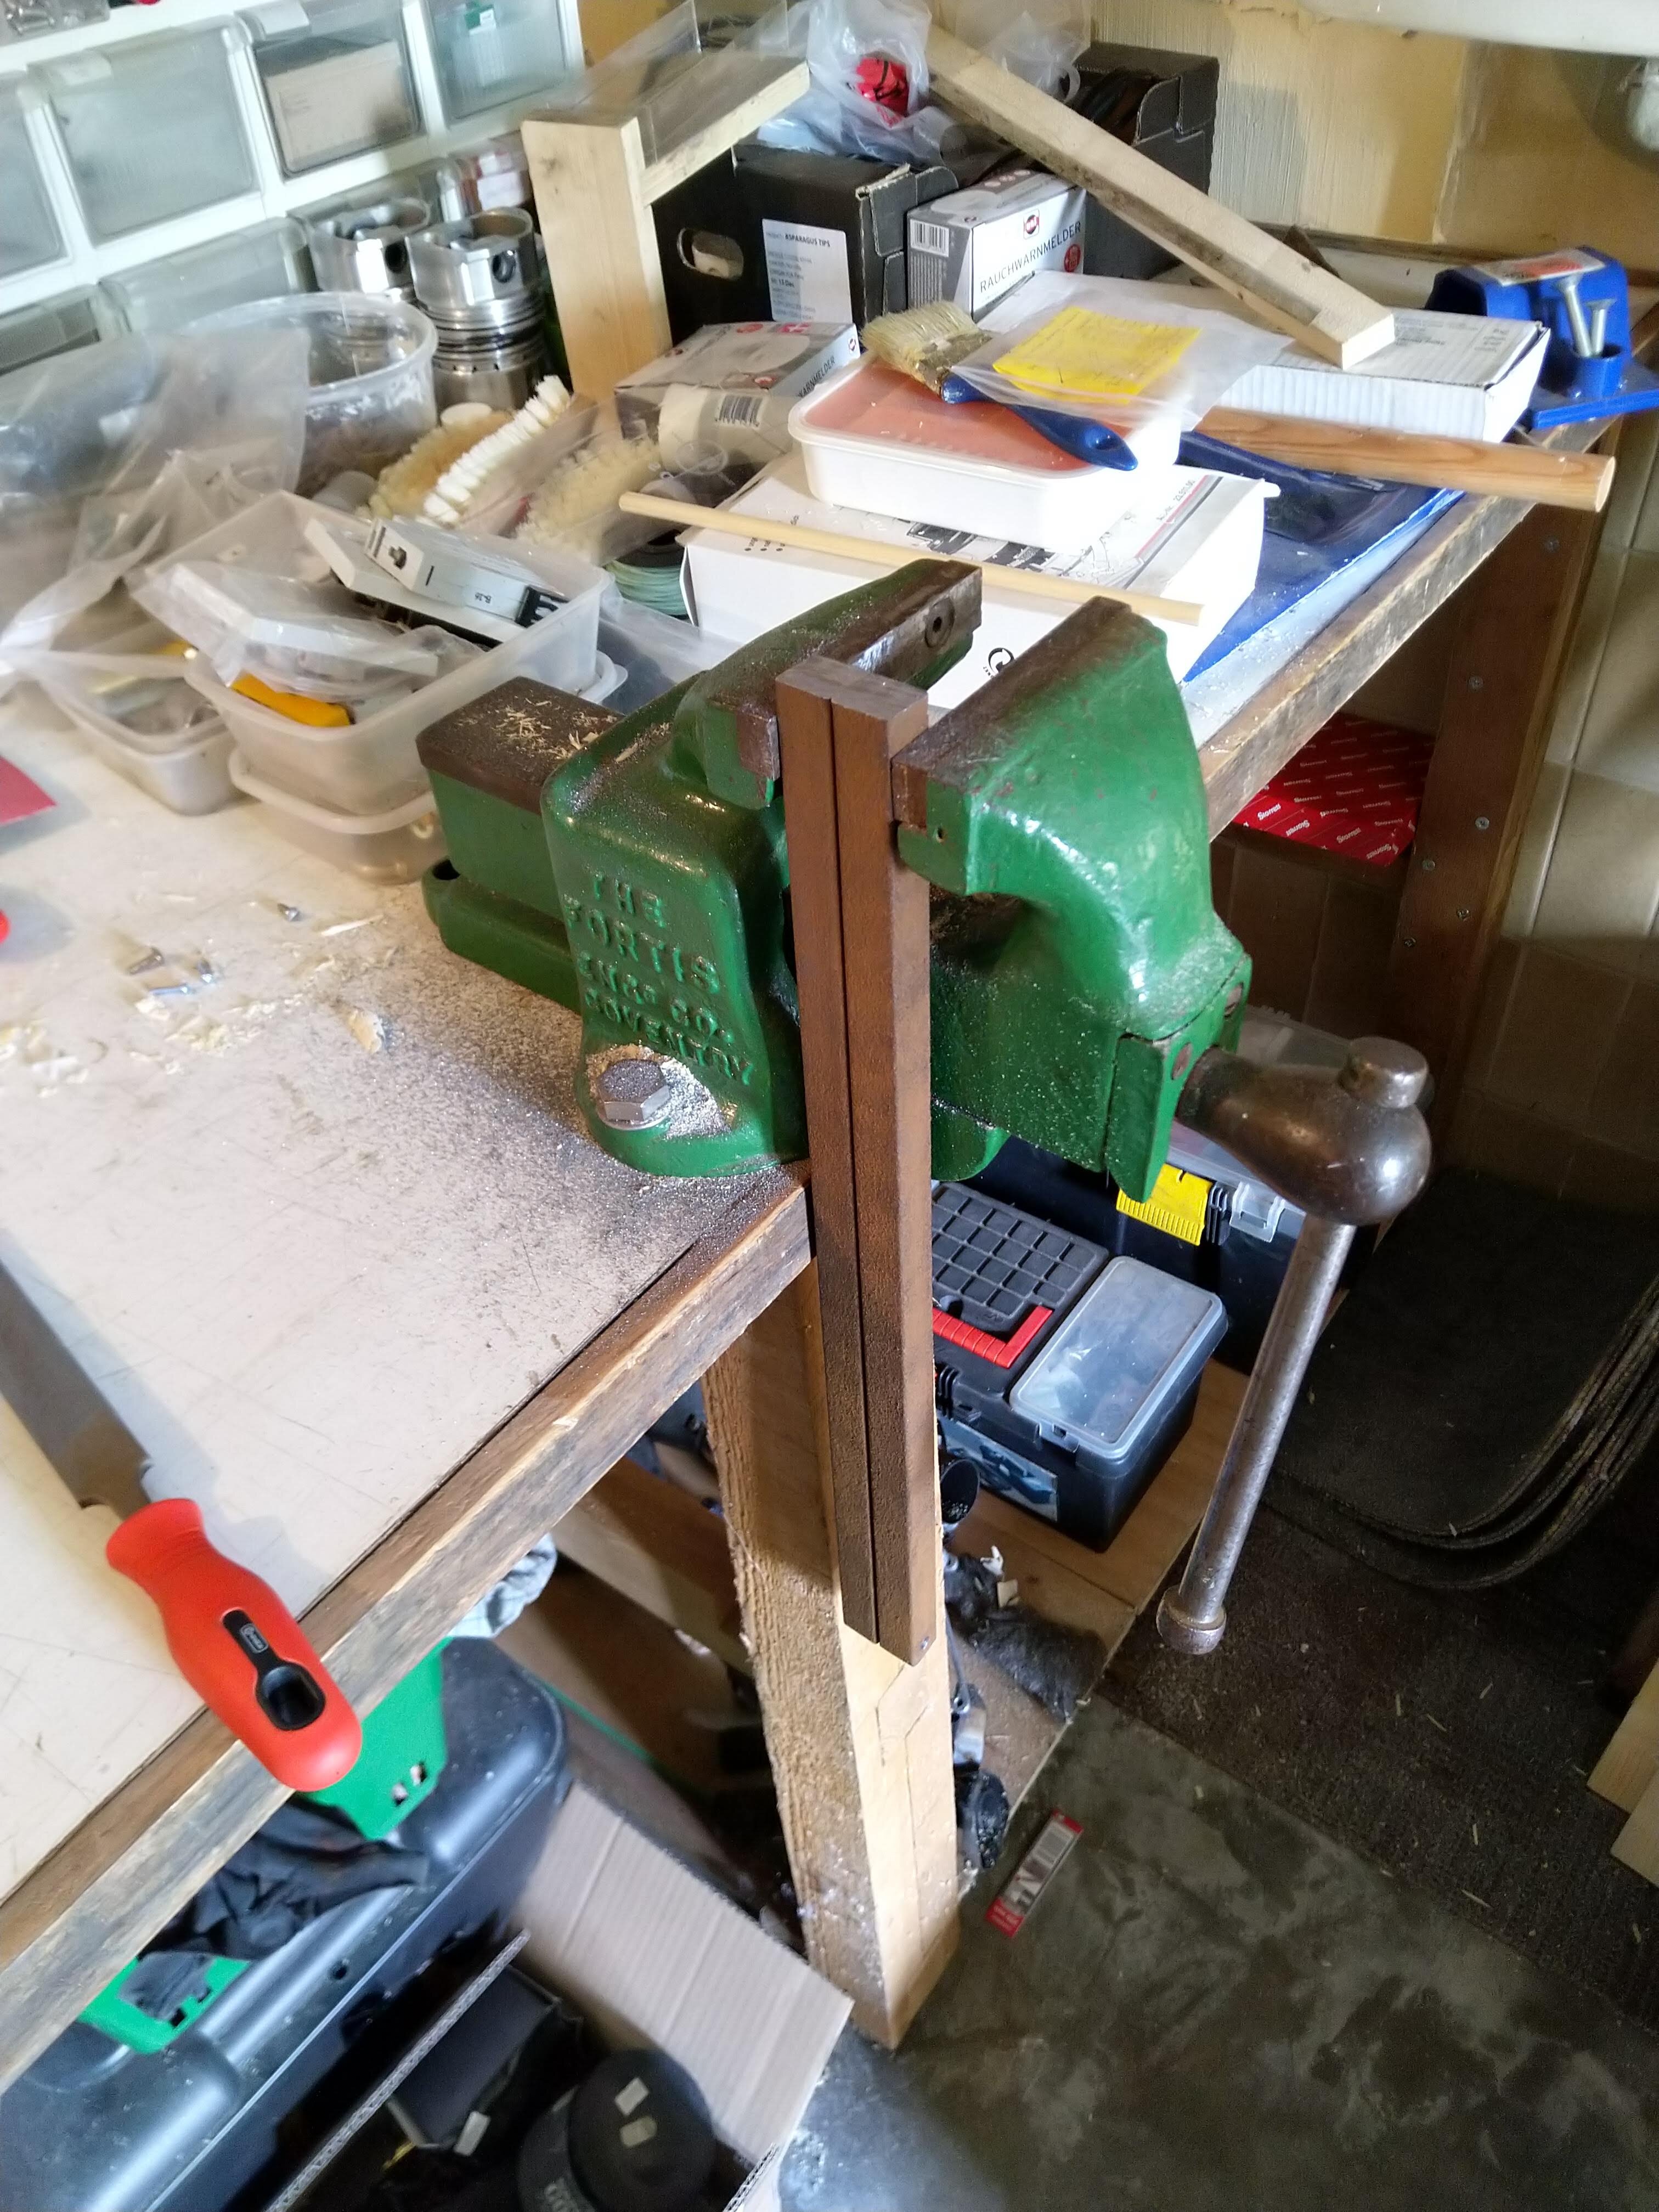
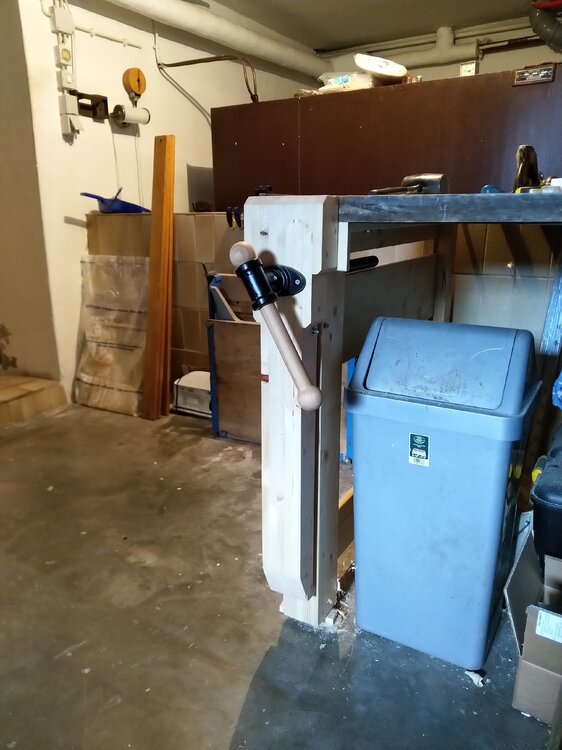
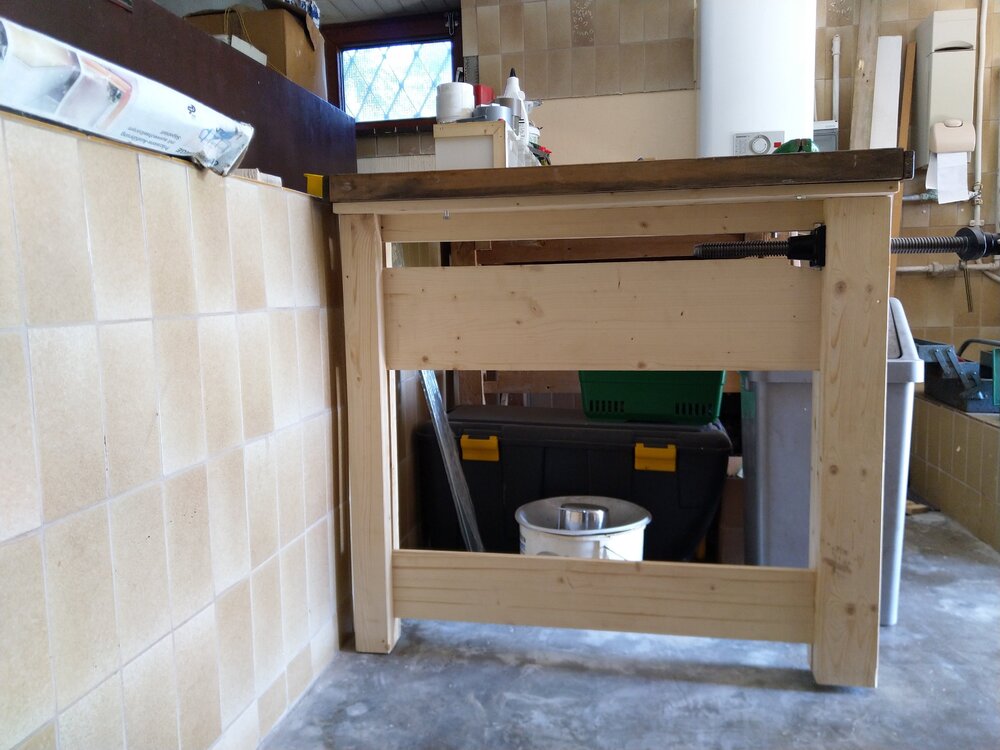
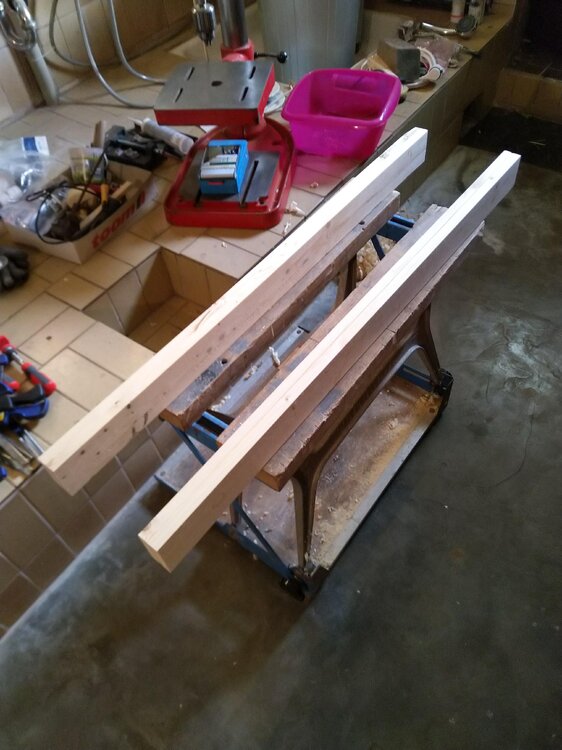
You lucky Guitarchatters get this before those pesky bassists, the finished and fitted vice. Three coats of varnish on the chop and all shipshape and Bristol fashion. Which means what exactly, it's a slave vice? It has a maximum capacity in line with the screw of 250 mm, and that's right on the limit of thread engagement. It's width capacity is technically as long as I can fit in it, and I suspect, but haven't tried it yet, that if the leg met the chop all the way down you'd have an even clamping force nearly to the floor, you could glue up a length of around 900 mm if you wanted to. My vice jaw addition is 130mm deep, to the top of the screw really. I hope you've enjoyed my journey into chaos and insanity, and I've made the mistakes for you if you make your own version.


-
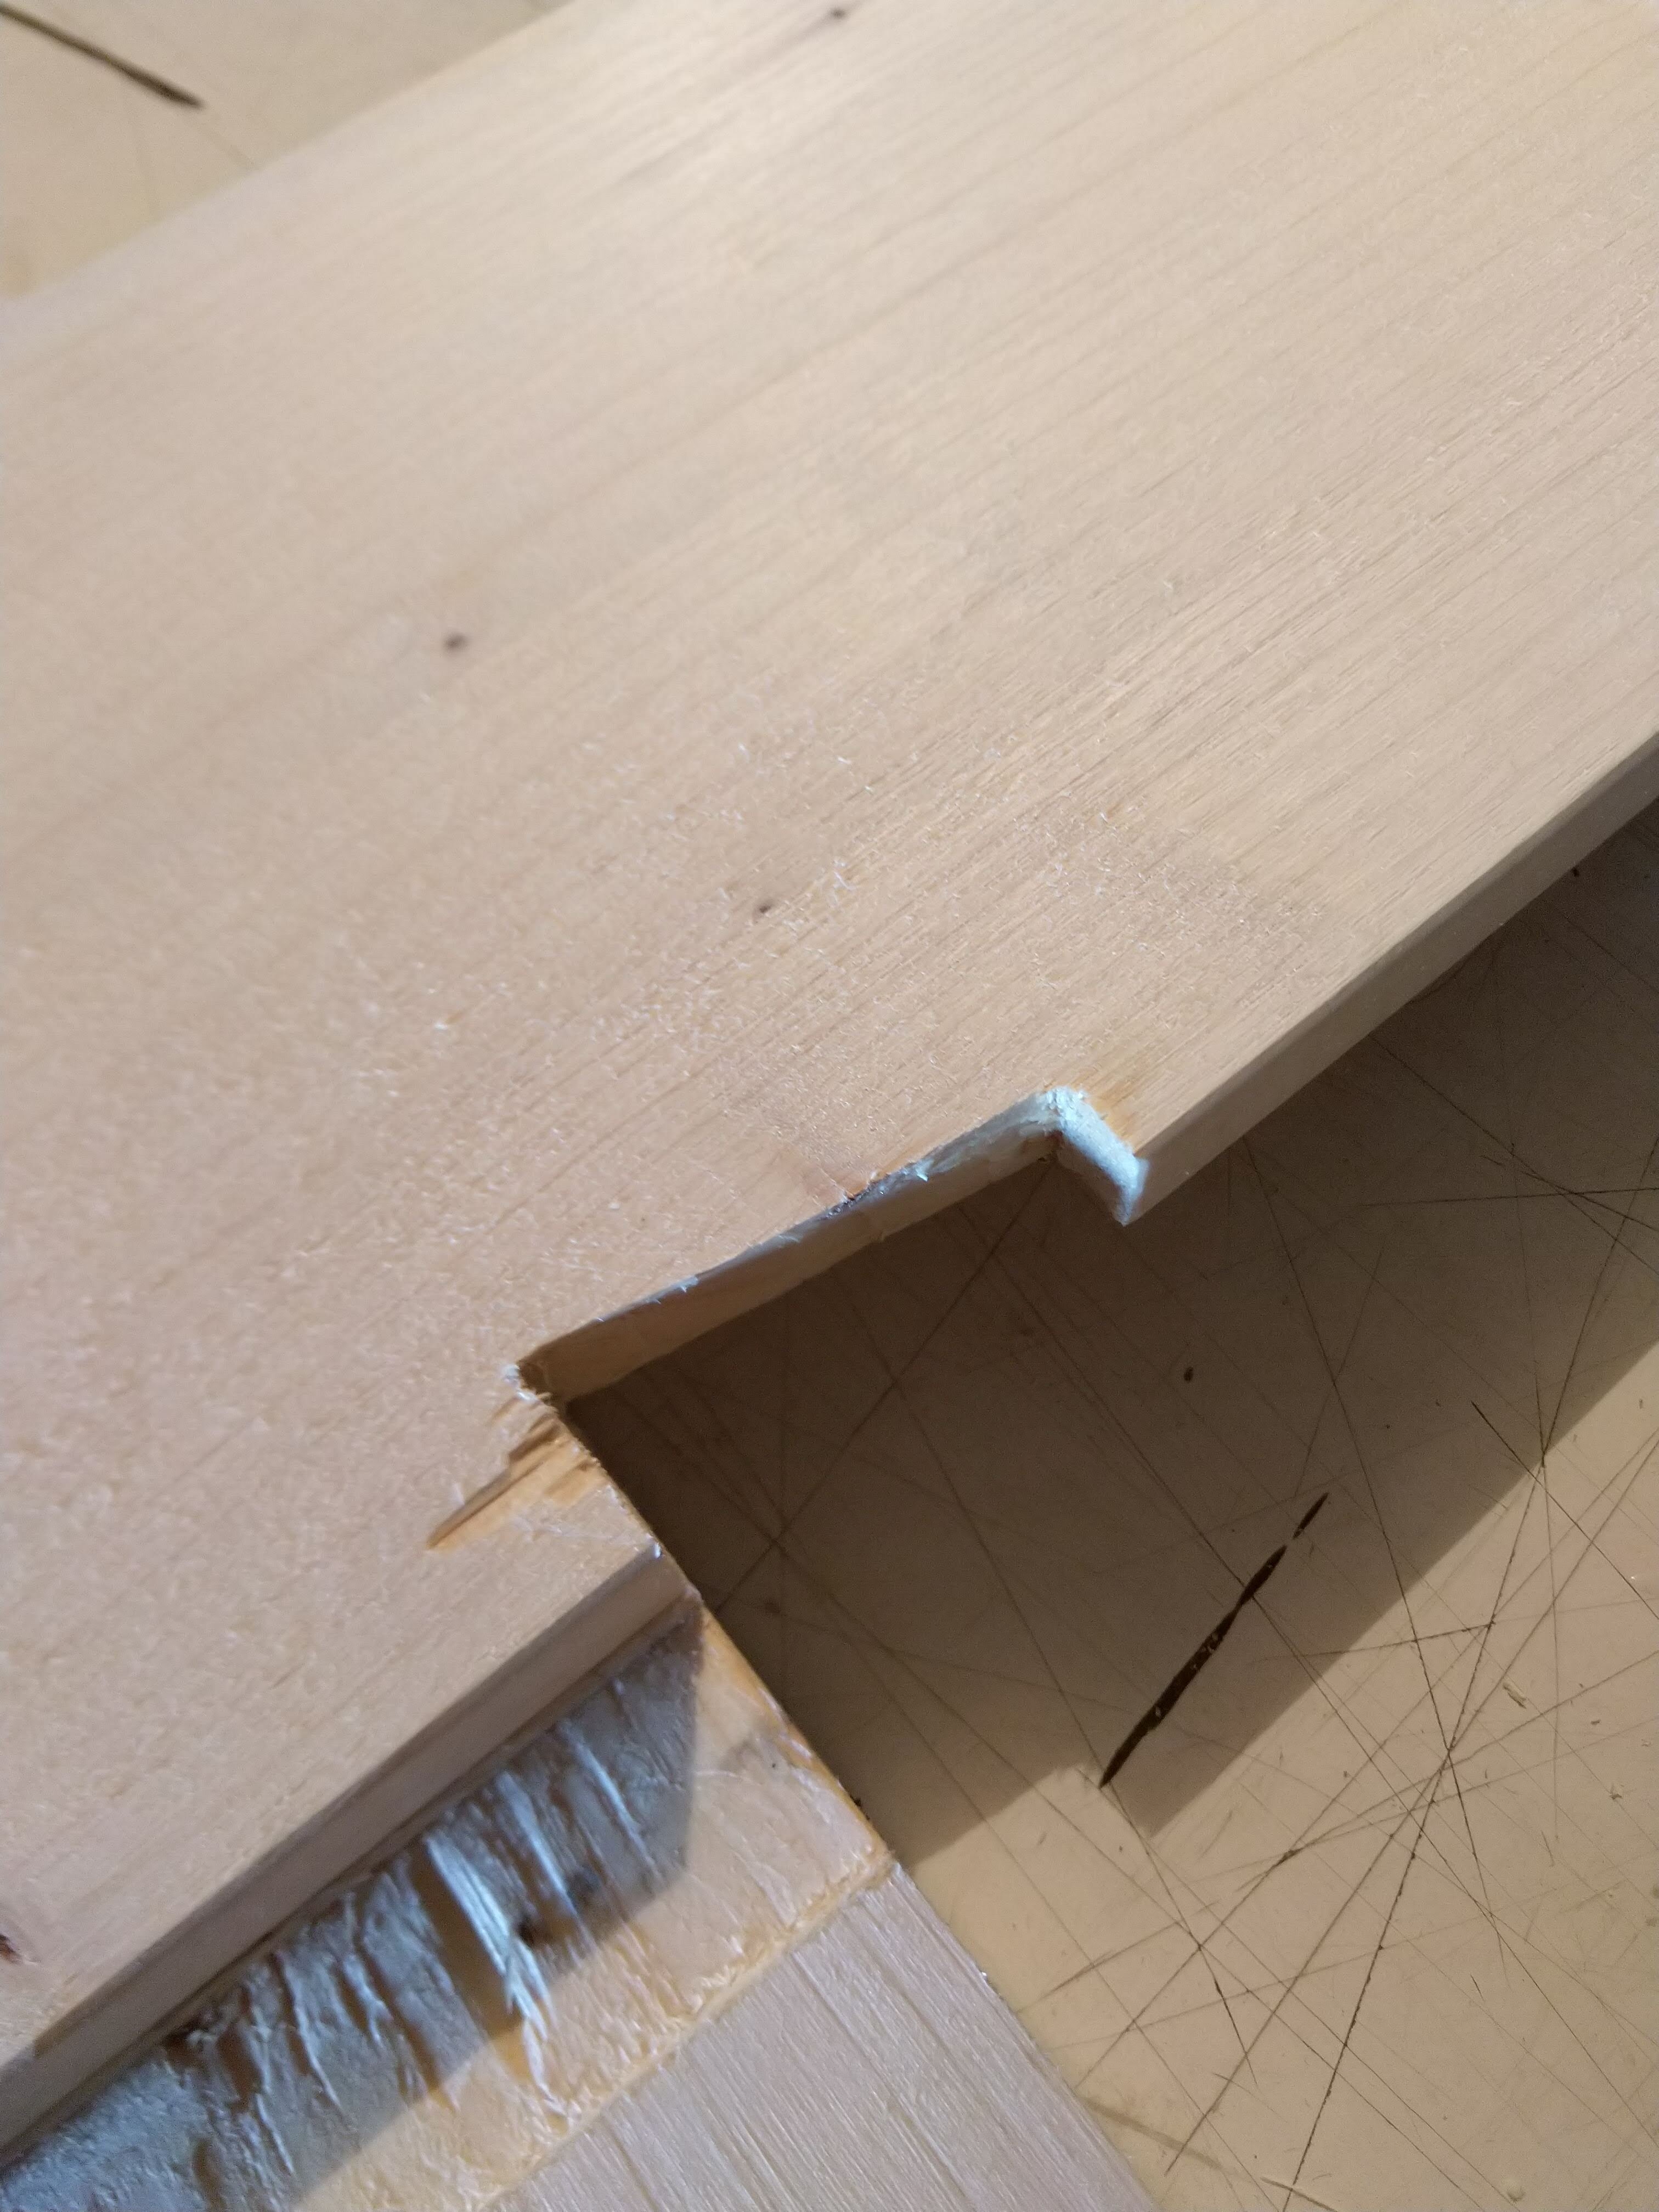
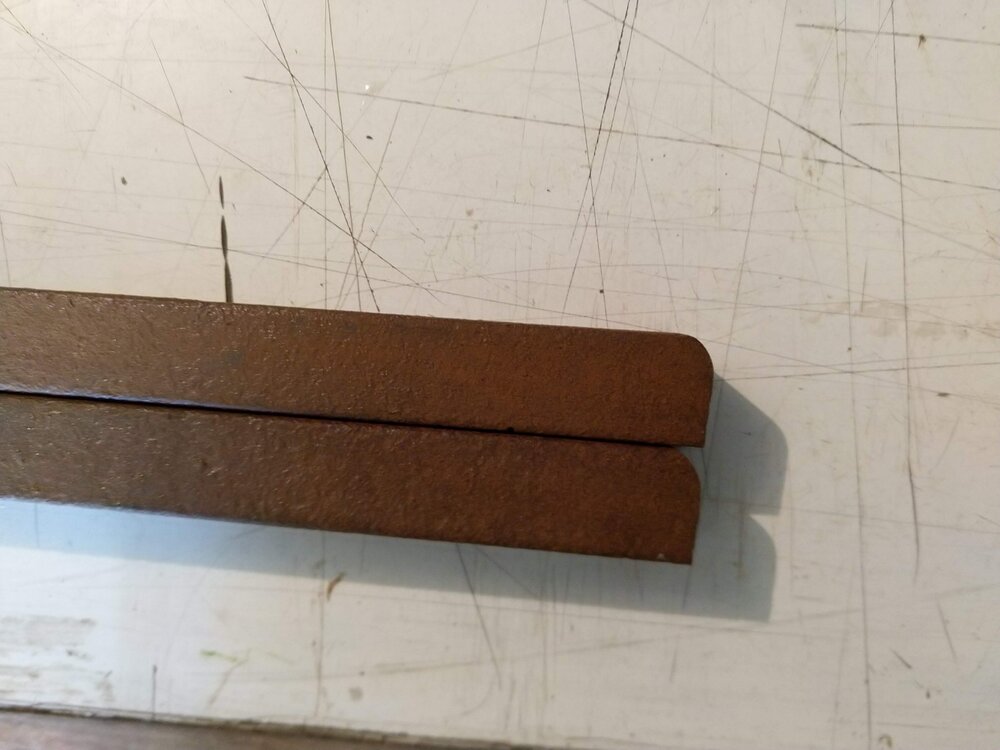
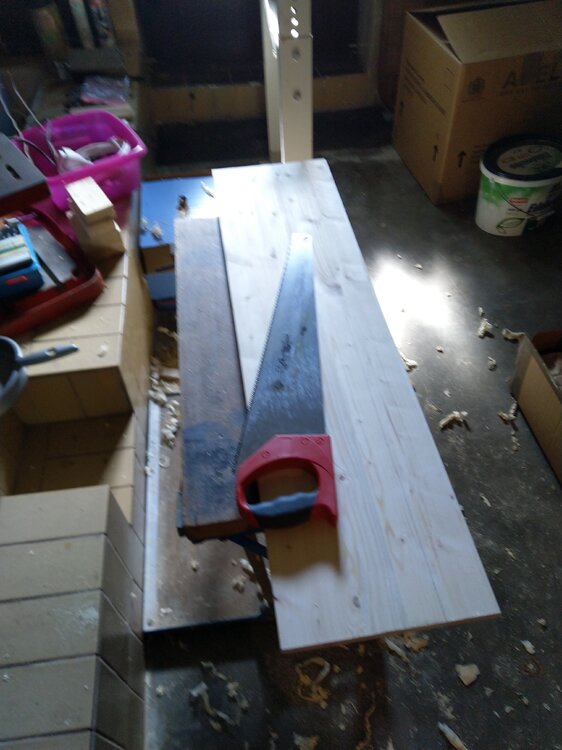
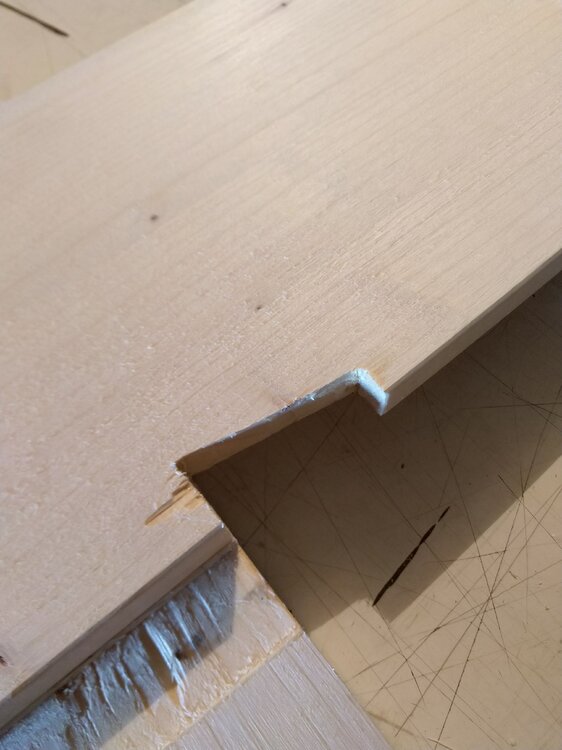
I fitted a little 5mm riser plate at the bottom of each slot so that the chop is now parallel. Then I started cutting the back edge of the chop off to make it a little less chunky and look a bit nicer. Catastrophe!!!!! I started on the wrong side and cut the fore edge of the vice off. The GC Swear Aunty won't let me type what I said. A little rebate and... a little insert This is the back edge, like it was supposed to be.

-
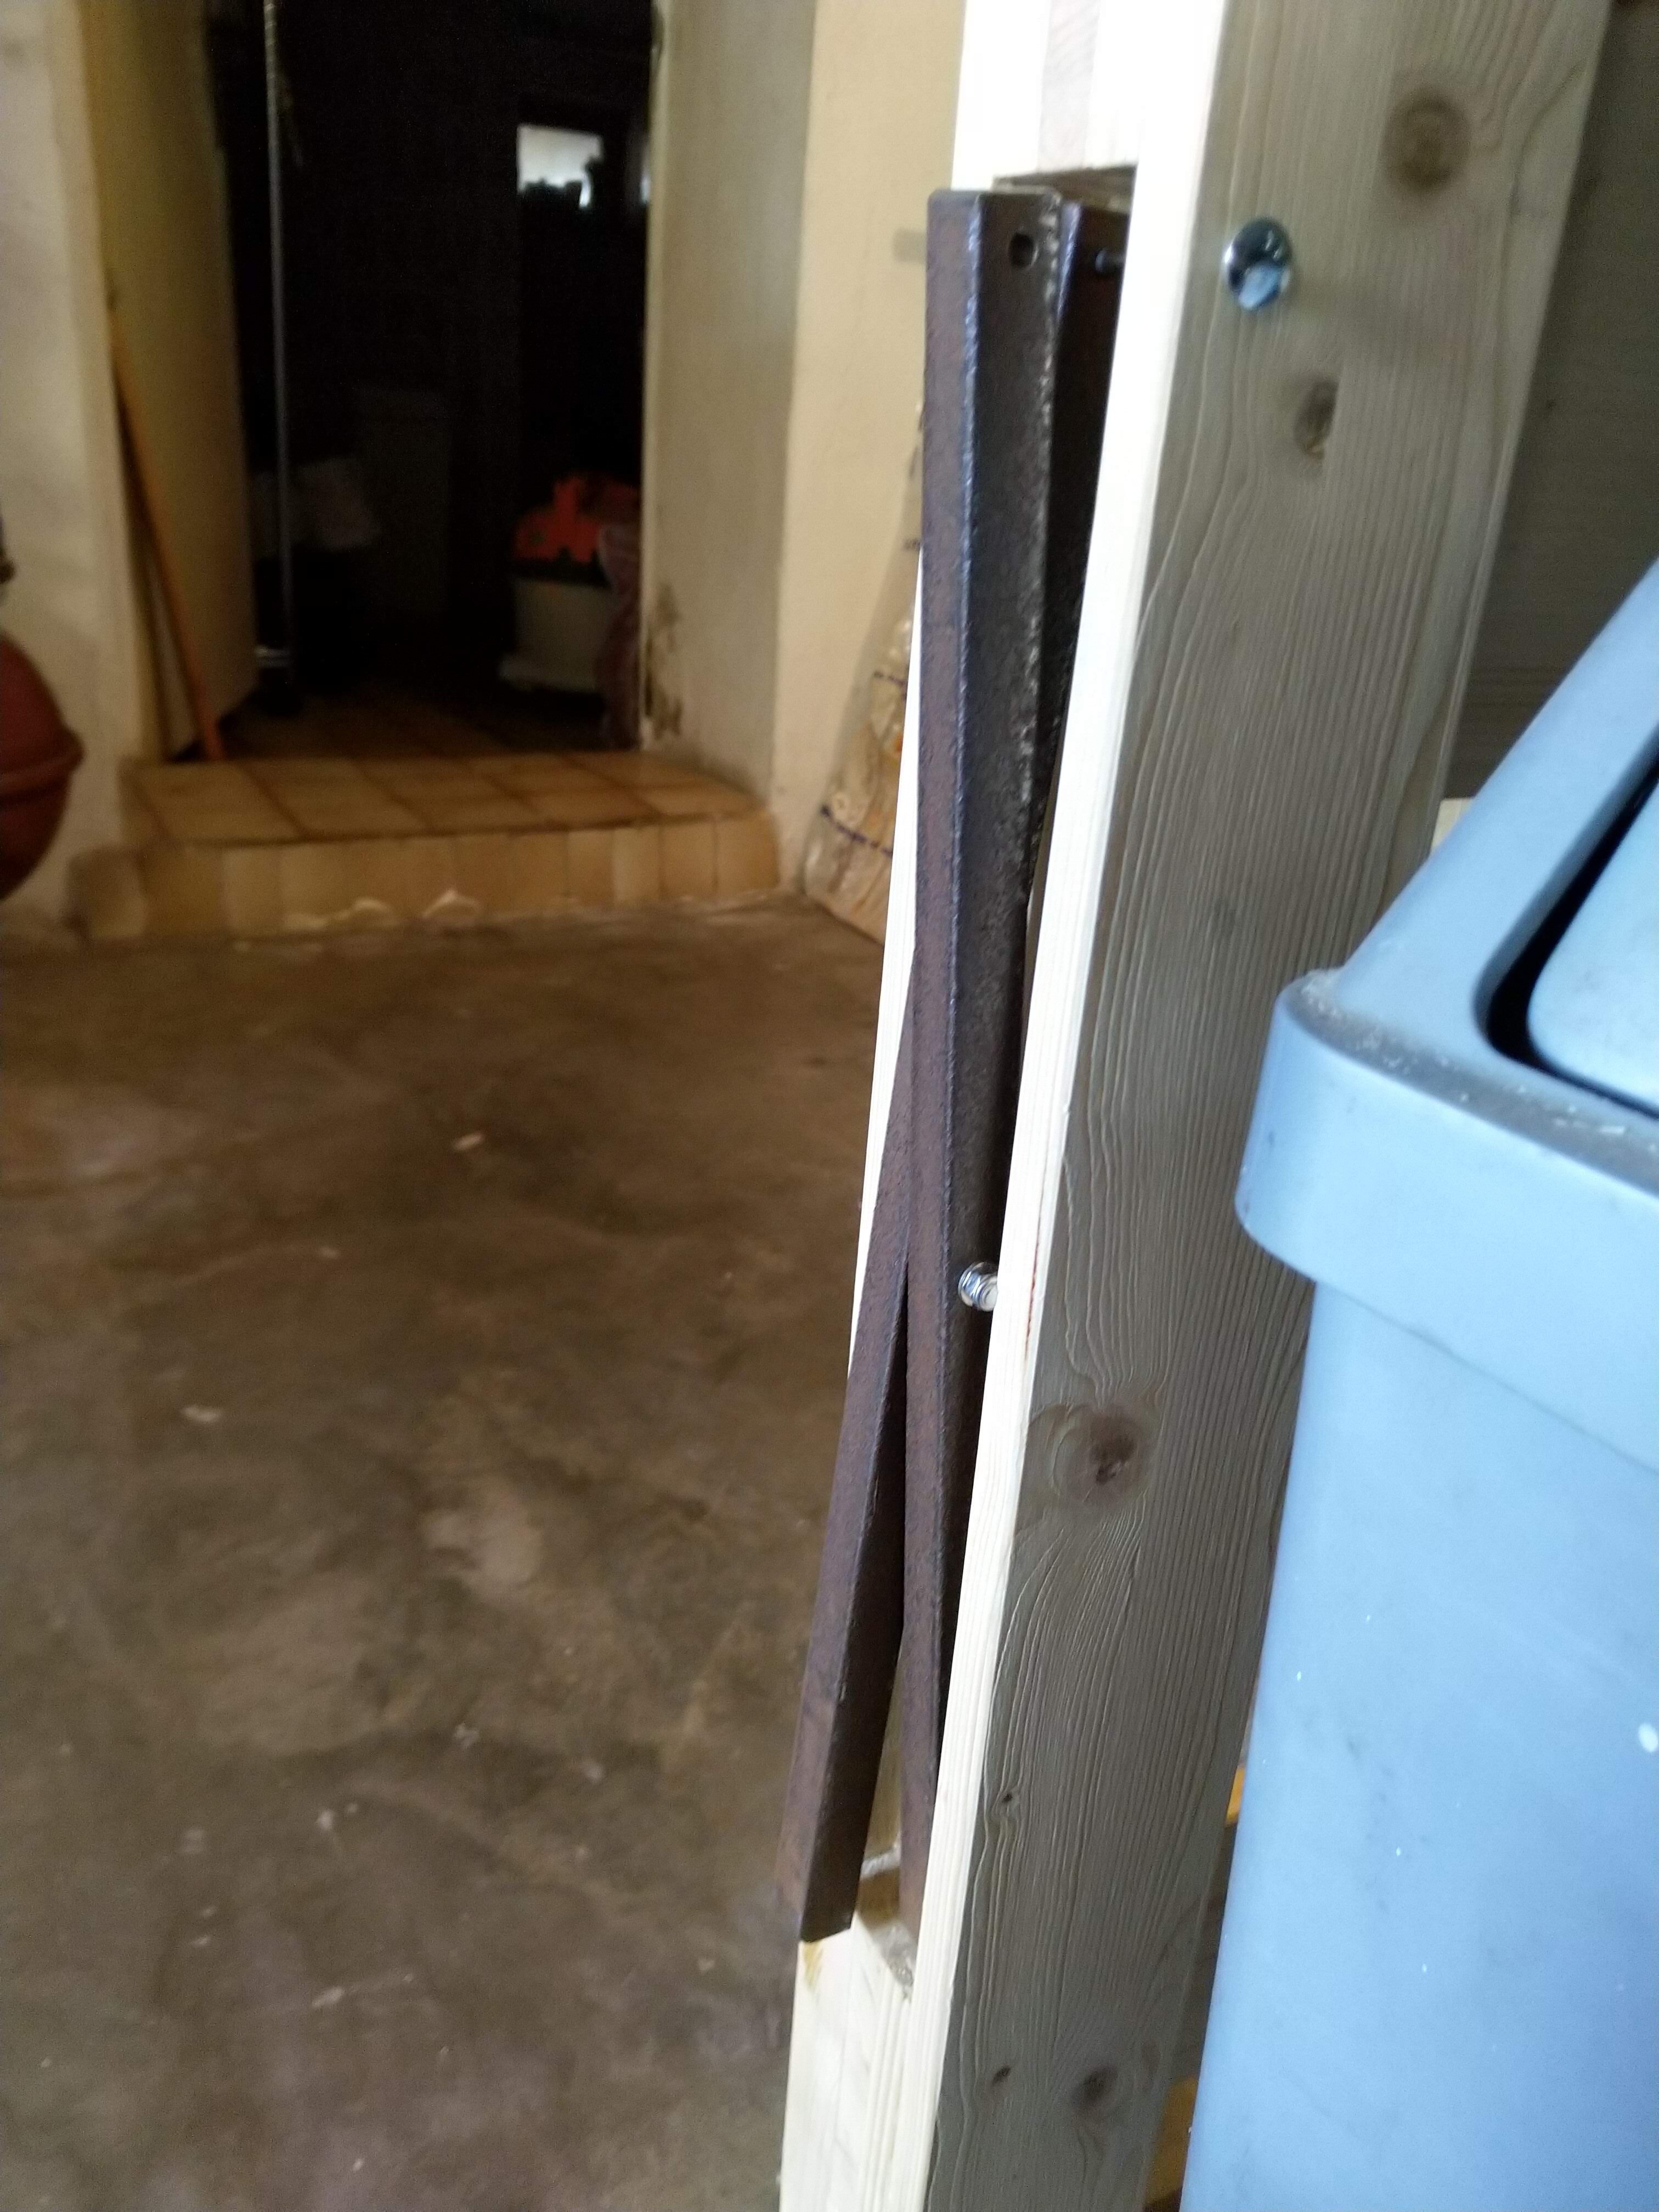
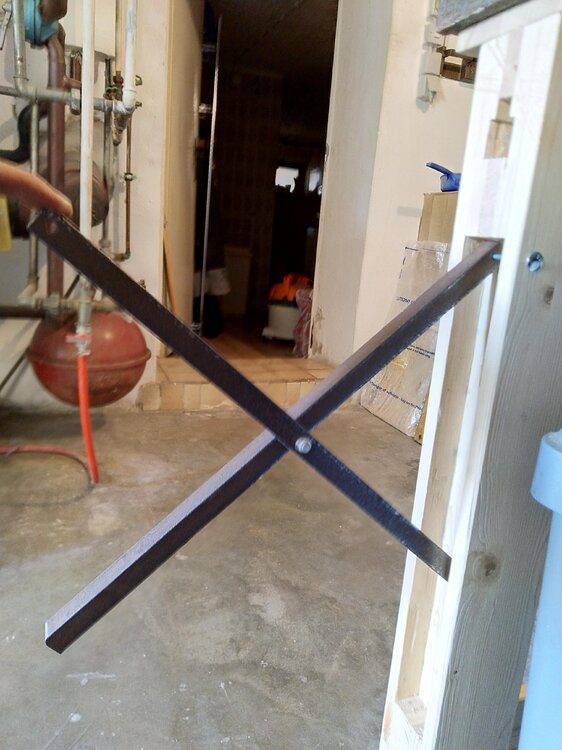
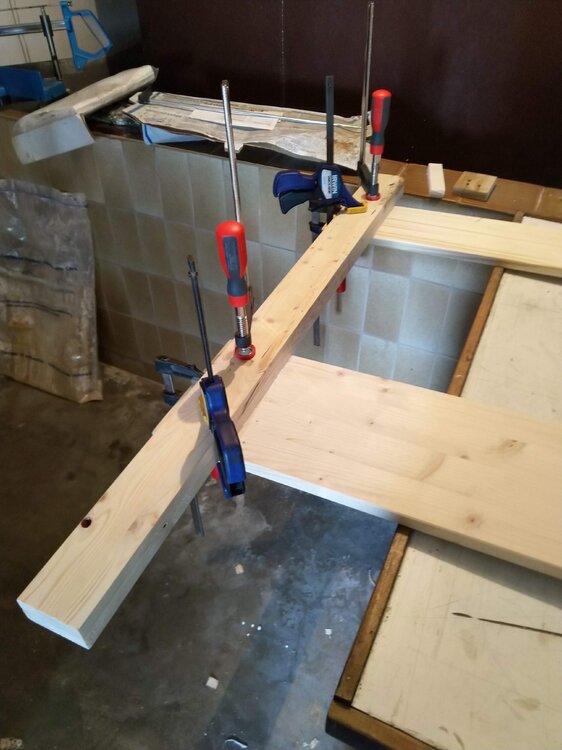
Once the chop is dry and realeased from it's clamps hang it to see what happens. Is this going to work? Is it remotely functional? Is the end of the world nigh? Well, it does work, it is functional and going on the report from the climate guys this morning, yes, the end is nigh. A little bit of a problem with the chop. You'll recall, unless your attention span is that terrible, that the scissor mechanism is the same length. This causes the vice chop to hang toe in, i.e. it's not parallel, the end is closer than the top. It should be about 5mm longer on the end furthest from the mounting bolts. I could see four ways to get around this at this time, build up a lump of weld on the end of the bar to push the chop out a bit. Fit bearings that are 5mm larger than the bar, bend the bar or insert 5mm plates into the slot.


-
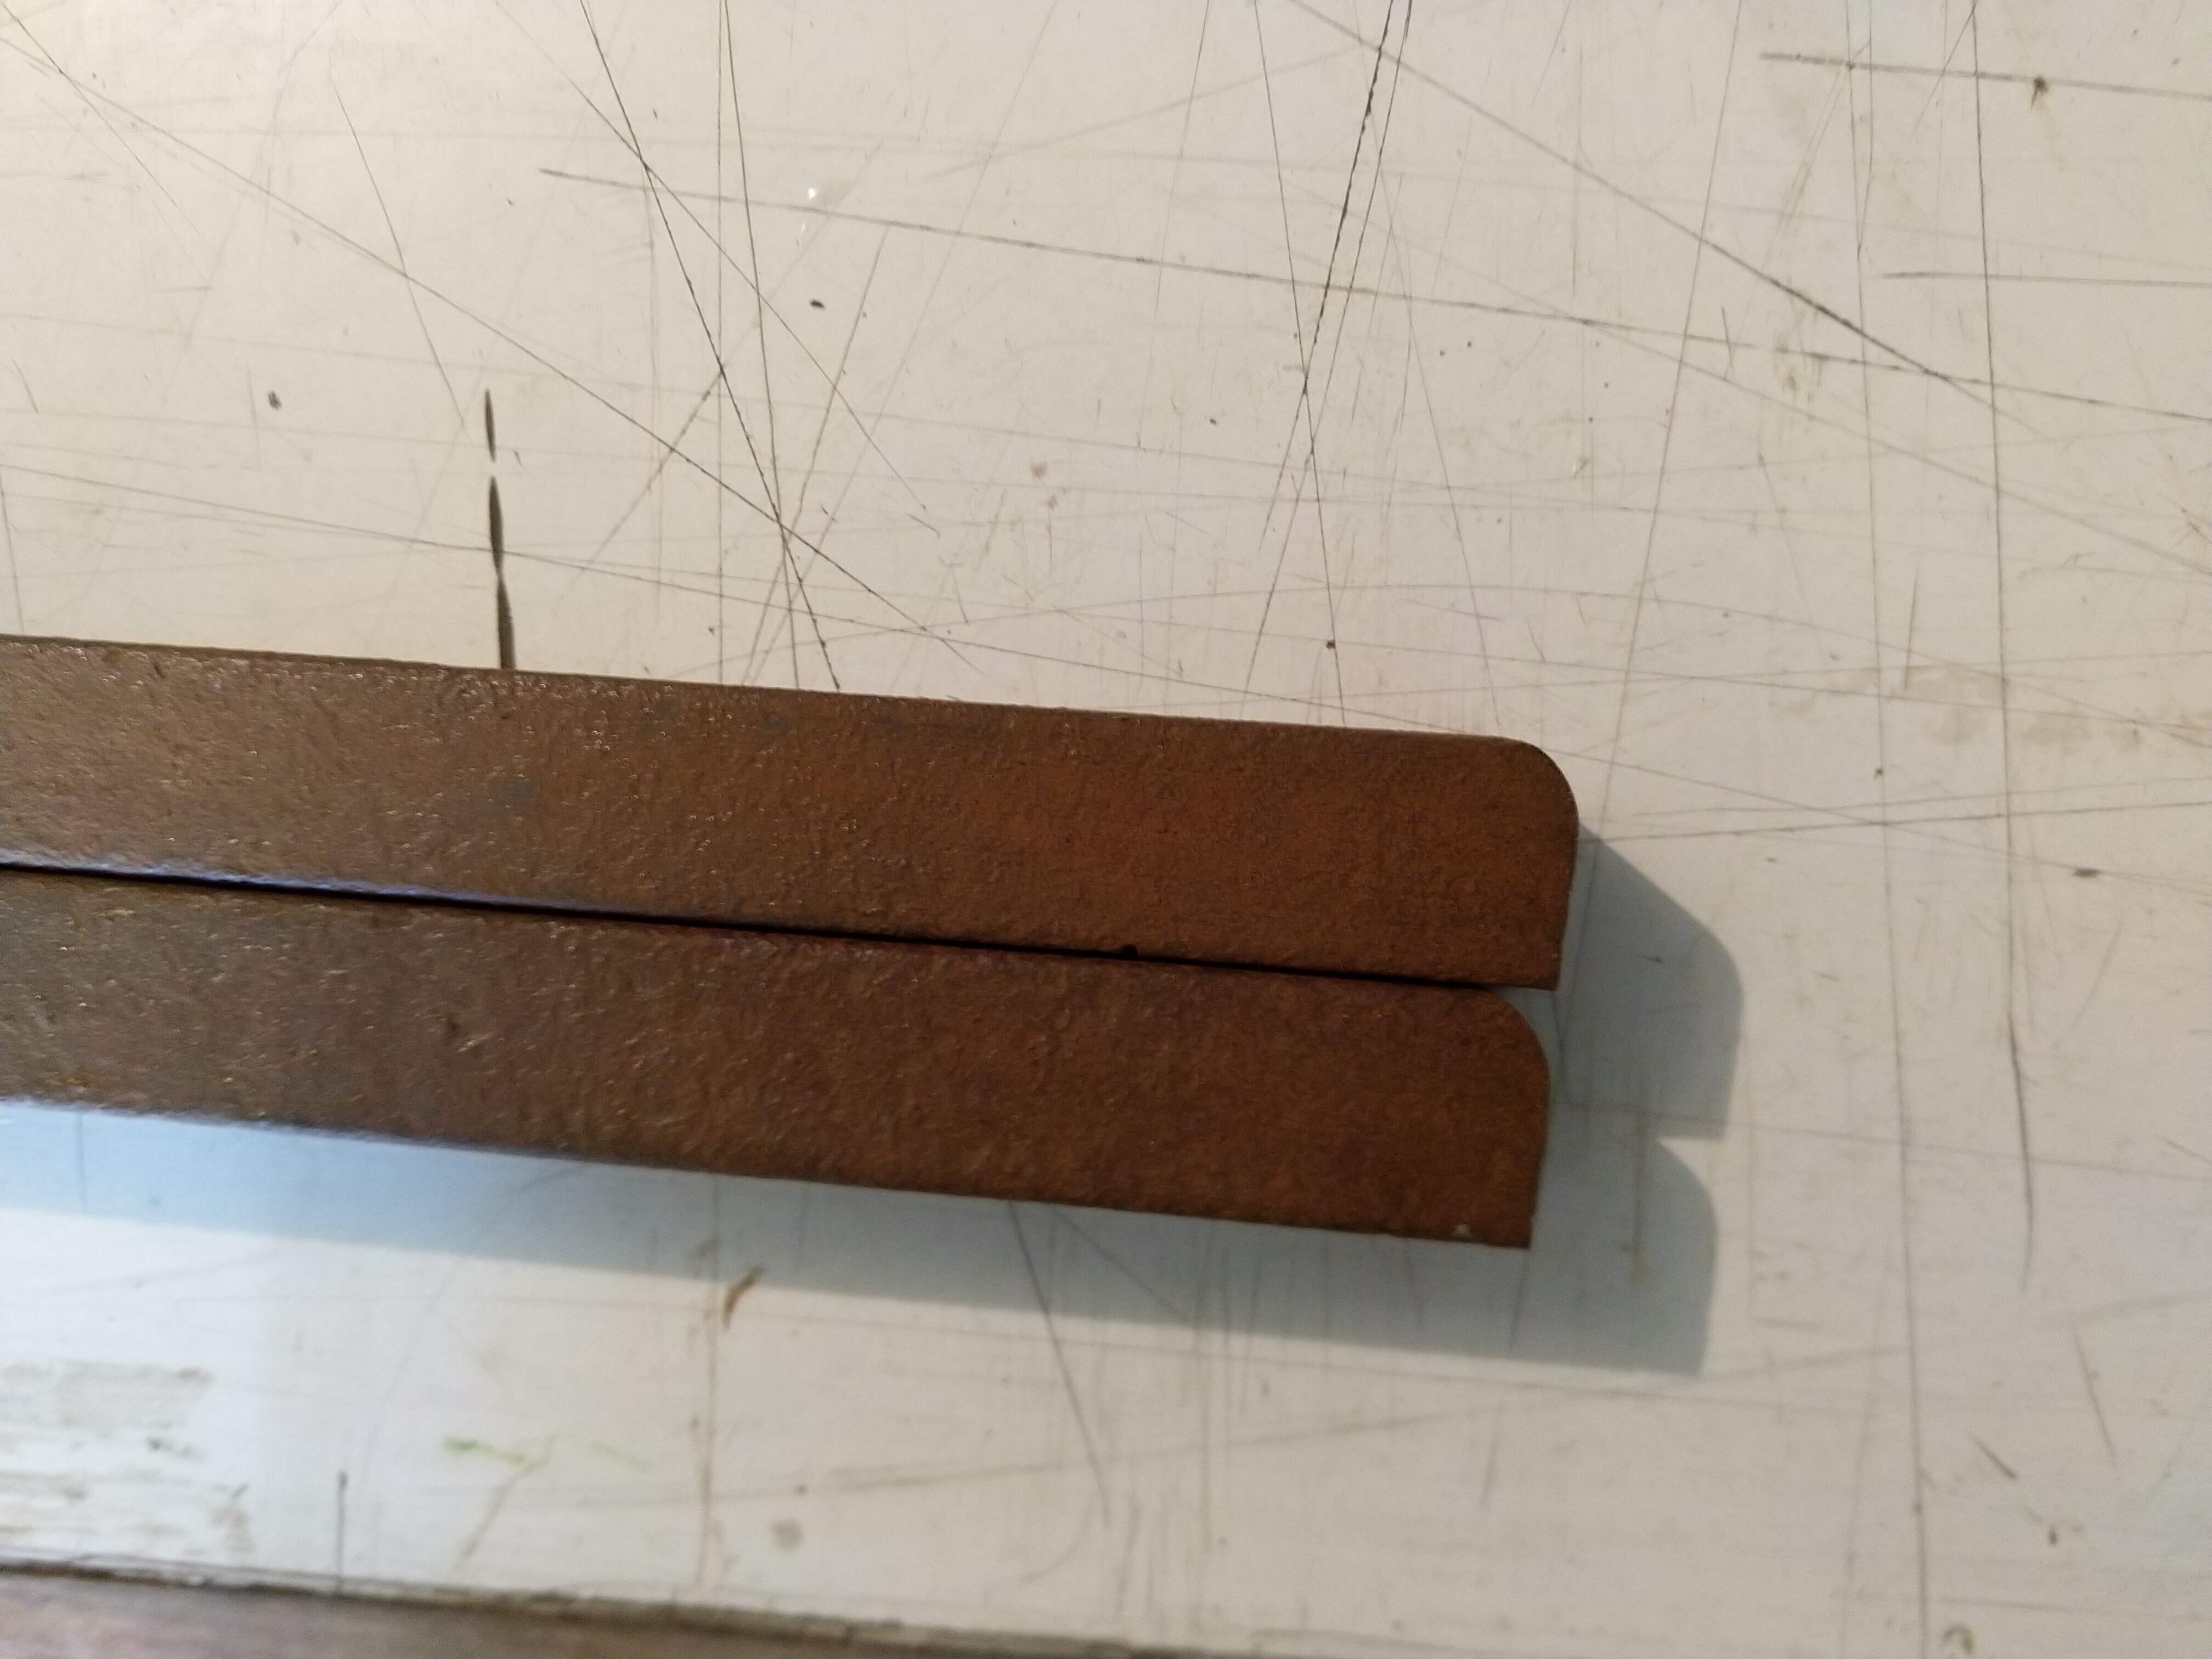
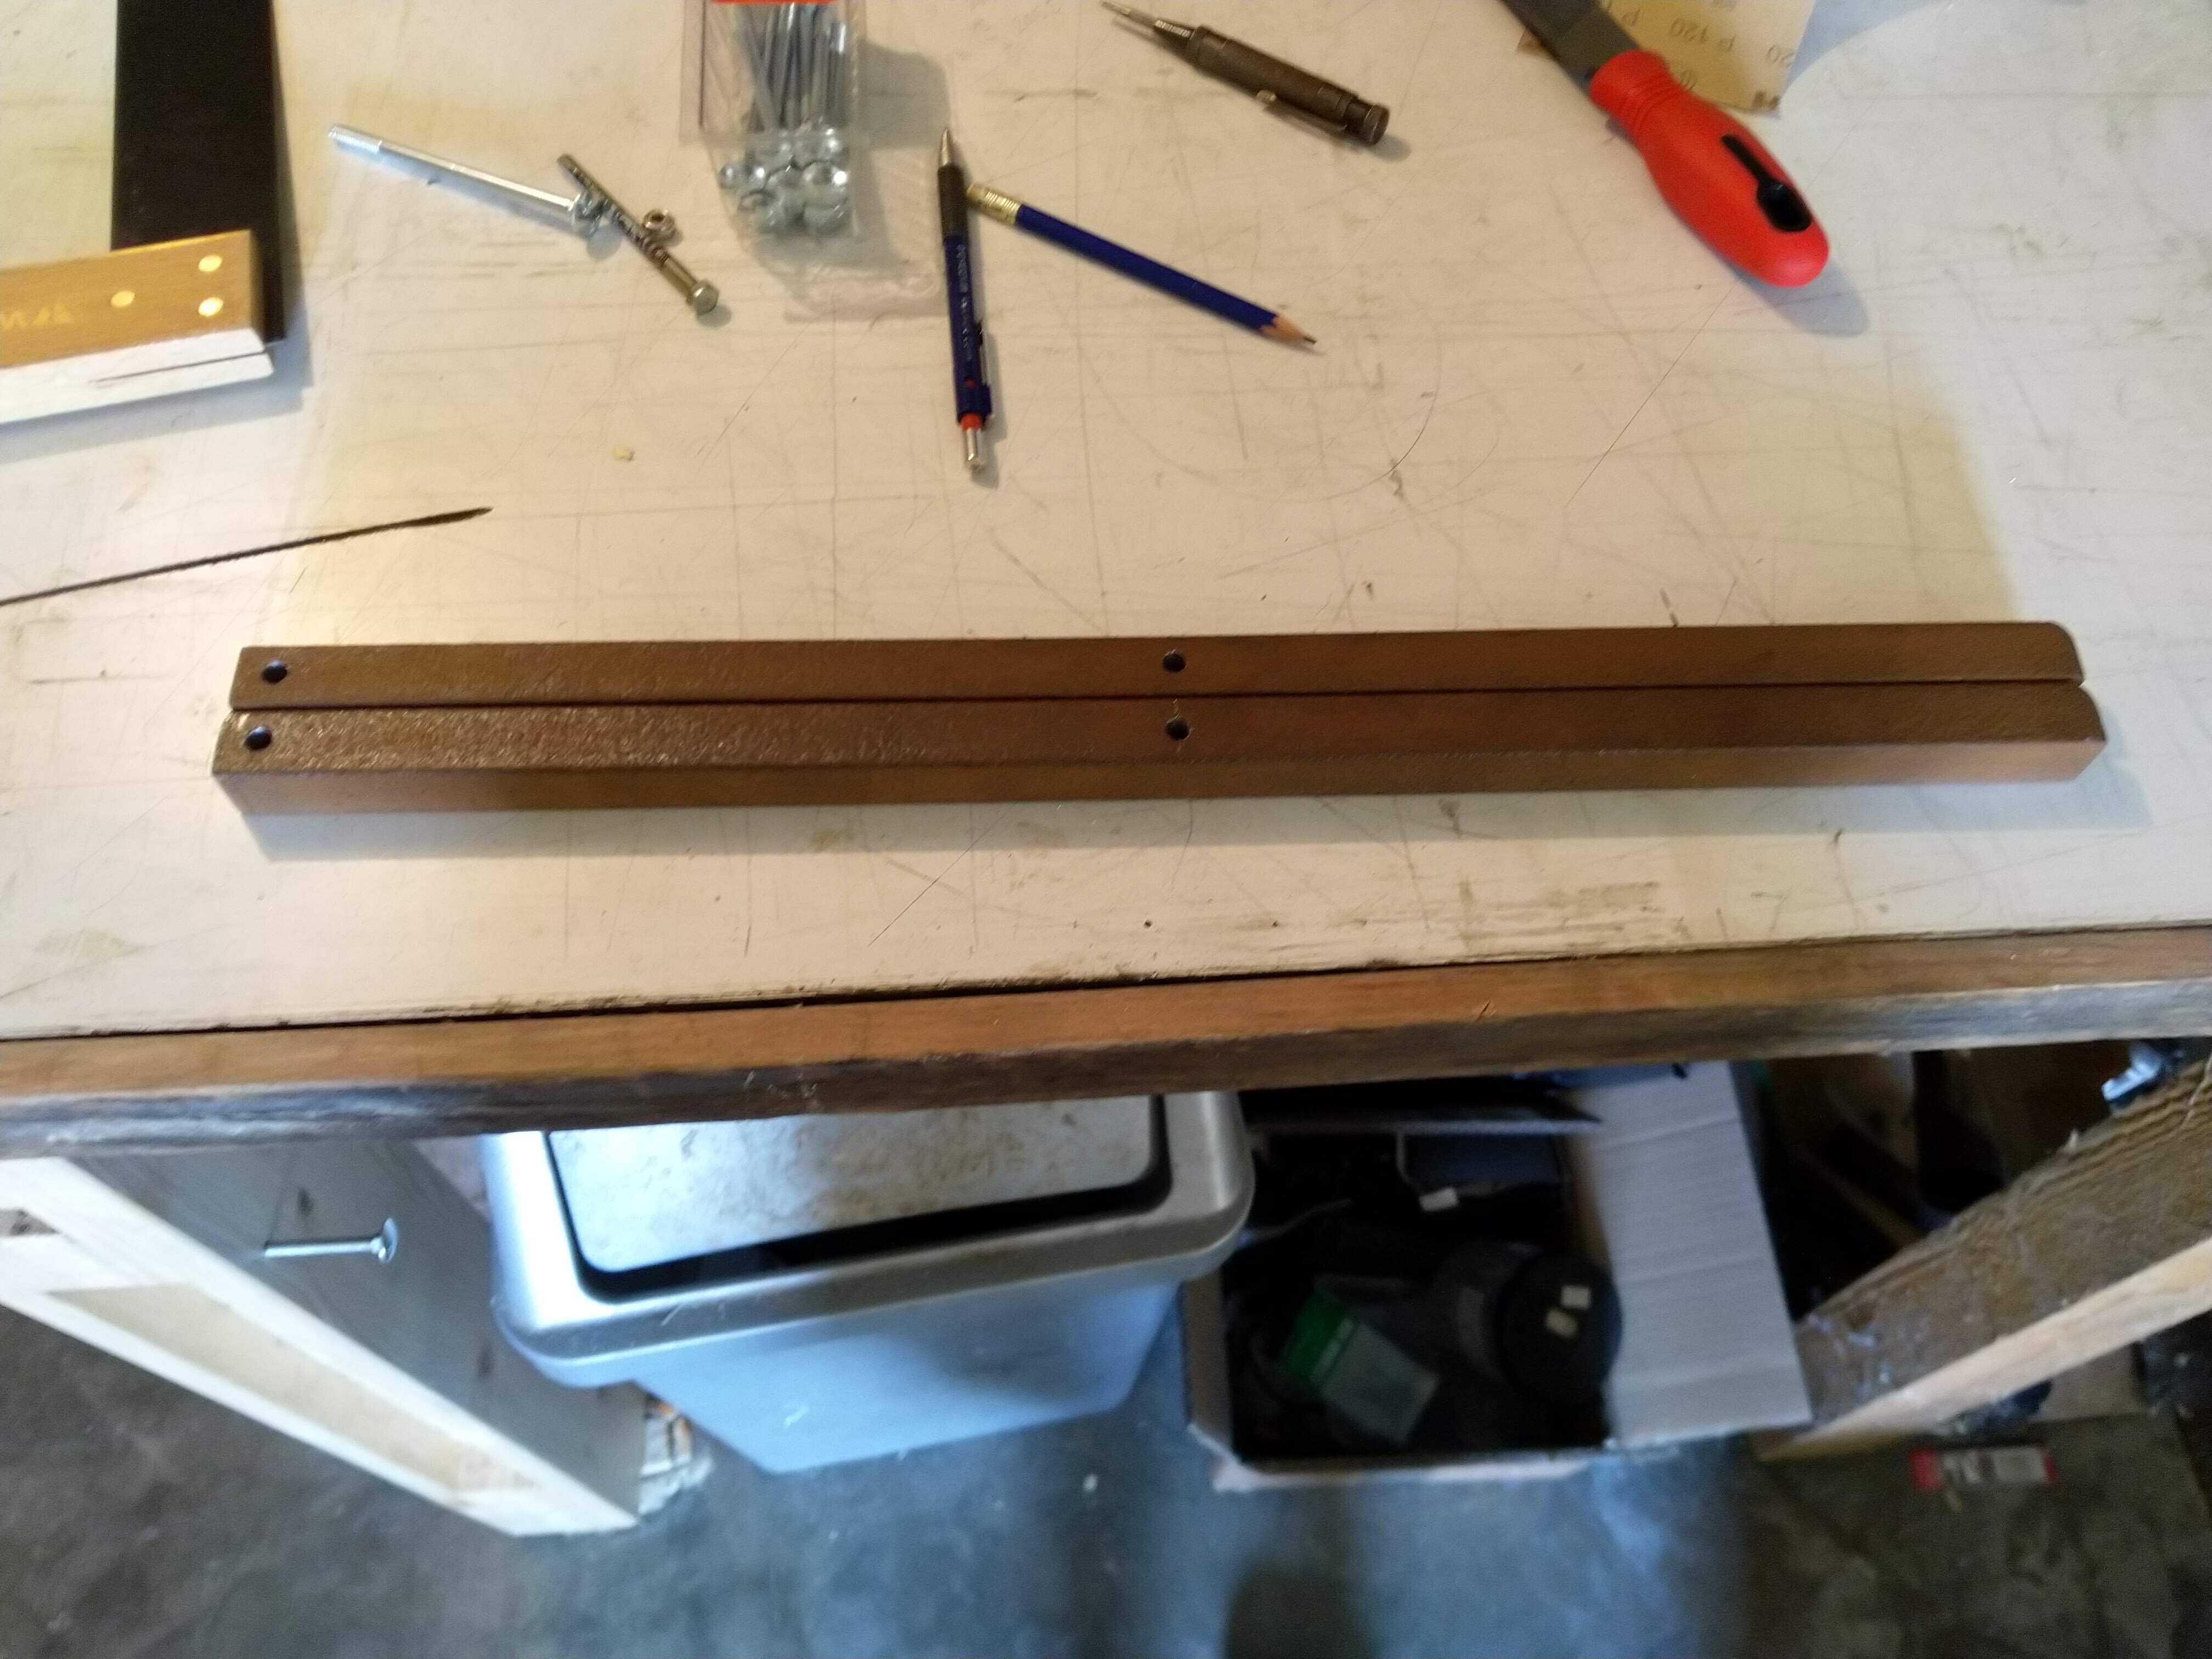
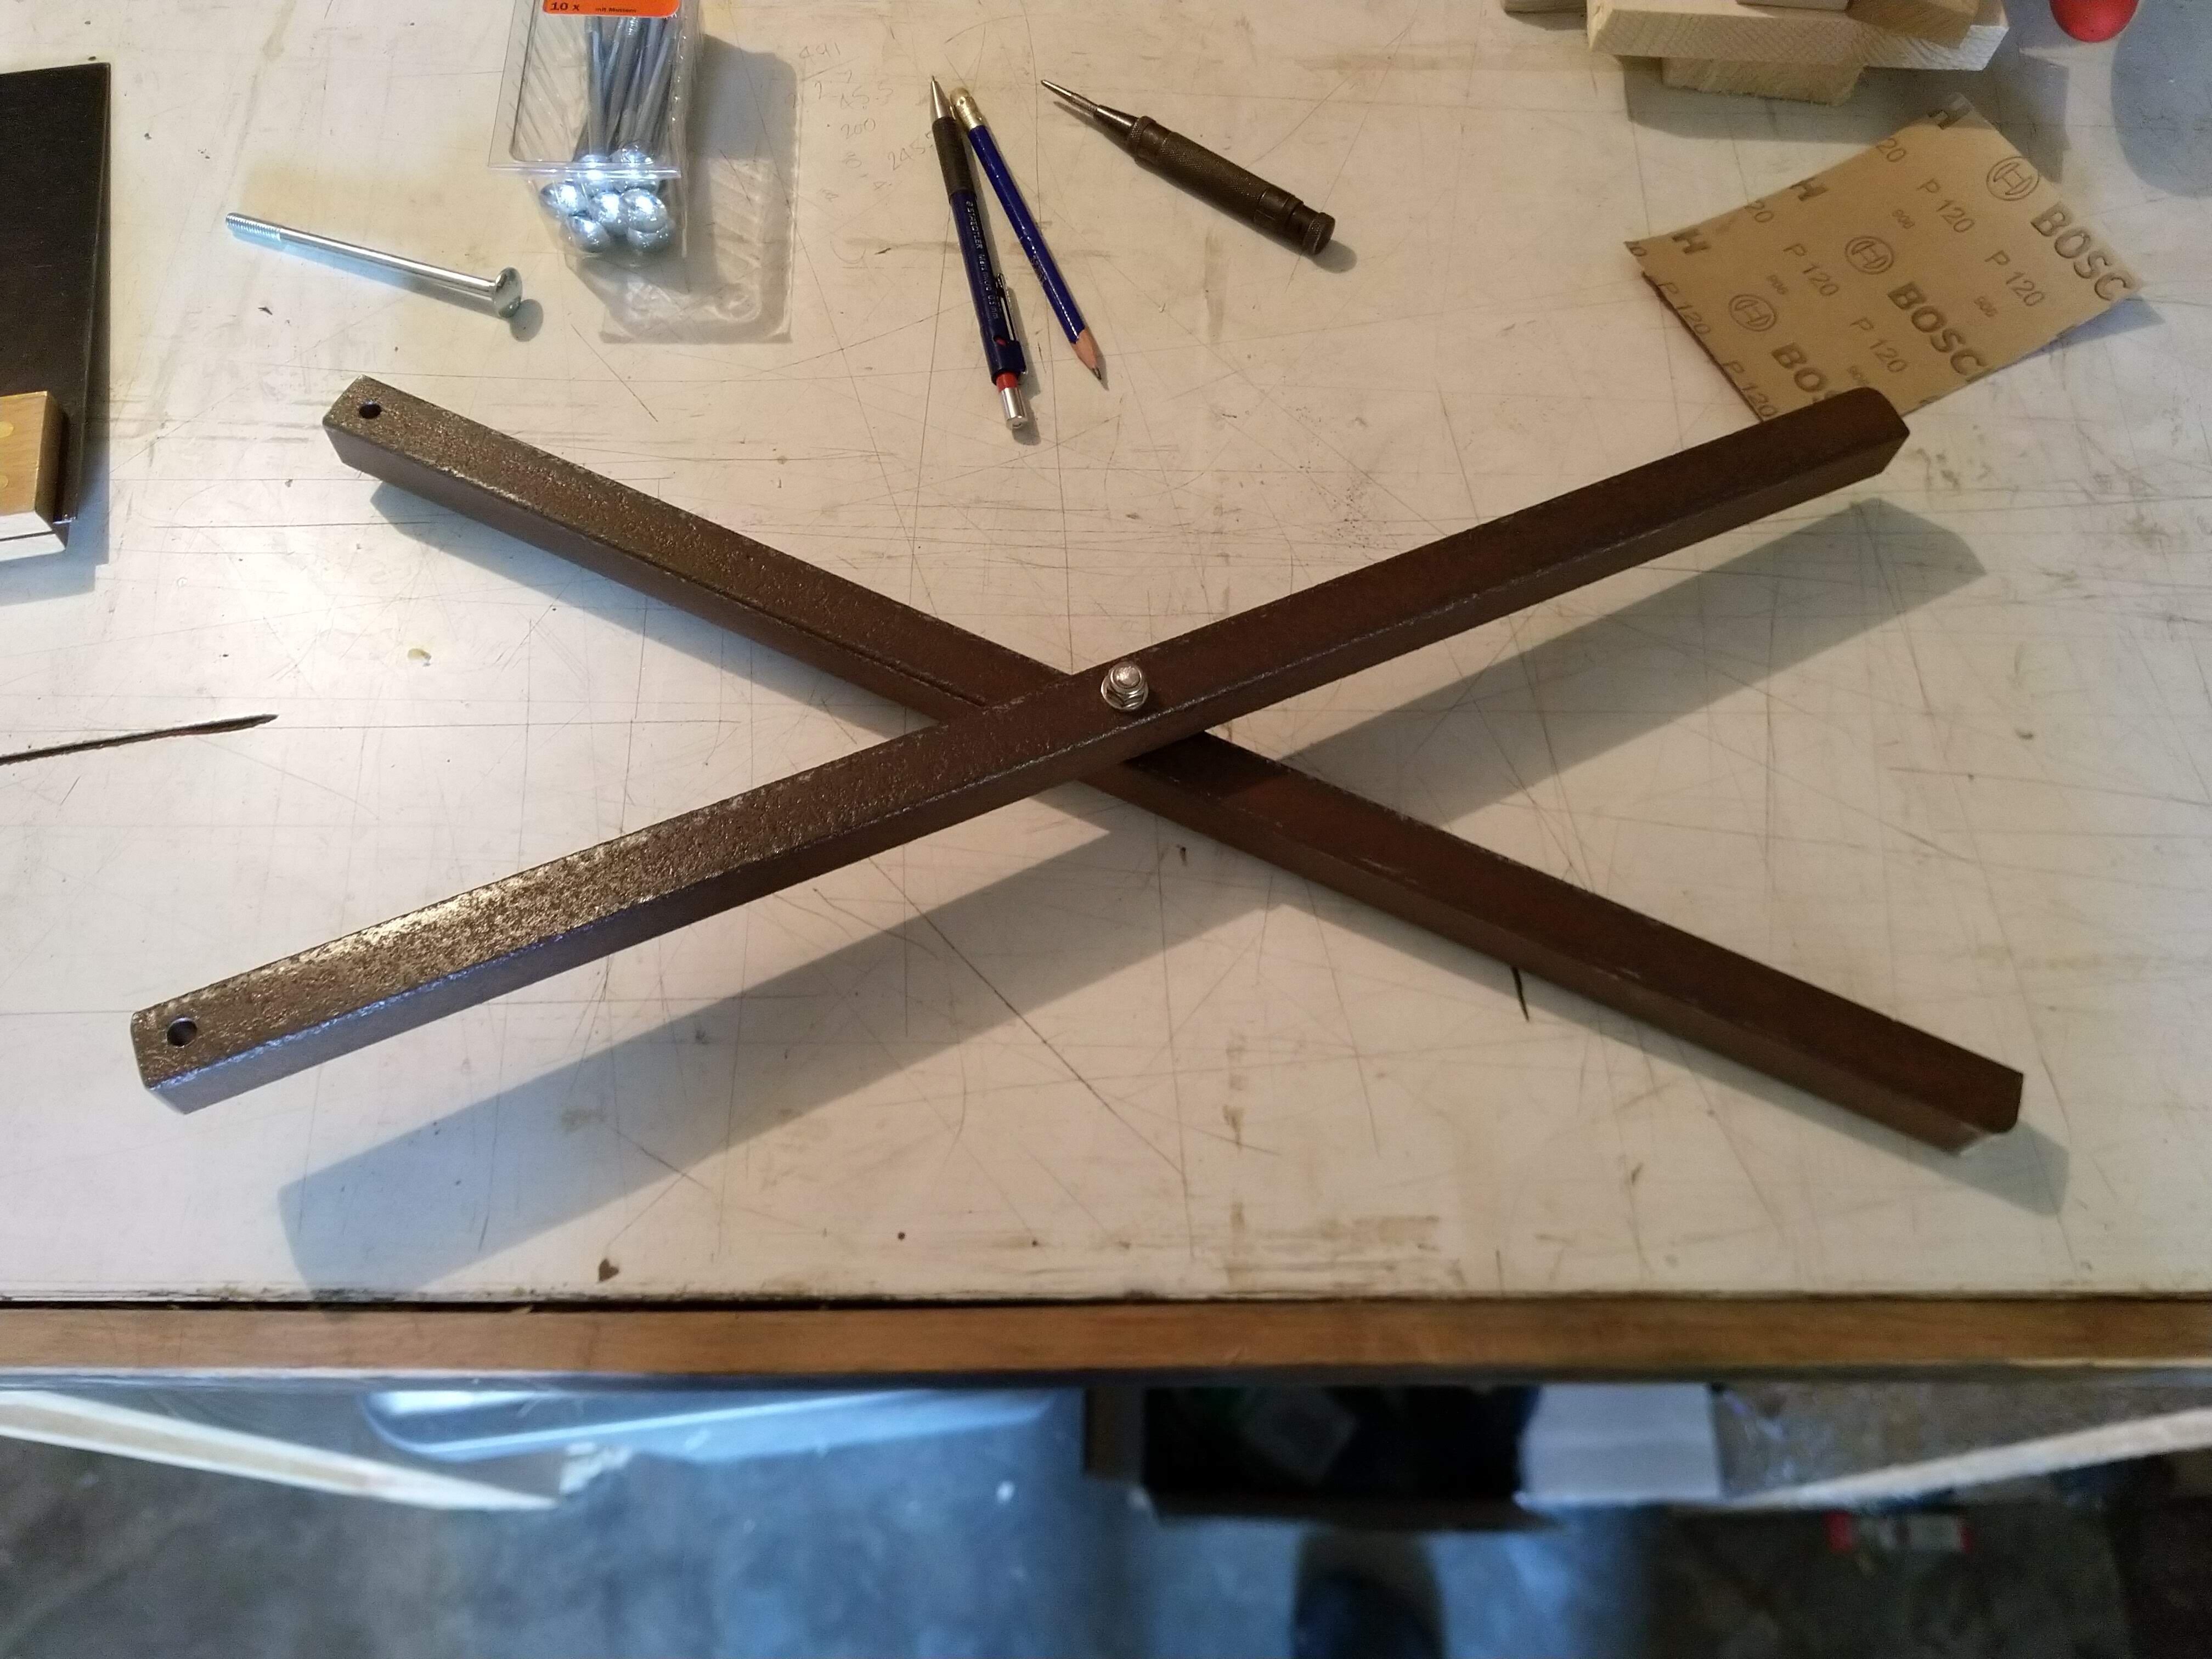
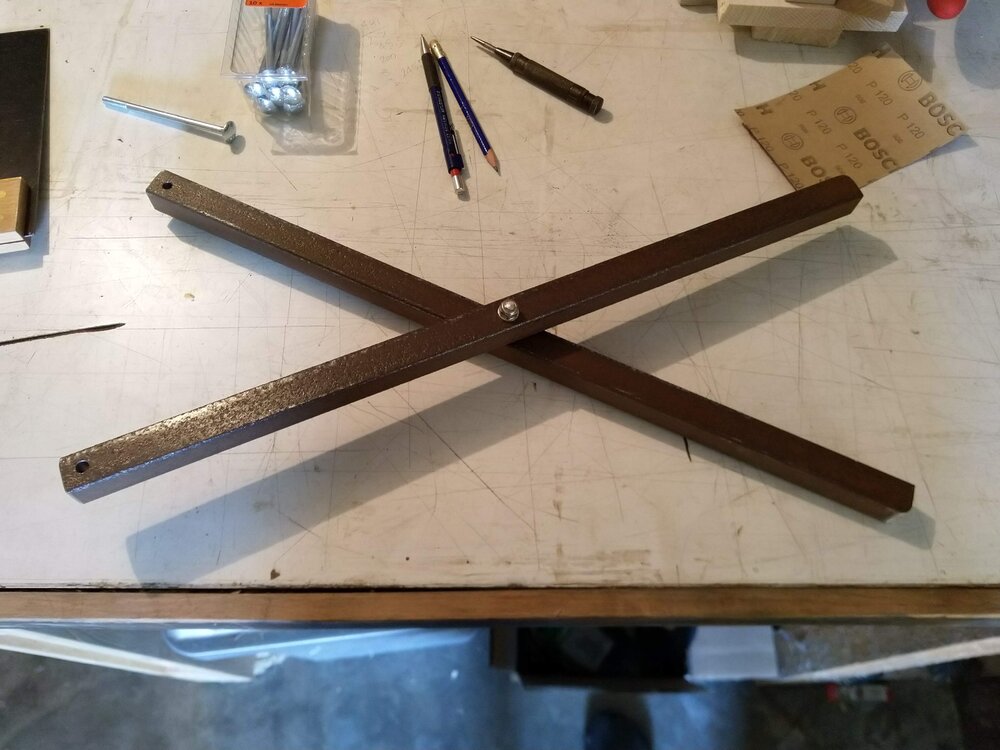
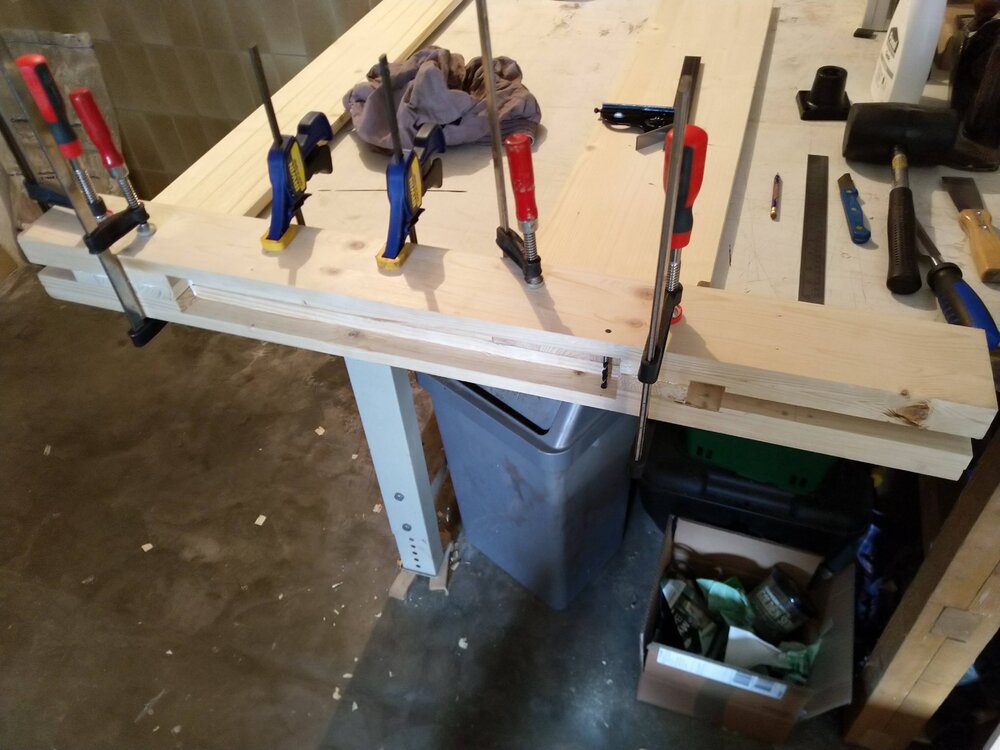
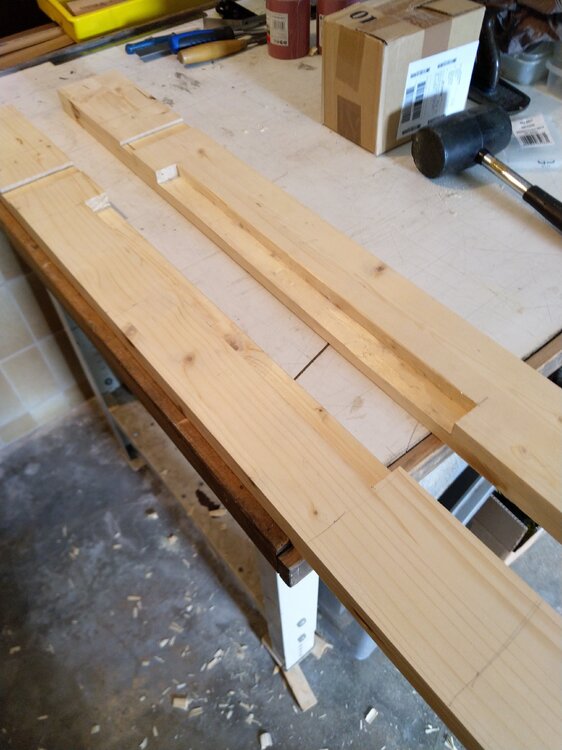
Whilst the chop was drying I made a start on the scissor mechanism proper. A length of 20mm square bar cut onto two 500mm lengths, it turns out that was too long, so I had to cut them down a bit more, they're 490mm long now. Drilled an M6 clearance hole in the end of ech of them, you can just see it on the other end in this picture. Here I'm filing the end into a semicircle. I decided, looking at the slot and the physics of the thing that it doesn't need a full semi-circle at the end, it just needs to corner knocking off. The opposite side of the end, if that makes any sense, doesn't run against anything. Time will tell if this is enough rounding playing with it suggests that it is. You then need a hole in the middle. This must be the same orientation as the other, if you drill it crosswise then youn can't mount it! No I didn't do that. It's another M6 clearance hole. Bolt it up so it spins freely but doesn't wobble. I used a nyloc nut on it, though there's hardly any rotational moment on it so a normal nut would probably suffice. It's symmetrical in length, which turns out to be wrong as you'll find out later. Hang the scissor mechanism to try out out and sit back feeling pleased with yourself. It may need a little notch cutting out for the middle bolt heads when it's closed.


-
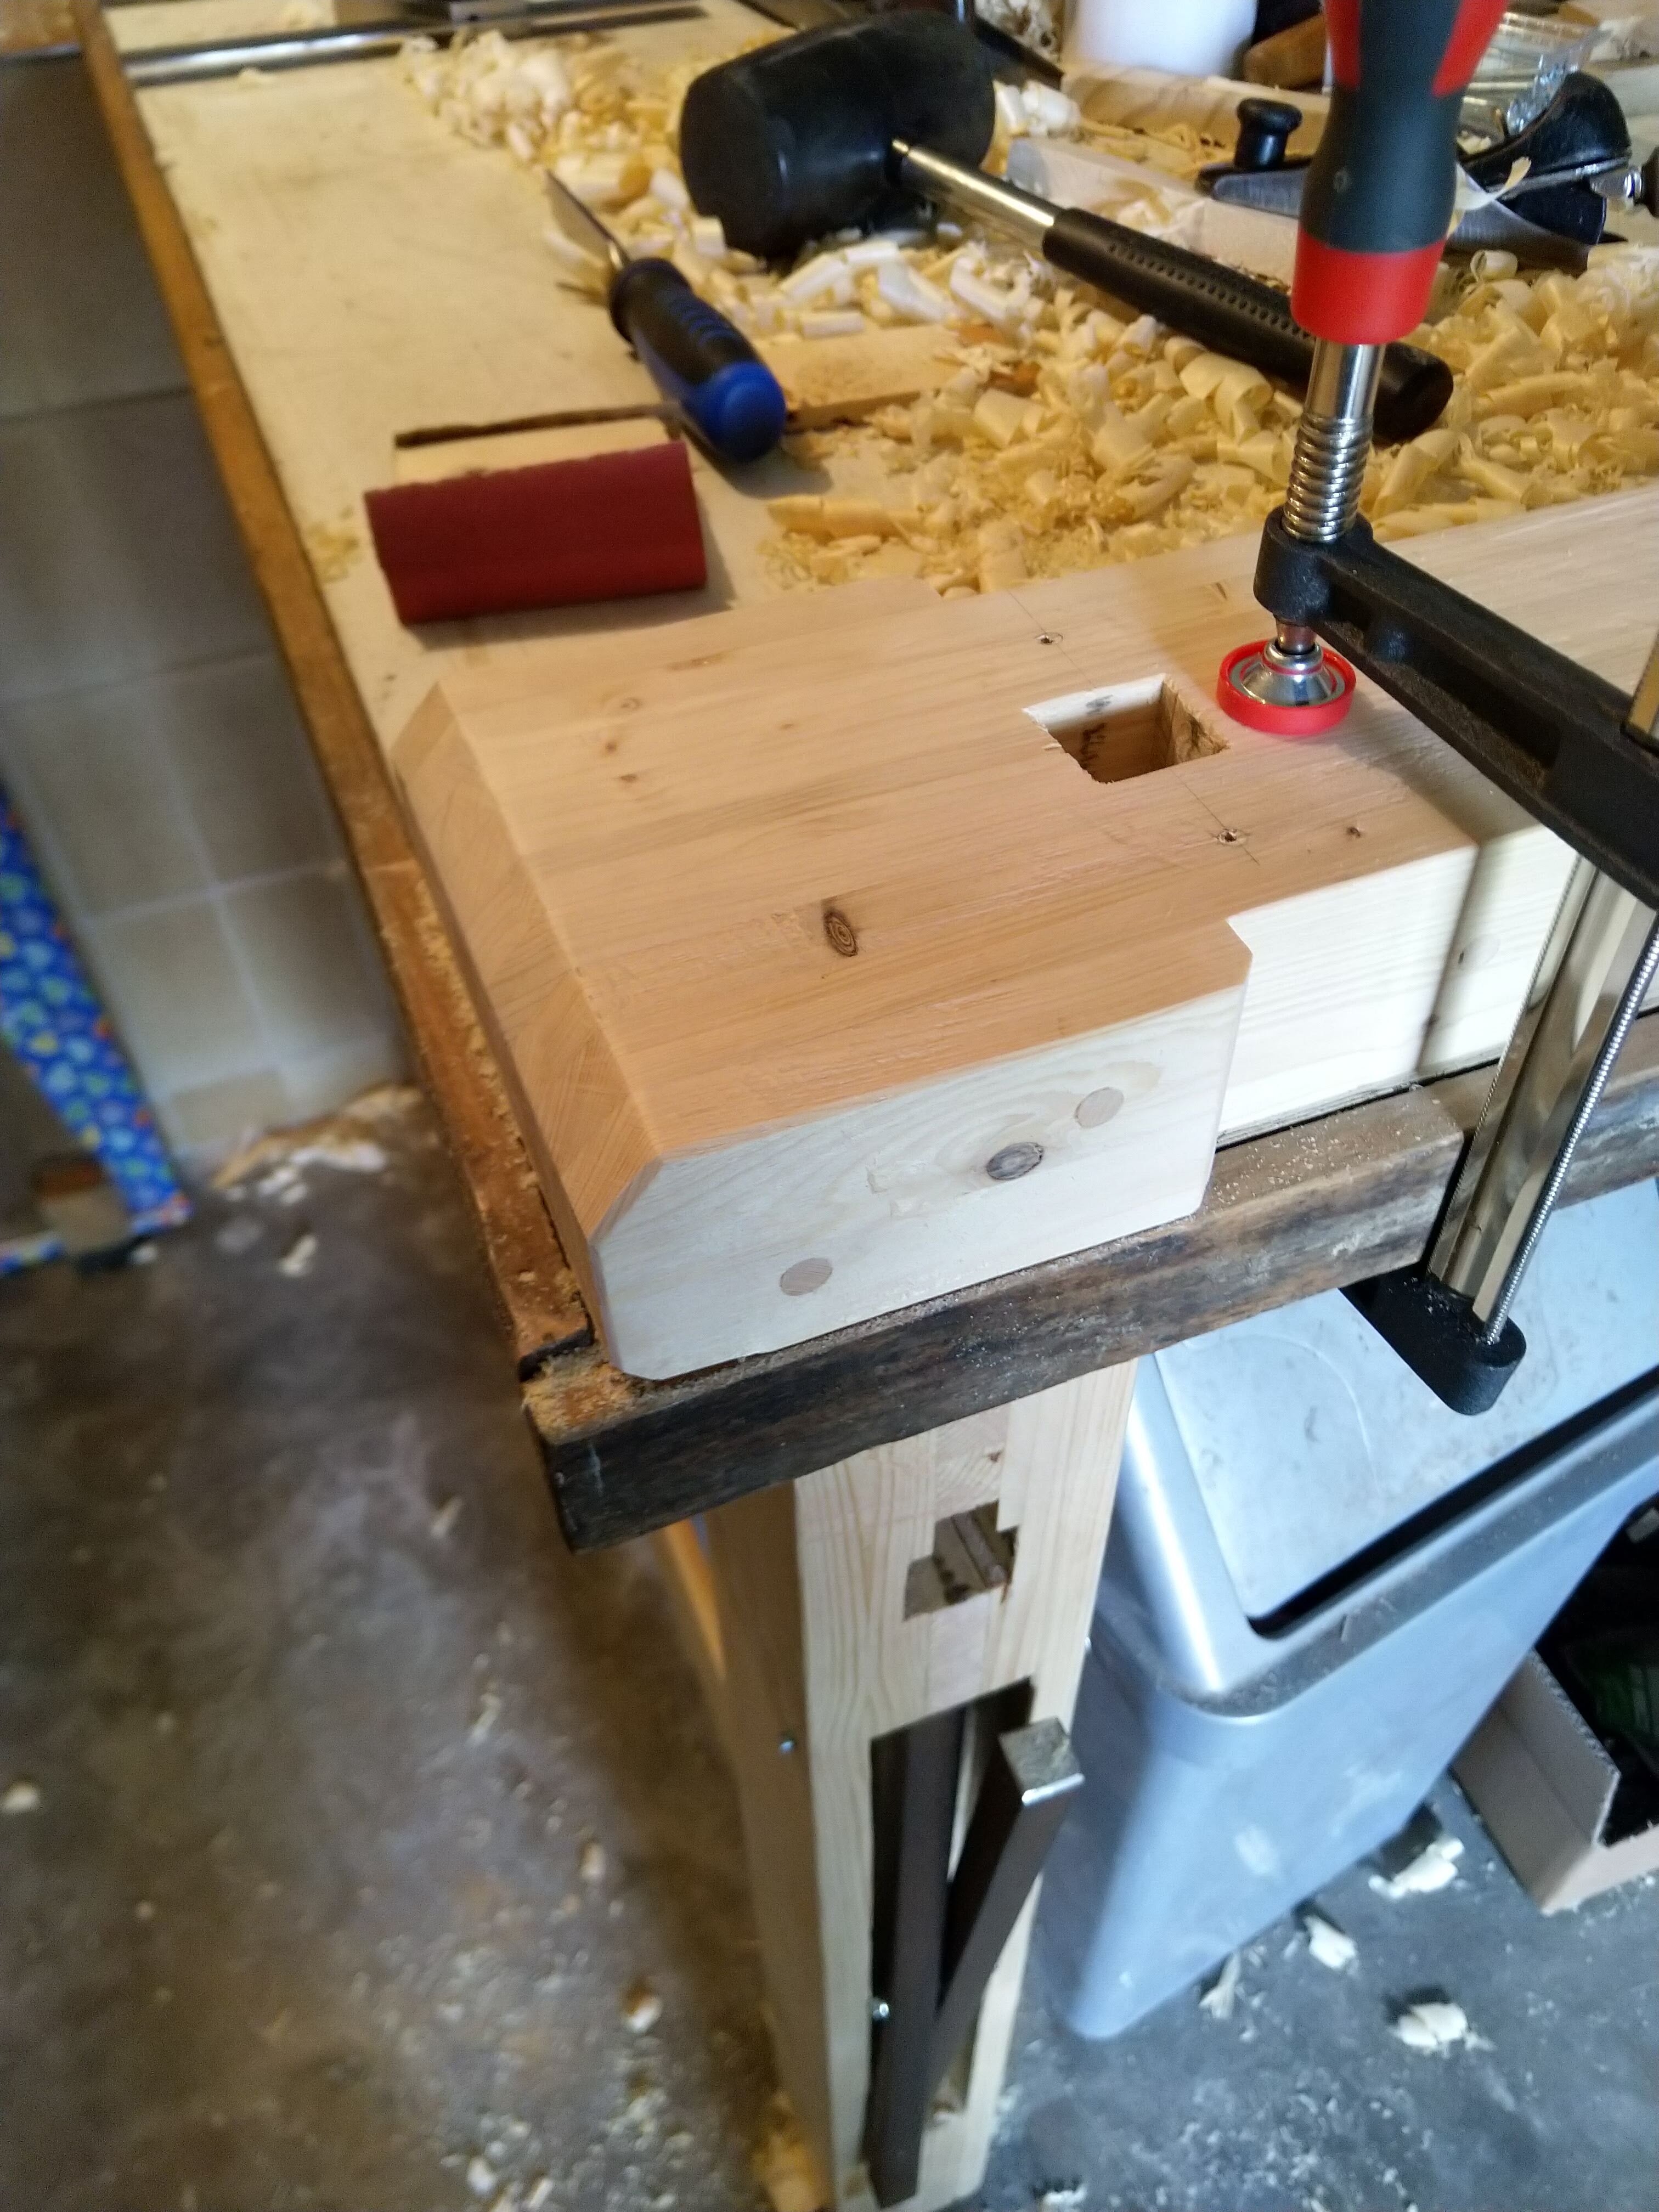
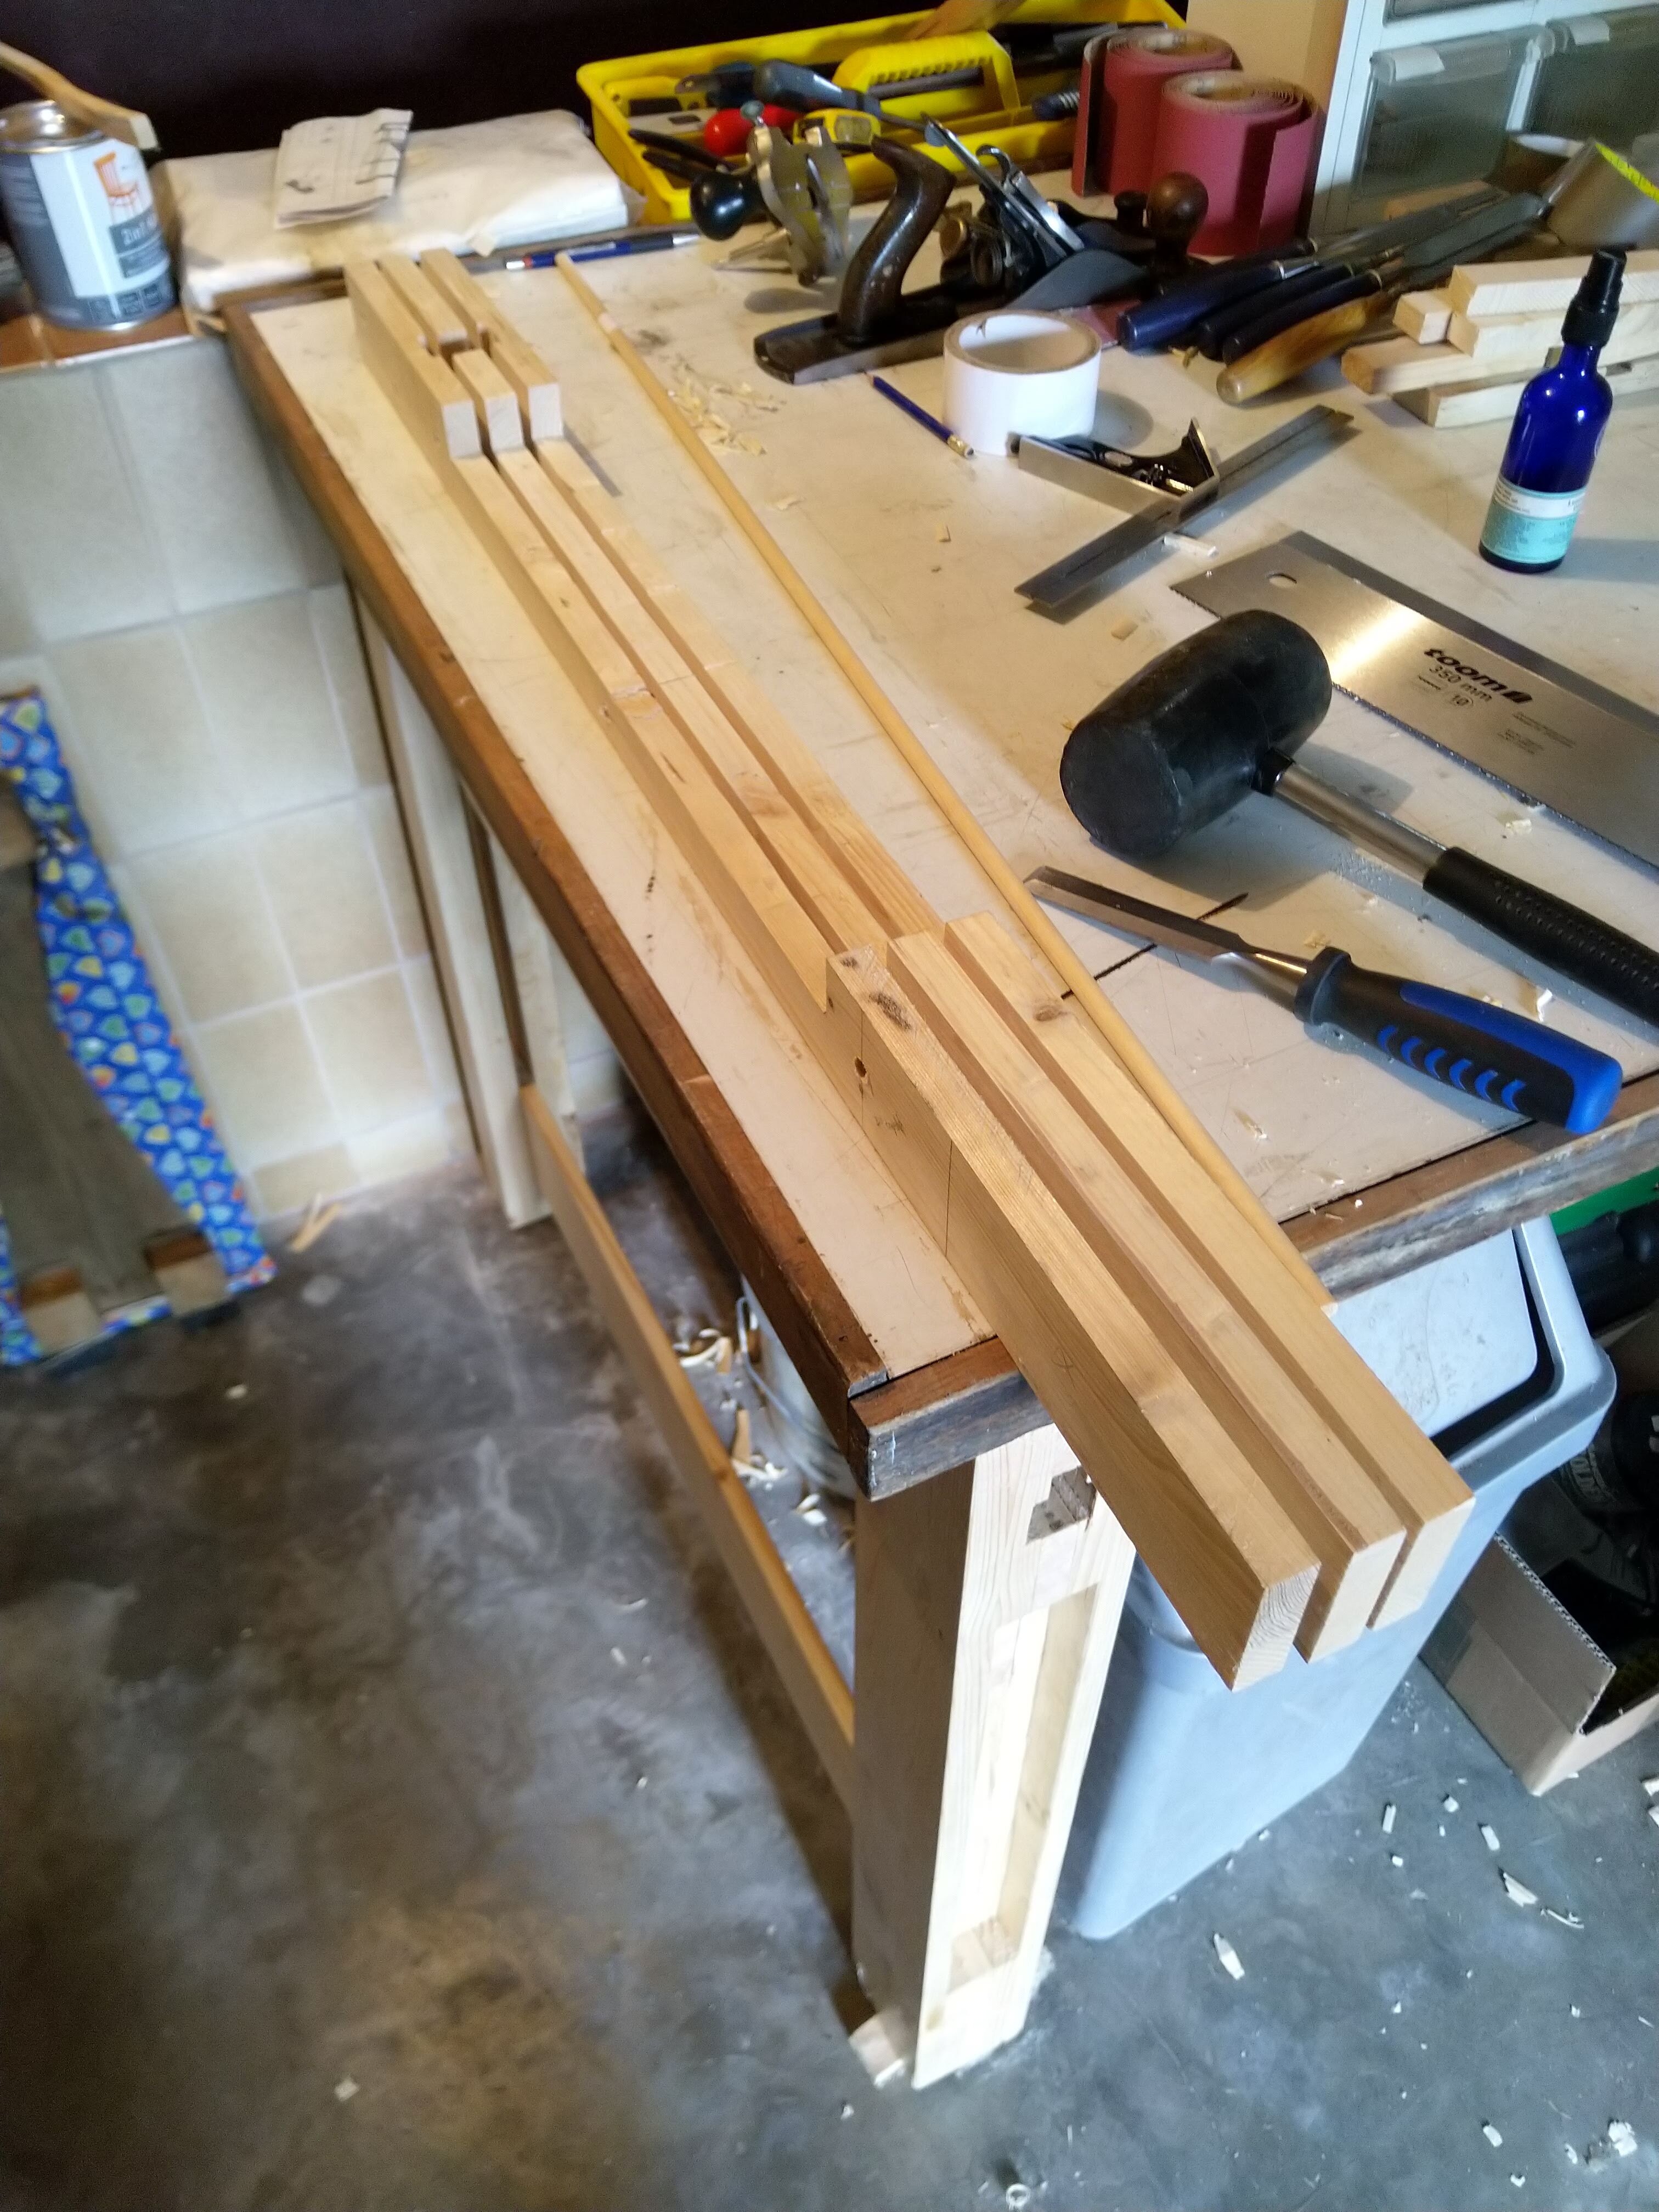
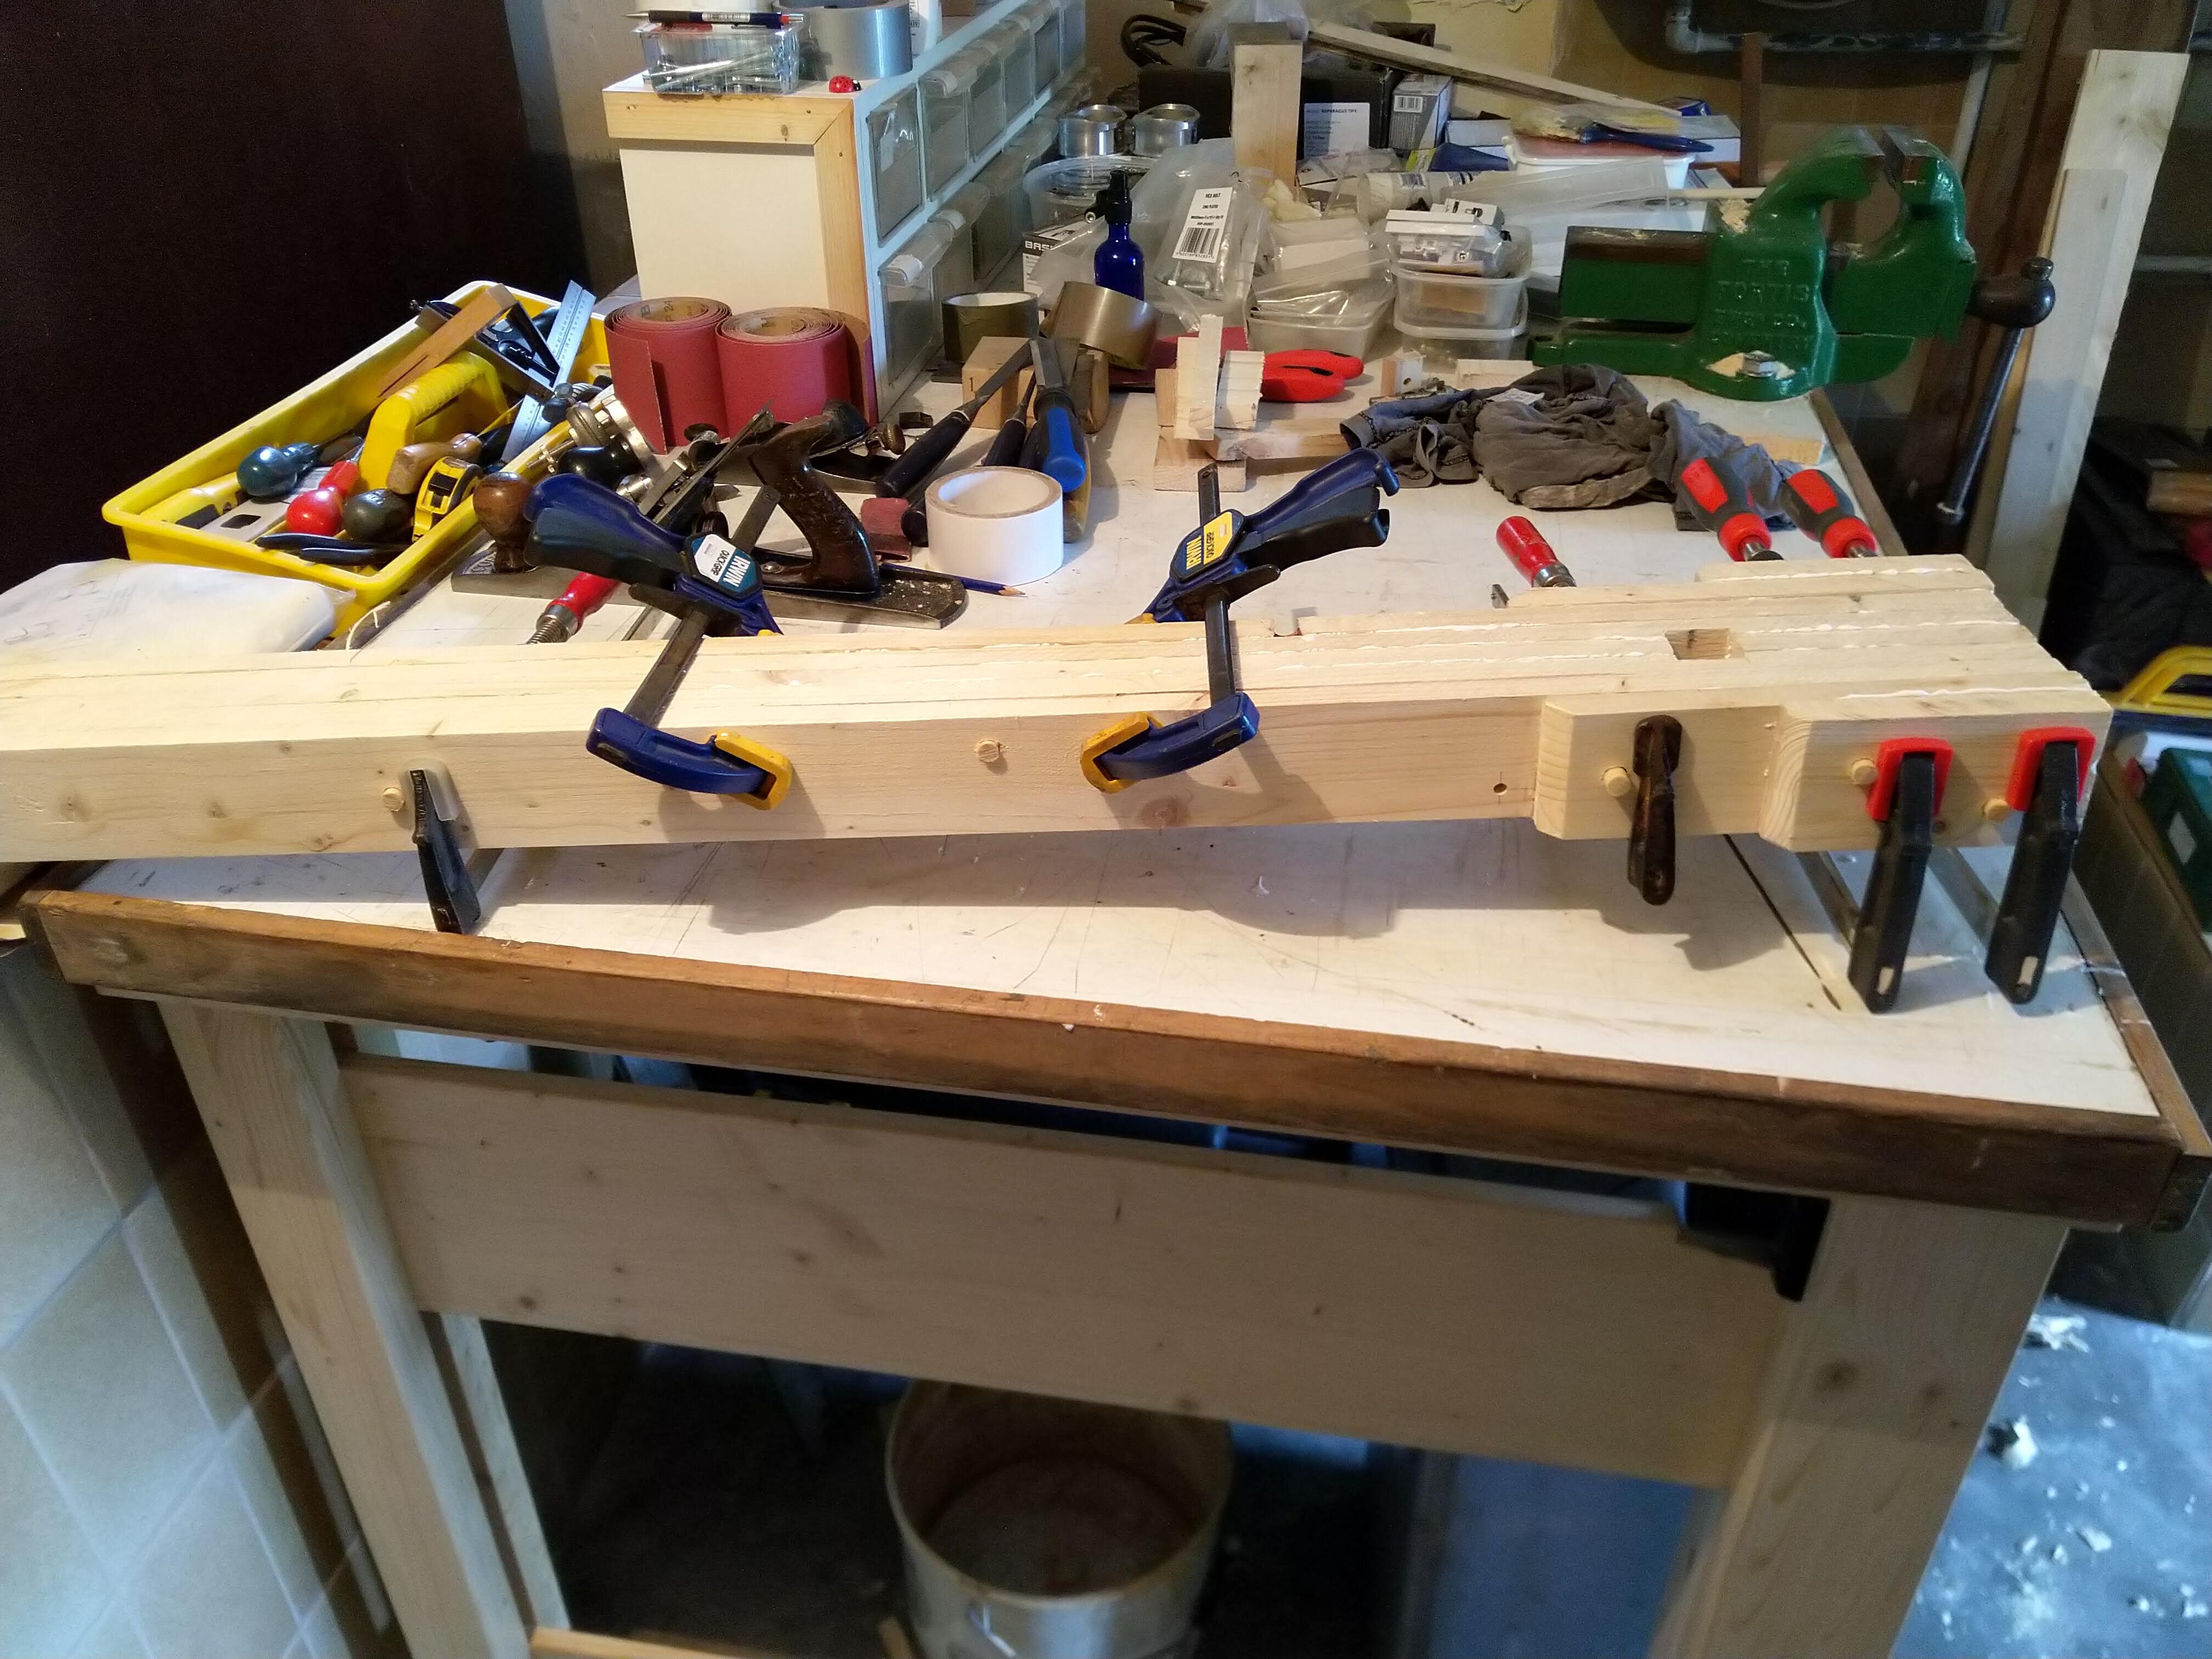
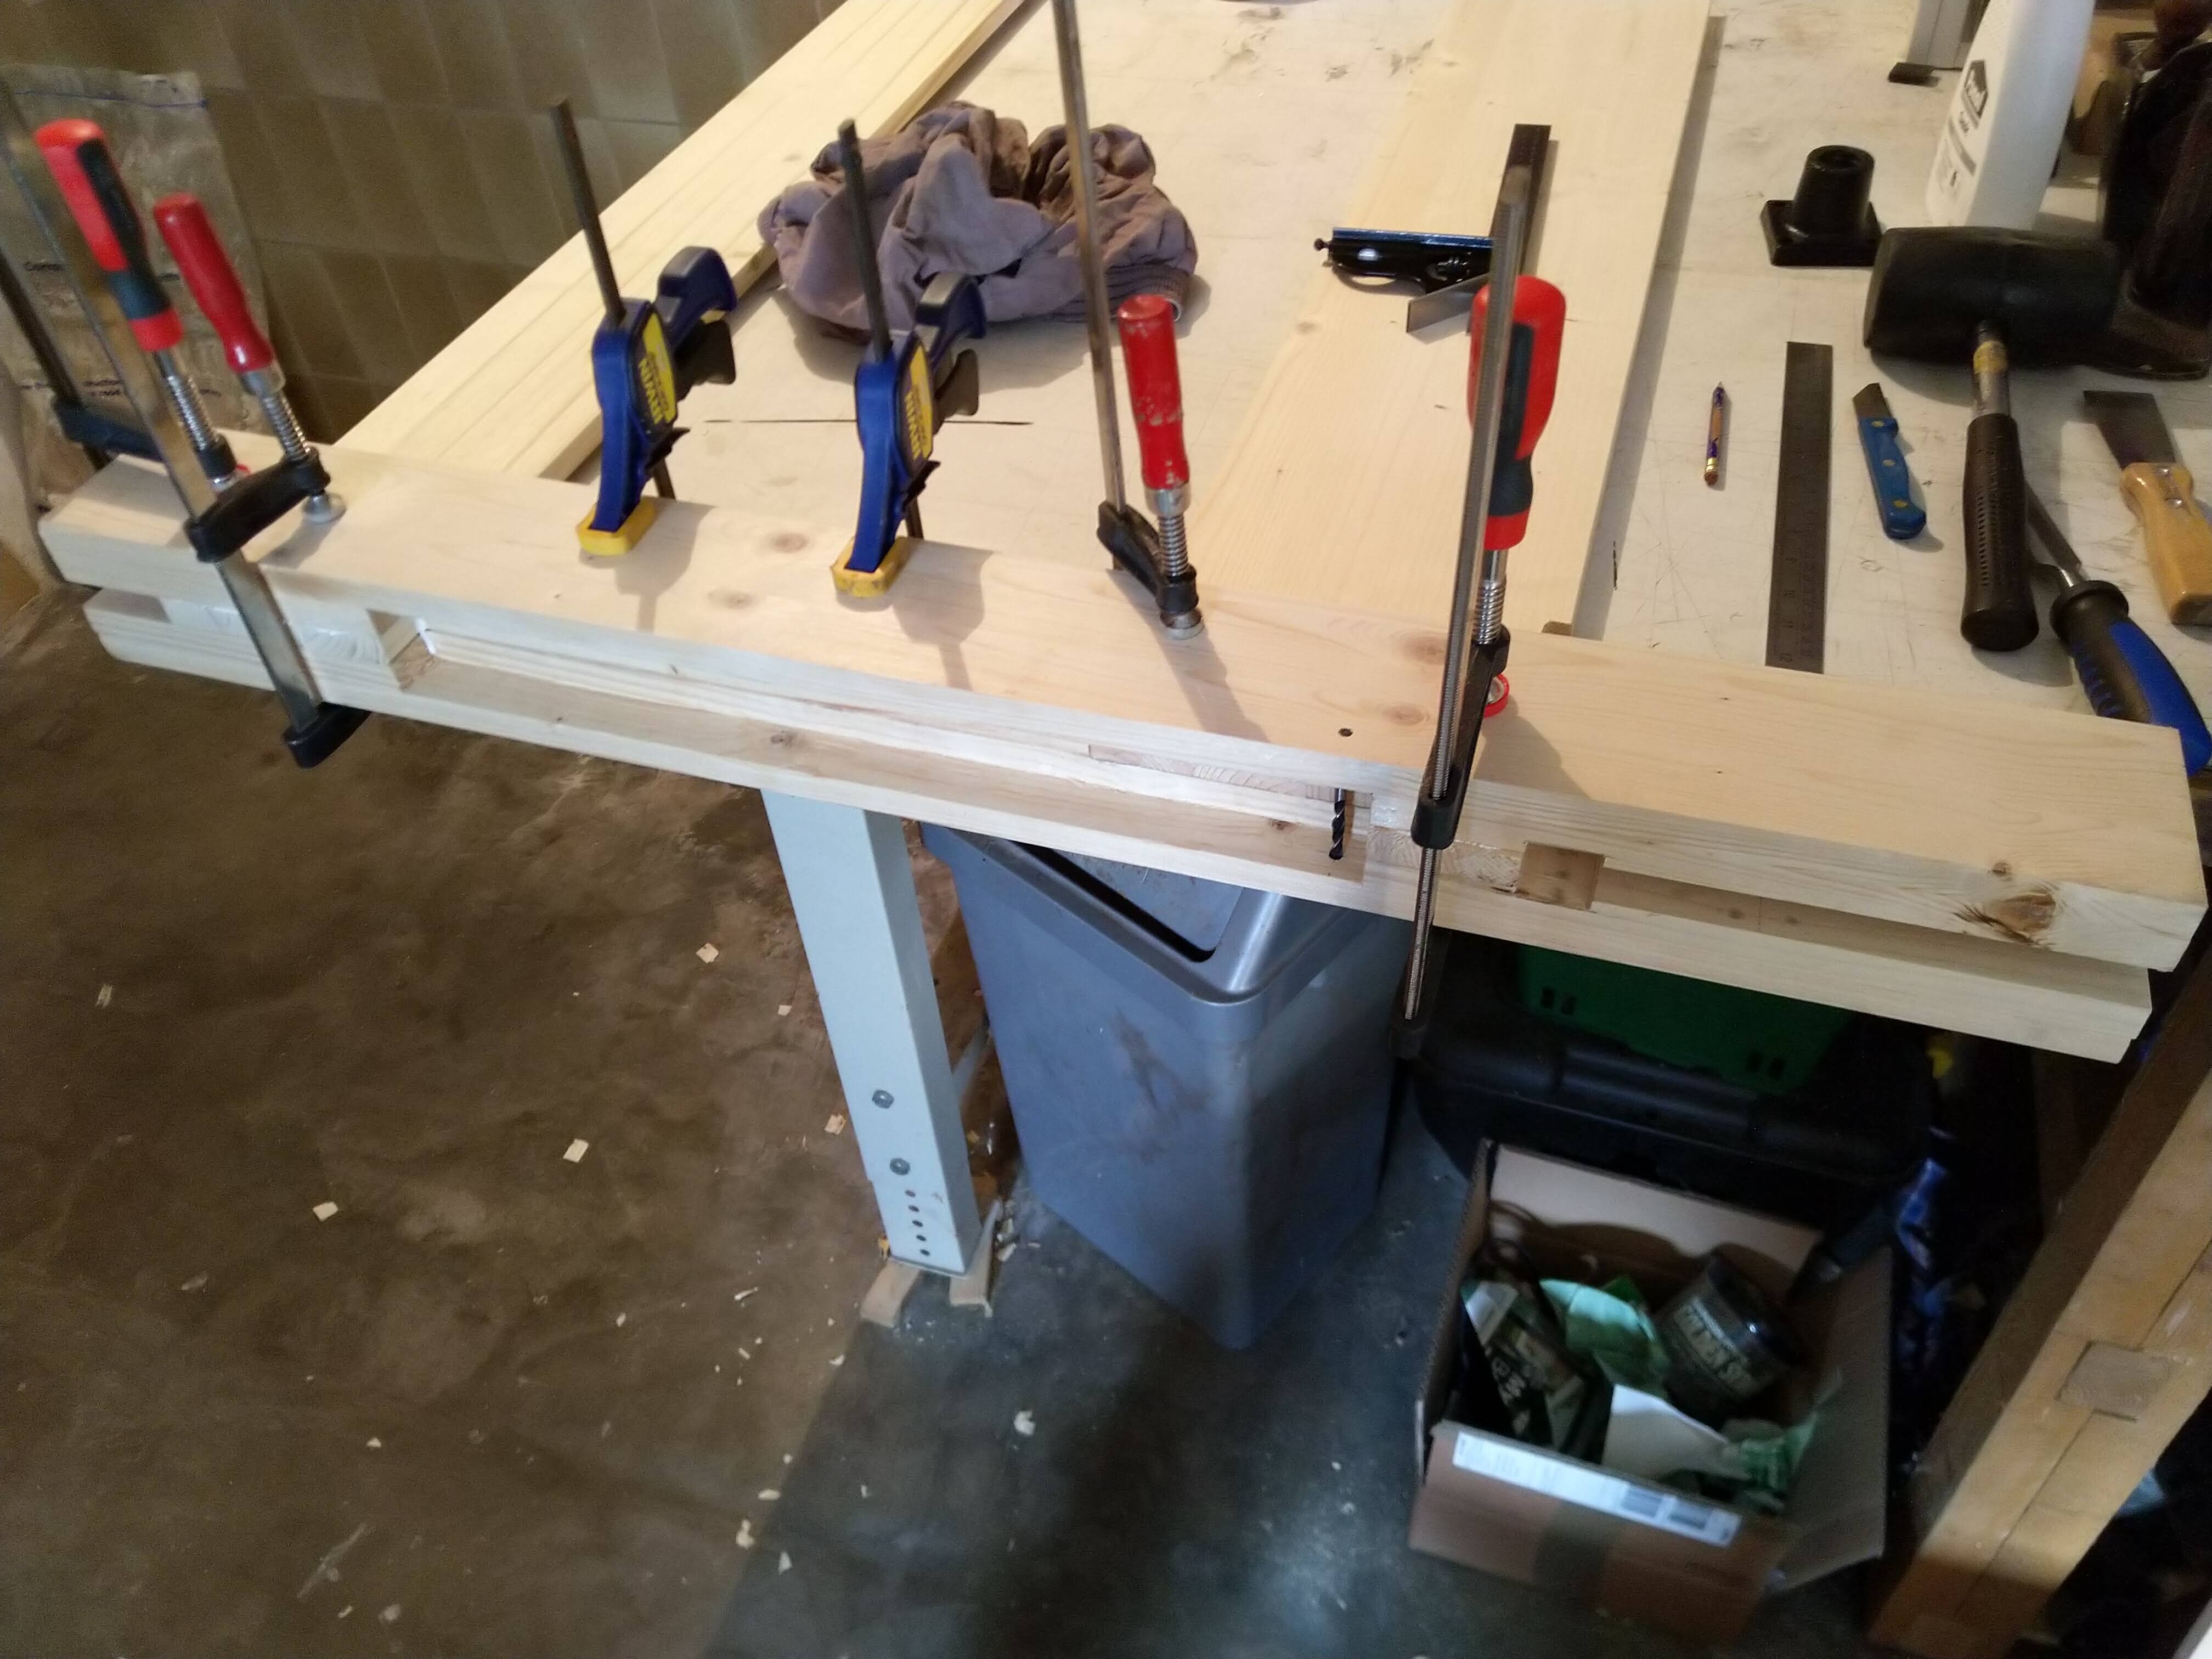
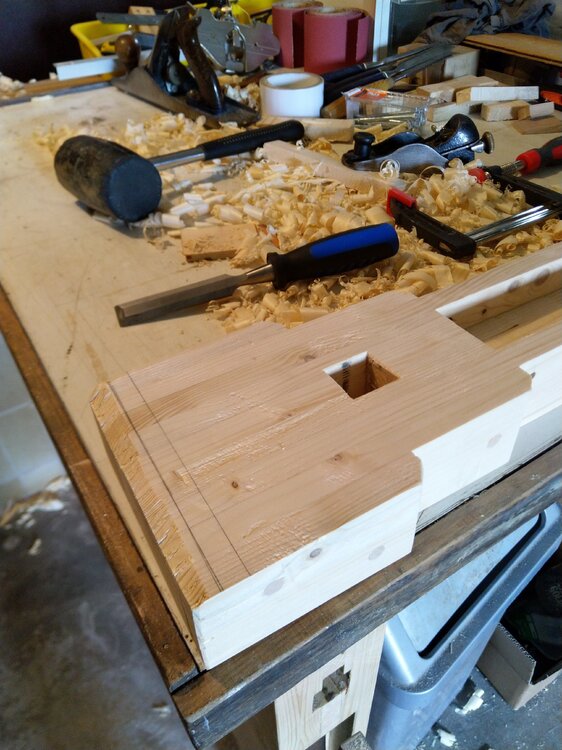
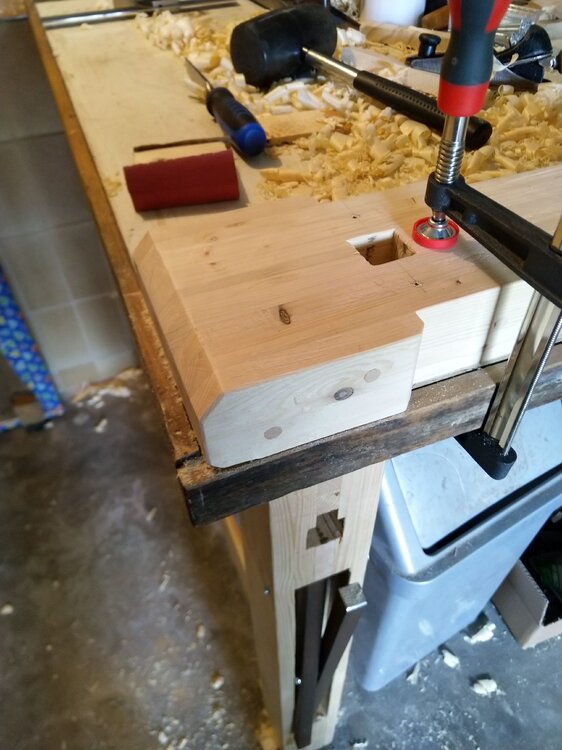
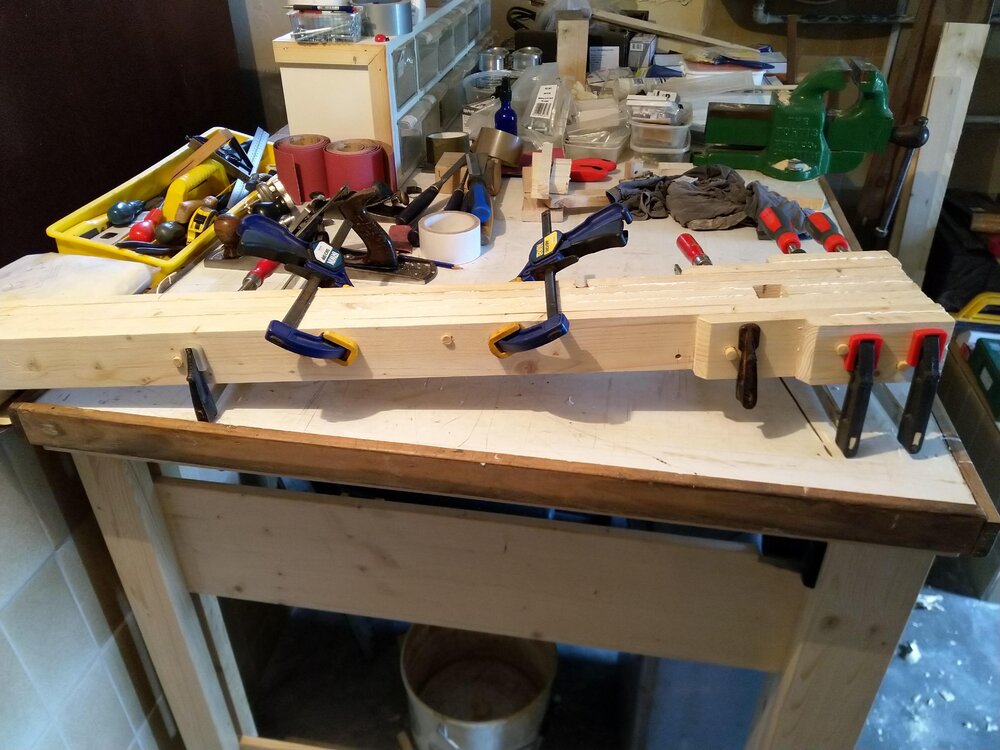
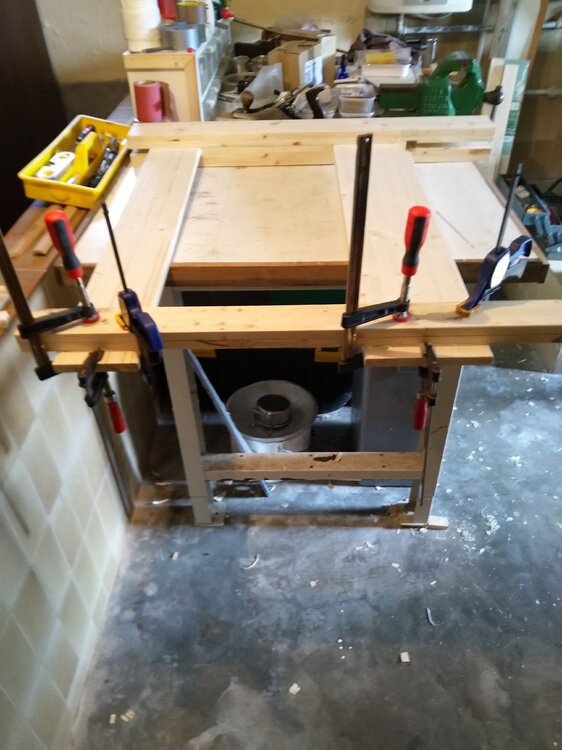
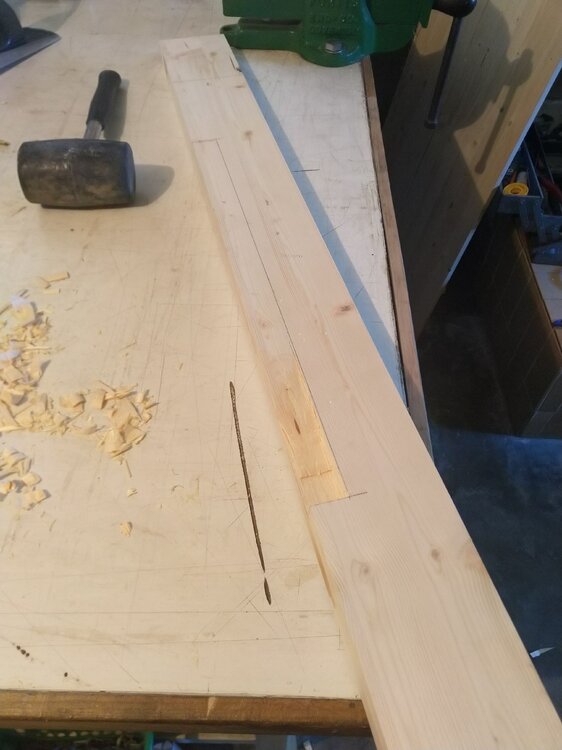
I've got a confession to make.. I've been neglecting you dear Guitarchatters, I've nearly finished the vice and Basschat know all about it. Sorry. Here I've finished the bit where the scissor mechanism runs, cut the middle section to leave the hole for the screw and the rebates to either side. I cut the outers of the middle block of 5 and made some cheeks for the top to make it wider. I also drilled each part for 10mm dowels as discussed above somewhere. Mark up each piece with a number... I Because this was always possible, dropped the bits trying to pick them all up at once. Apply glue, clamps and time.


-
I use 0.60 Dunlop tortex. No idea if that helps though, it's all personal preference.
-
It's pretty much all been said, my 2p is don't go for one with the three plastic strings. Get a proper one with metal strings. The plastic ones are a nightmare to keep in tune.
-
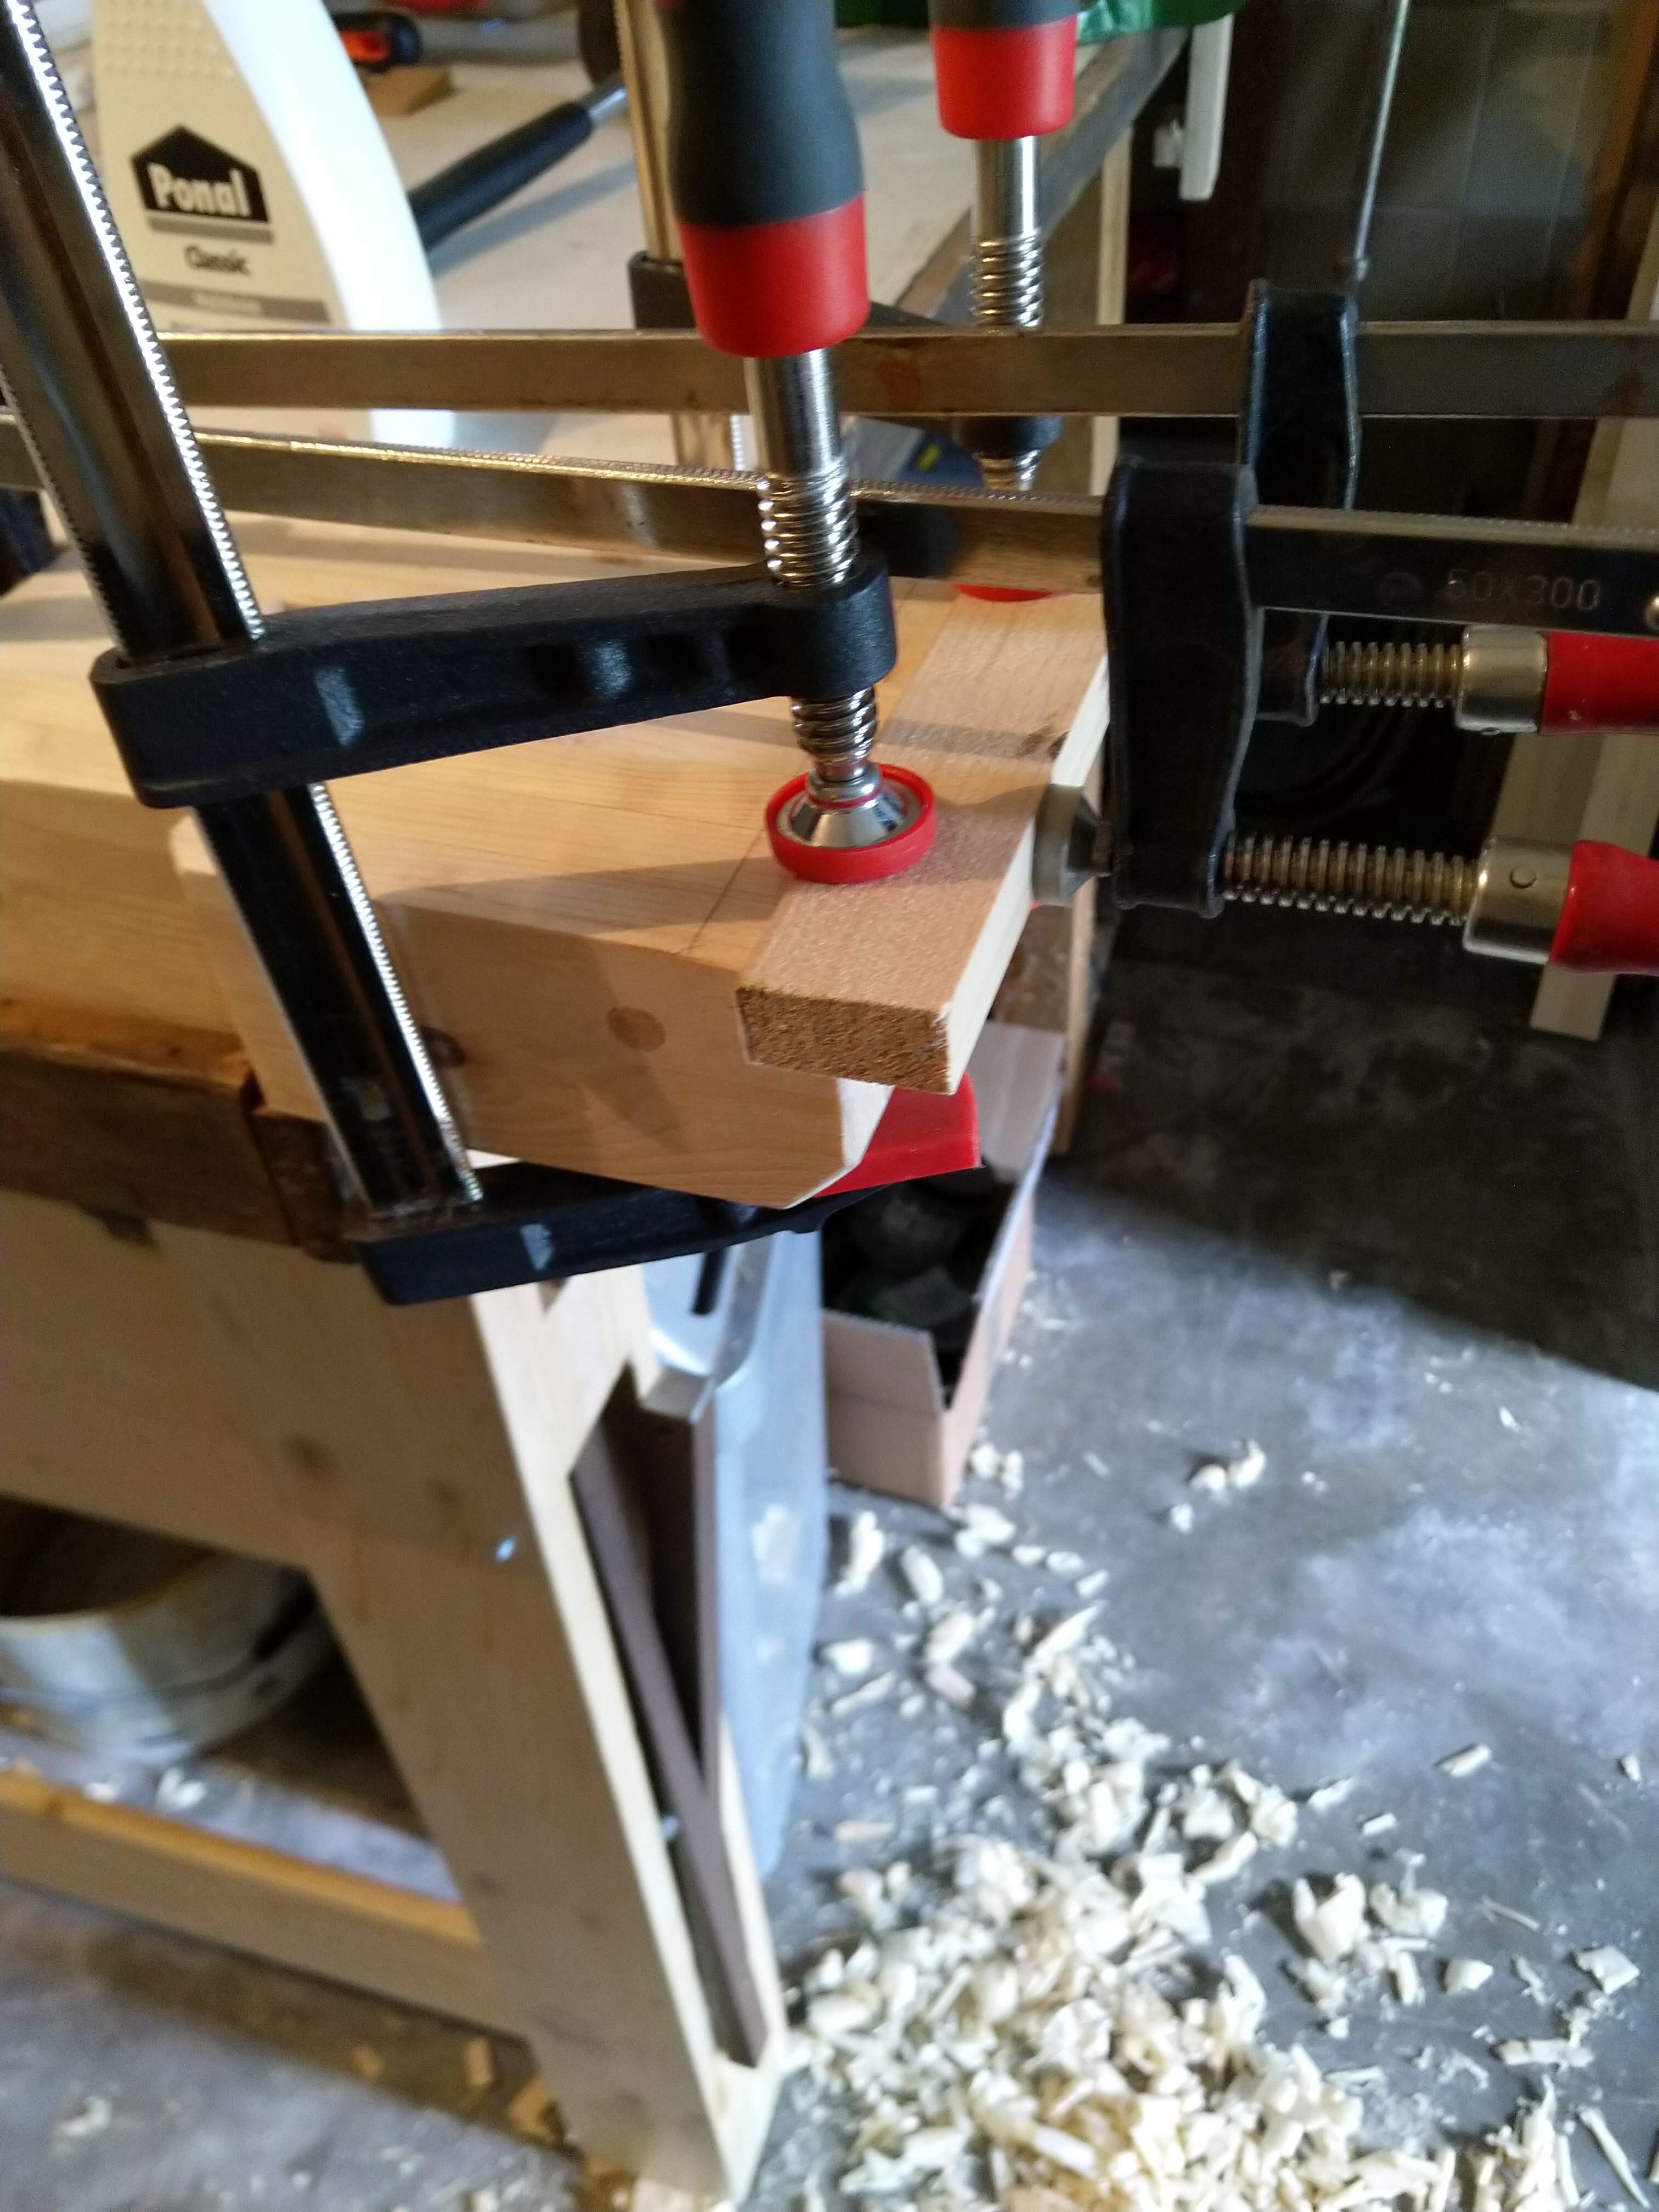
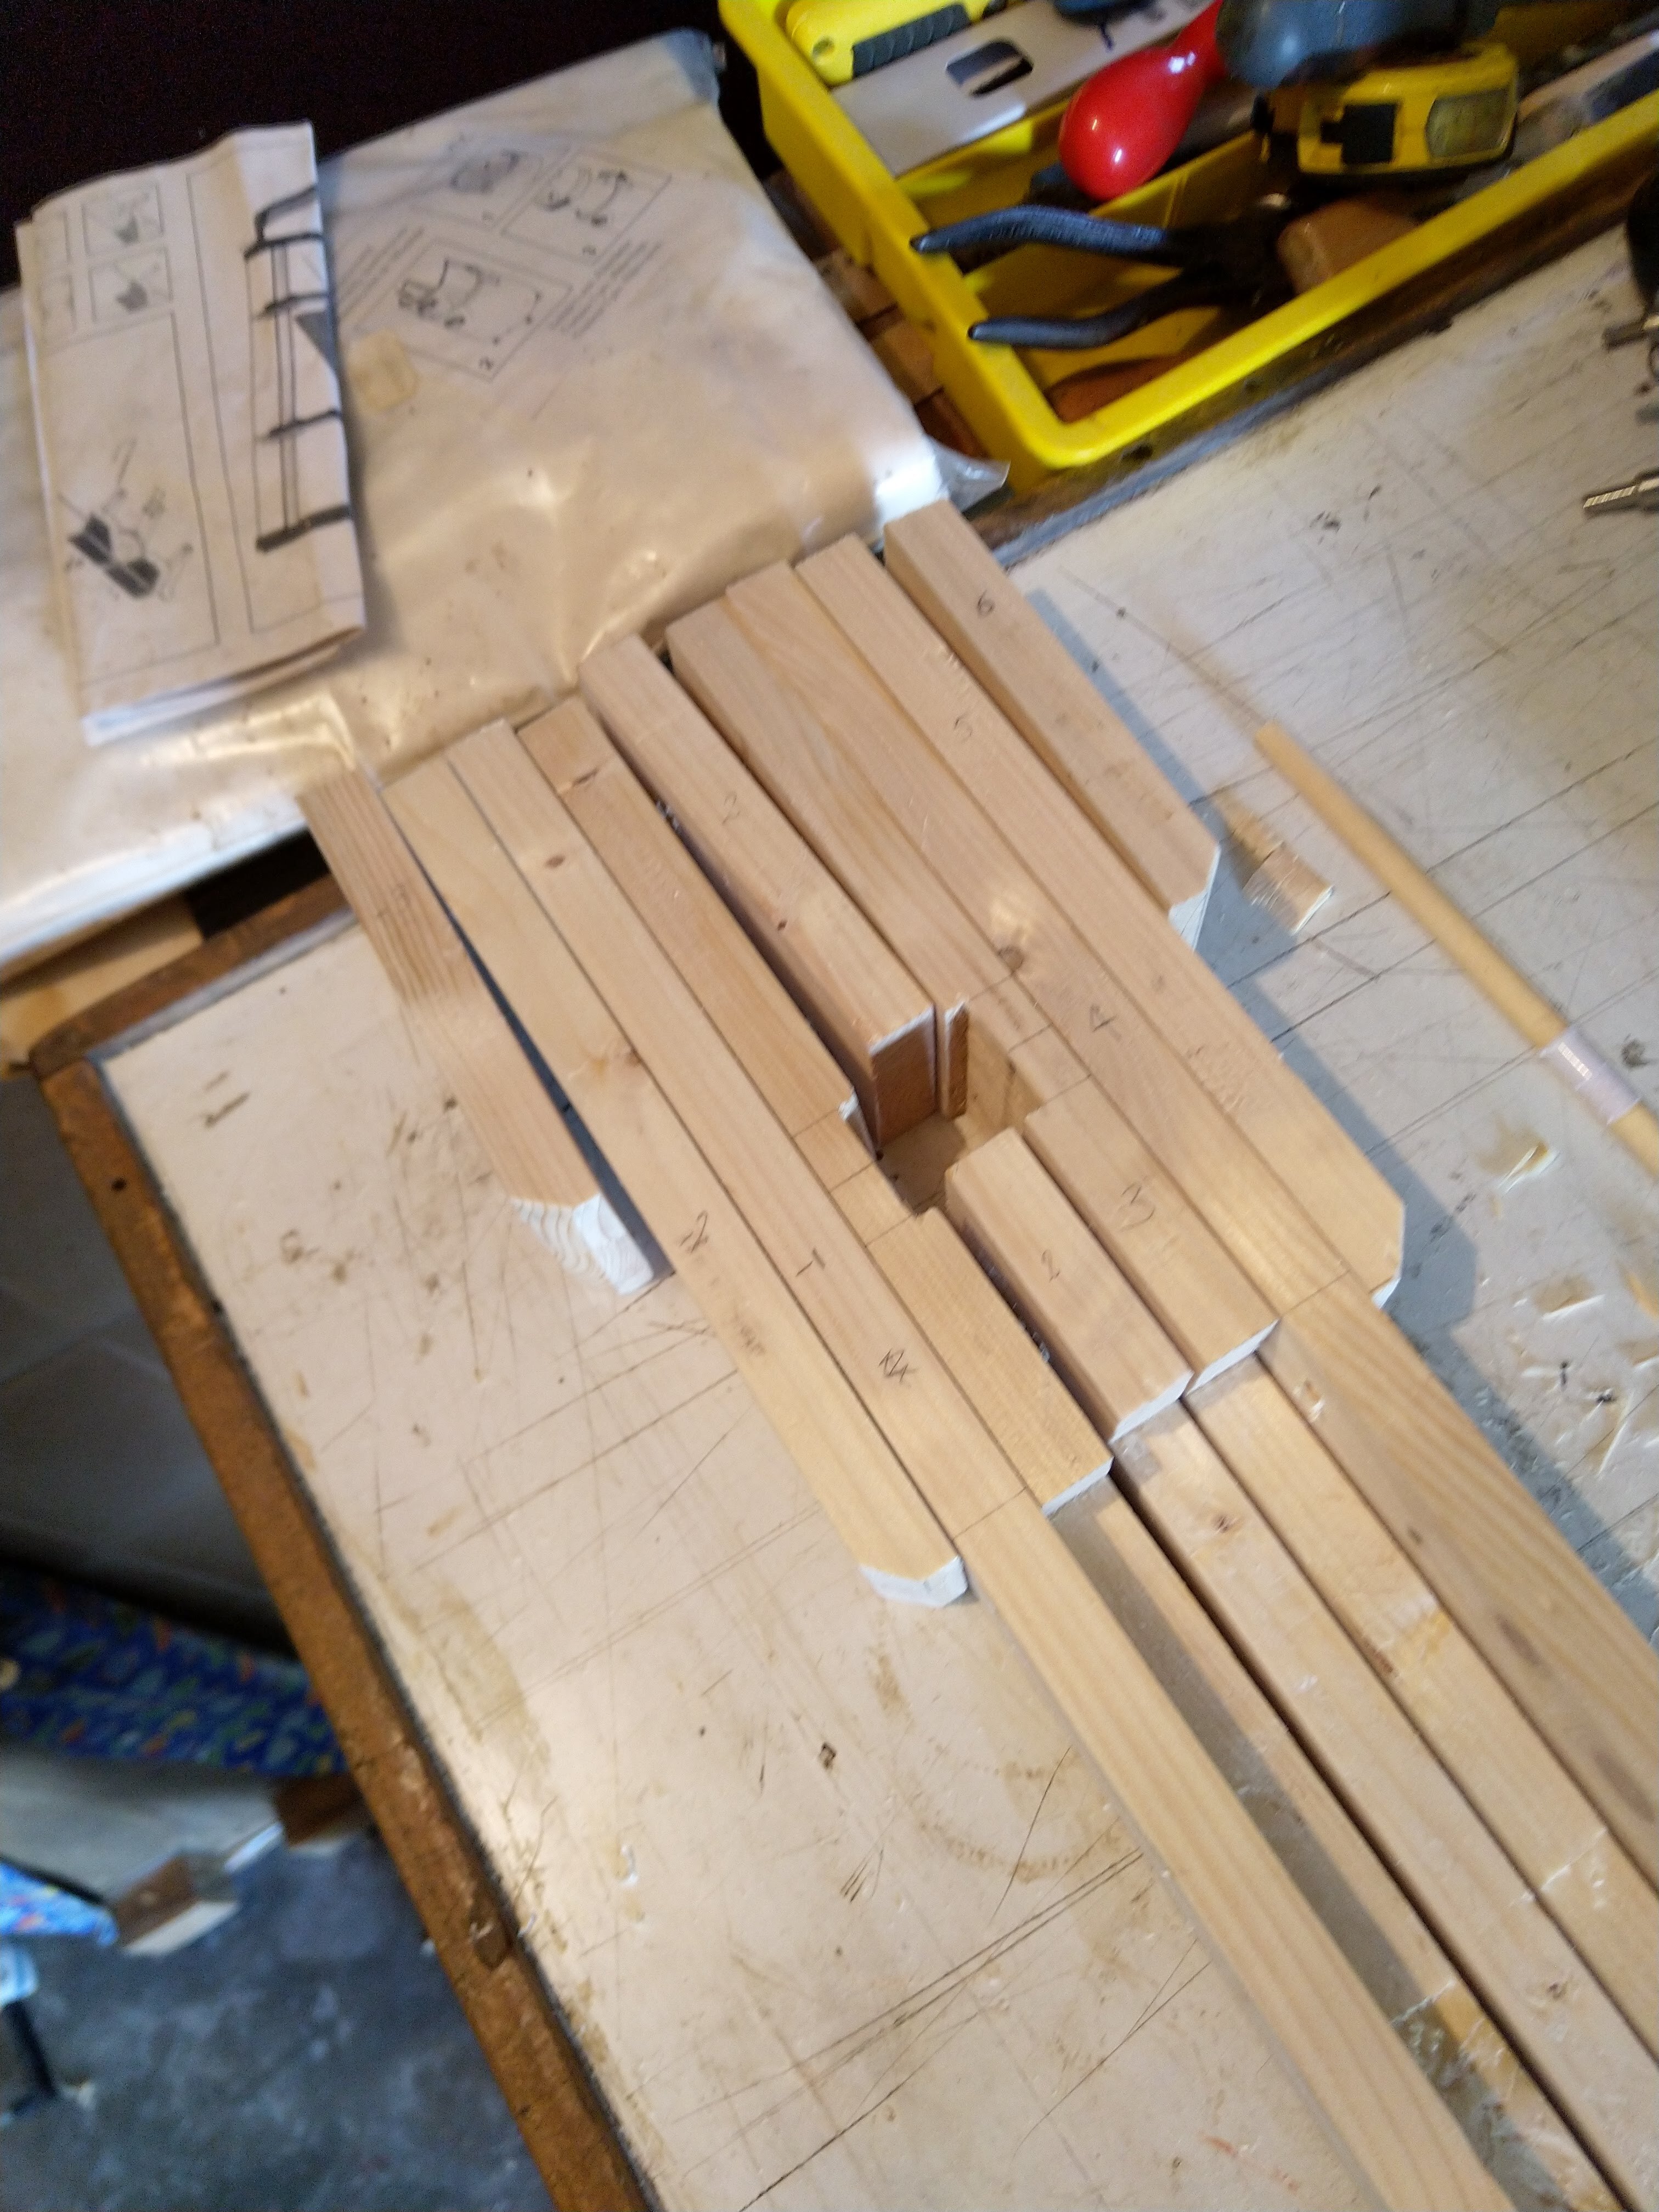
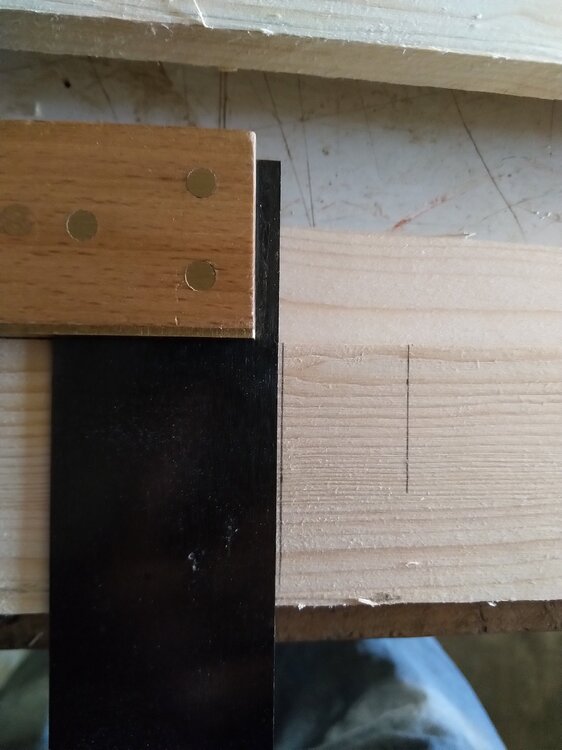
Back to the cellar again... You get the first post tonight, them bass players will have to wait. The first two are just me showing off. It's nothing to those who know what they're doing, but a hand planed square face is something for me to boast about OK. So having learnt from the legs I'm cutting the slot for the scissor mechanism before gluing. To ensure that they don't move once it's time to be glued I'm screwing the strips together and I'll drill the holes out for dowels later. I don't think it'll need dowels, the compression moment is against the long grain and something else will break first. But it's another skill to learn.


-
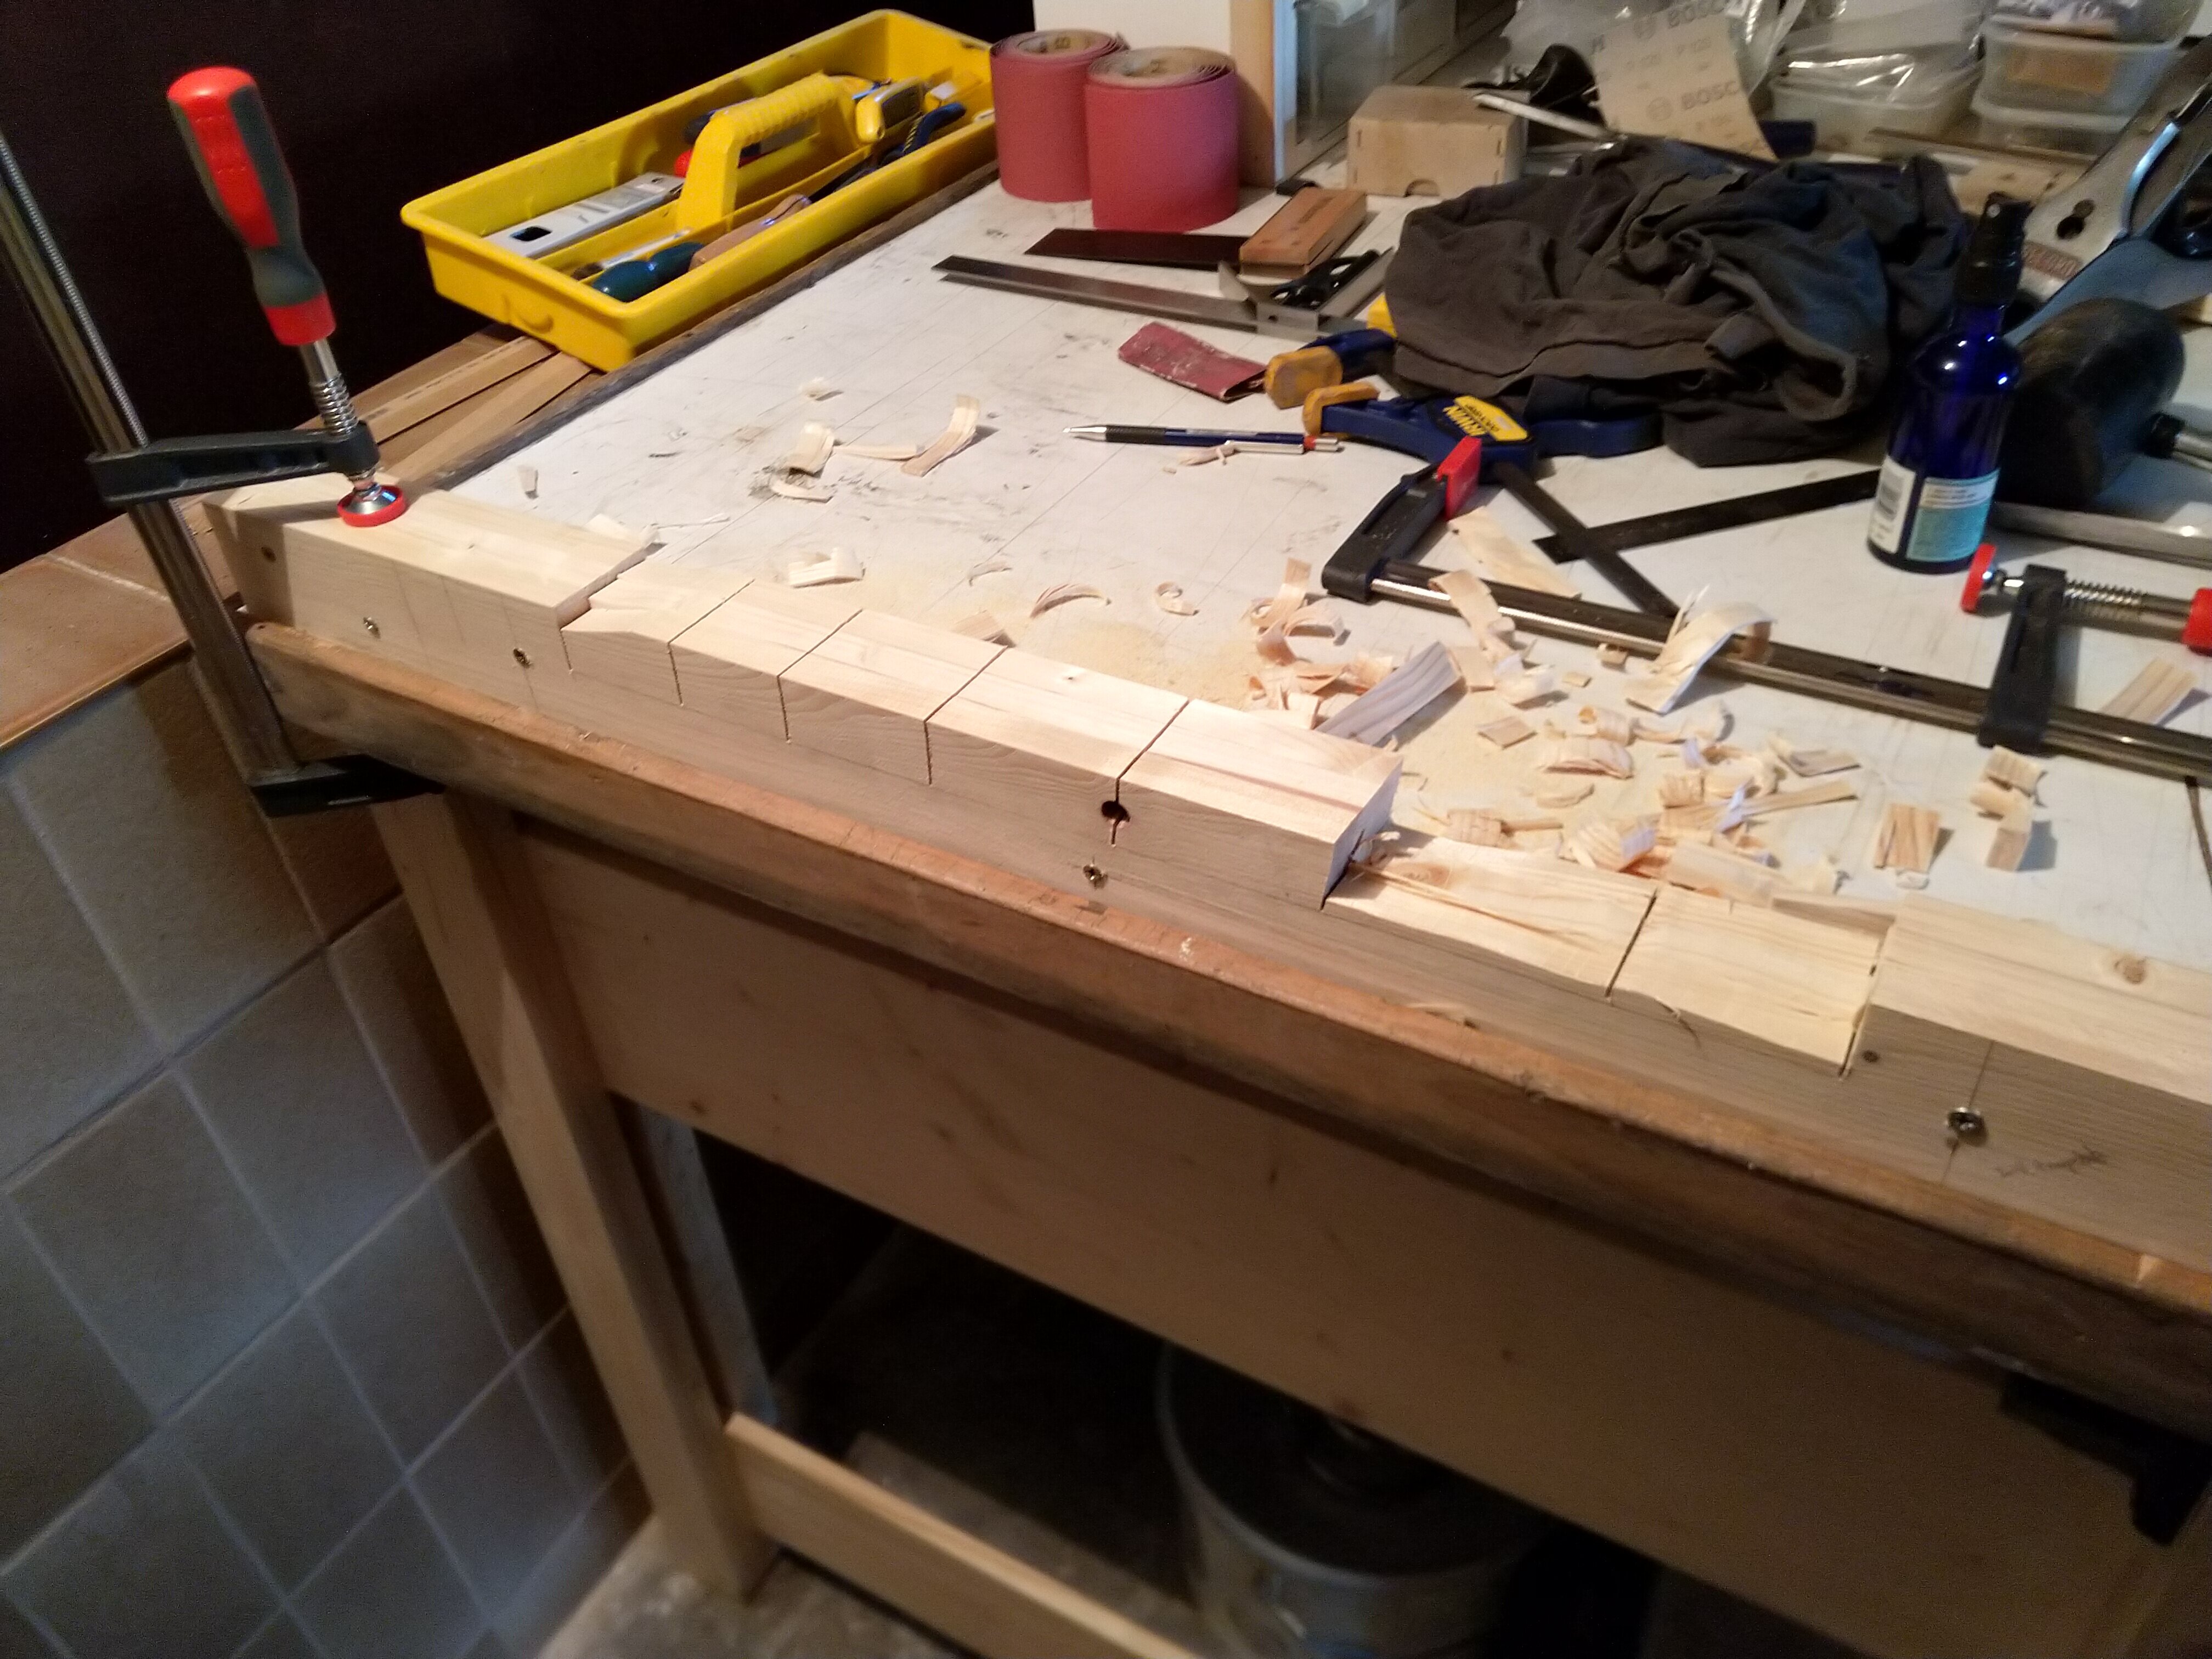
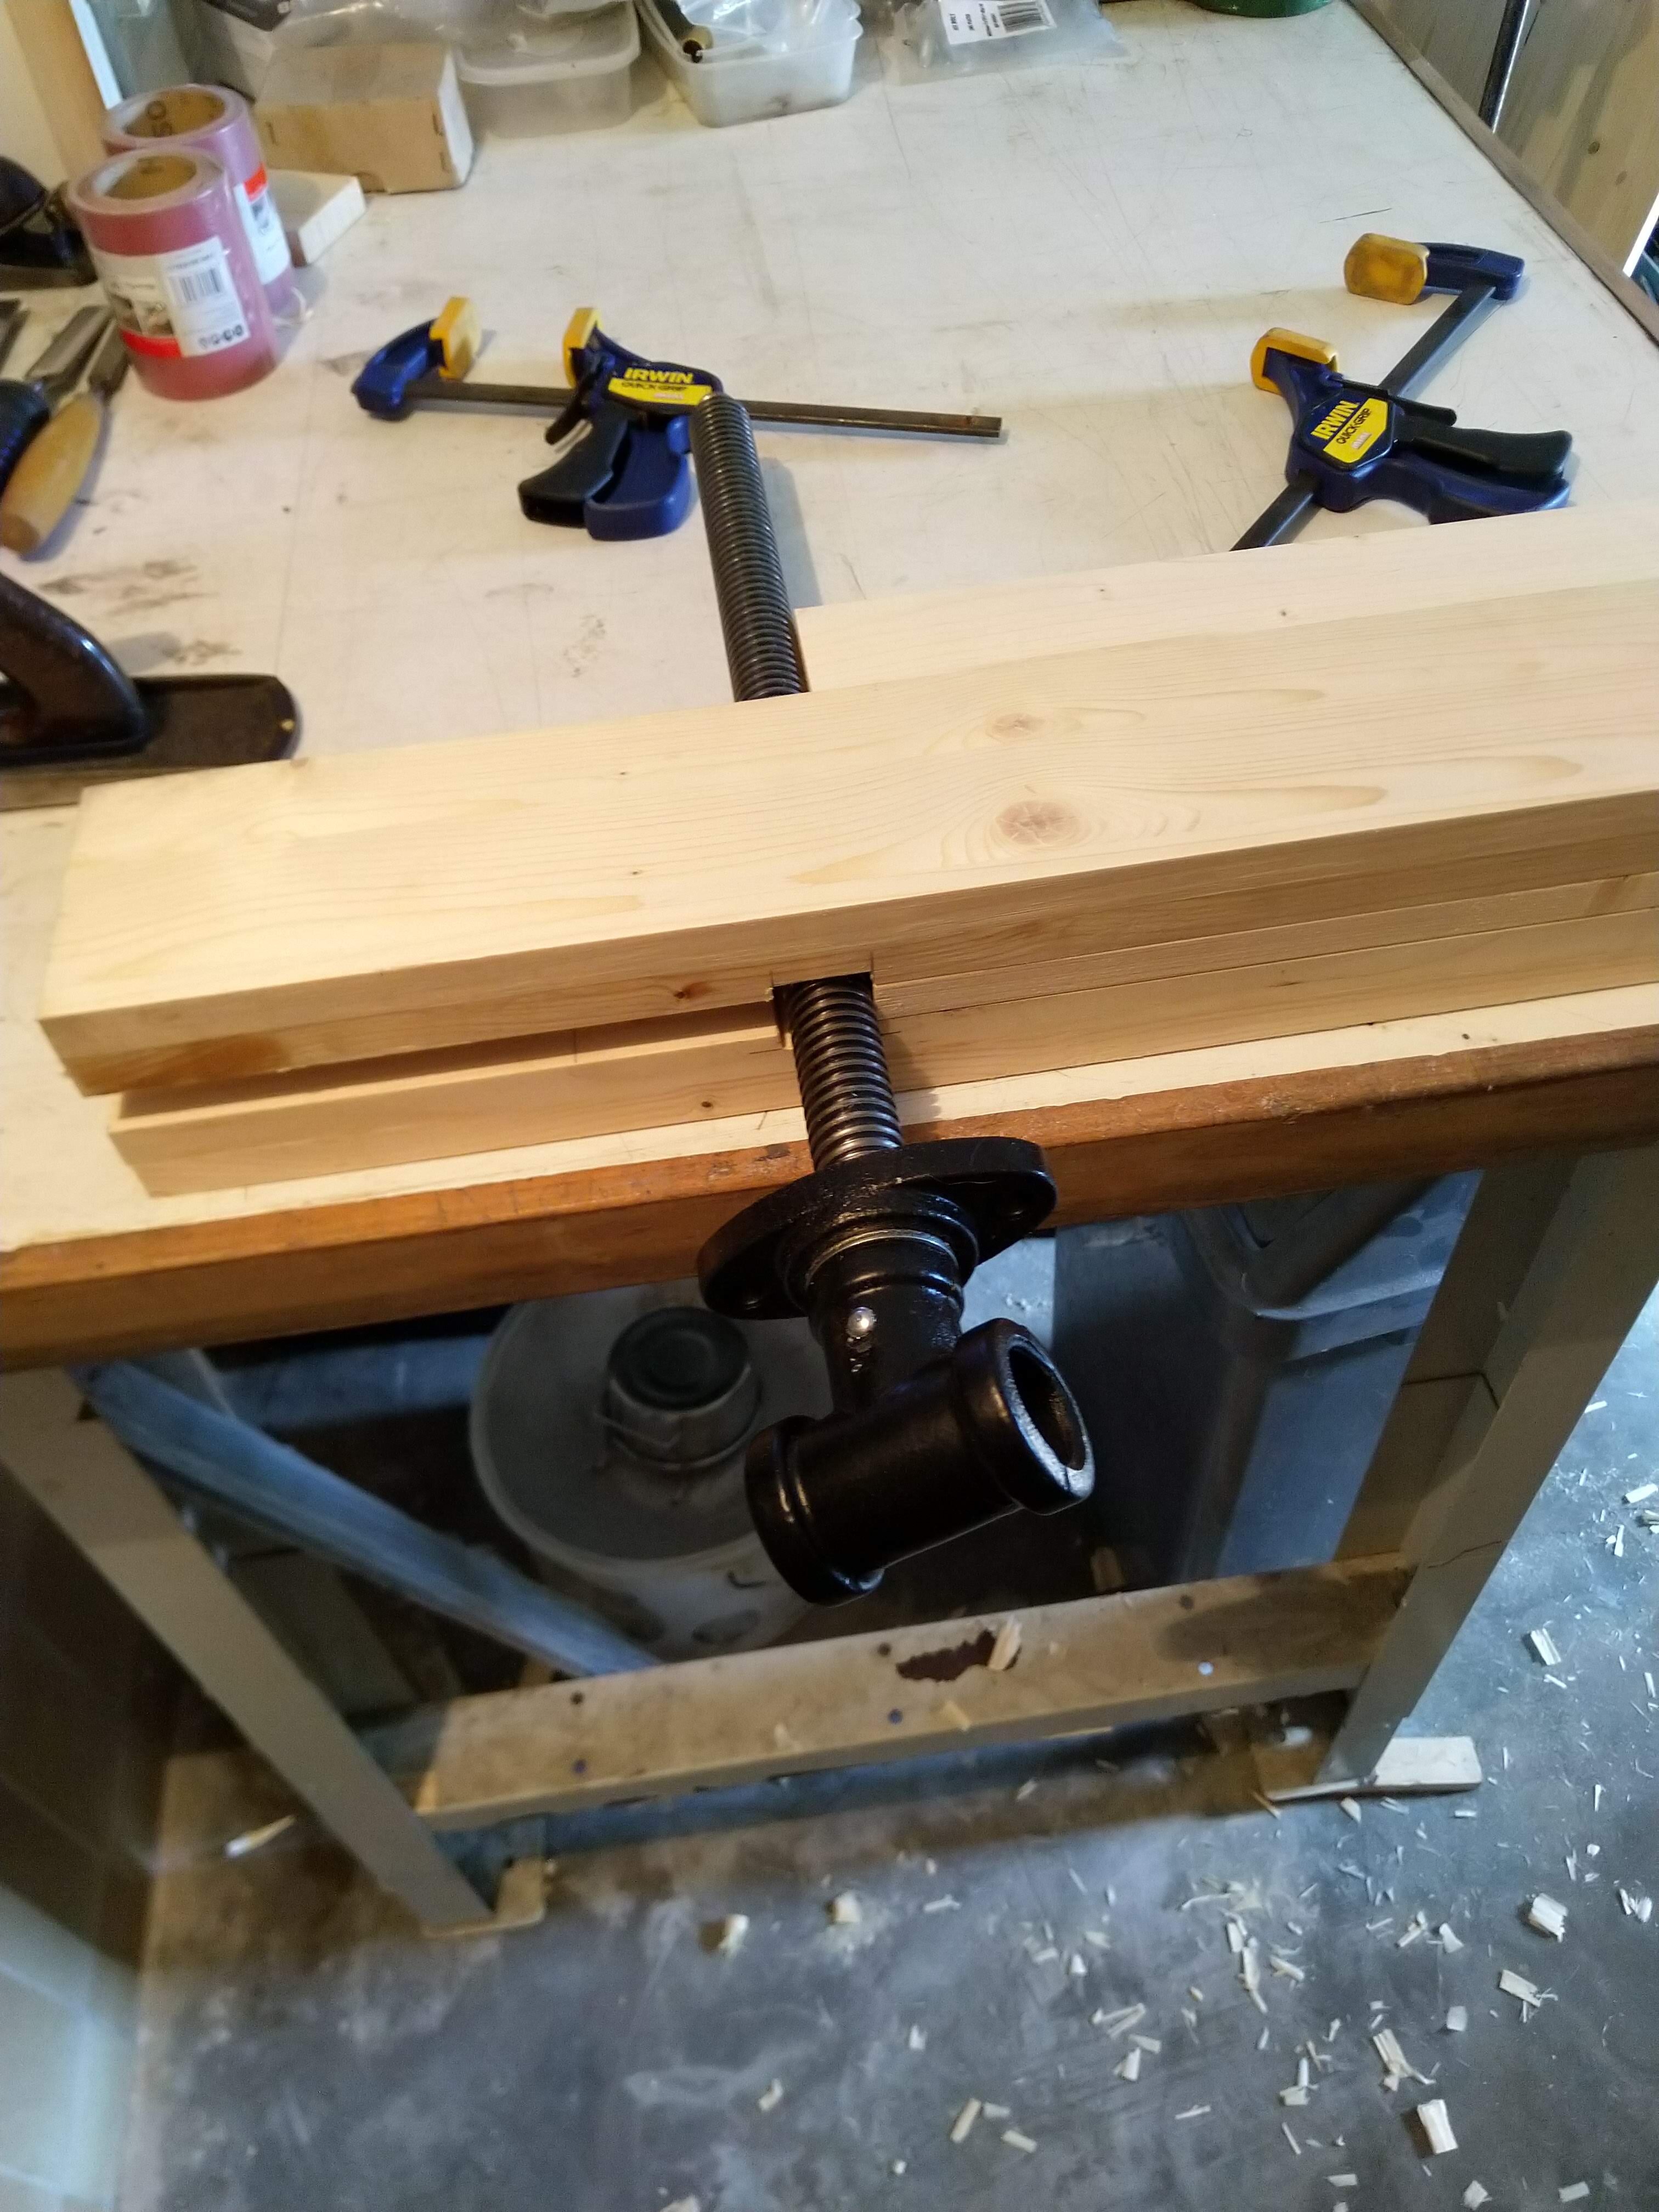
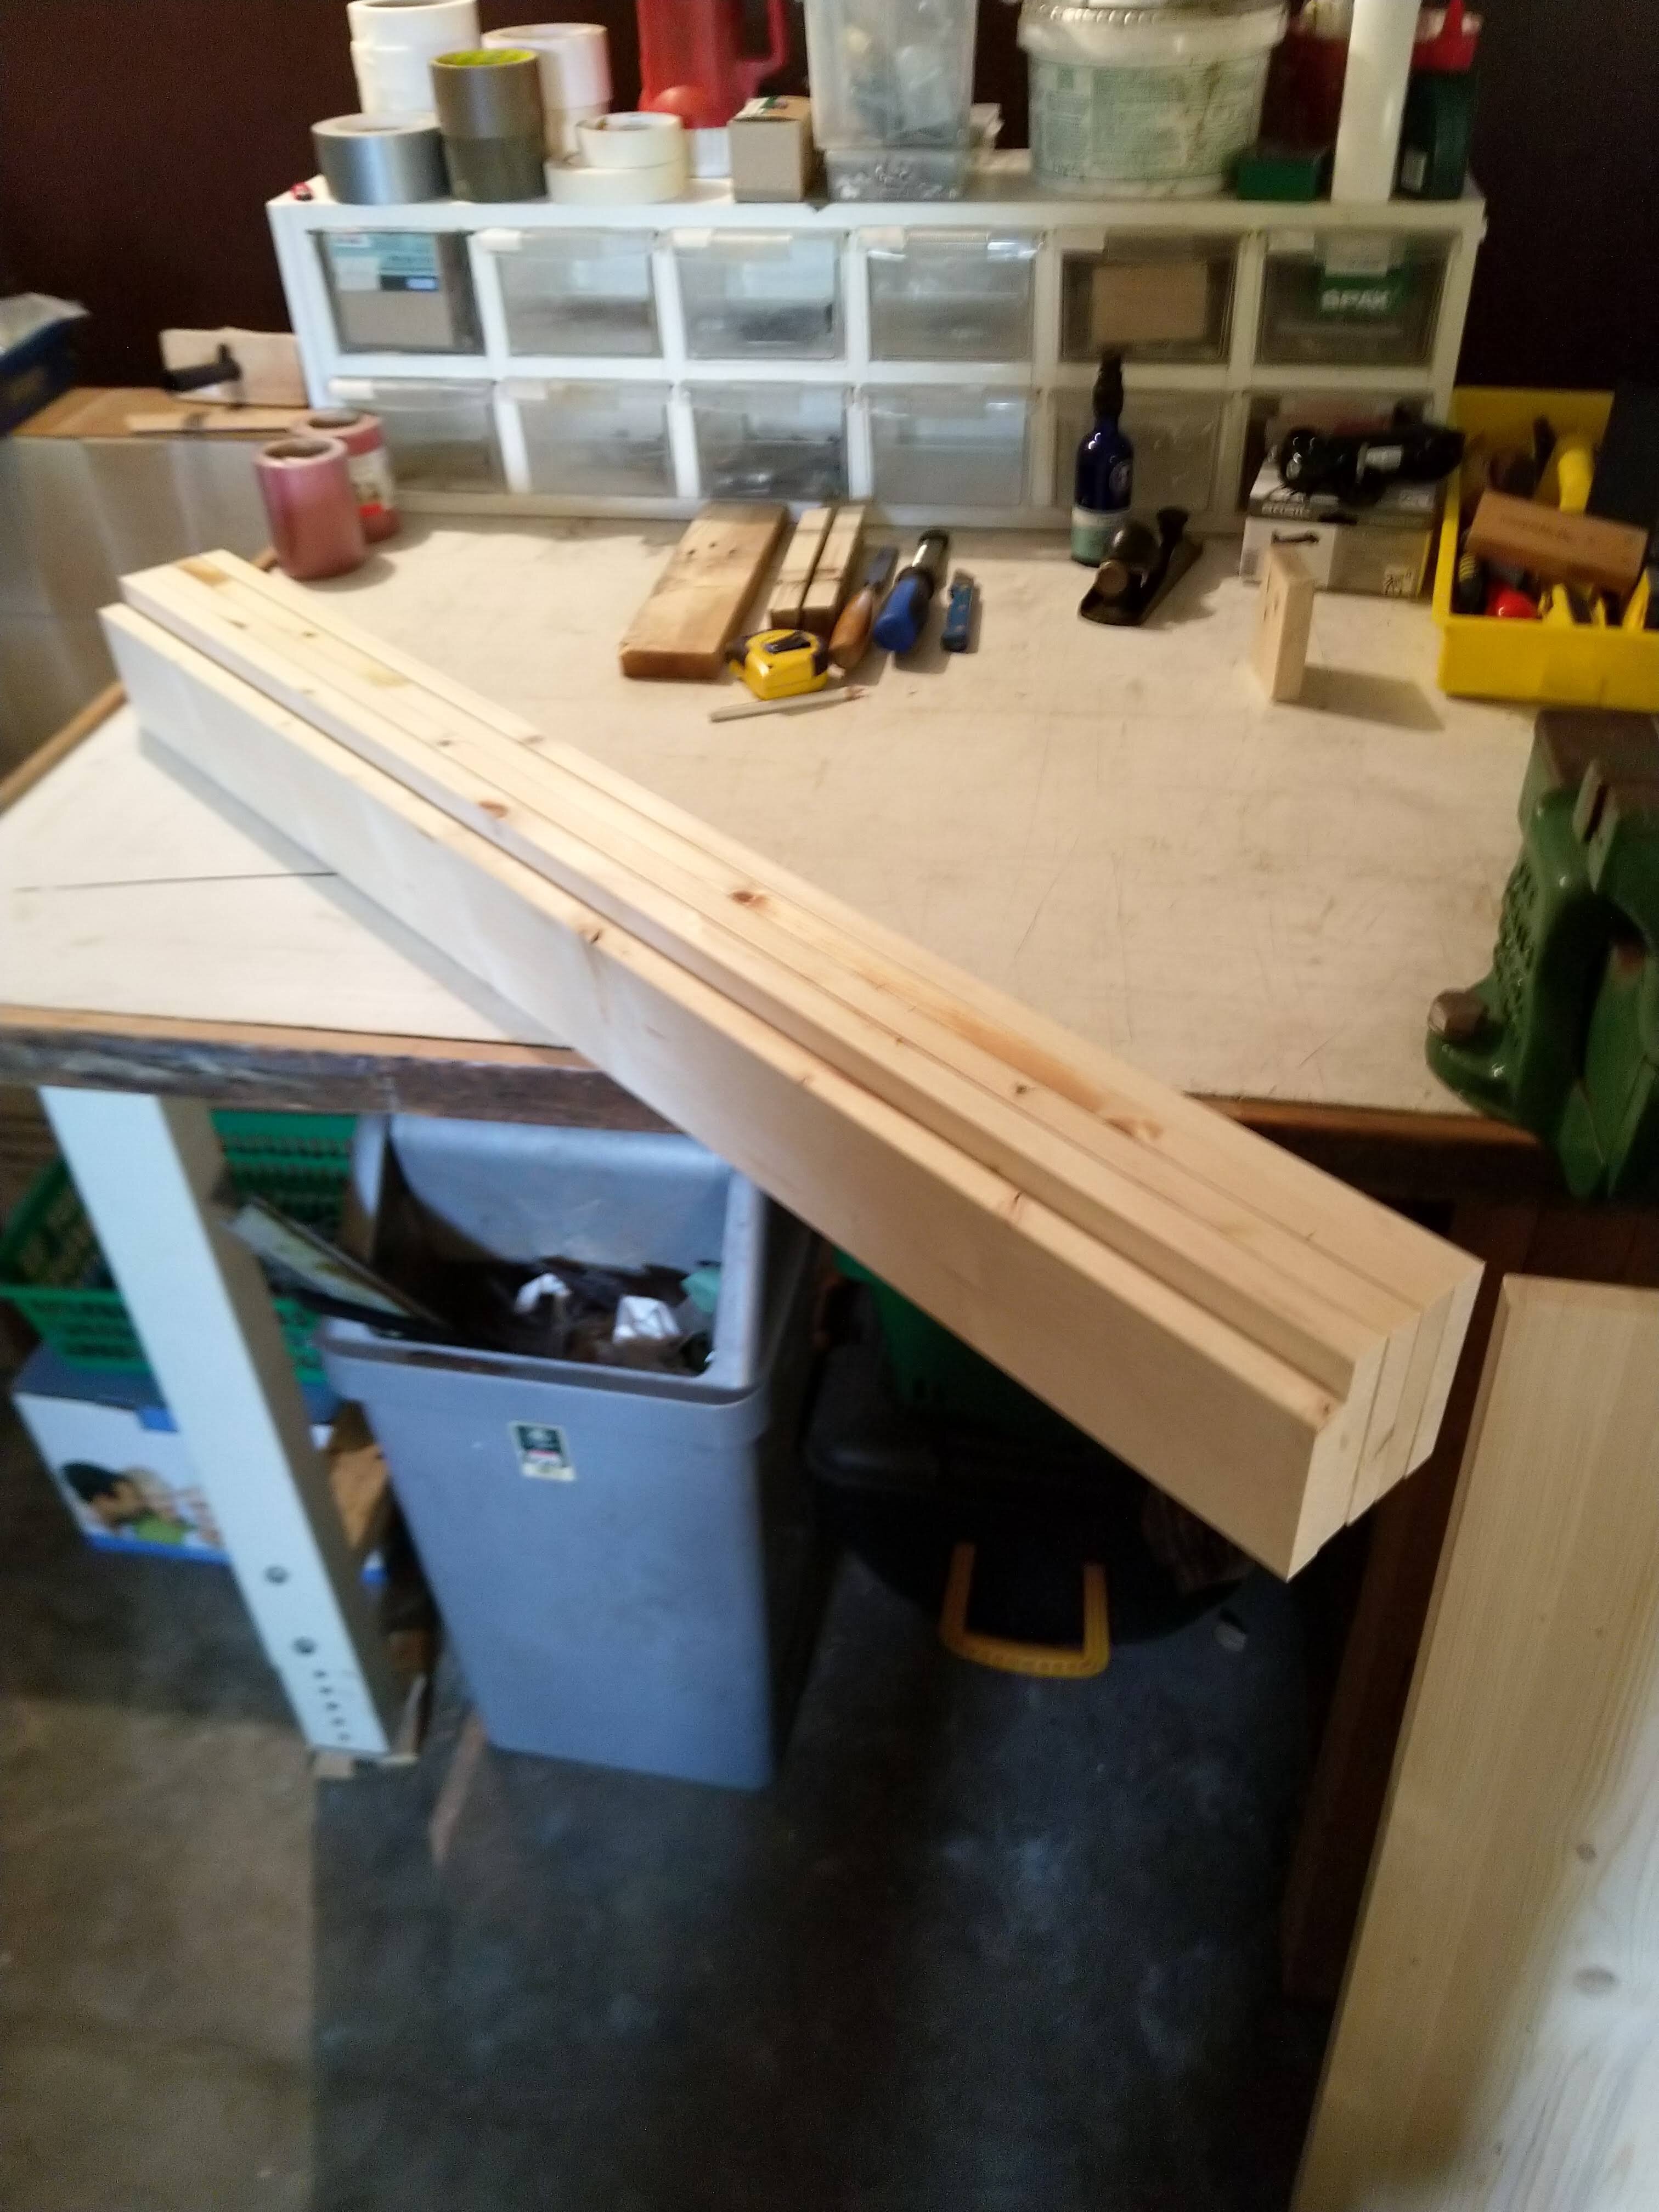
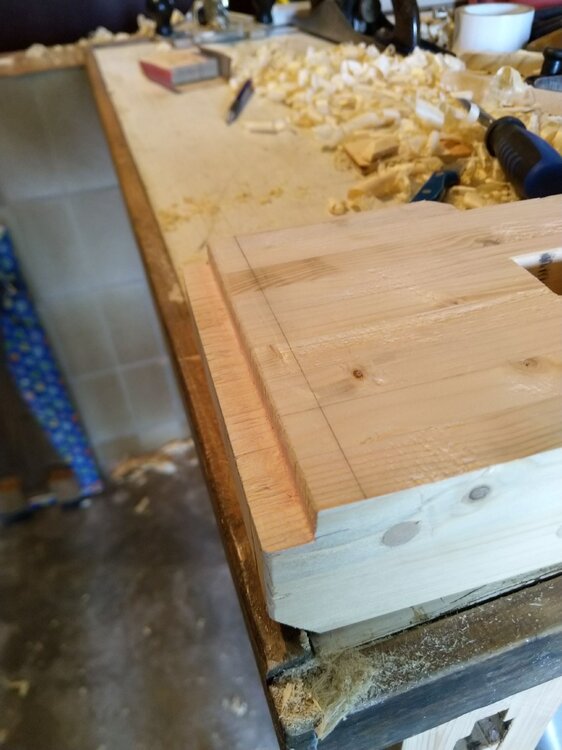
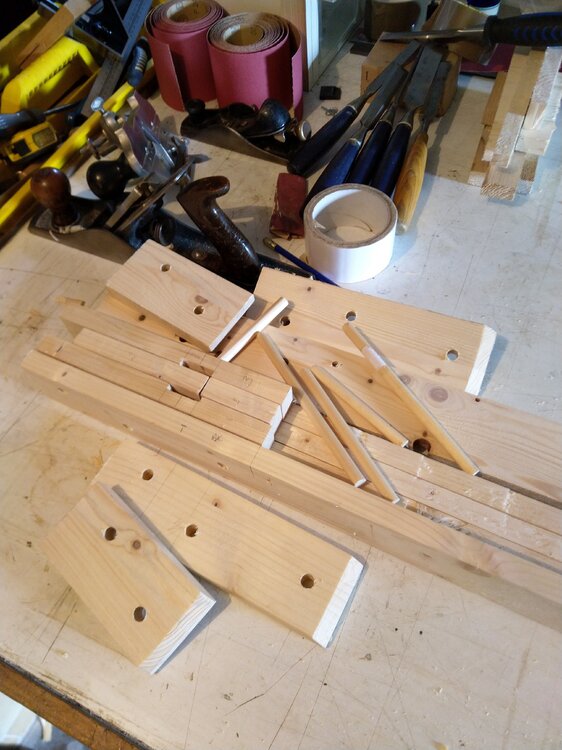
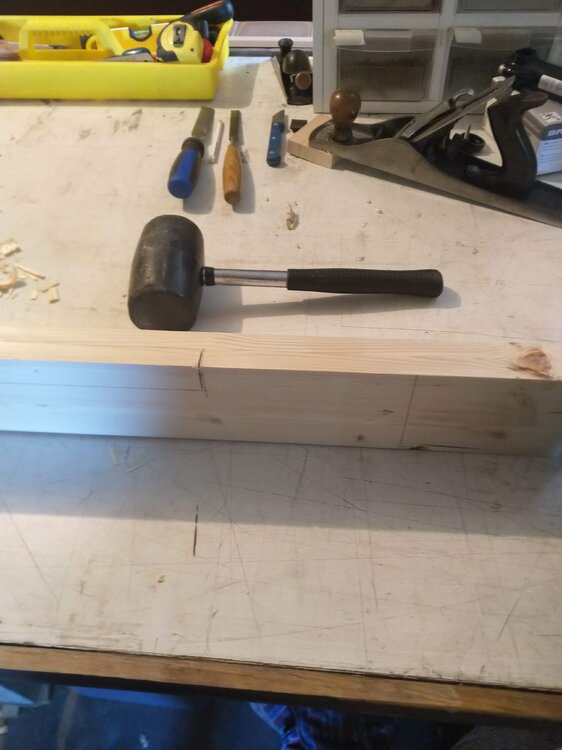
I've got to do the same post twice now.... After I finished on here I went to do some more to my *Thing* in the cellar... Starting on the chop. It's going to be 60mm thick, X mm long and the core is 5 lengths of the 18mm block board. I've been putting it off because I'm lazy and it's hand cutting. Nothing arduous really. Square off the edge of the board. Mark and cut a strip a smidge over 60mm wide. Square off and repeat until you have 5 strips of timber. I've remembered this time that the mortice thing for the scissor mechanism needs to be cut, so here are the strips marked up for cutting. I need to remember to add a third one for the middle, it's a slightly different middle to the leg, no runners to fill the gap.

-
Hope you enjoyed the popcorn
-
This is a copy n paste direct from BC: 1) It's solid AF. I can't make it rack front to back, side to side is a bit sloppier. 2) It's as near square as dammit lengthwise. Vertically from the bench top not so much unfortunately. 3) The individual sets of two laminations are four square, which I'm very happy with. As full units they're not great, the back leg in particular is very out on the cut dimension. 4) It's a little short as pointed out. I had always planned to make it the same size as the bench top excluding the edging, but why, I don't know. There's no reason to have done that, except, and this is in hindsight rather that being planned, it can have a removable fixed jaw plate which can be swapped if it gets tatty. Saves having to repair the leg proper, but I've only just thought of it. In general, I'm happy with what I've made. Yes, more care could have been taken, more thought should certainly have gone into it but I've learnt a lot and I've enjoyed doing it. The next step is cutting the chop, no idea why it's called that, and making the cross. Cutting the chop will have to be done by hand, I don't have a powered saw and I don't see why I should go to Hagebau and buy another board just becase they can cut it into 60mm strips for me. The sawing and planing practice will be good for me. It'll be laminated the same as the legs, but I'll cut the mortise first this time and dowel the laminates whilst gluing to make sure they don't float on the glue. That's you on GC up to date with what I've been up to. I'll add more as I make more sawdust/firewood... Oh, and to steal a quote from the doyen of BC Build Diaries, @Andyjr1515, this is how I'm doing it. It doesn't necessarily follow that this is a) the right way, b) the only way, or c) it'll ultimately even work. (Though even I can manage to post on two foruii at once and not put dirty guitar builds on BC... )
-
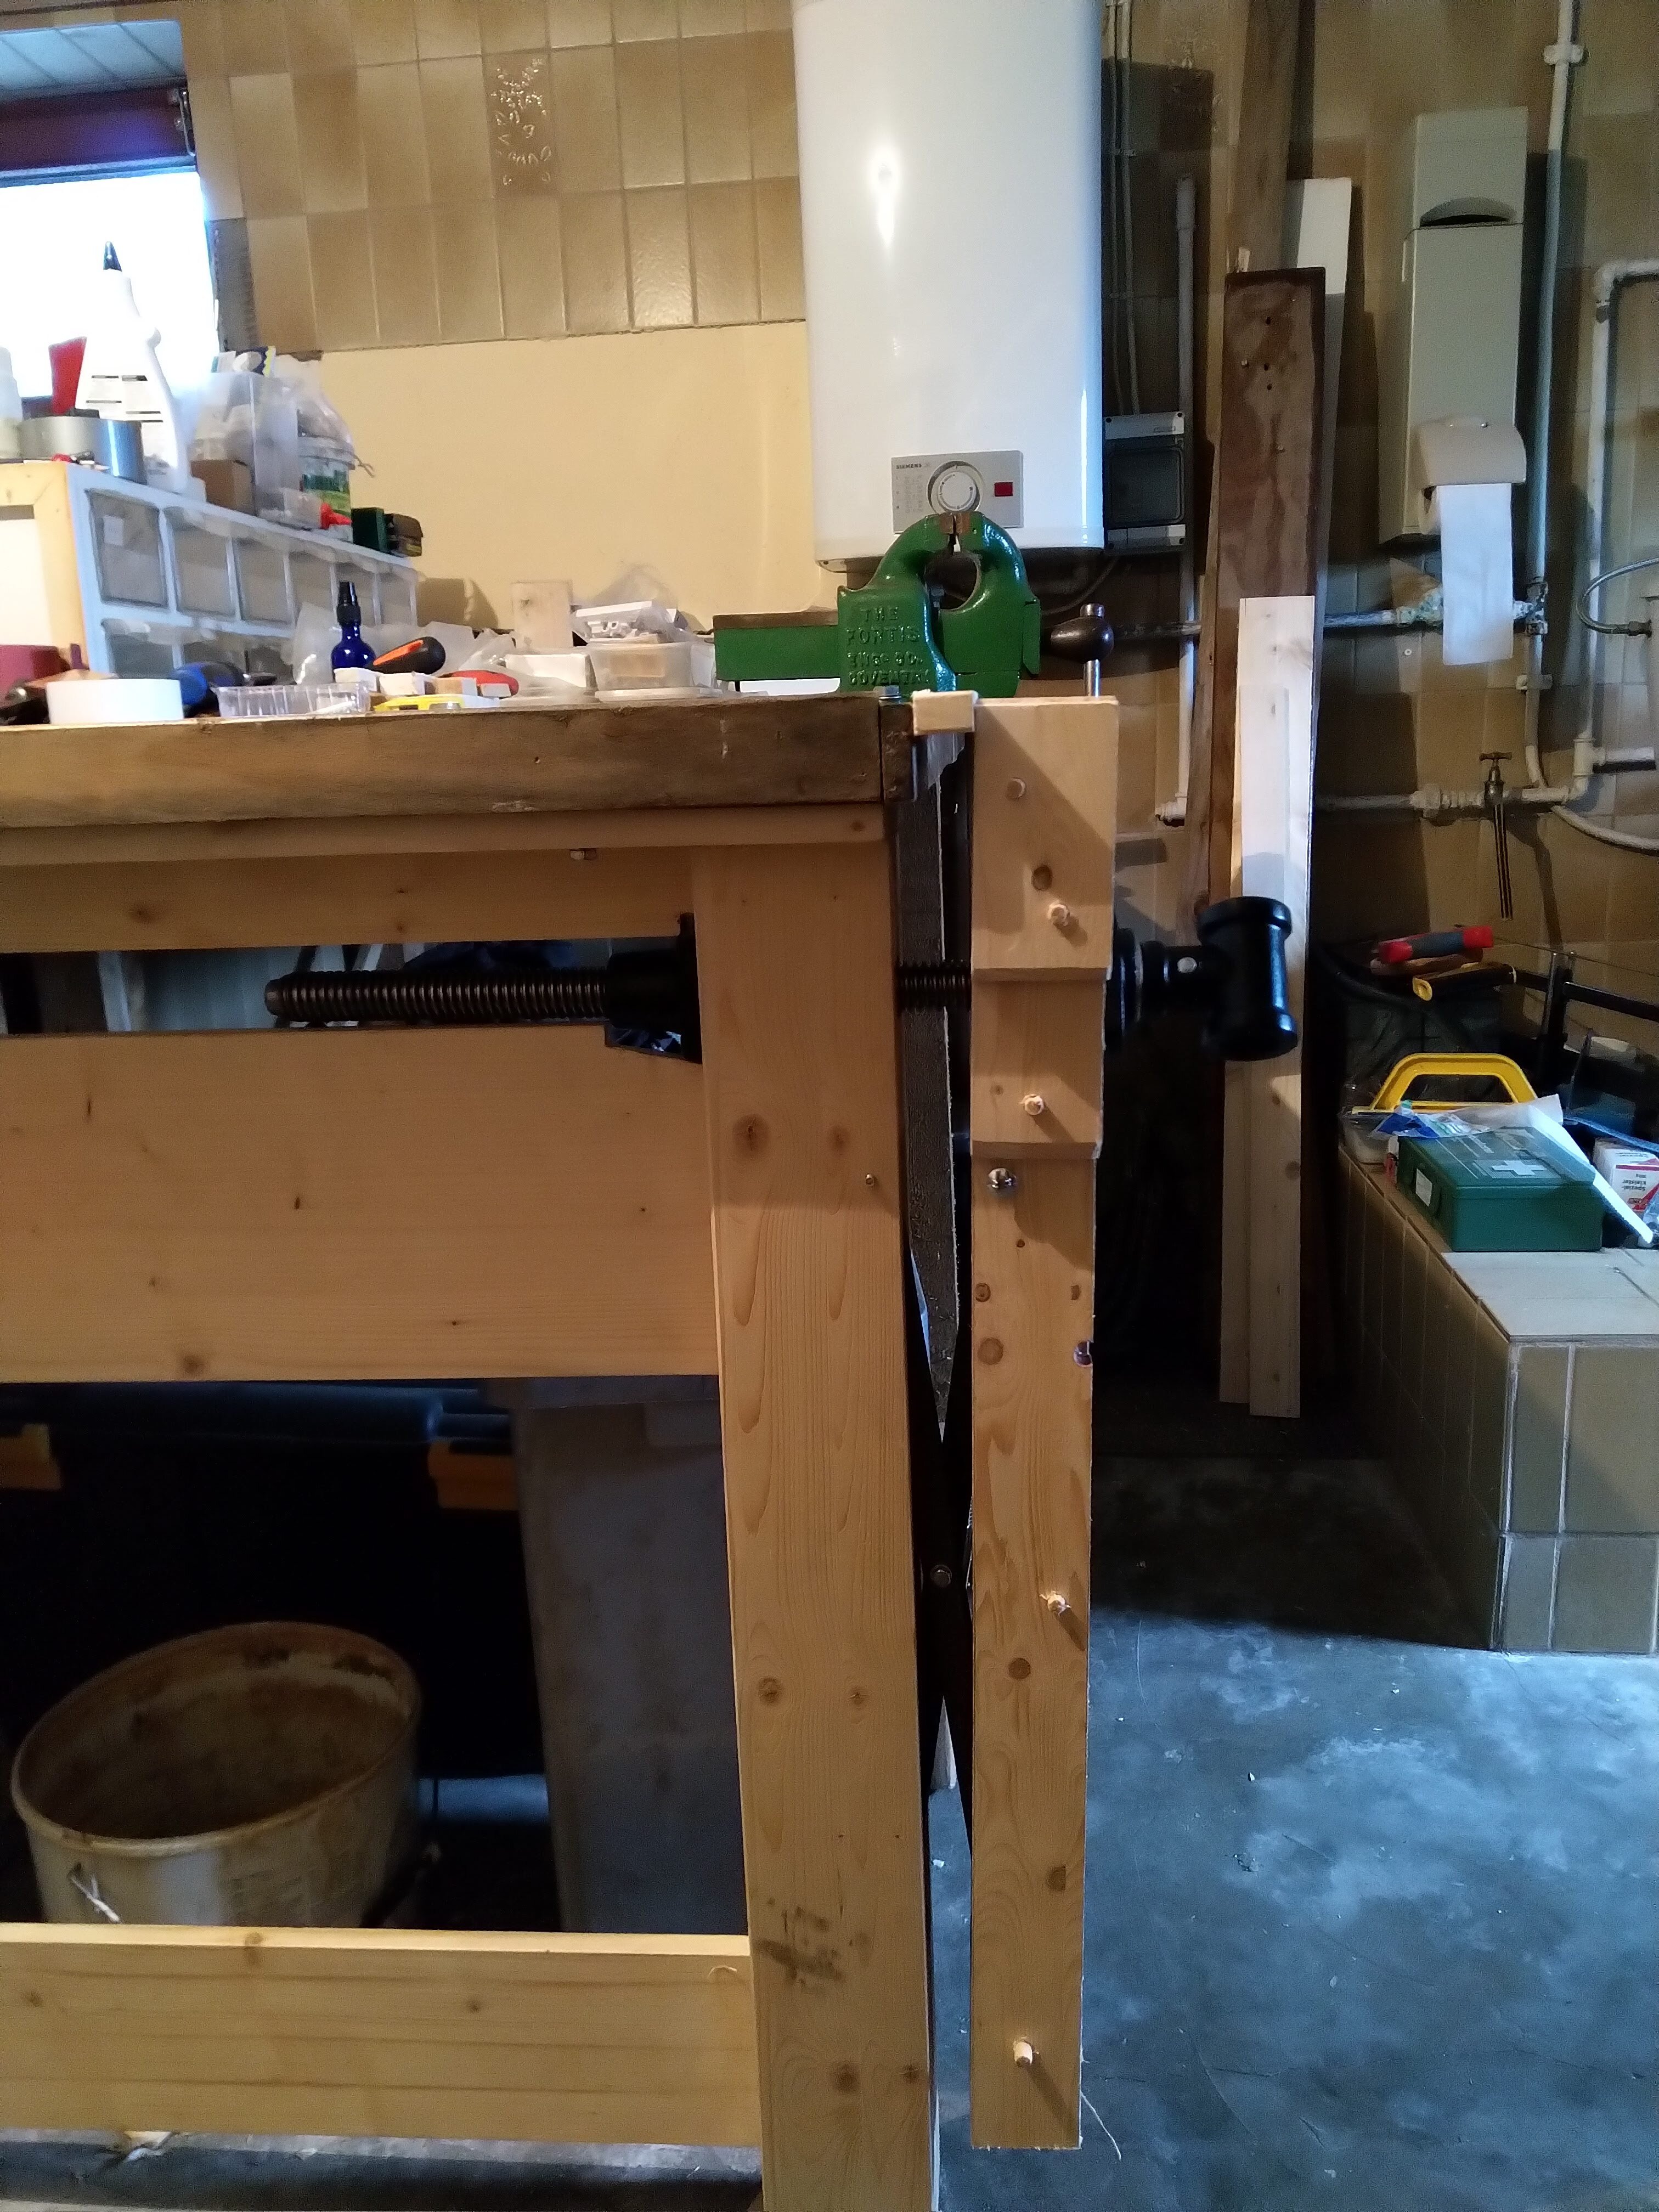
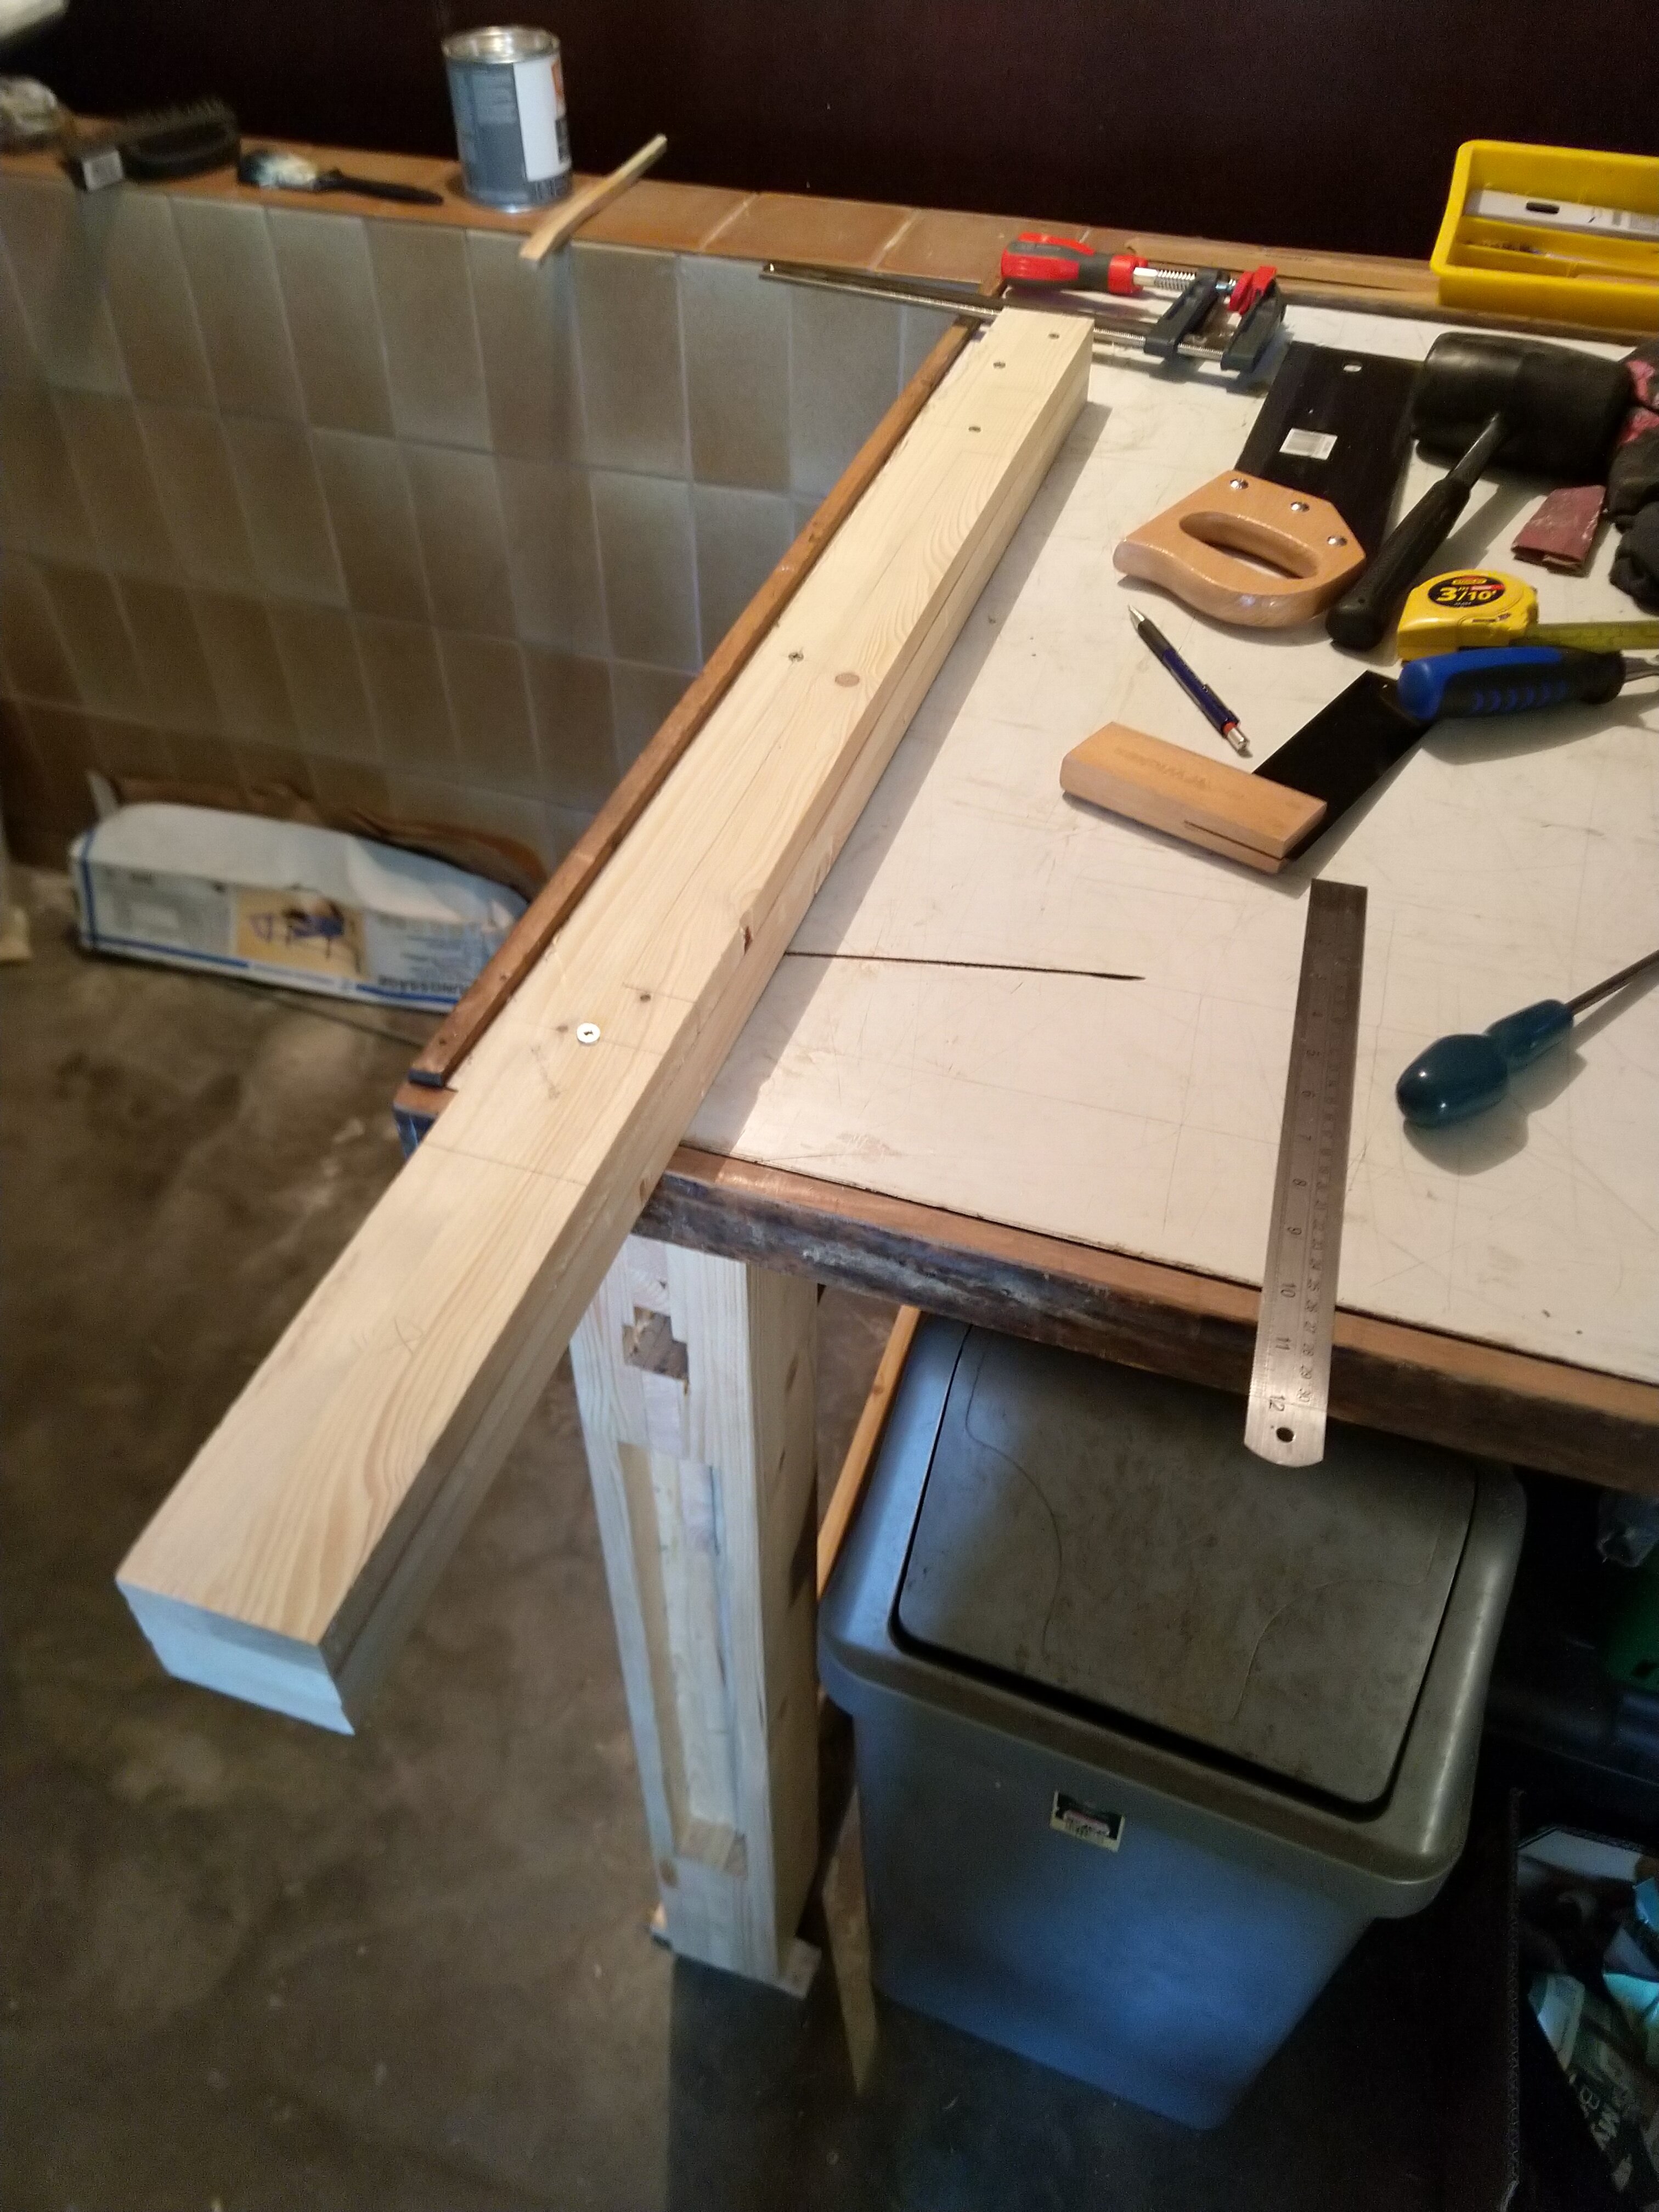
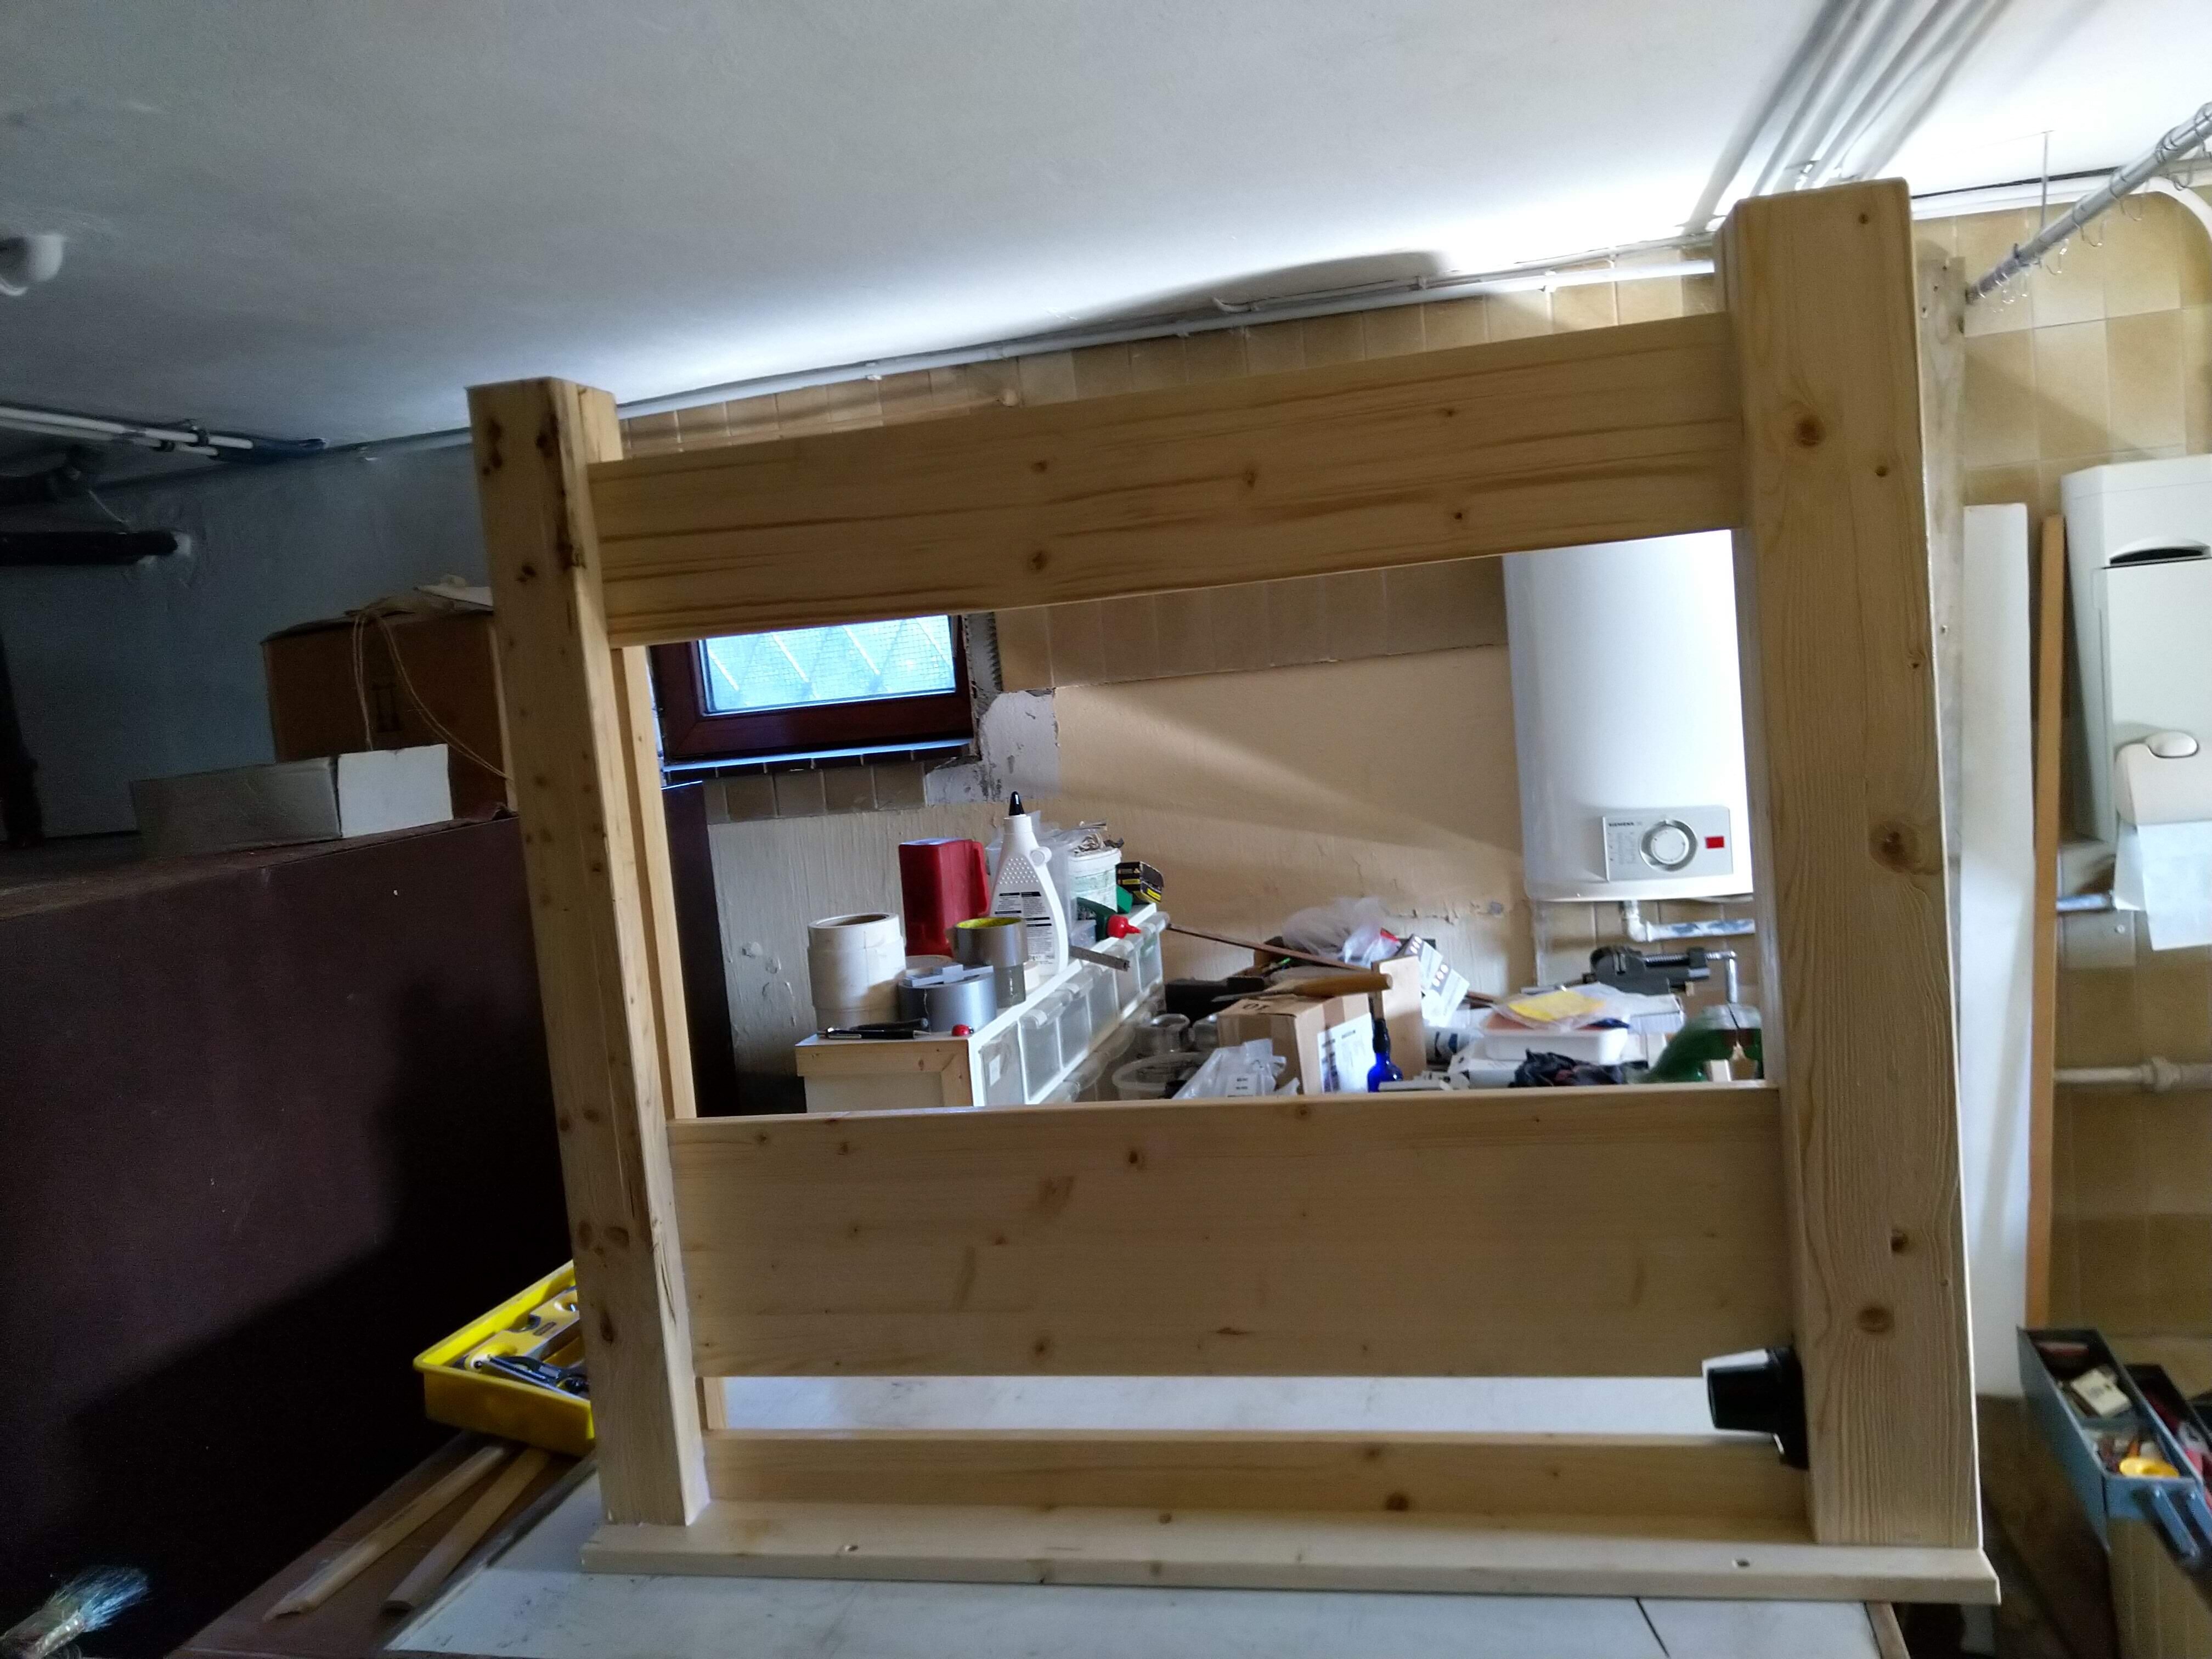
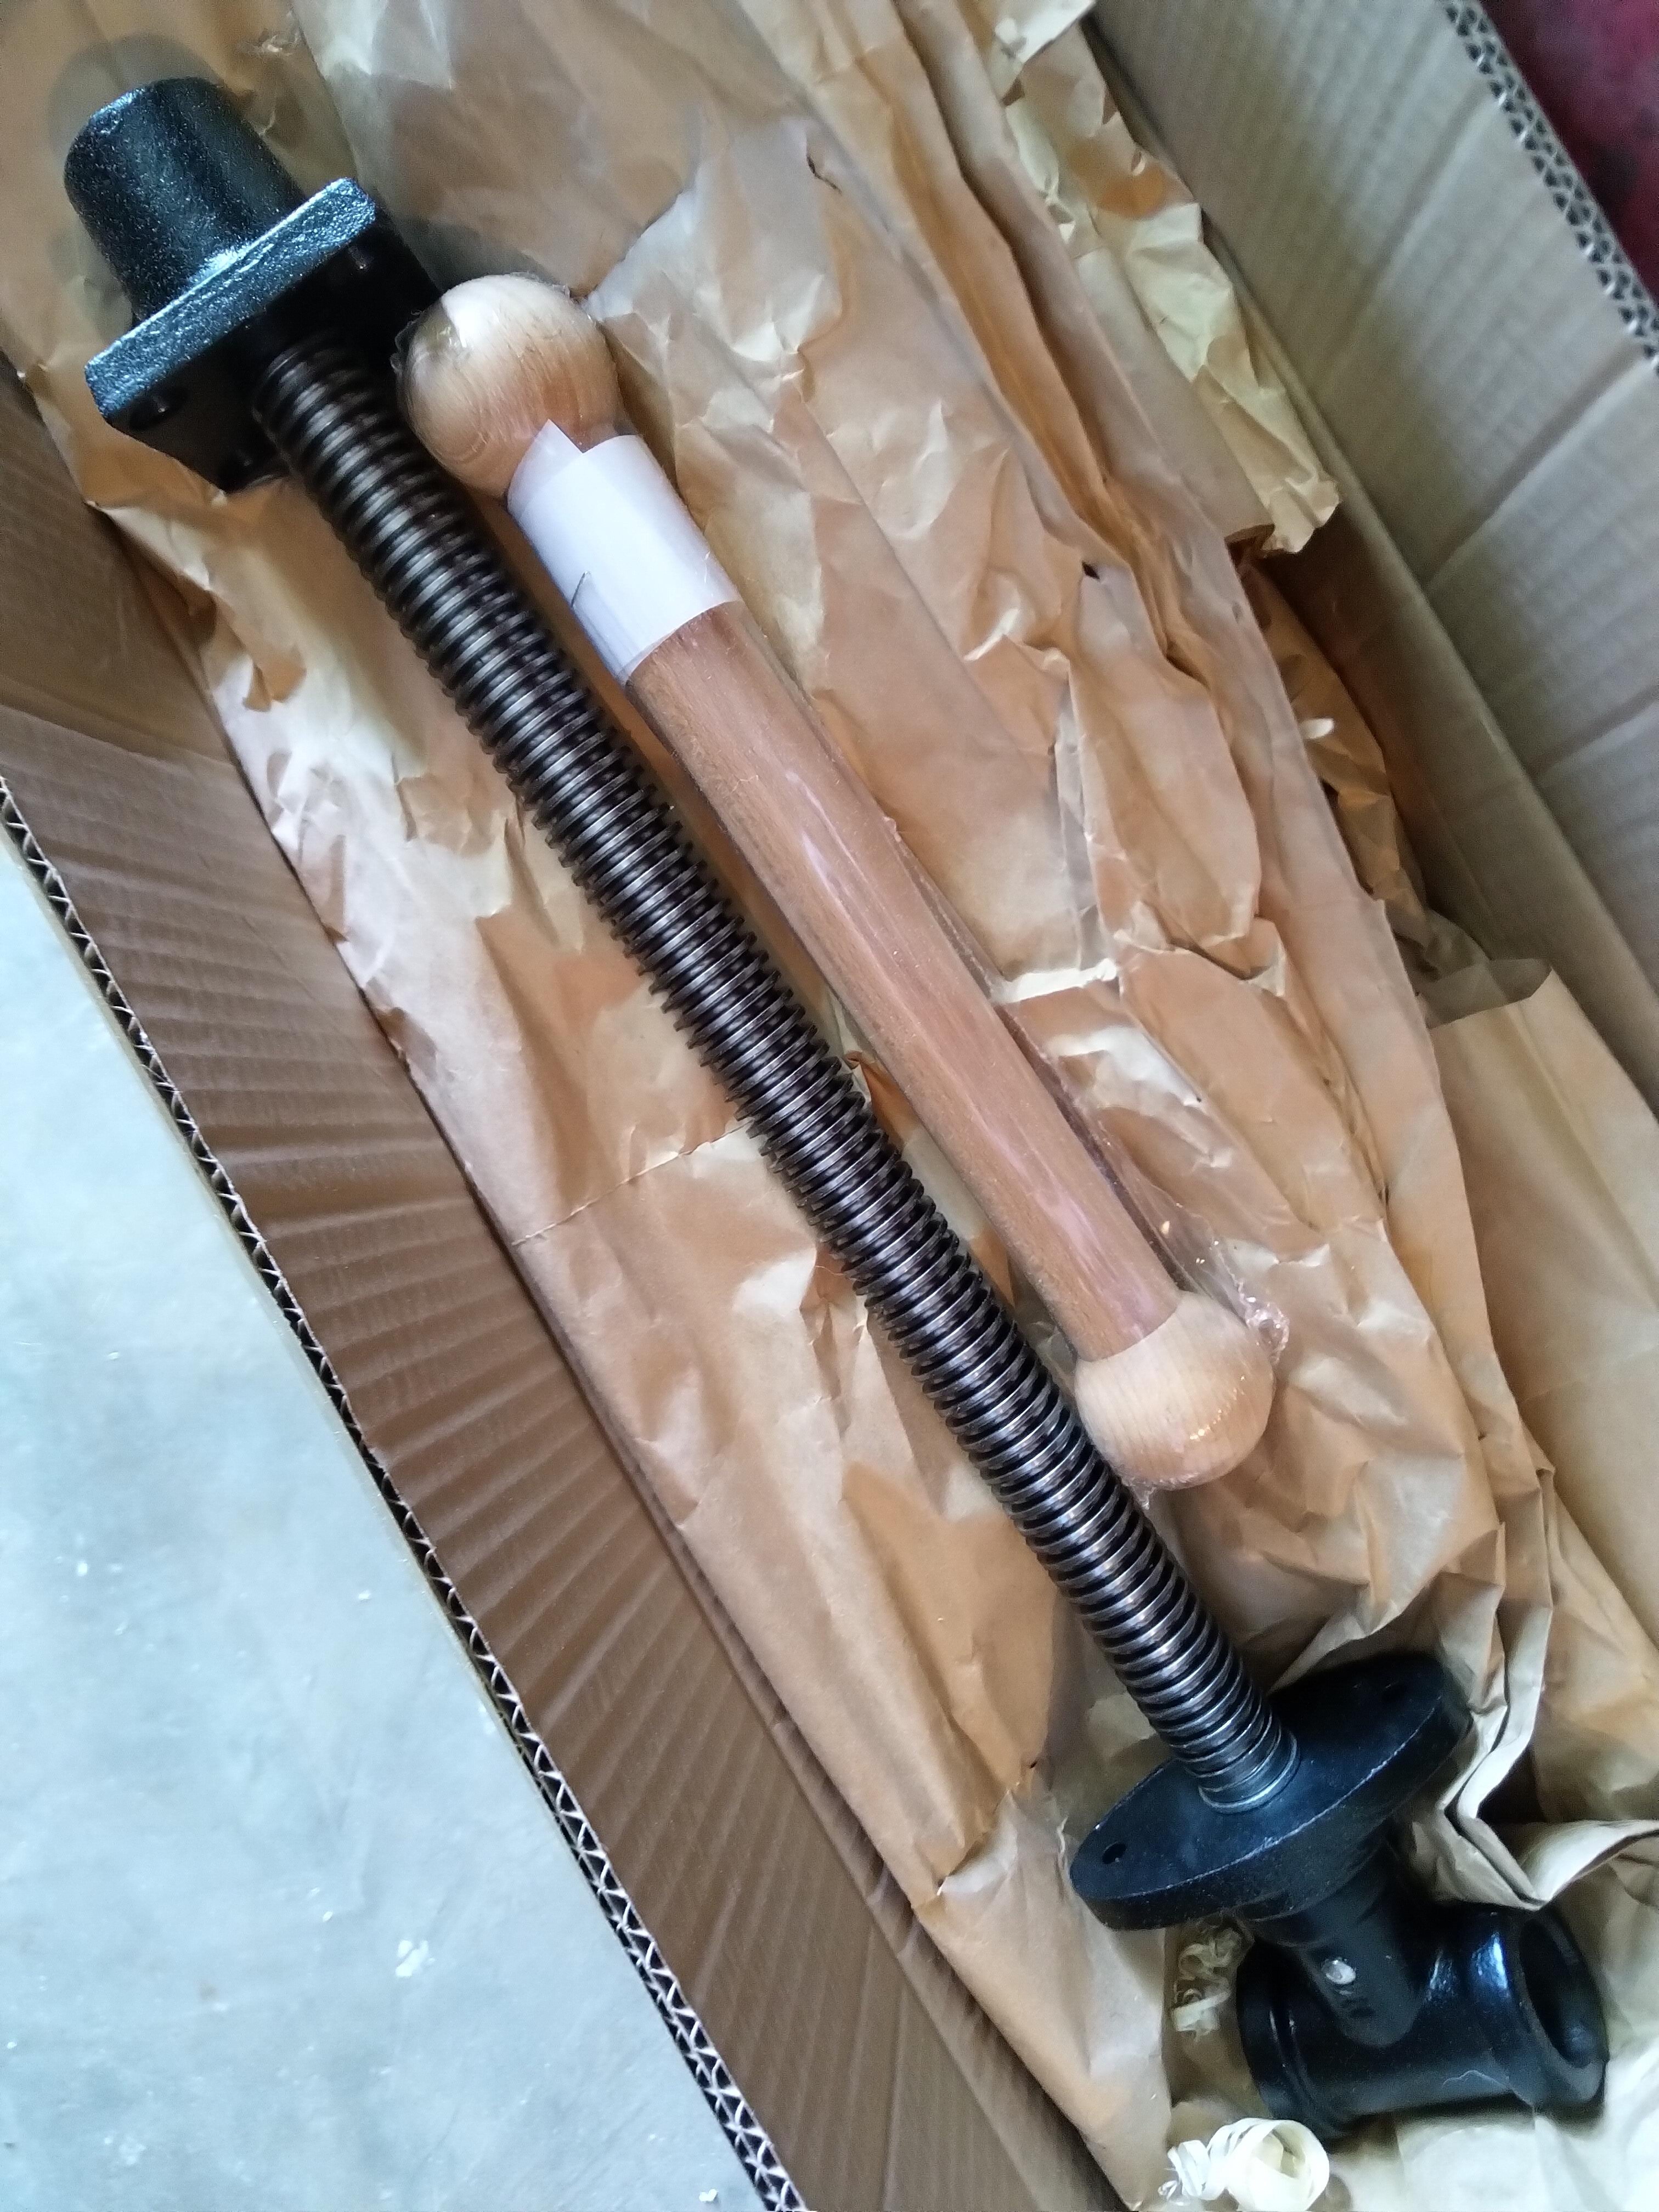
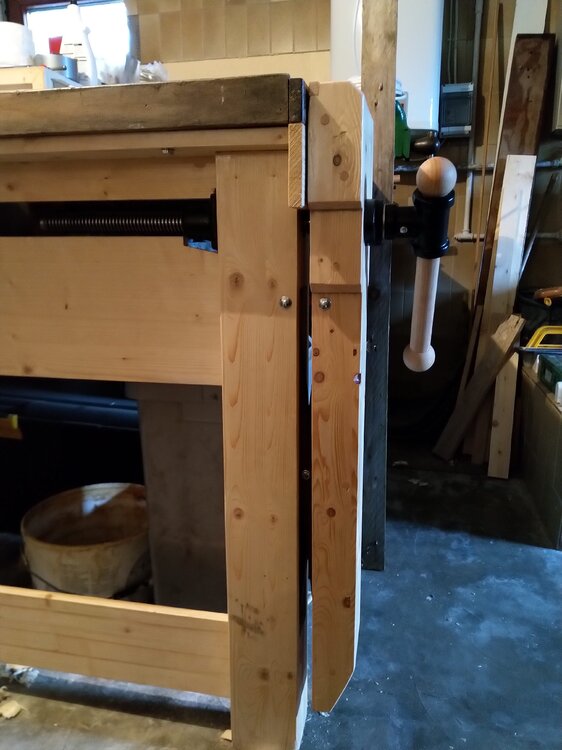
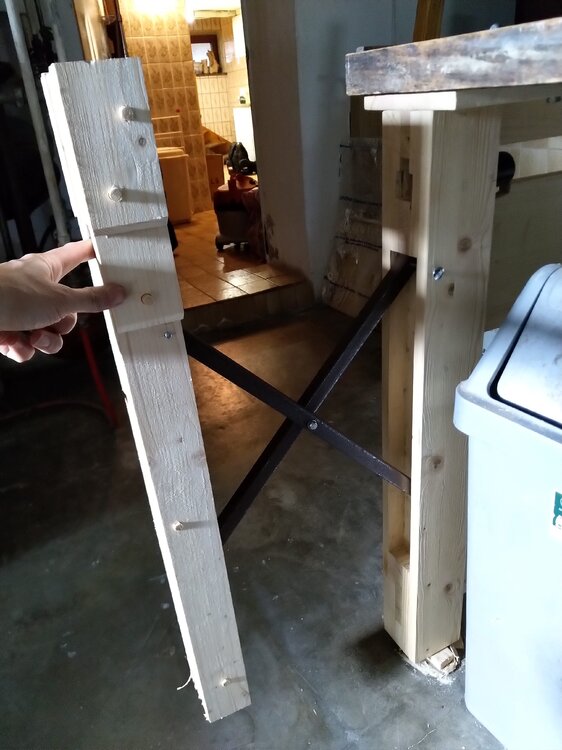
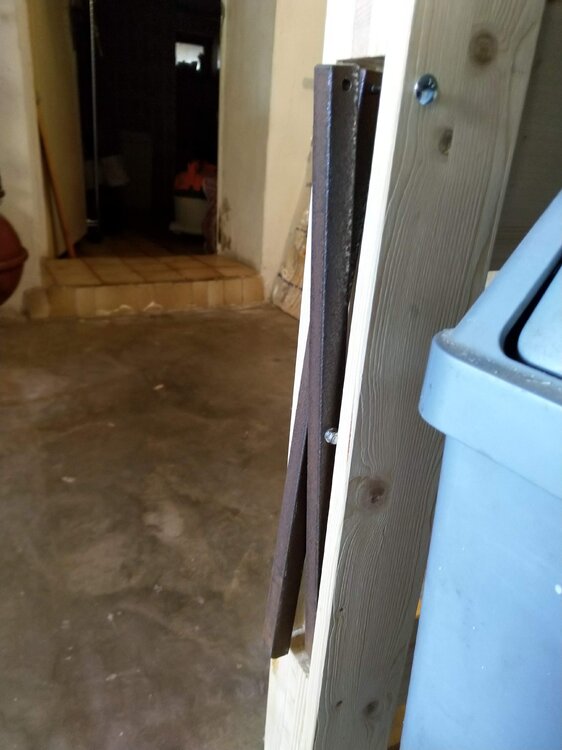
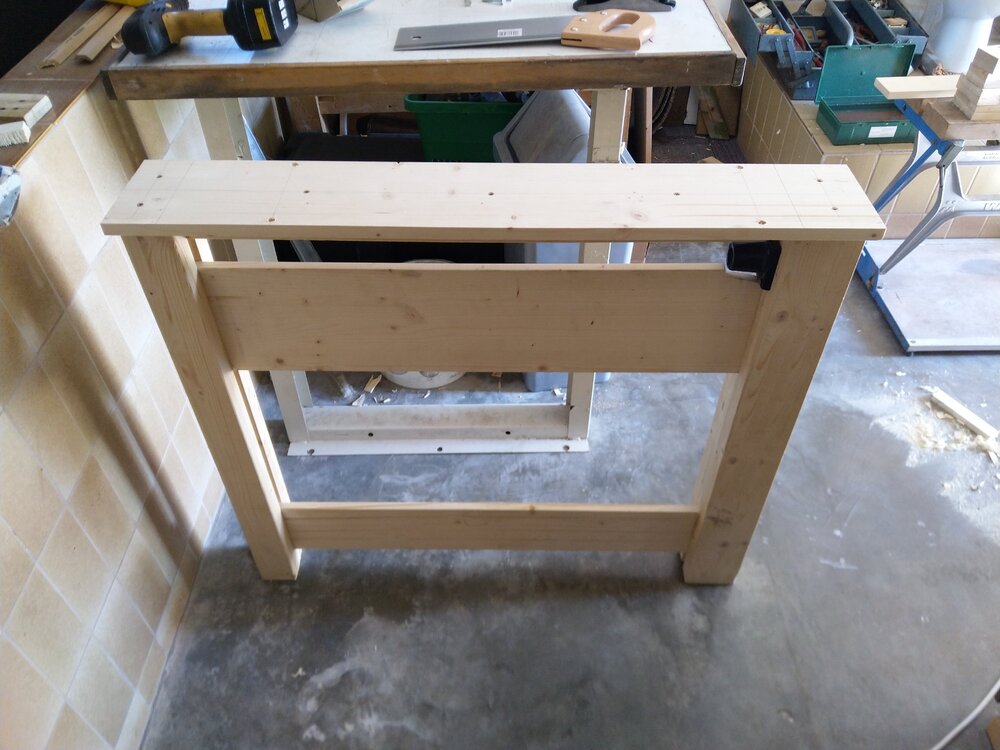
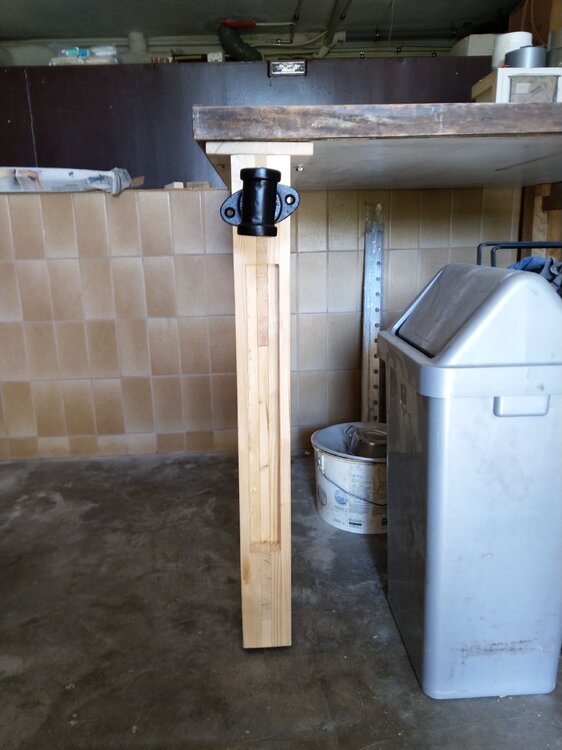
Varnish dry and the leg assembly properly fitted. Temorary chock under the front foot. The next part is to make the scissor mechanism out of this piece of 20mm square bar my brother-in-law had in his stock behind his workshop. As I said earlier, the Benchcrafted ones are very tasty, but if I was going to spend that sort of money I'd have got a Record vice off eBay at the very beginning.
-
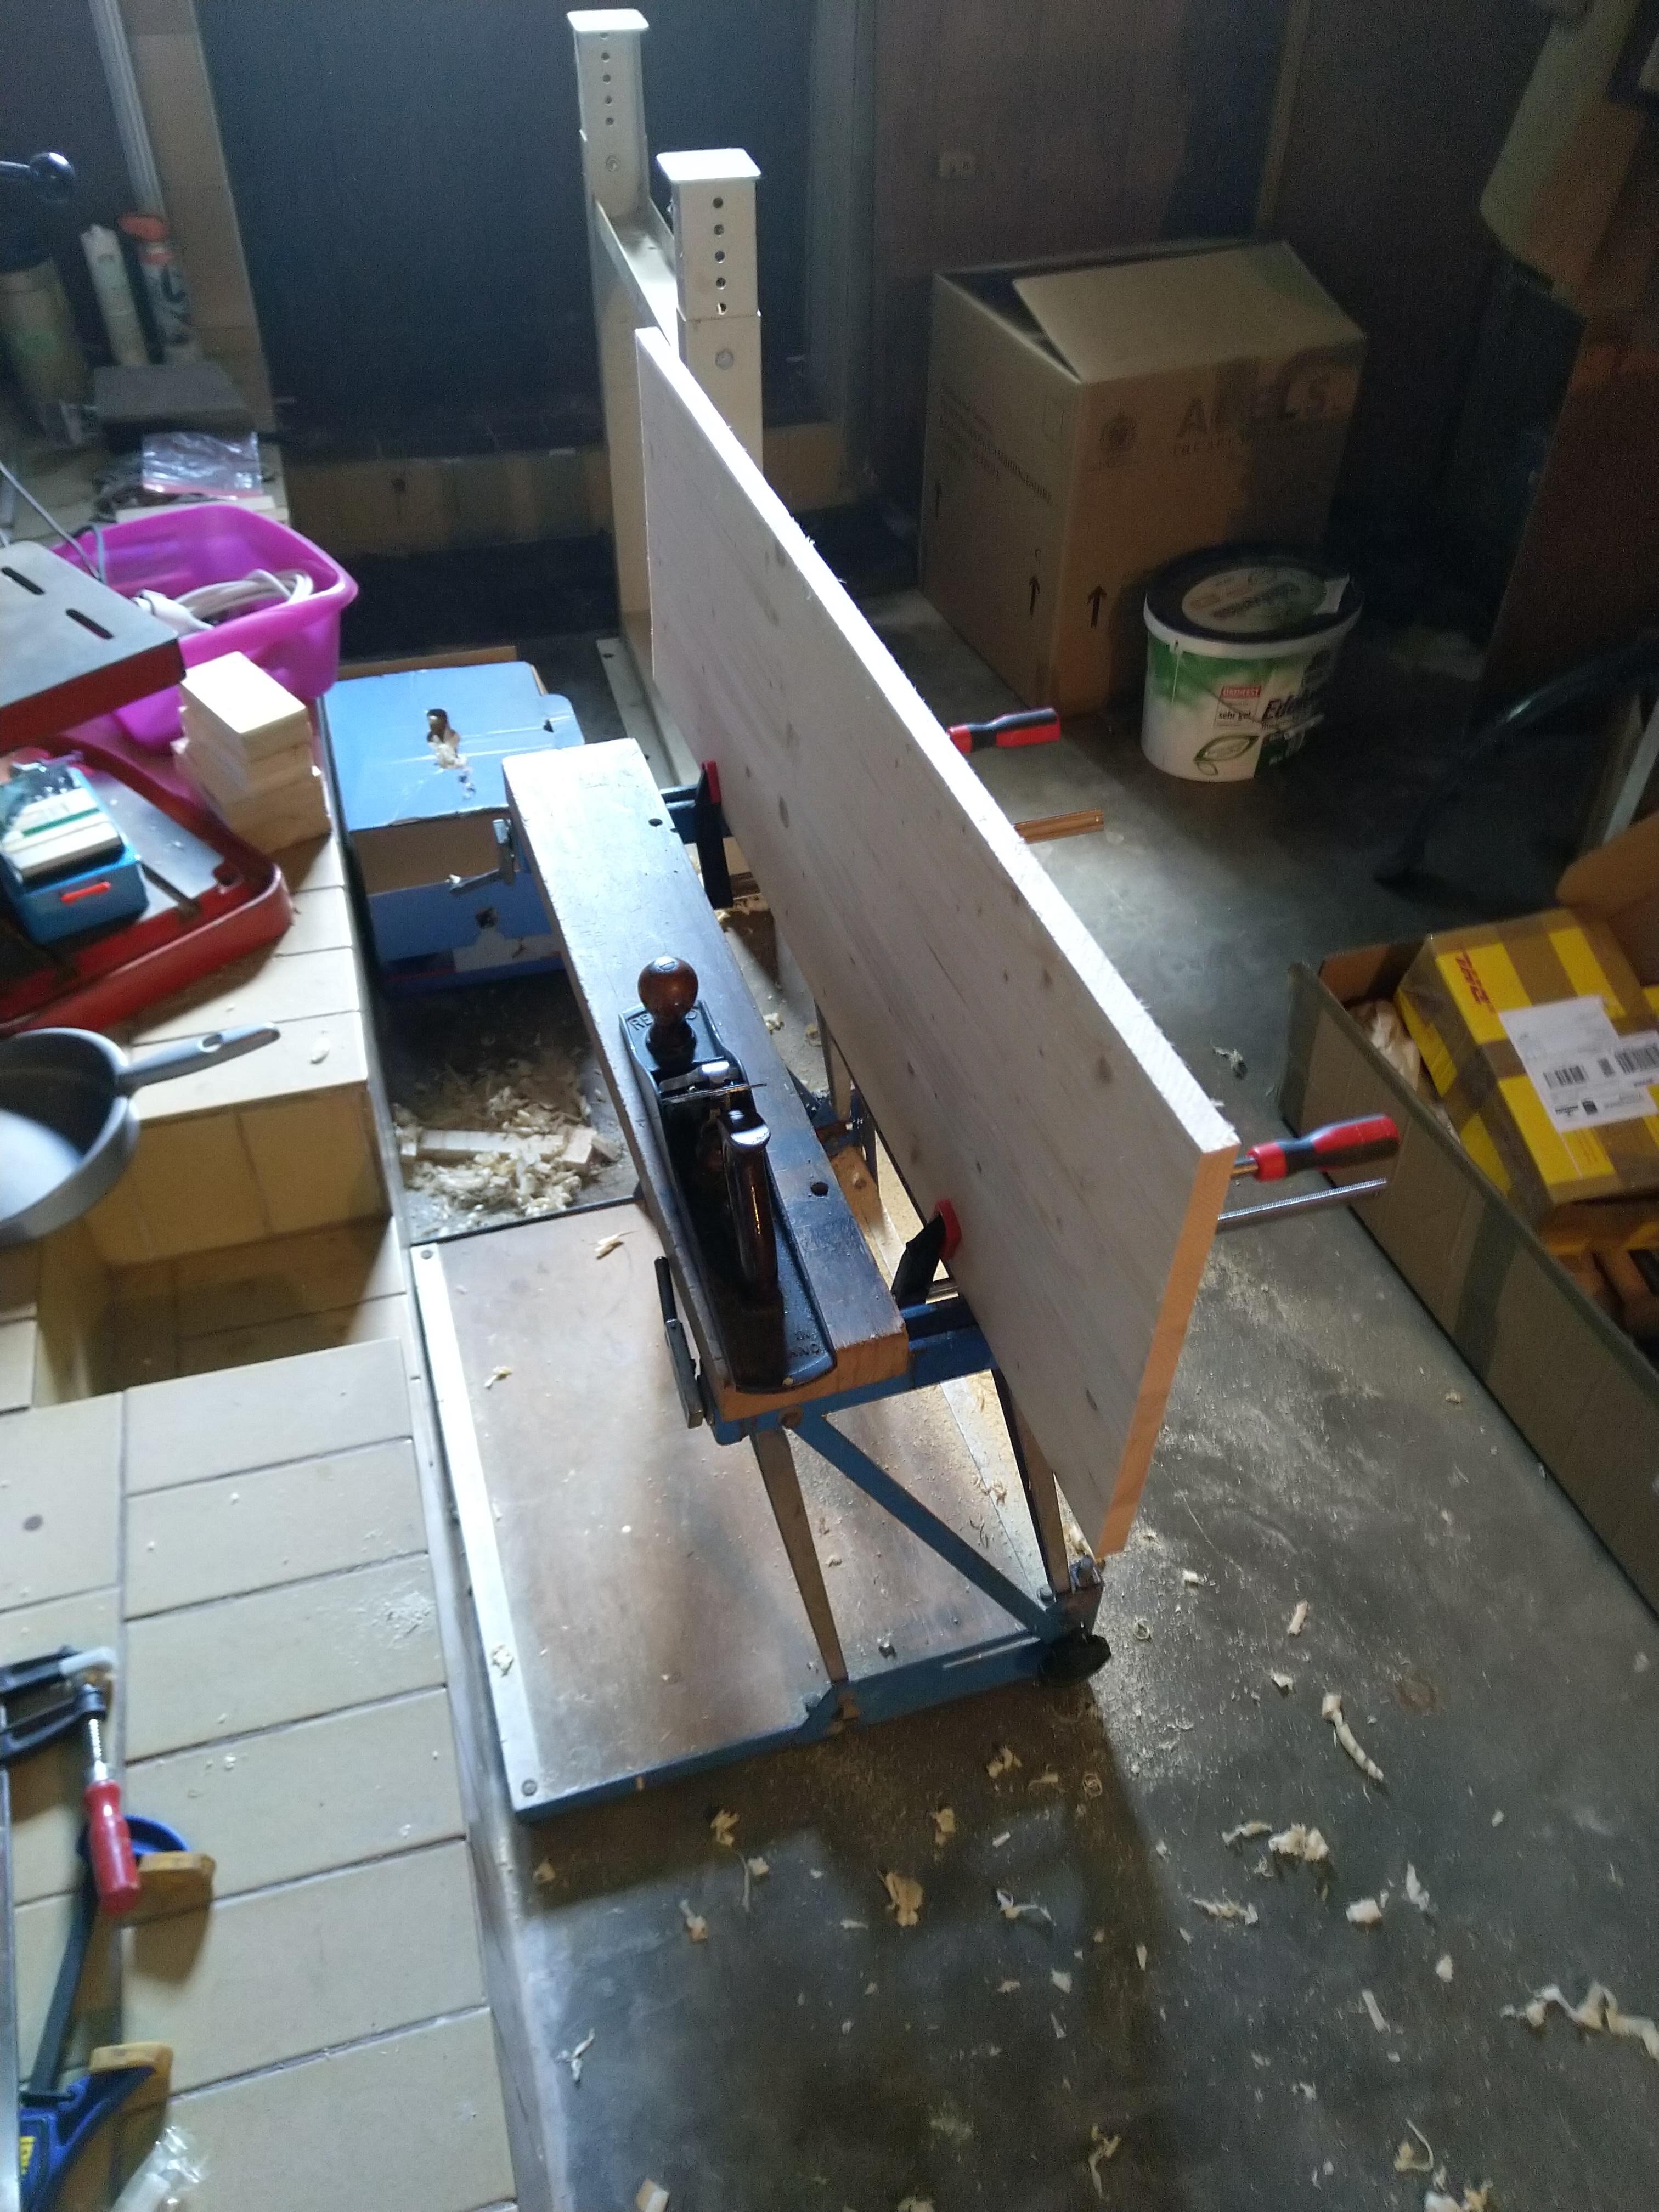
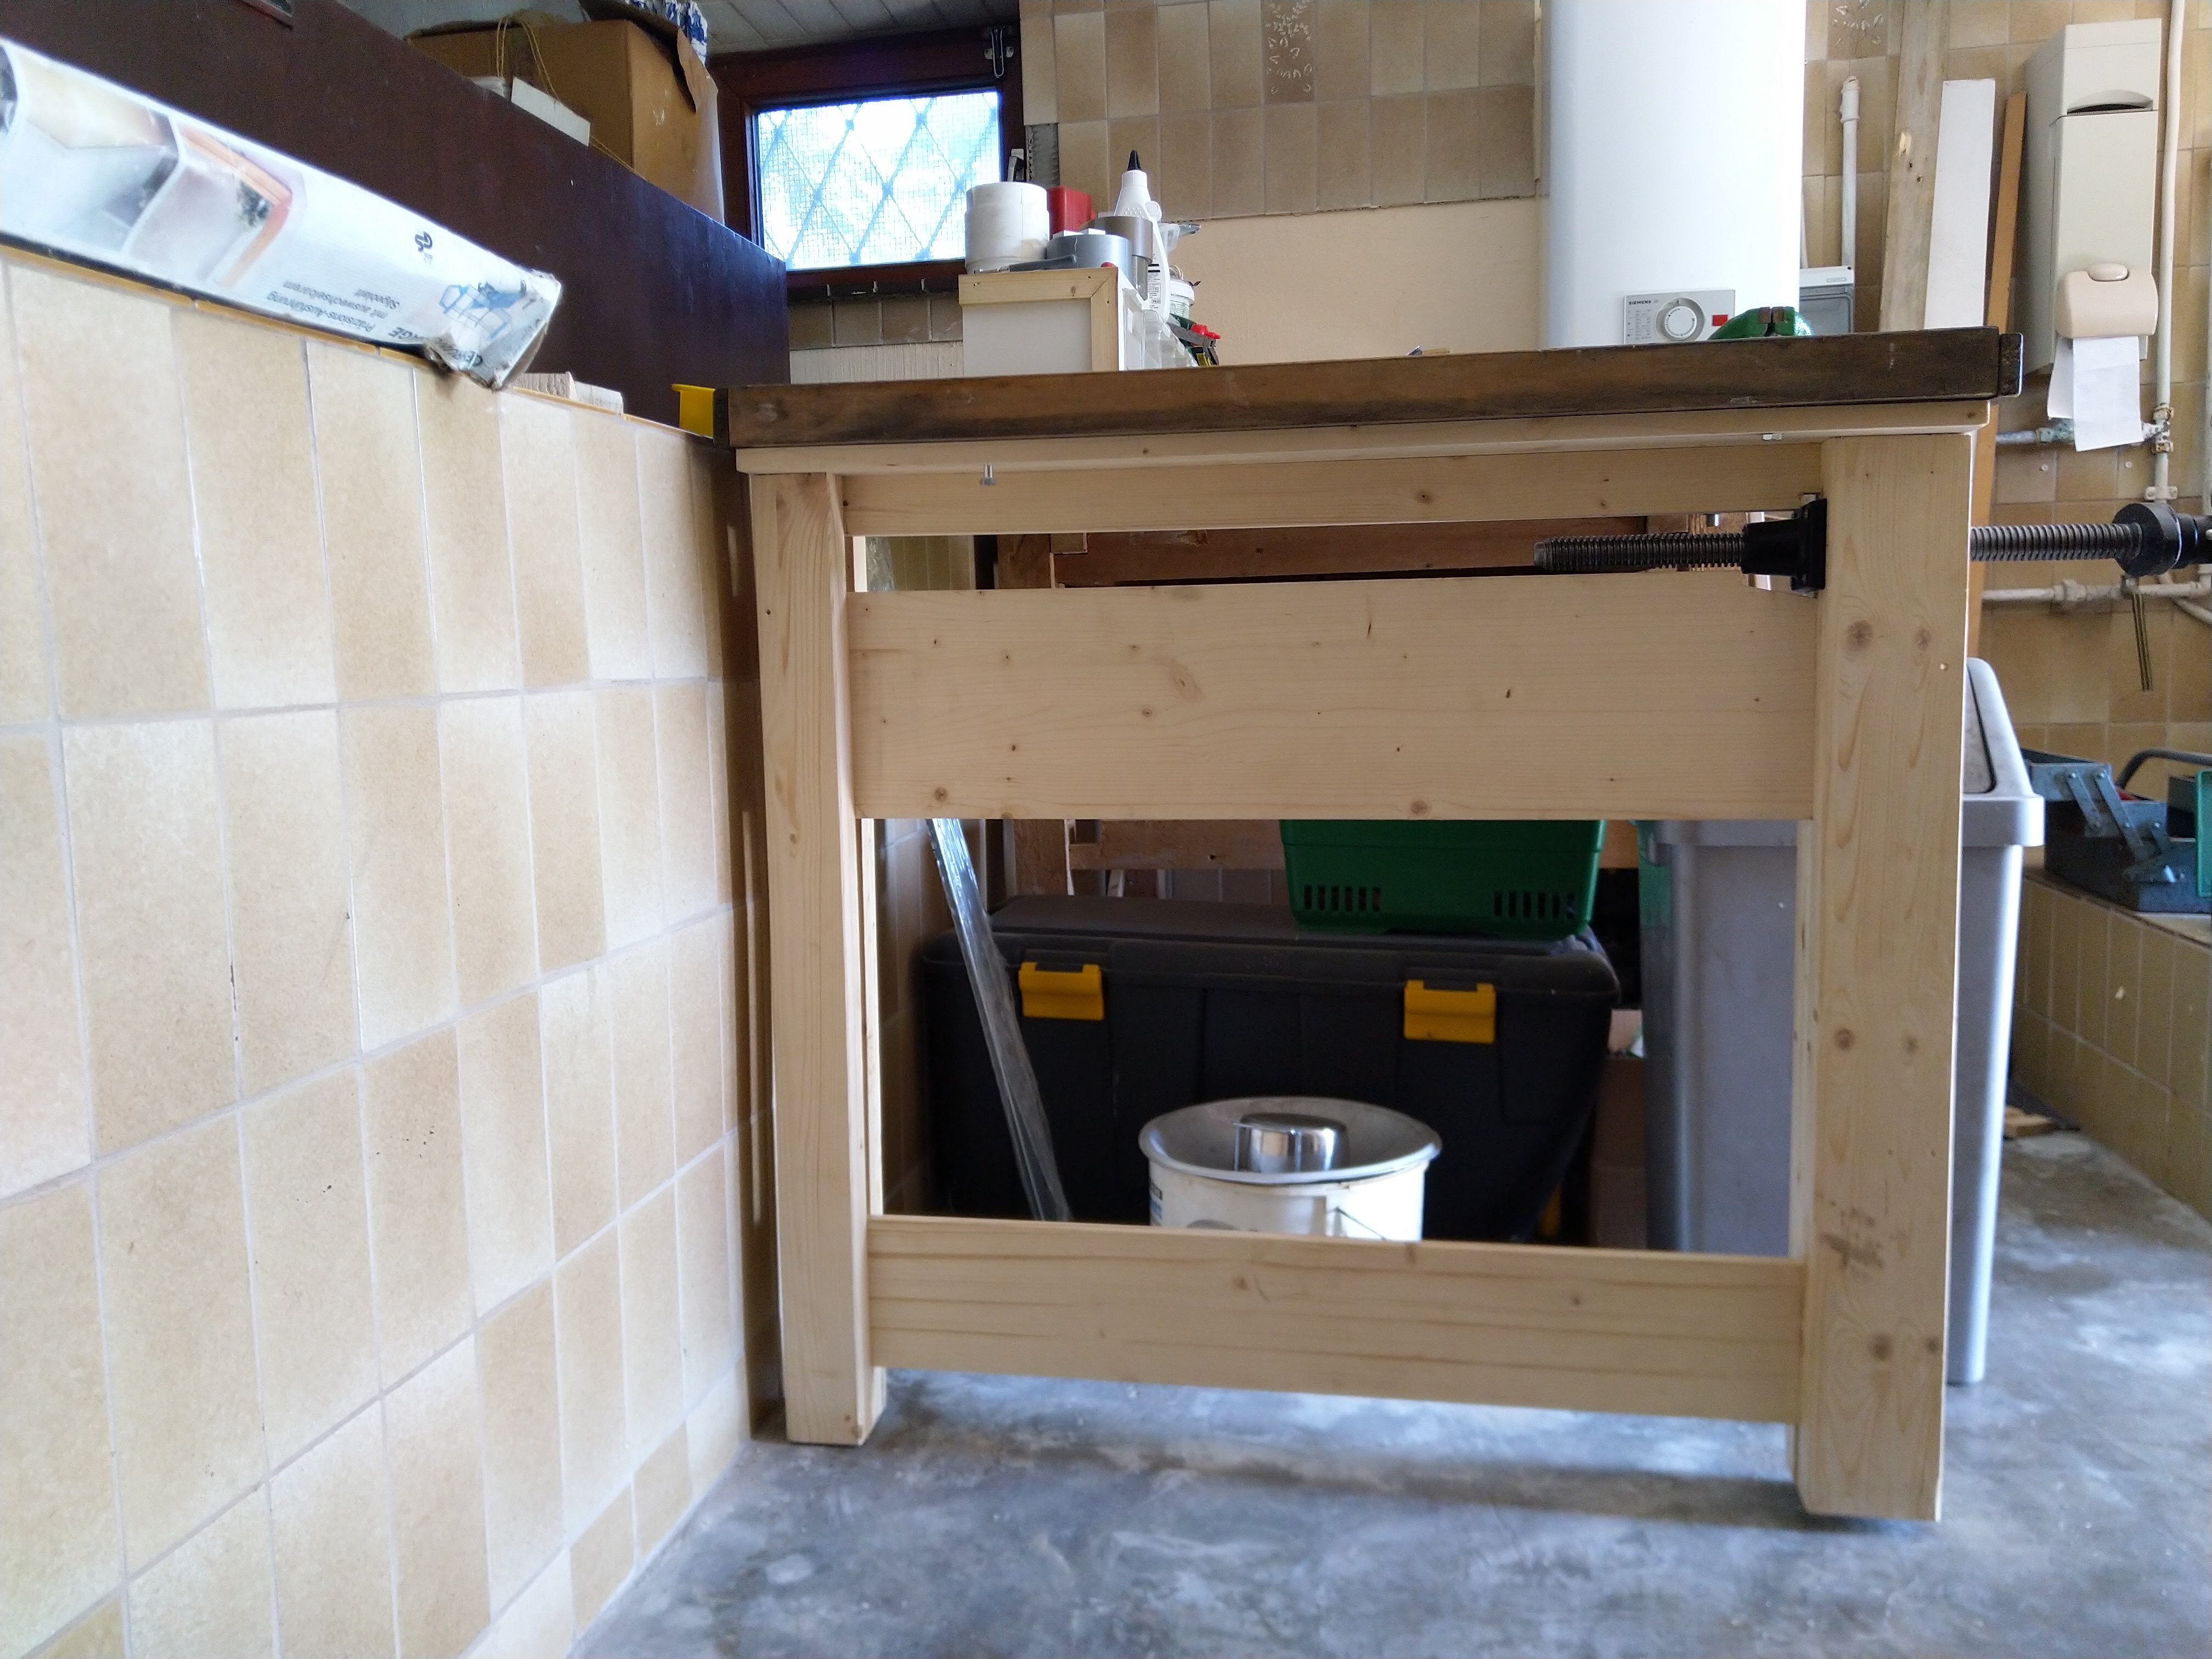
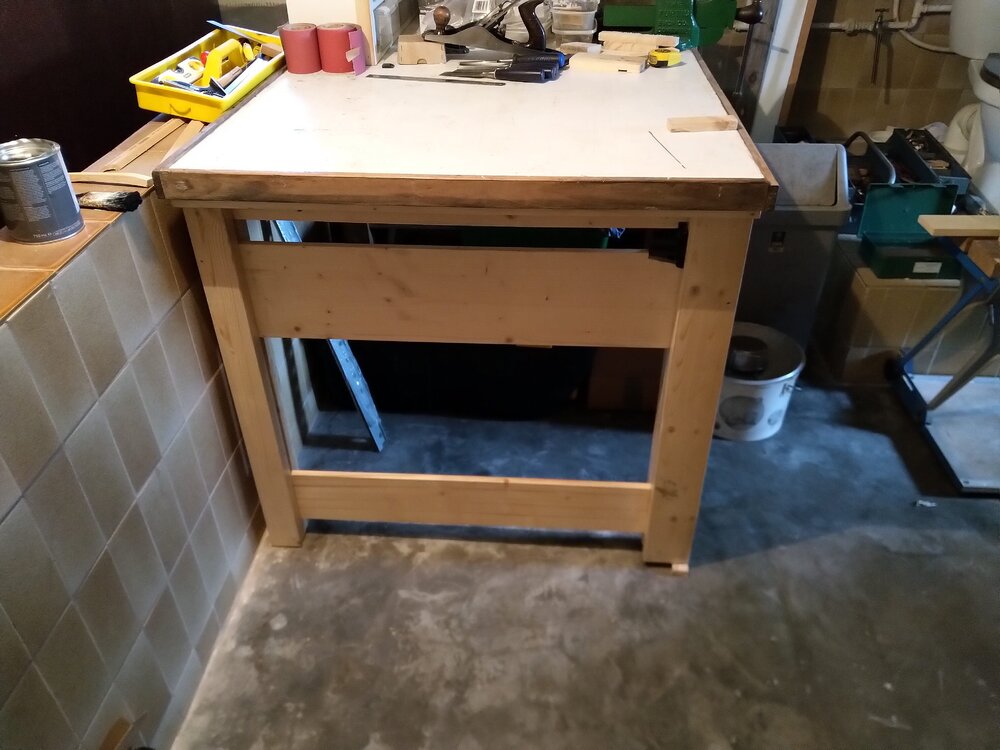
There's a bit of a jump now, the other part of the back leg has been glued on, the ends trimmed and planed square as best I can. The top plate that fixes it to the bench has been marked up, drilled and fitted. The nut is fitted and the screw tested. The face of the nut isn't square to the bore unfortunately, nothing massive but needed a bit of shaving inside the hole. I need a lathe to true it up, but I haven't got one, nor access to one anymore. It's test fitted to the bench to ensure that the holes for the fixing bolts line up. They do. No, the front leg doesn't reach the ground. I thought about it, but as the floor isn't level and I may want to move the bench in the future I thought that making it stand properly on one patch of floor would be a mistake. A little plinth wil be made for it. On it's back being varnished.


-
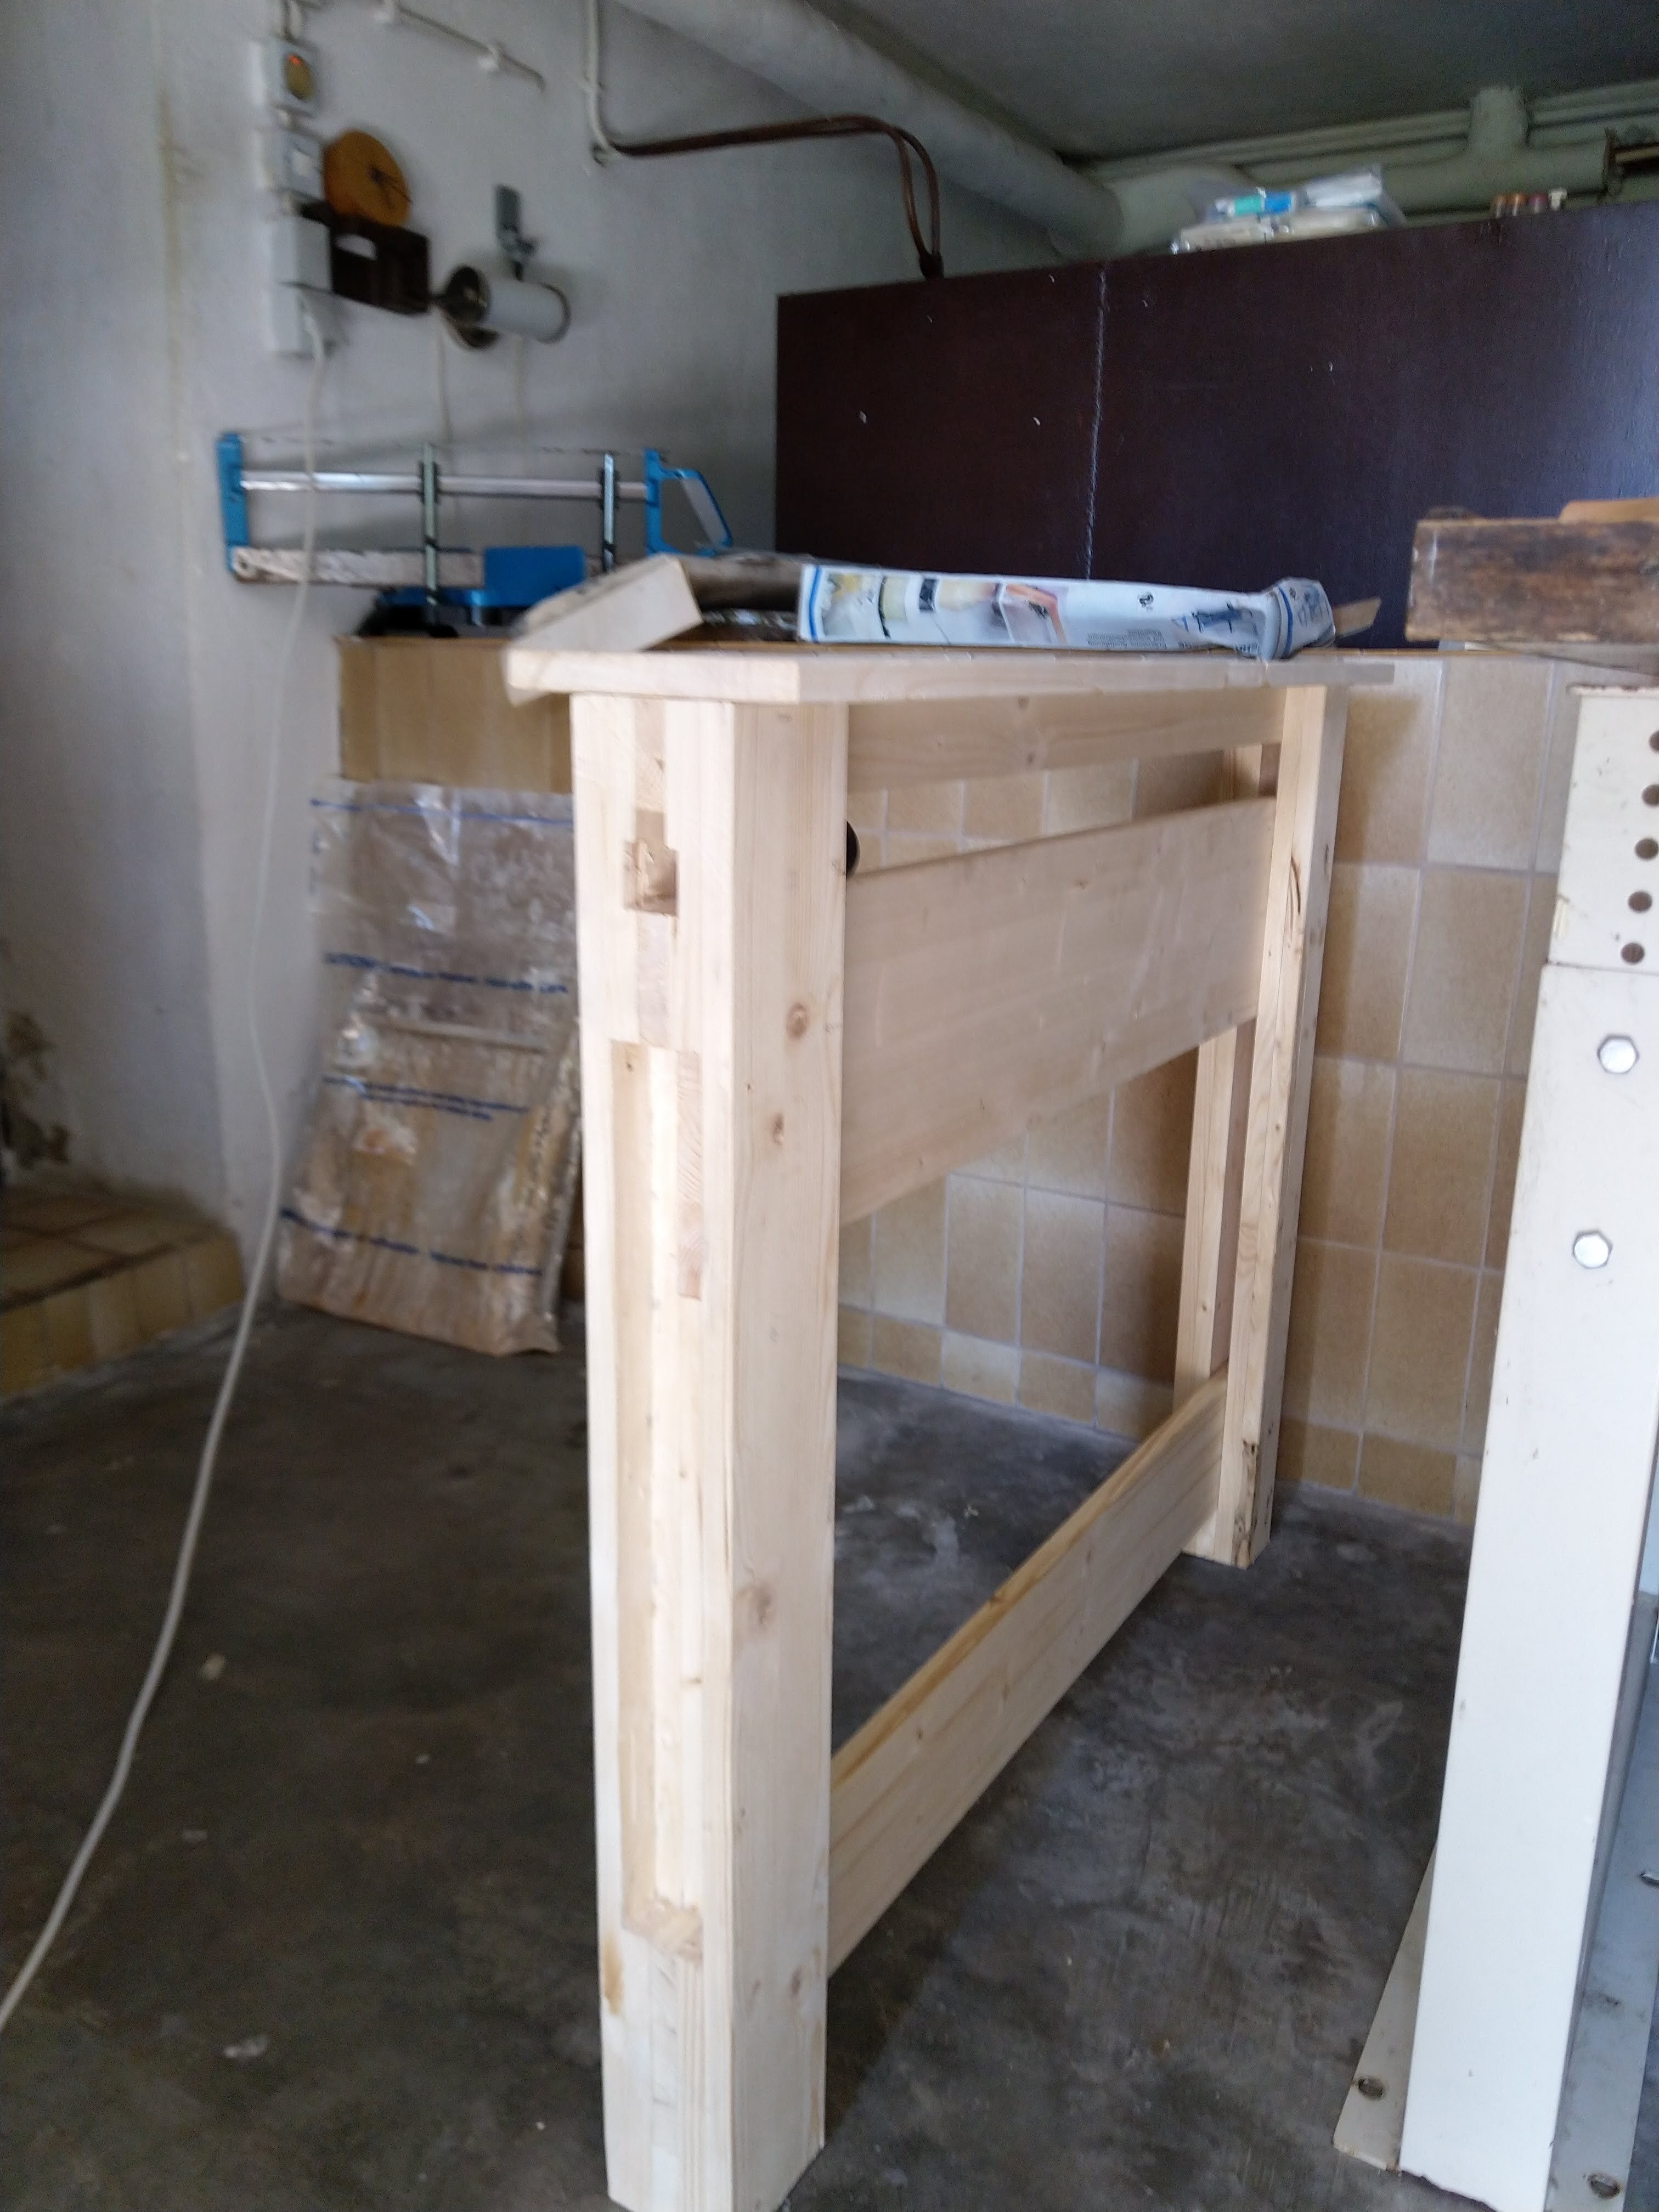
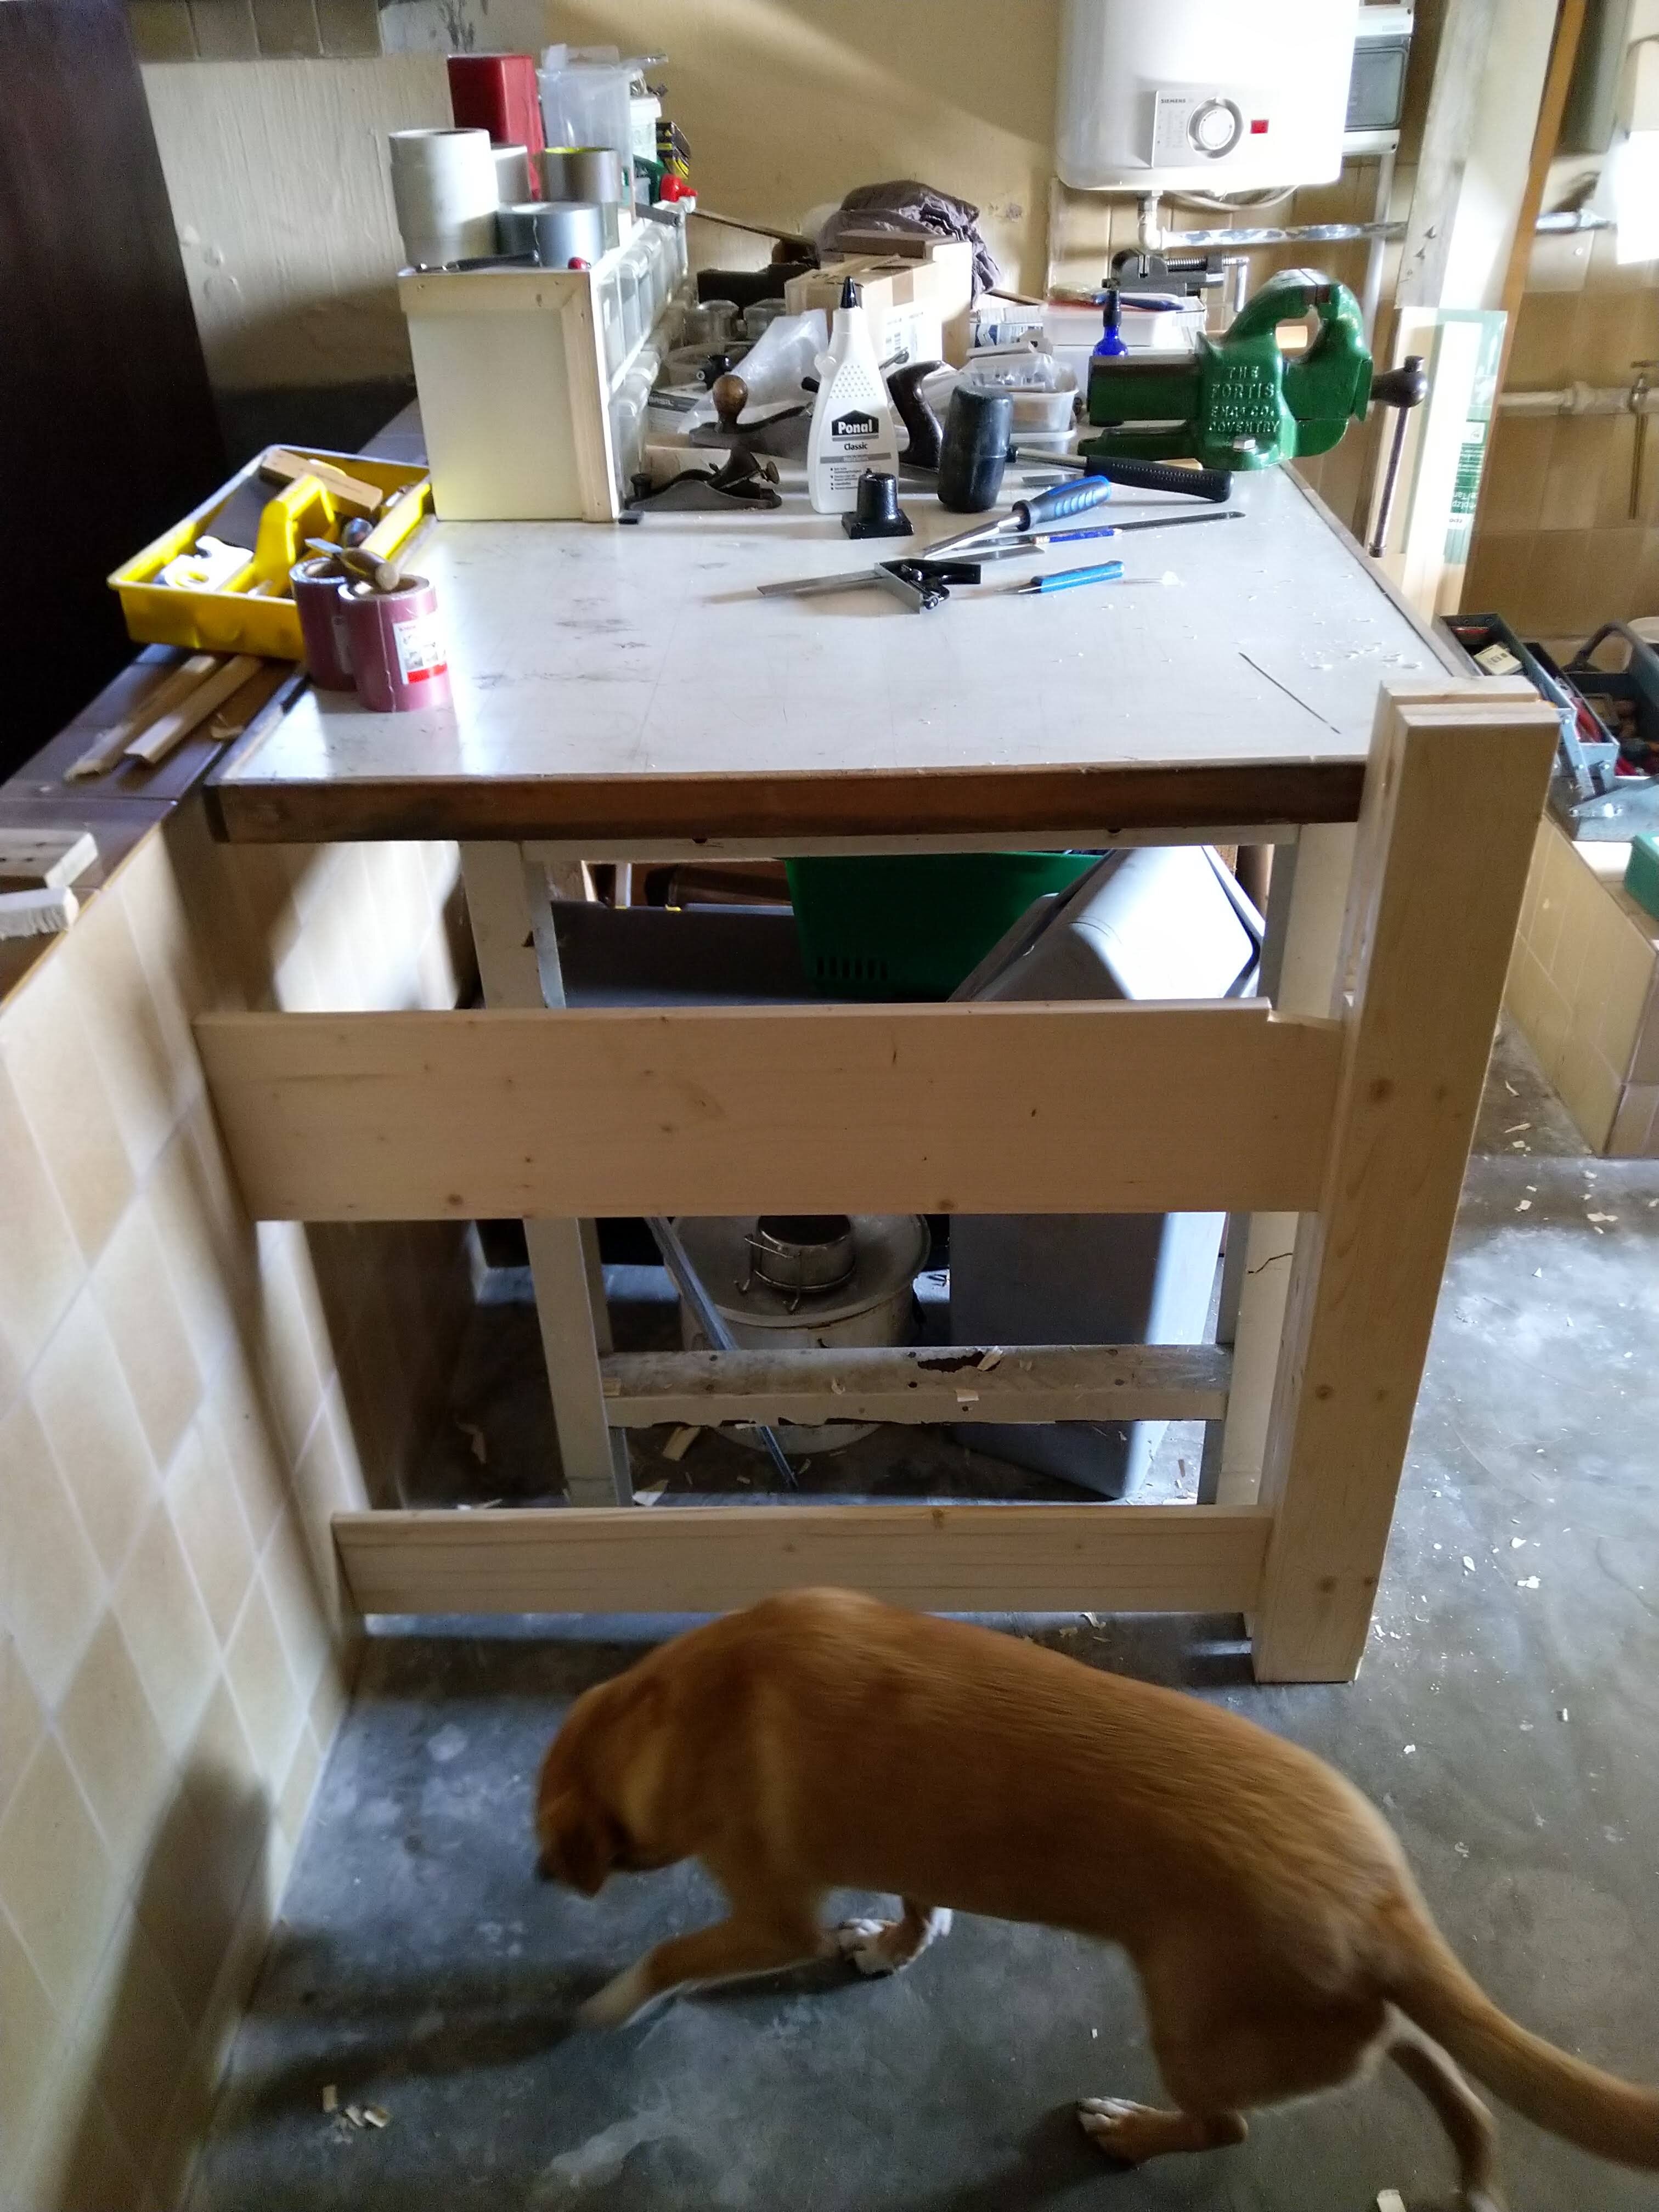
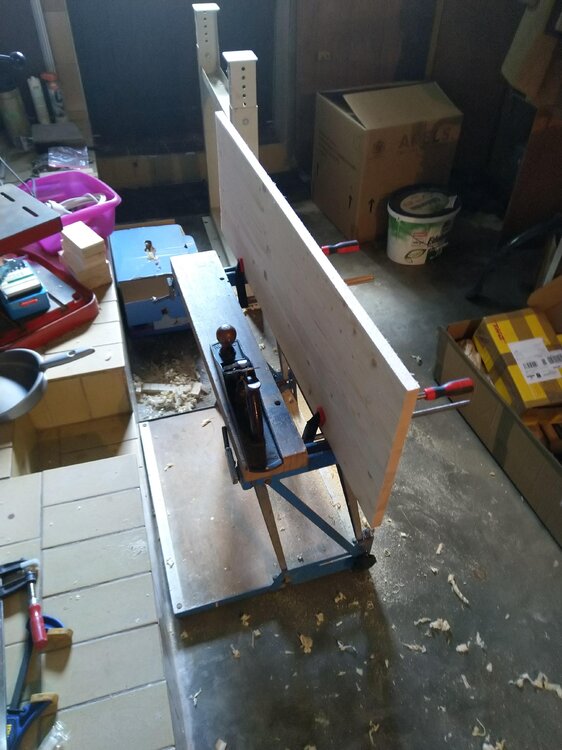
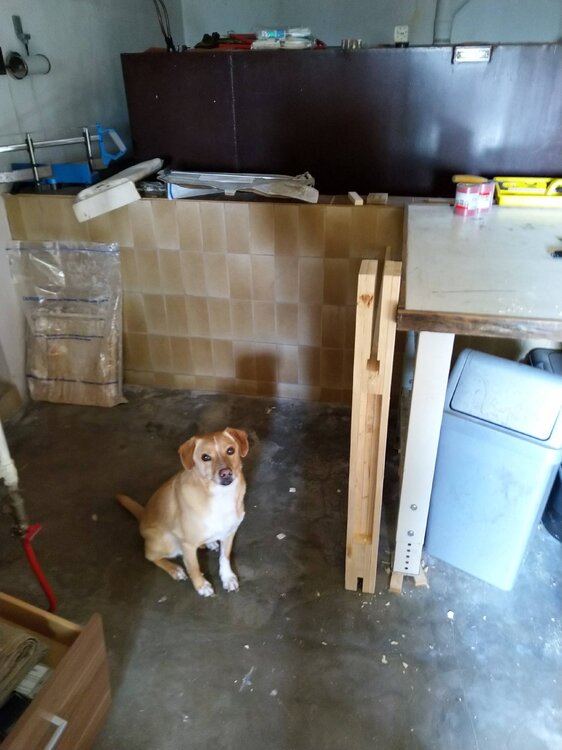
Released from it's clamps and propped up against the bench and wall to get an idea of whether it's dimensionally in the right area. Tedy came down to supervise. Fortunately he didn't try and wee on it. Fitting the back leg is more or less the same as the front. The only way I could think of to get it square was to lie the tape measure on it and then use a square to ensure that the tape was square so the front to back dimension would be the same for each runner. I was very pleased to find that after the gluing process the legs are the correct distance apart and parallel The two clamps doing nothing are there as stops to try and prevent the leg floating on the glue and moving. They did, it just moved lengthwise instead.


-
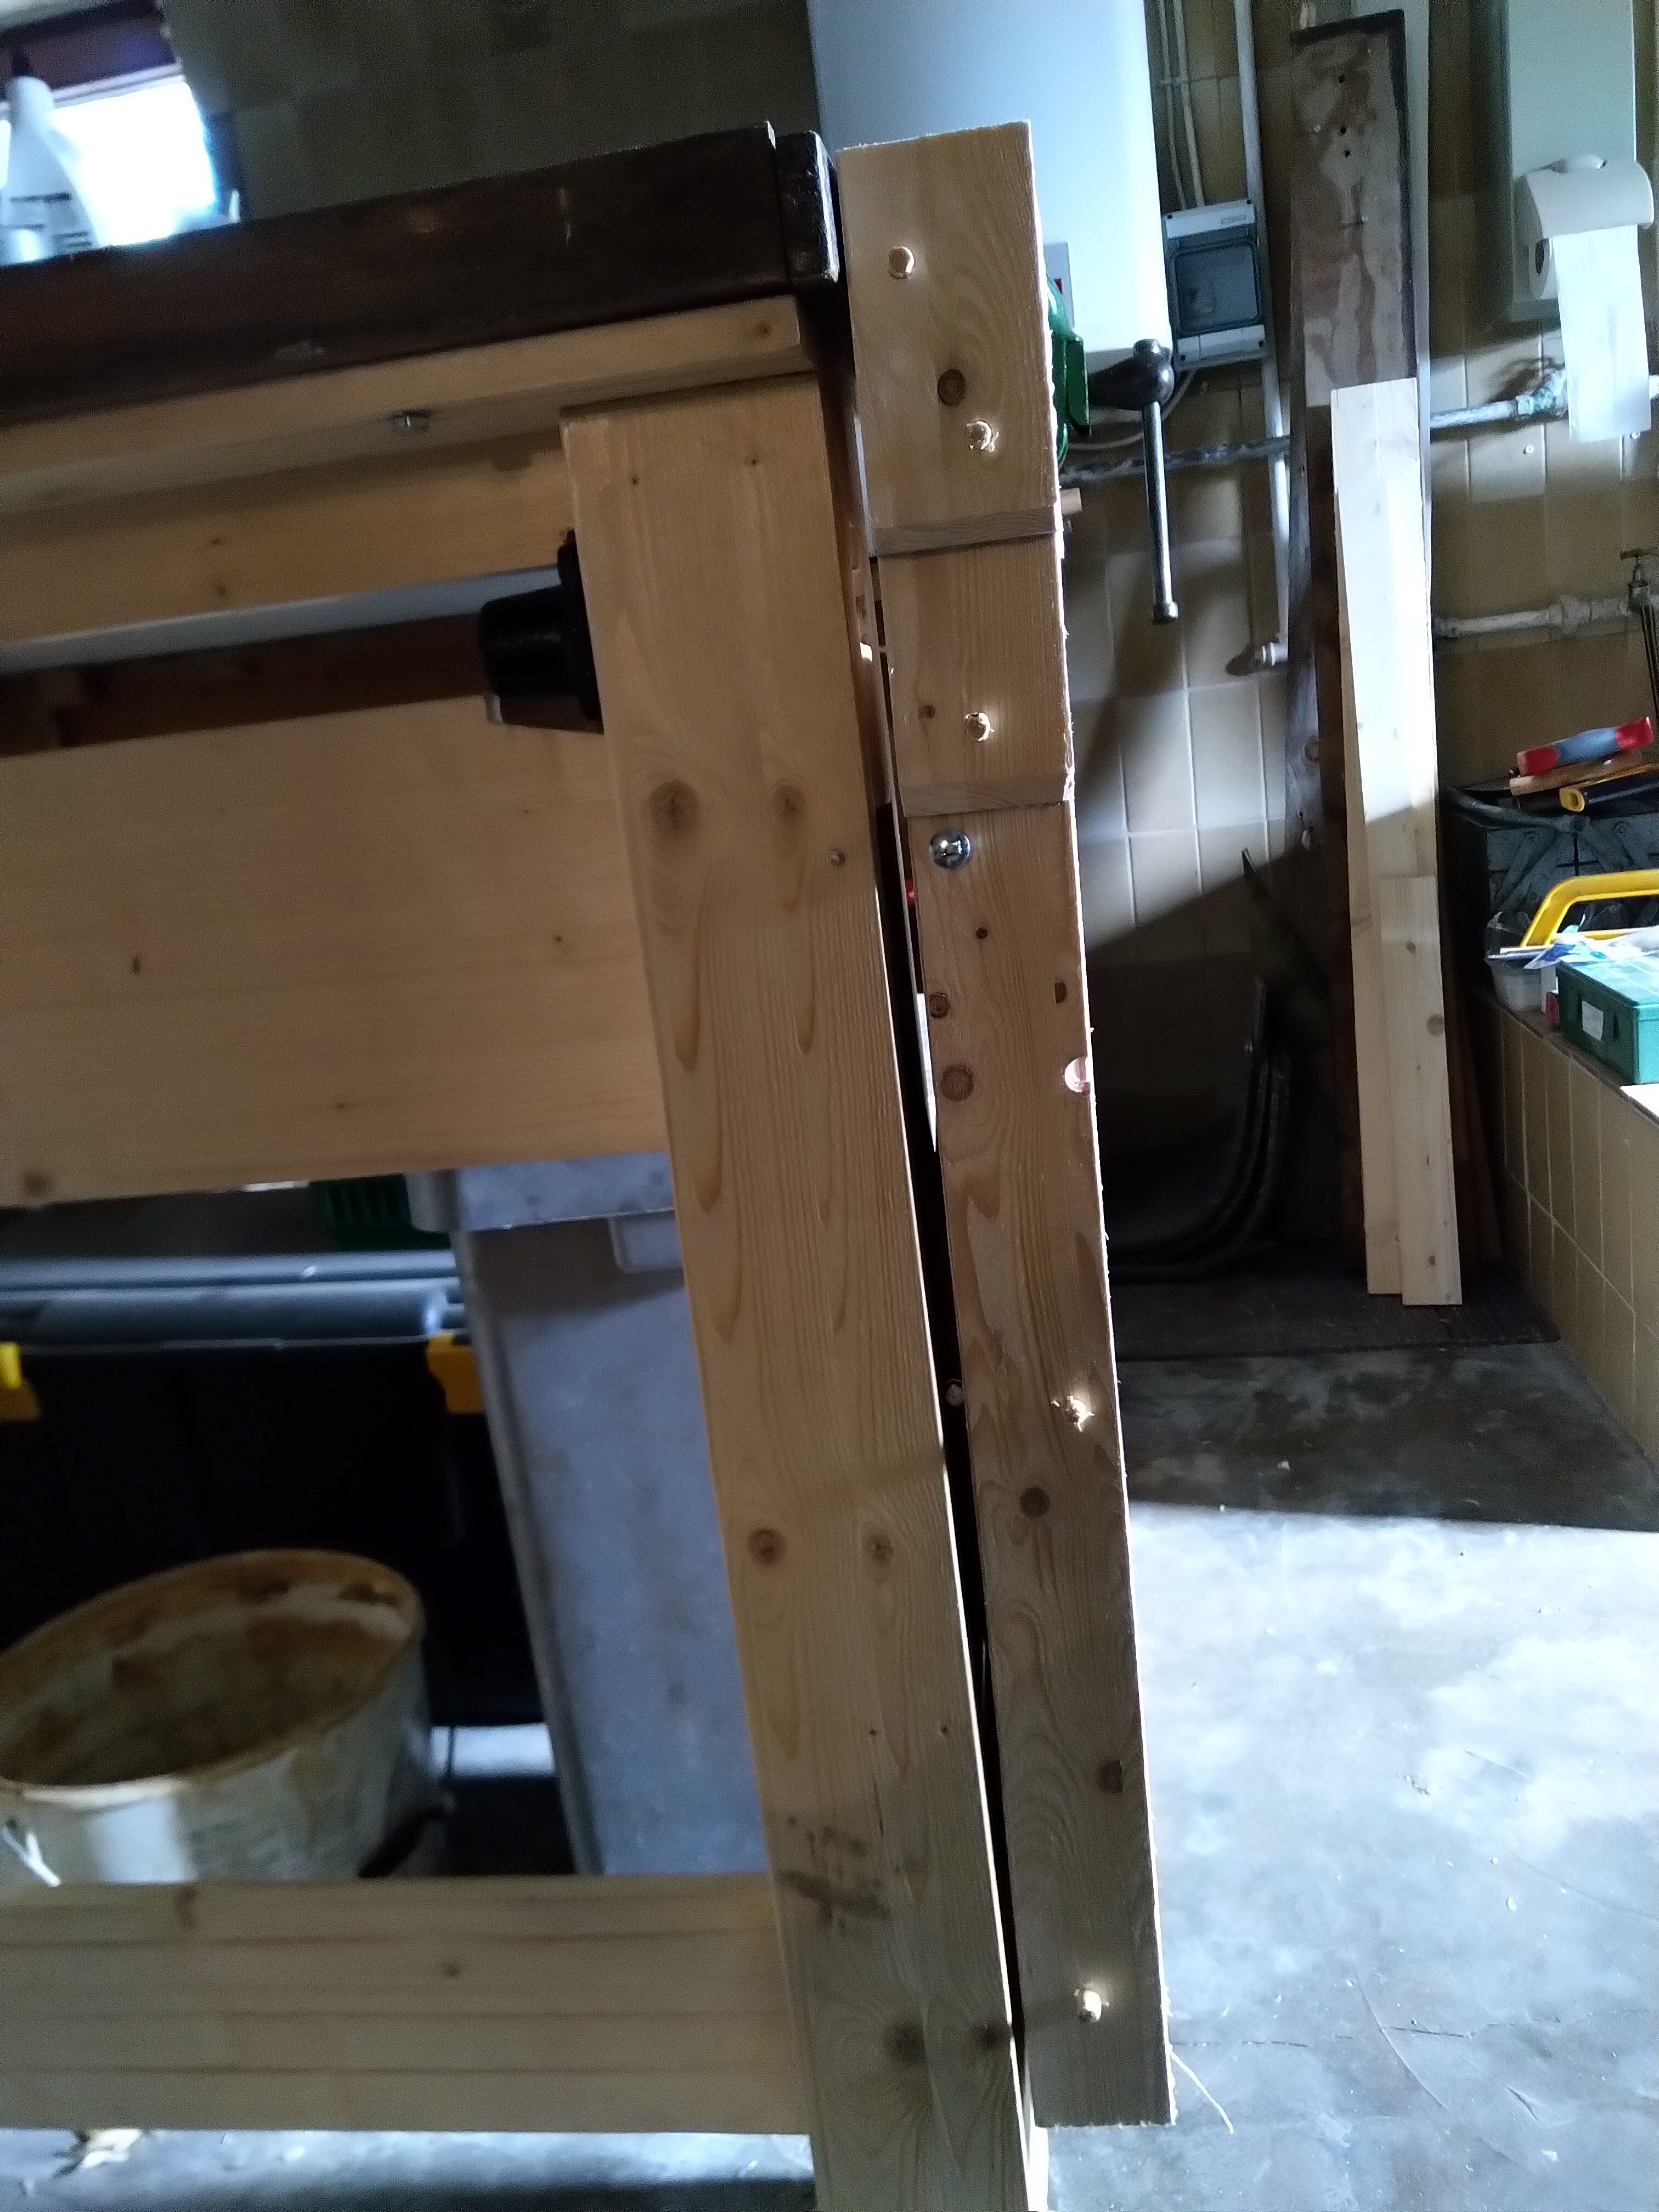
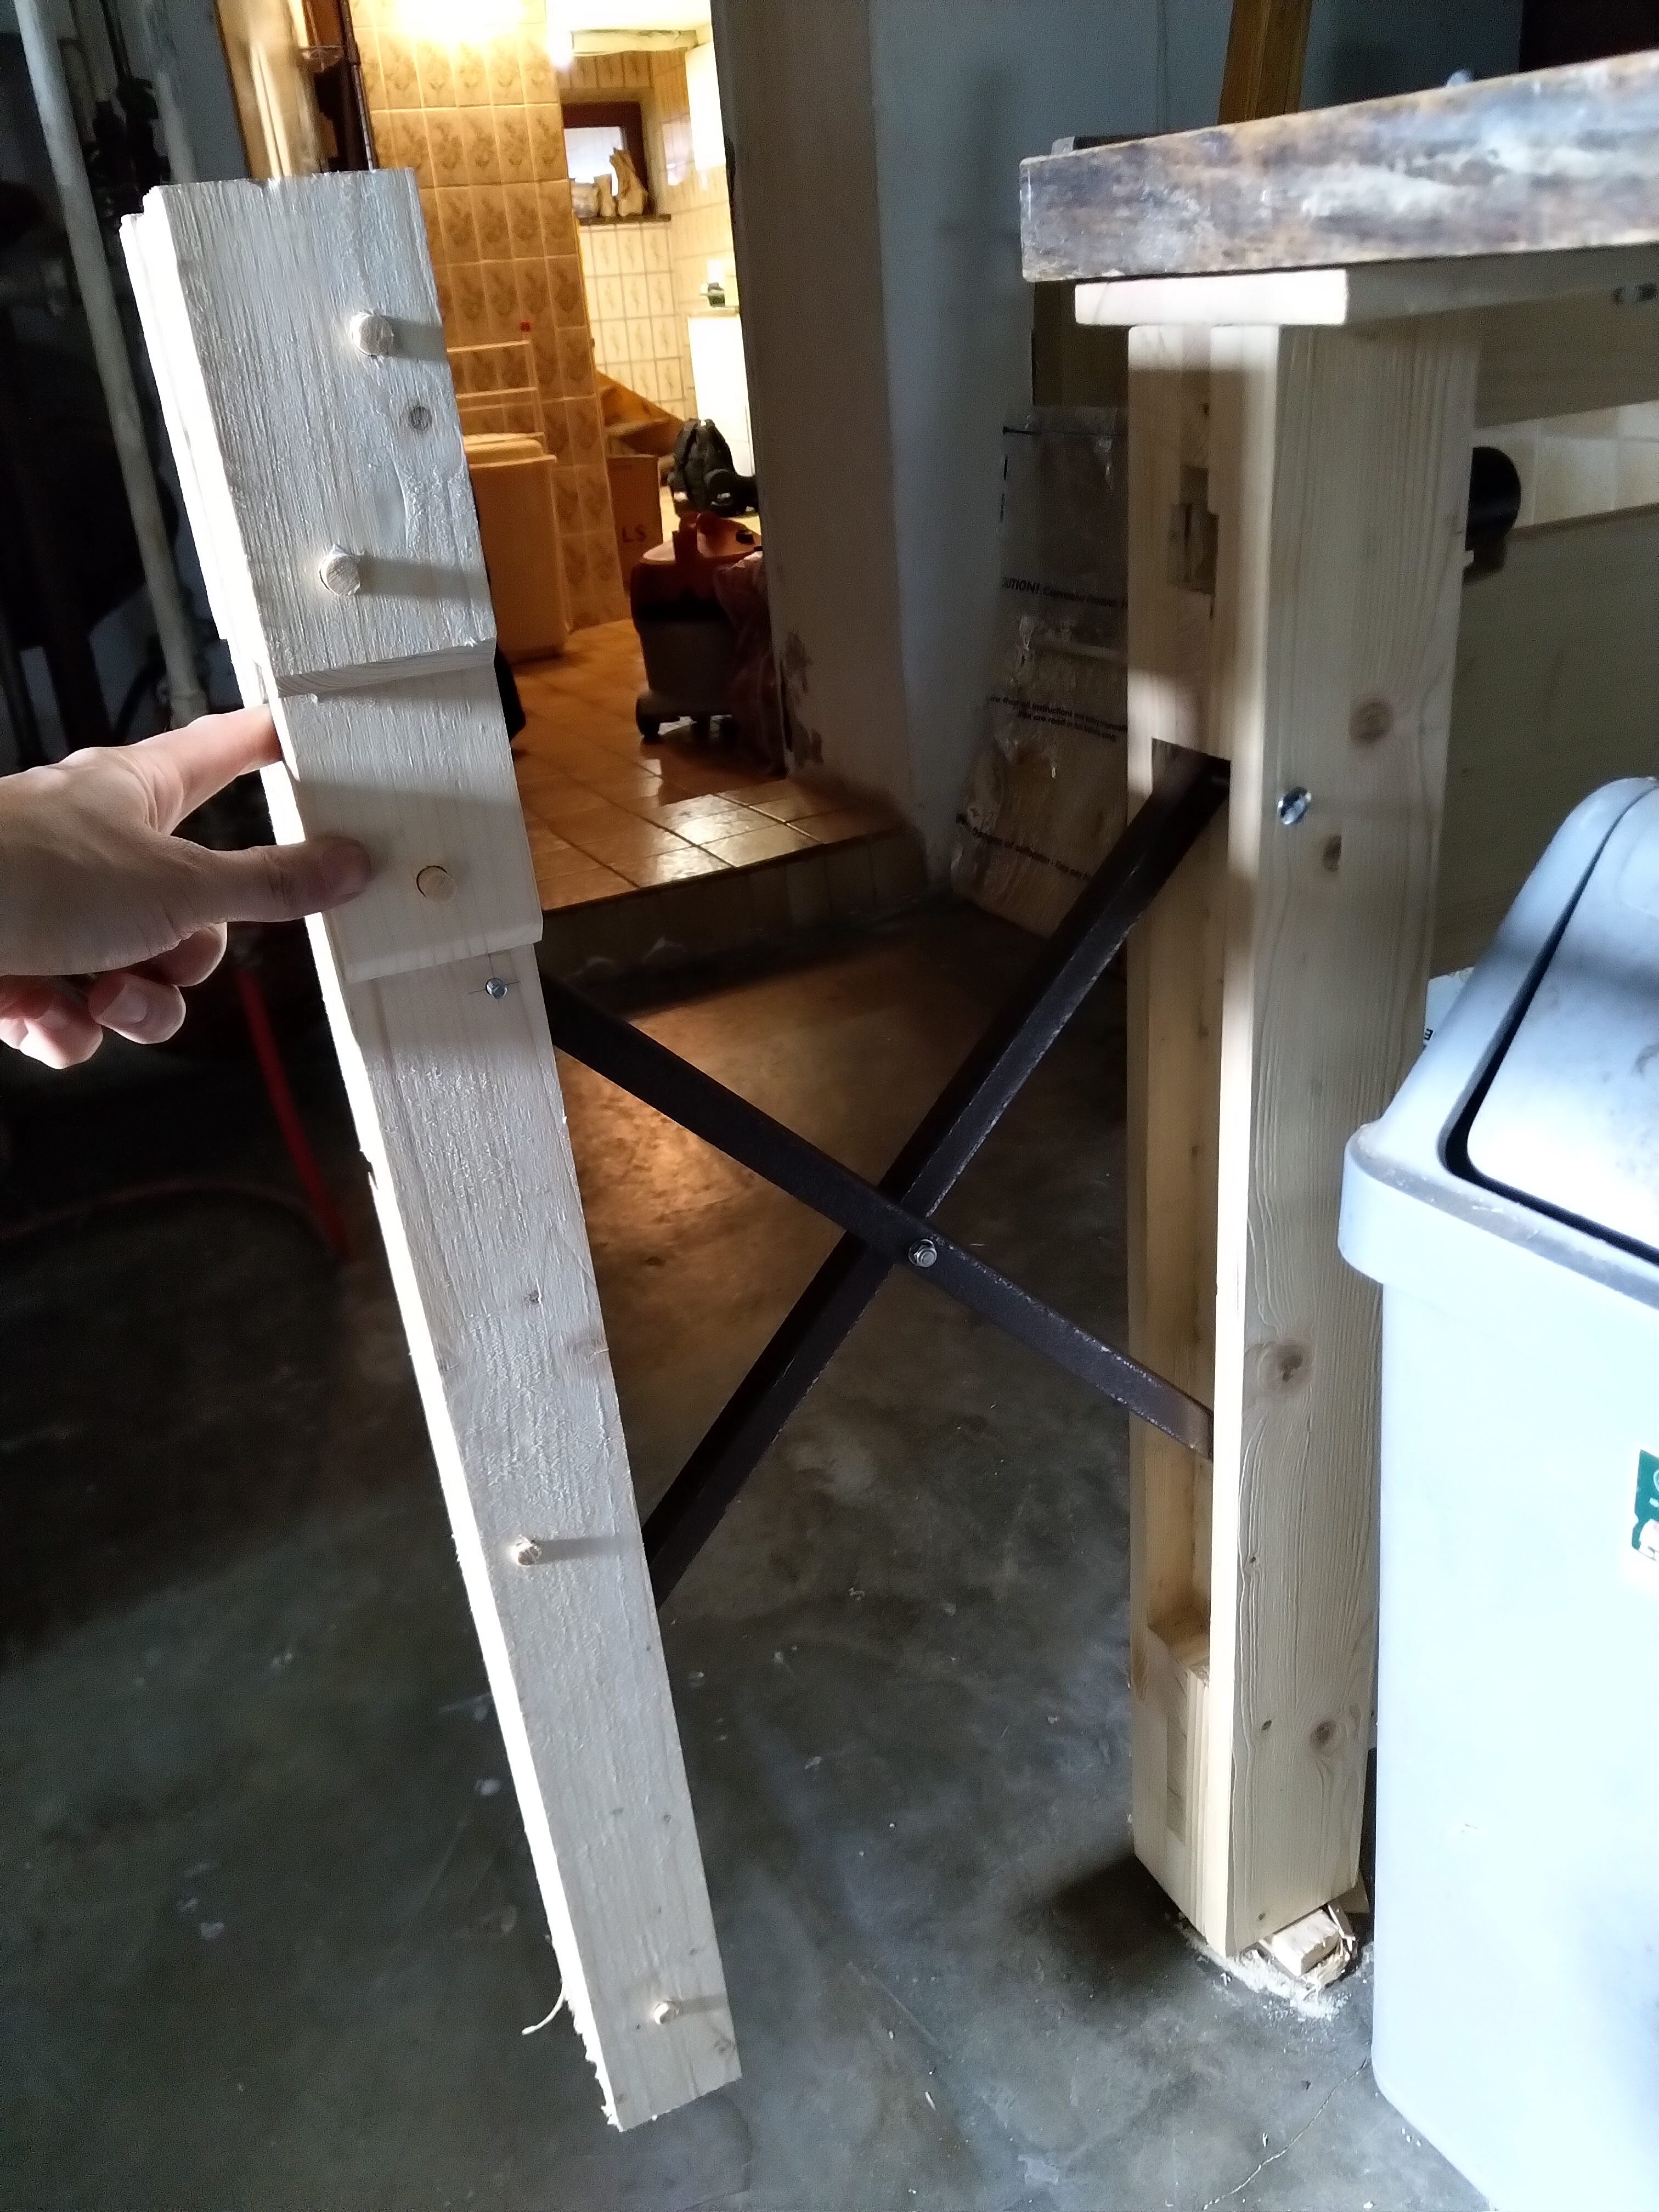
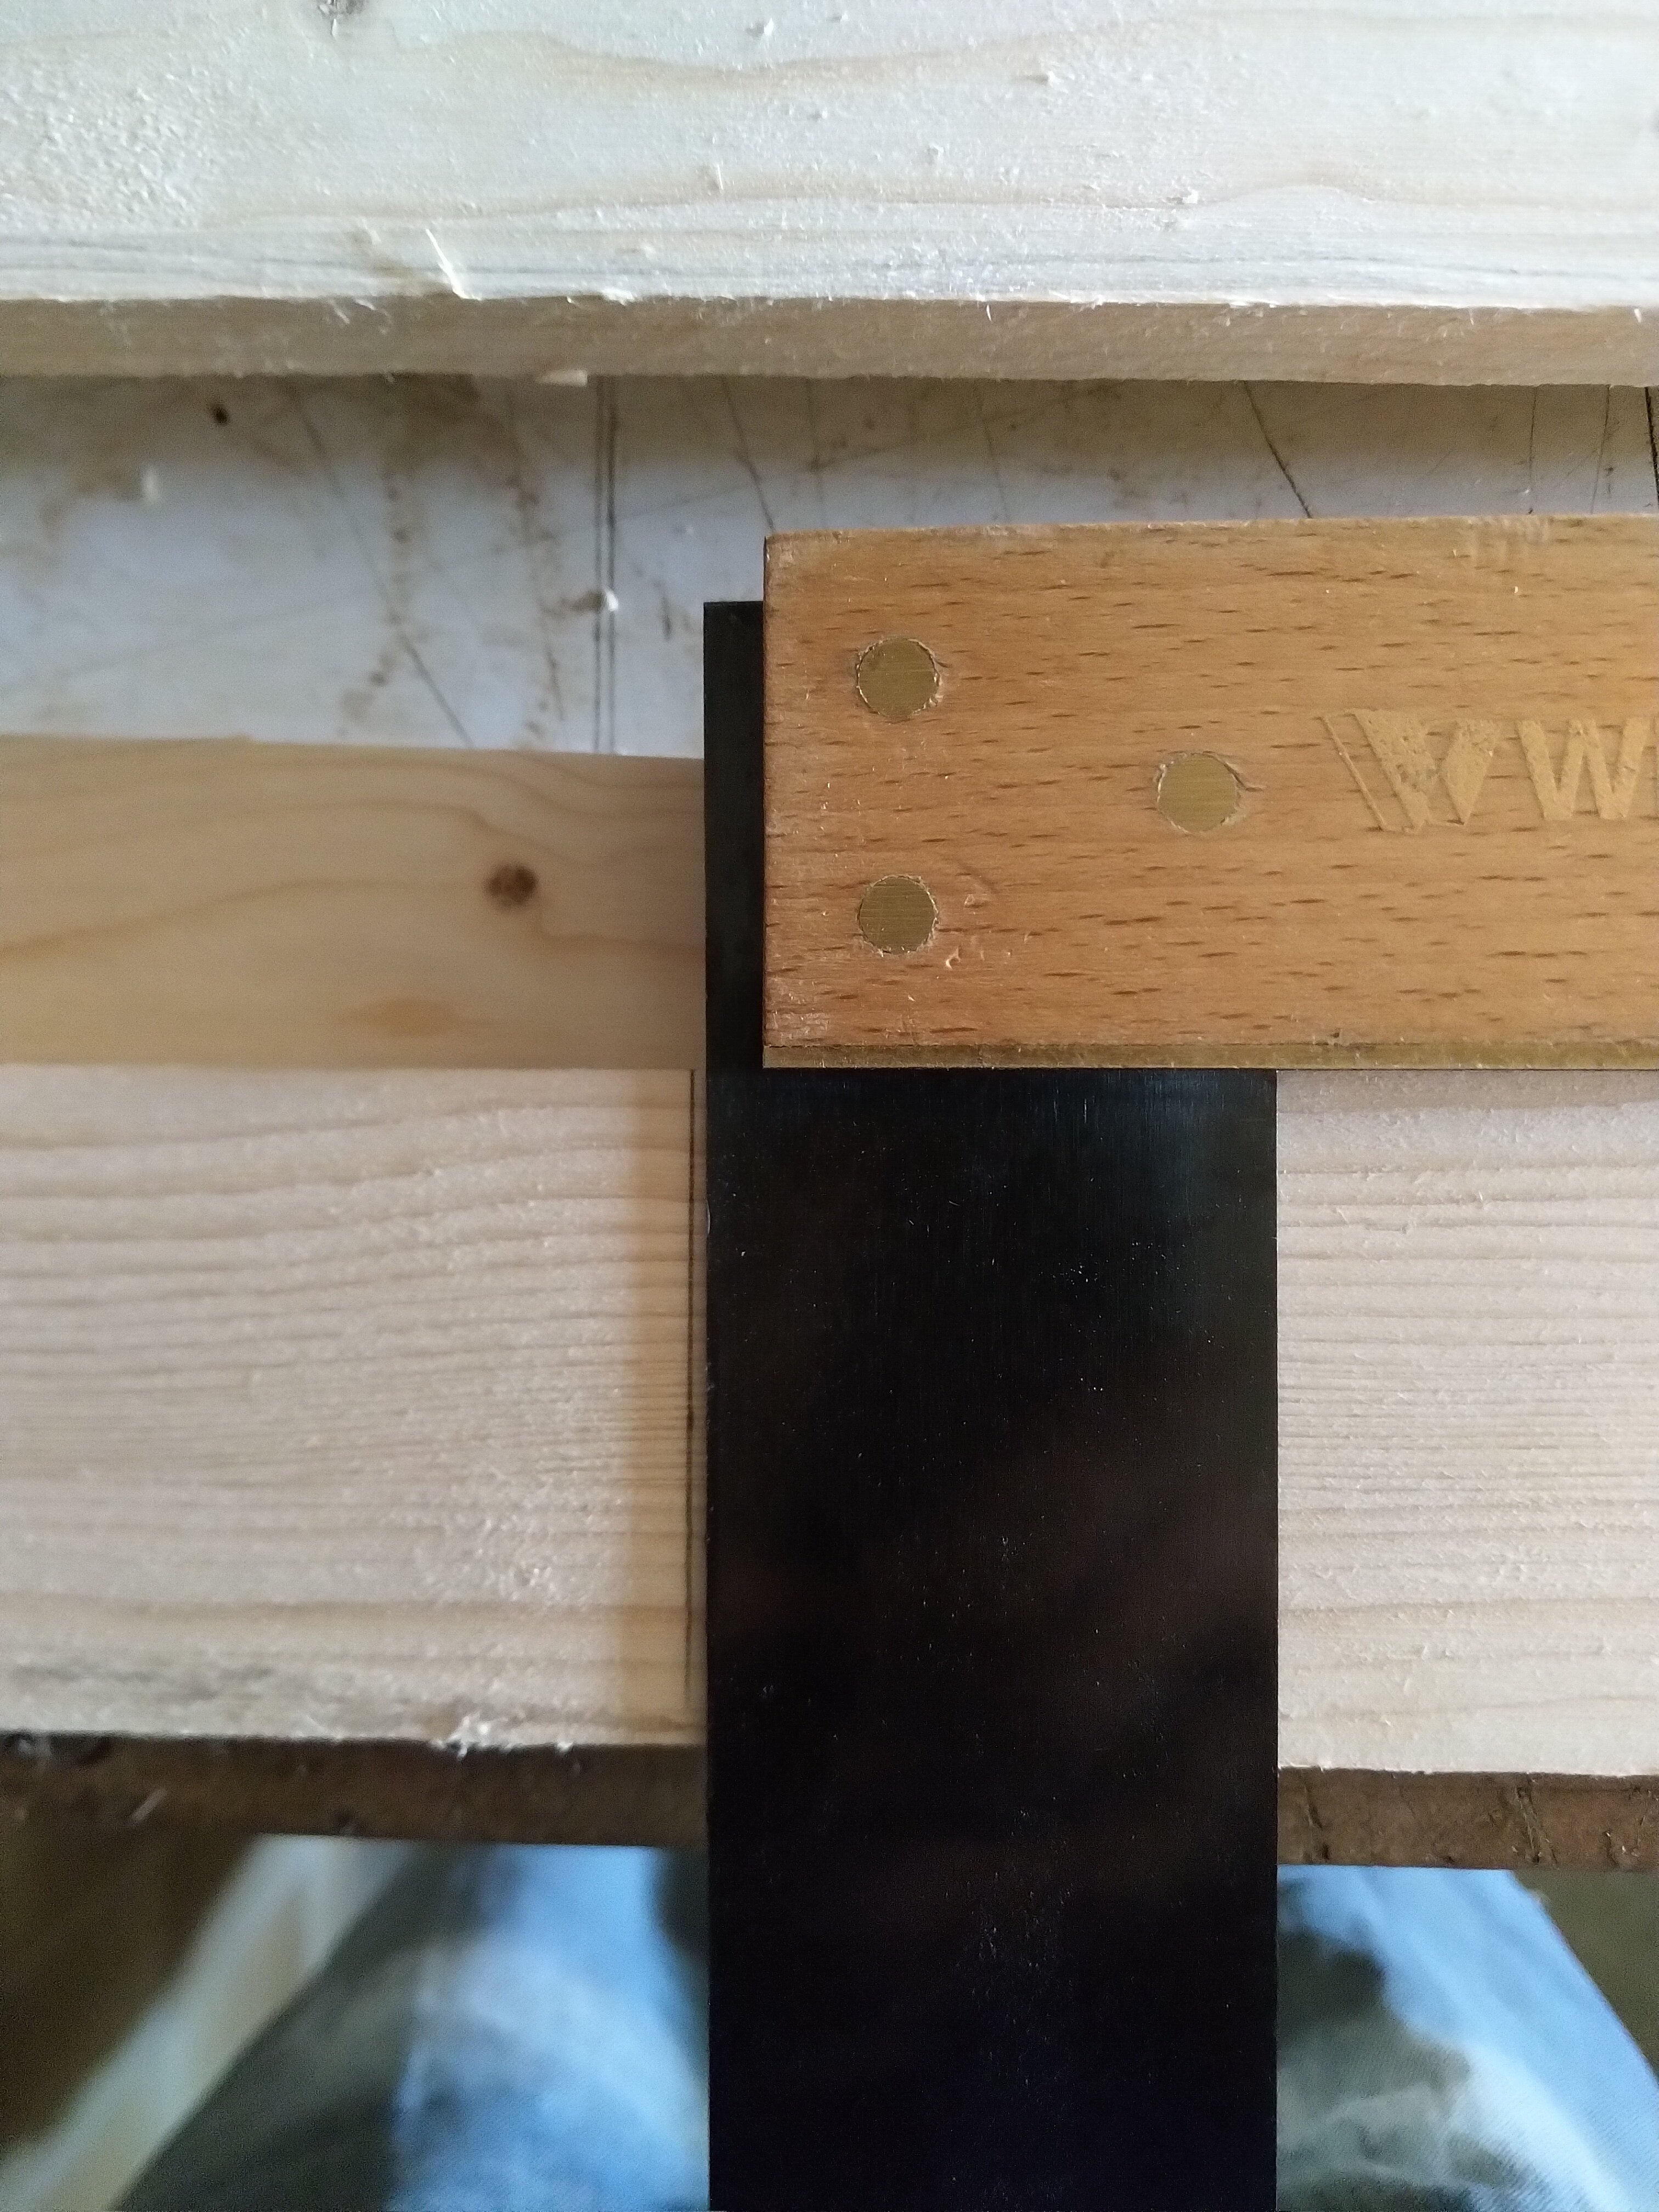
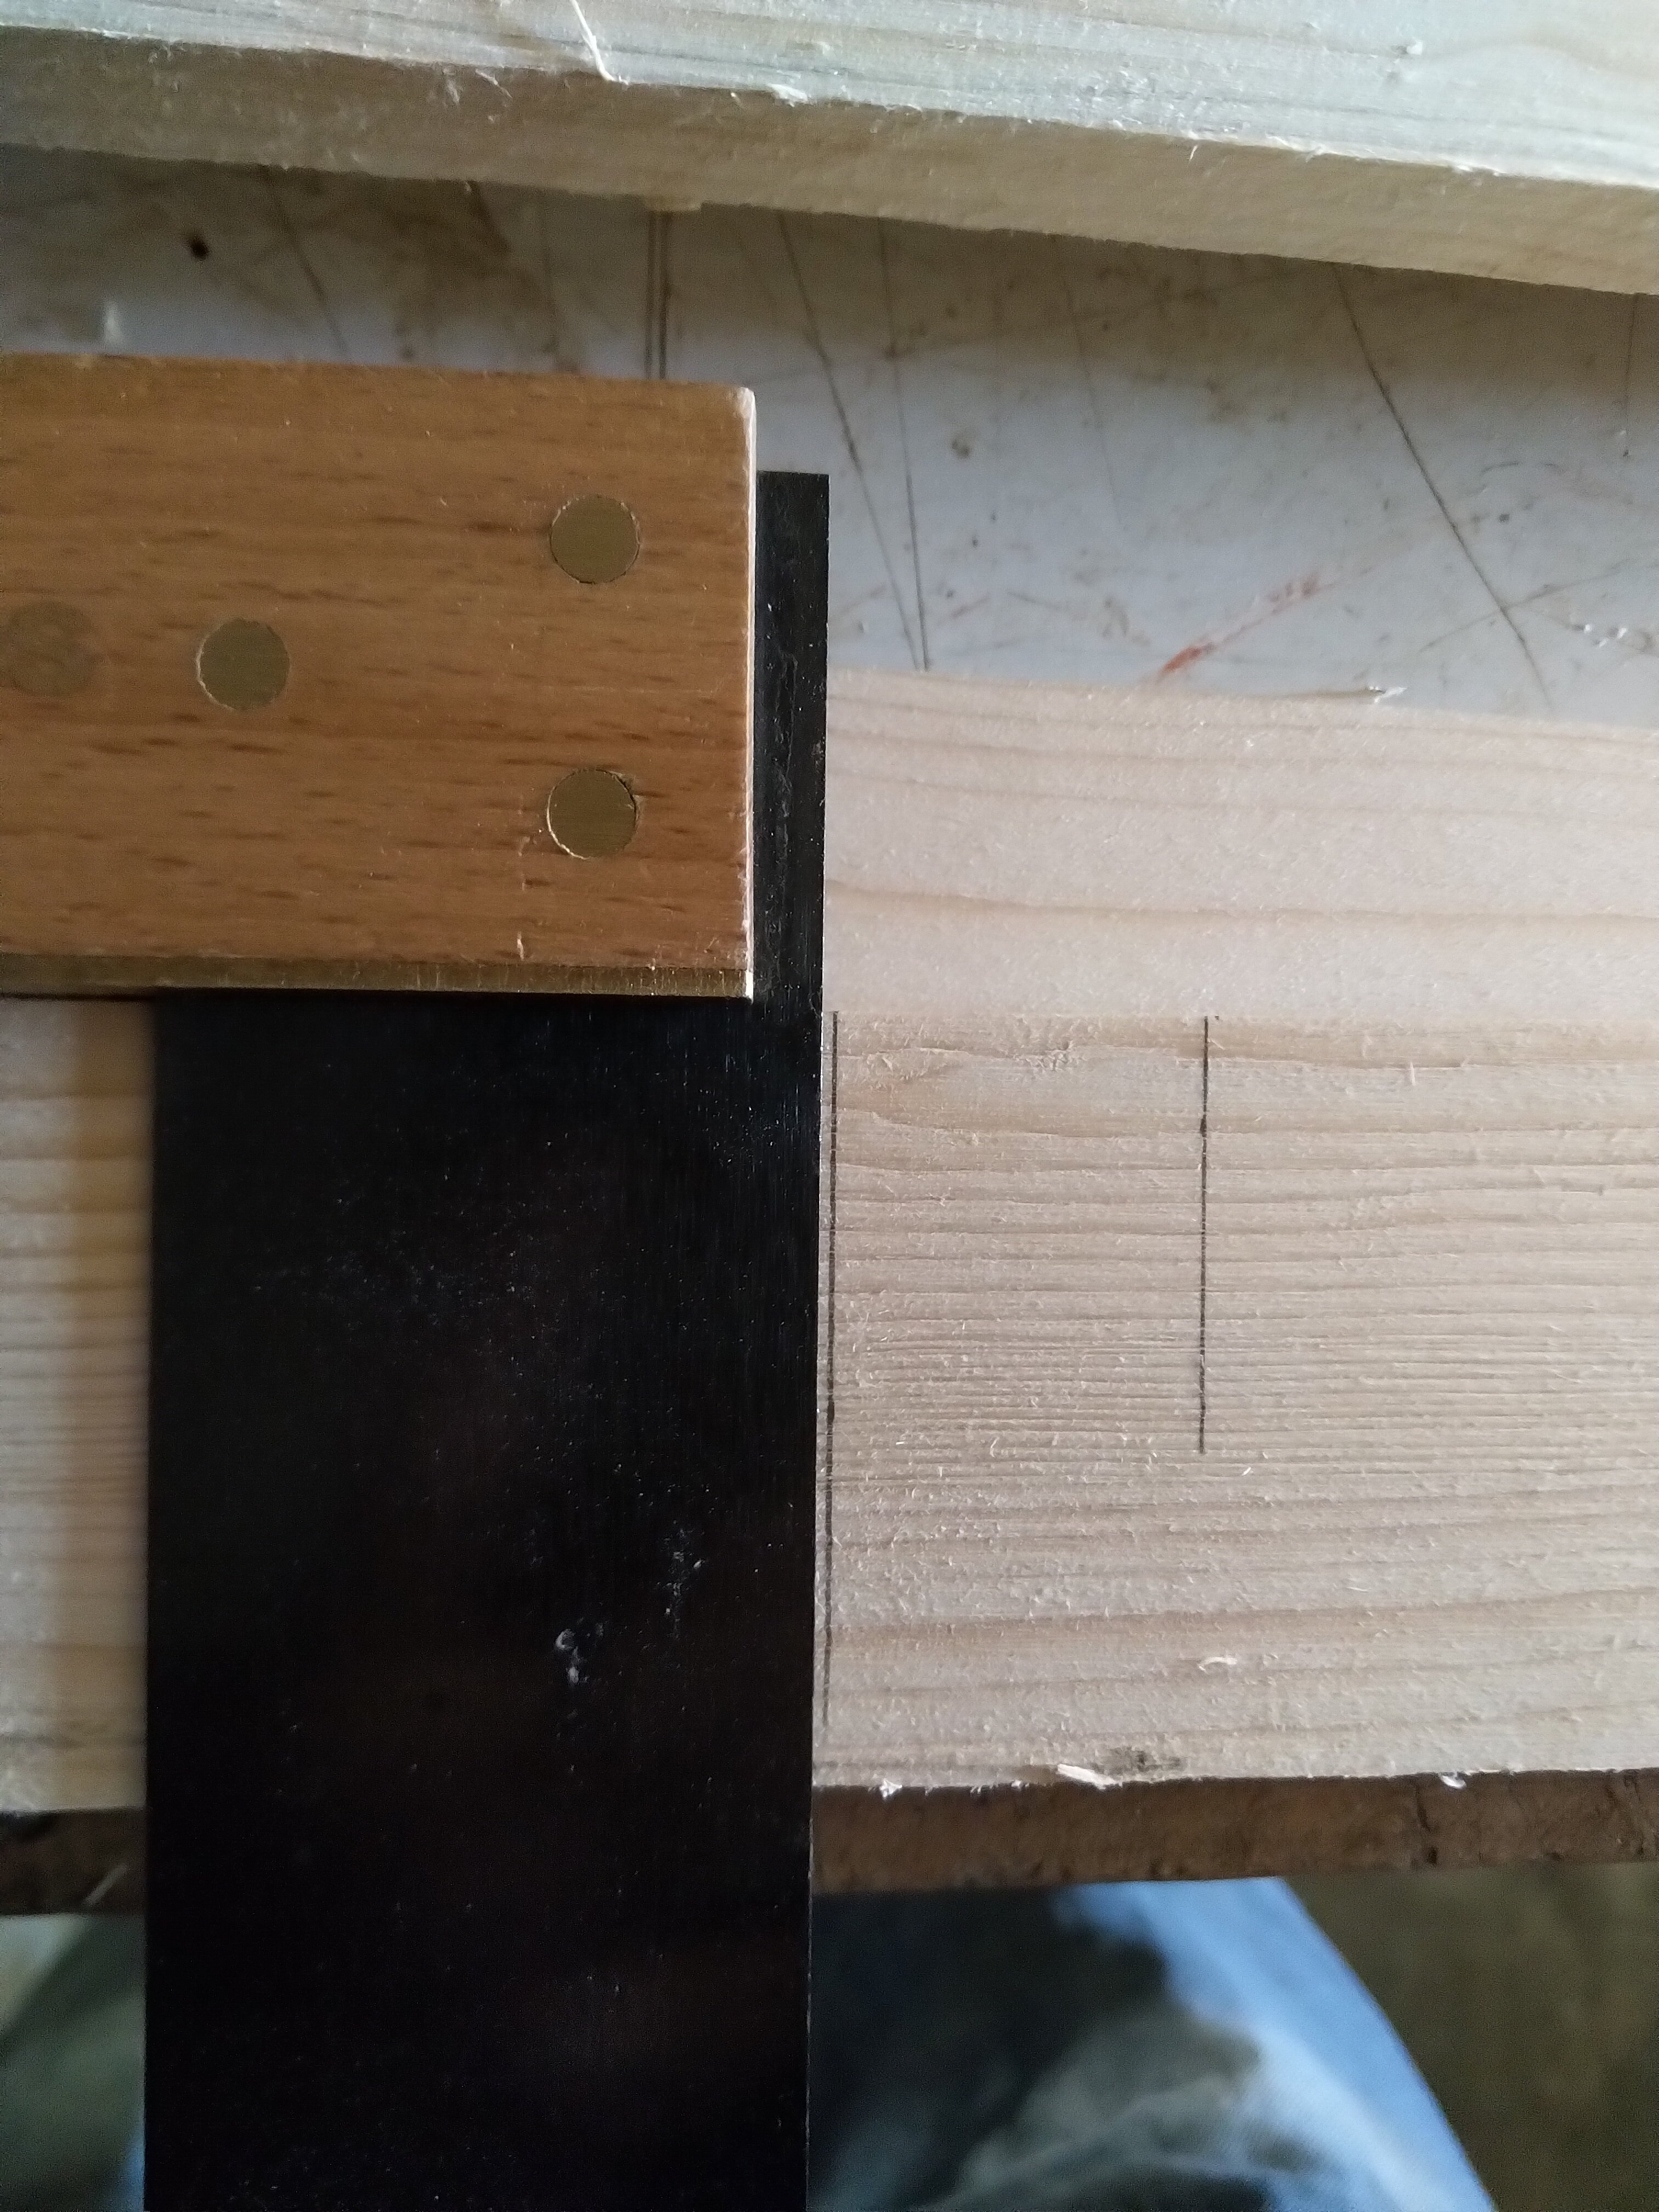
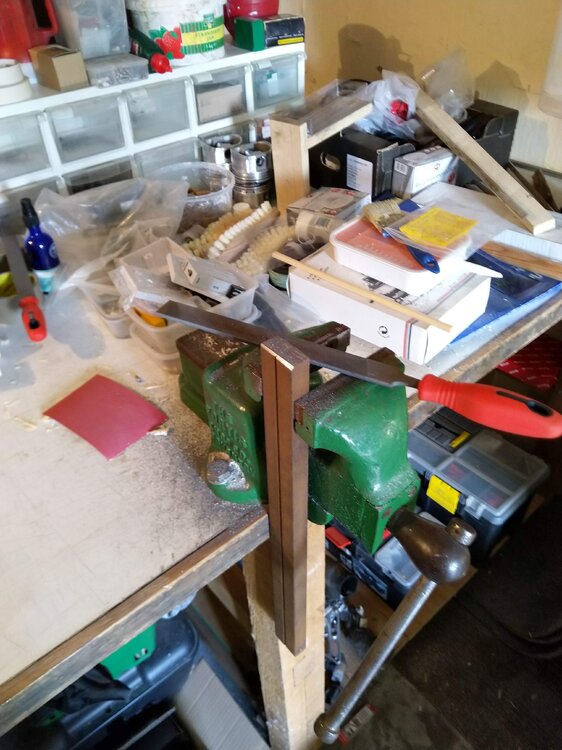
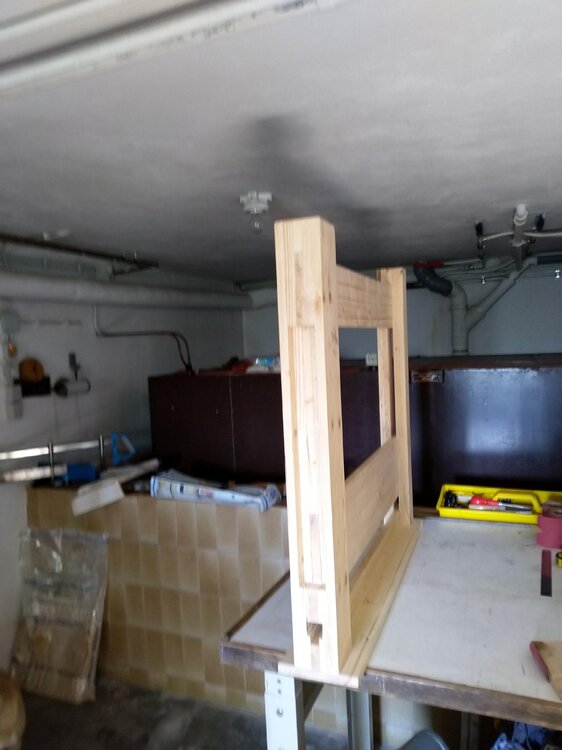
Crikey, these photos are big, same phone, same camera, same resolution. This is the hole for the pivot pin that the leg side of the scissor mechanism hangs off. The inner face of the mortise isn't great, but it's not a bearing surface, so at the end it doesn't matter. This is the infill panel between the two runners, it's with the grain so should be an OK bearing surface.... Time will tell. Gluing the other leg side to the first. The drill is to get the two holes for the pivot pin to line up. If I can turn it with my fingers it's probably not far out. Another view of the same.

-
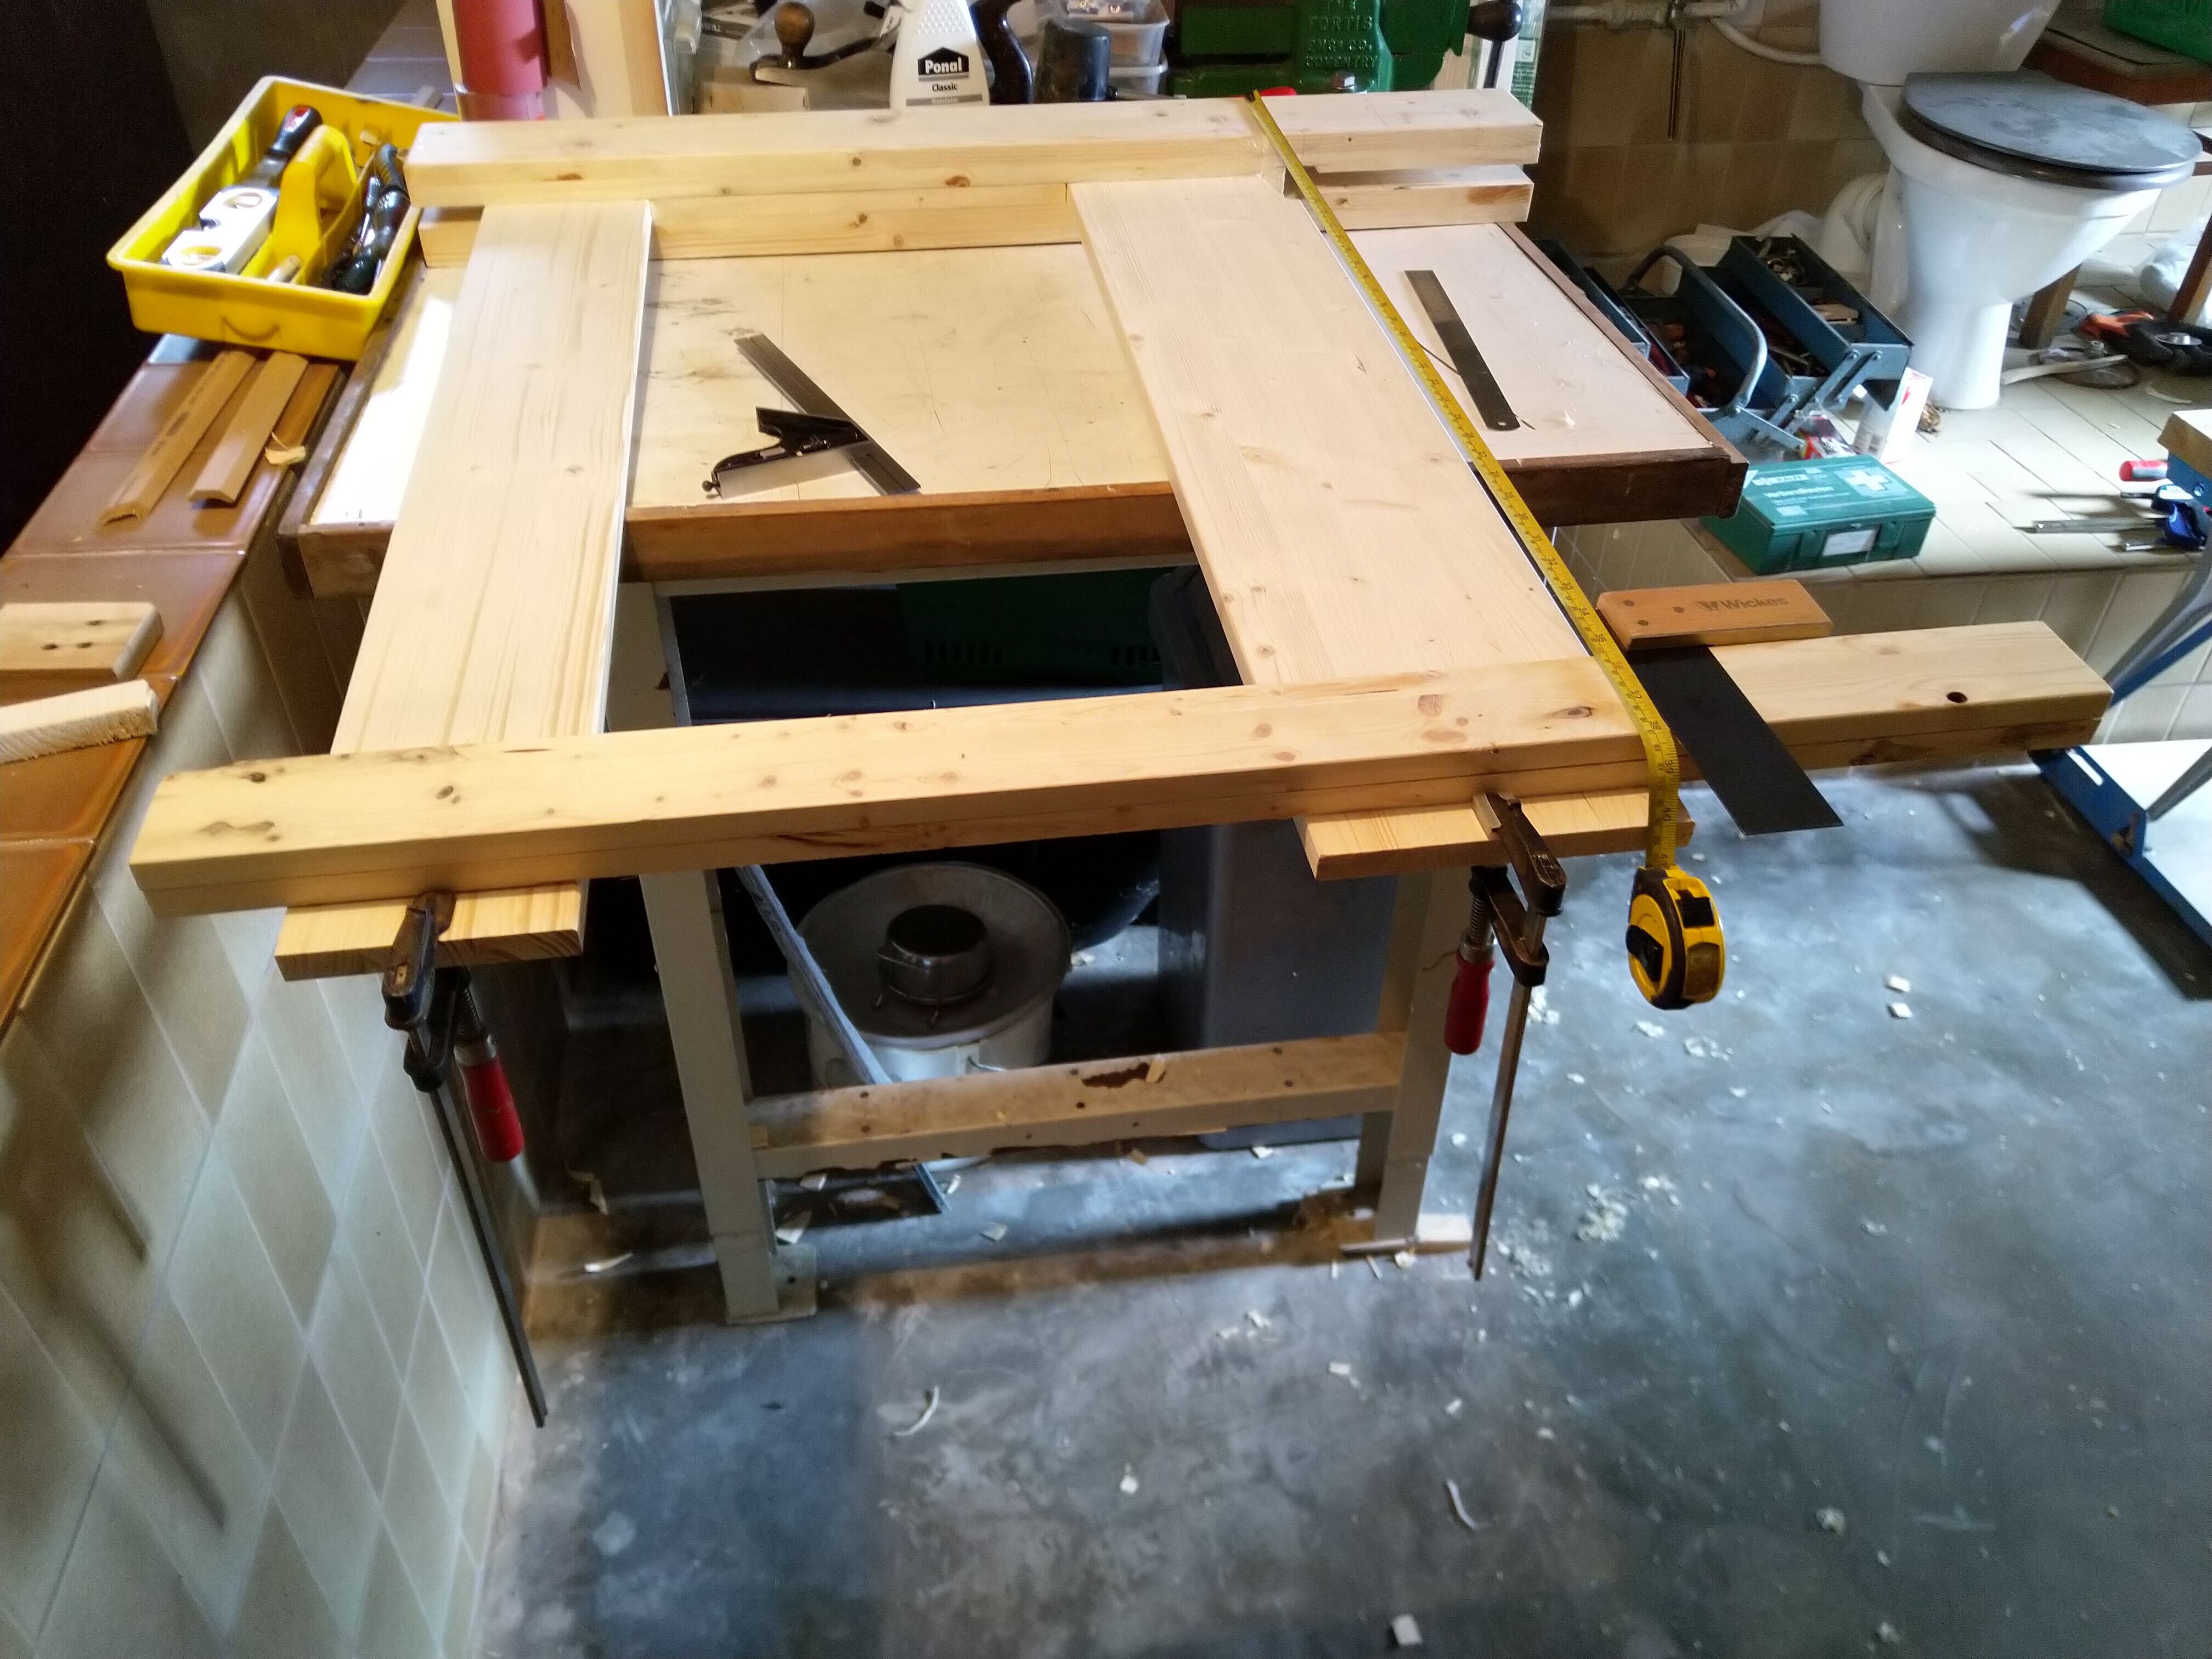
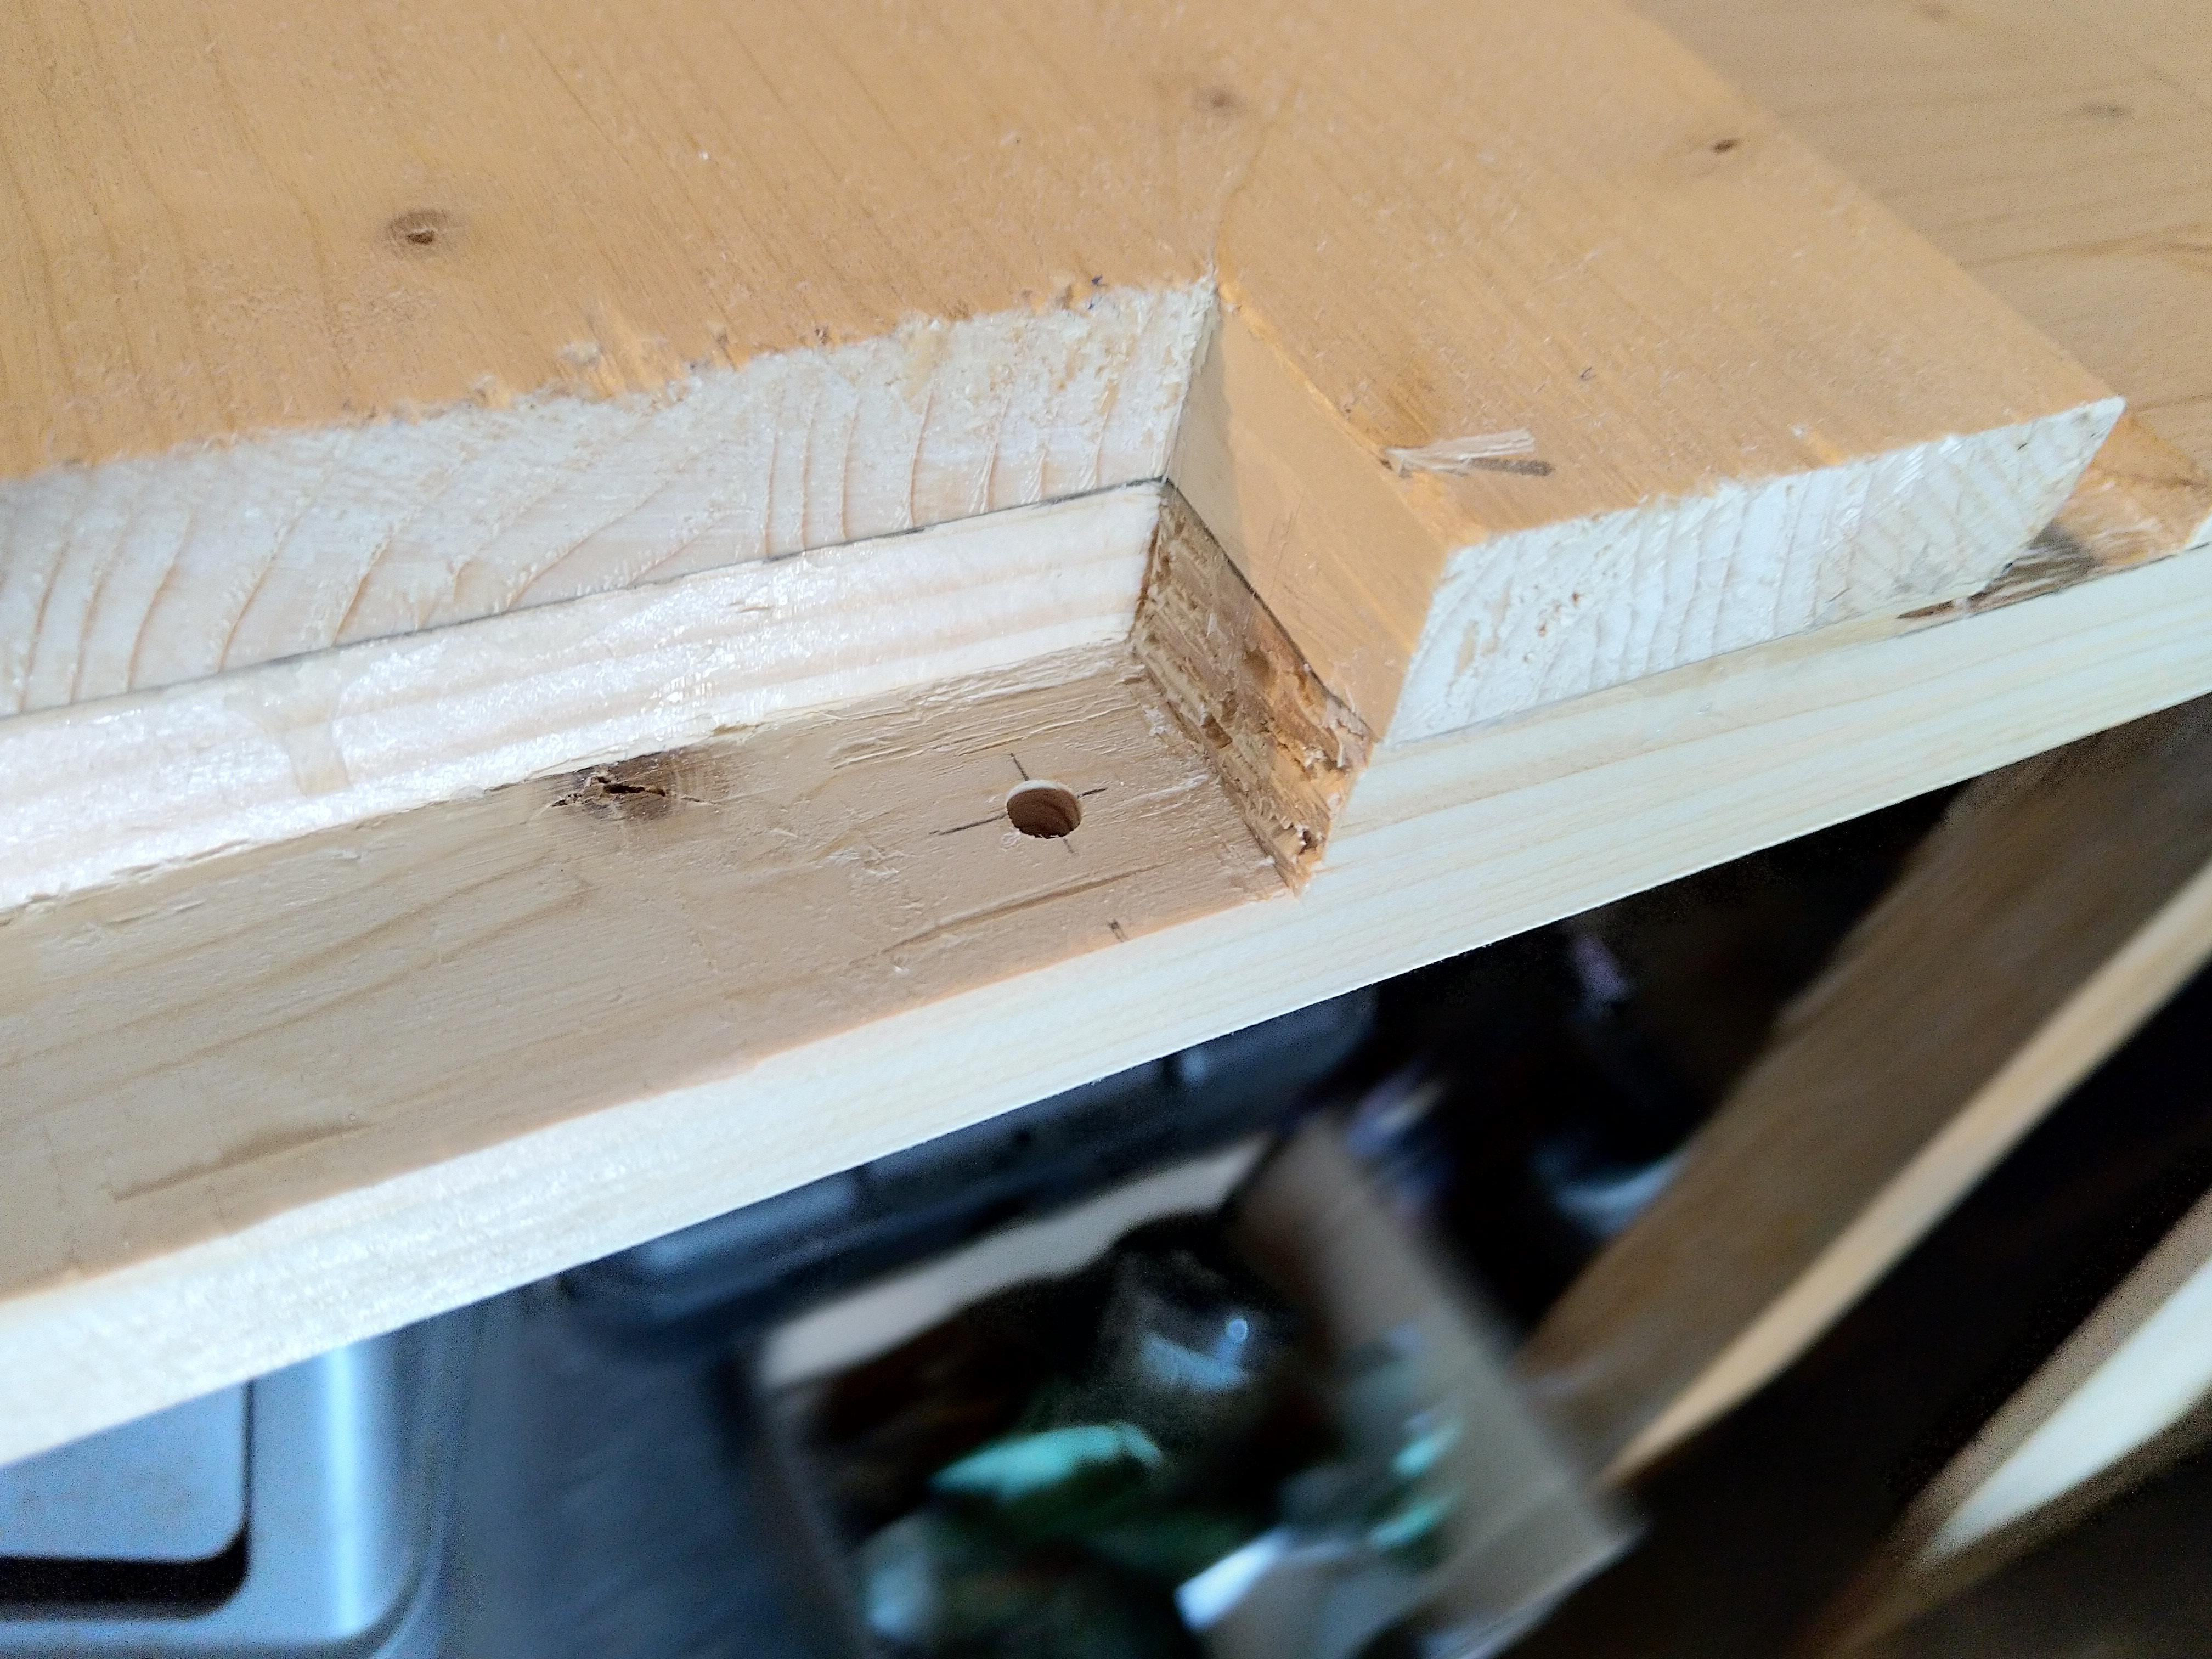
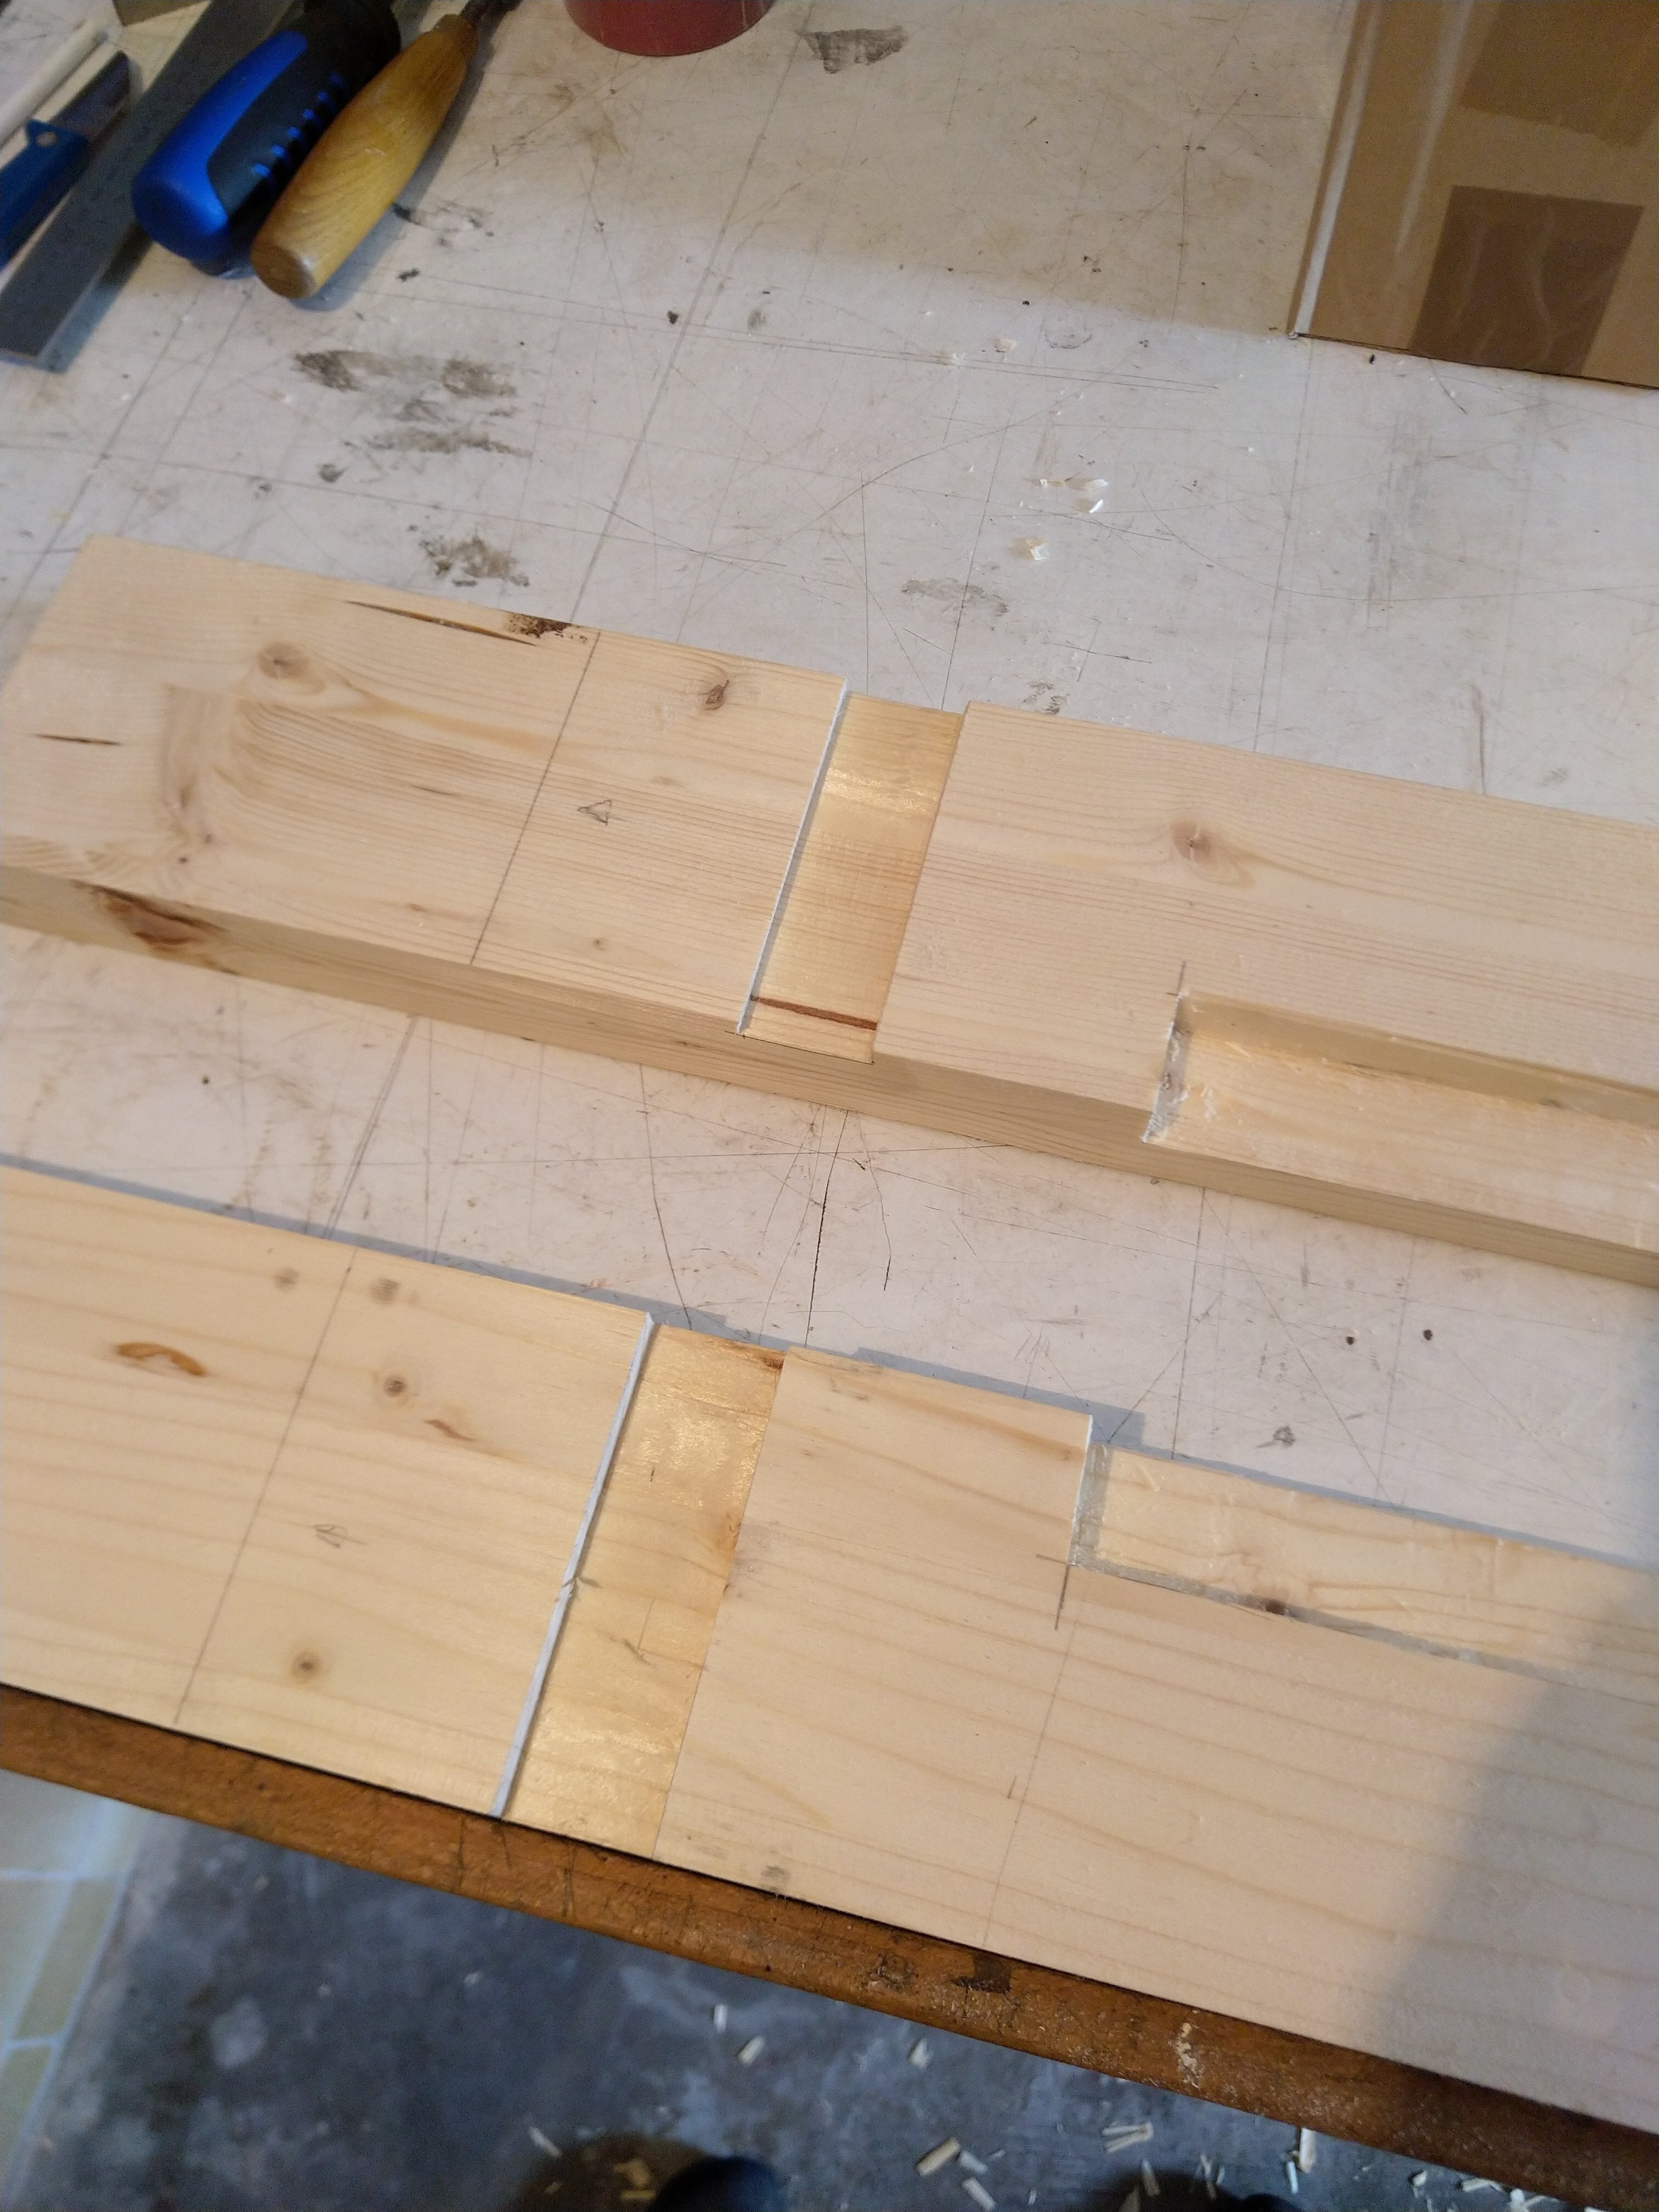
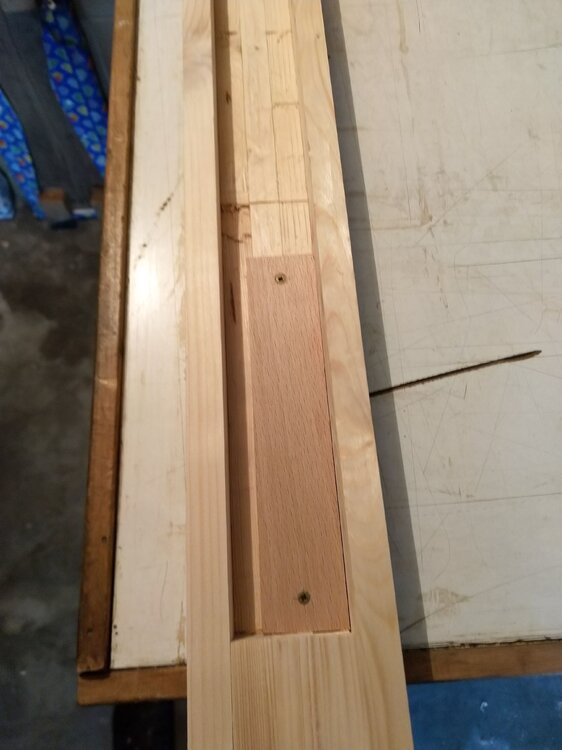
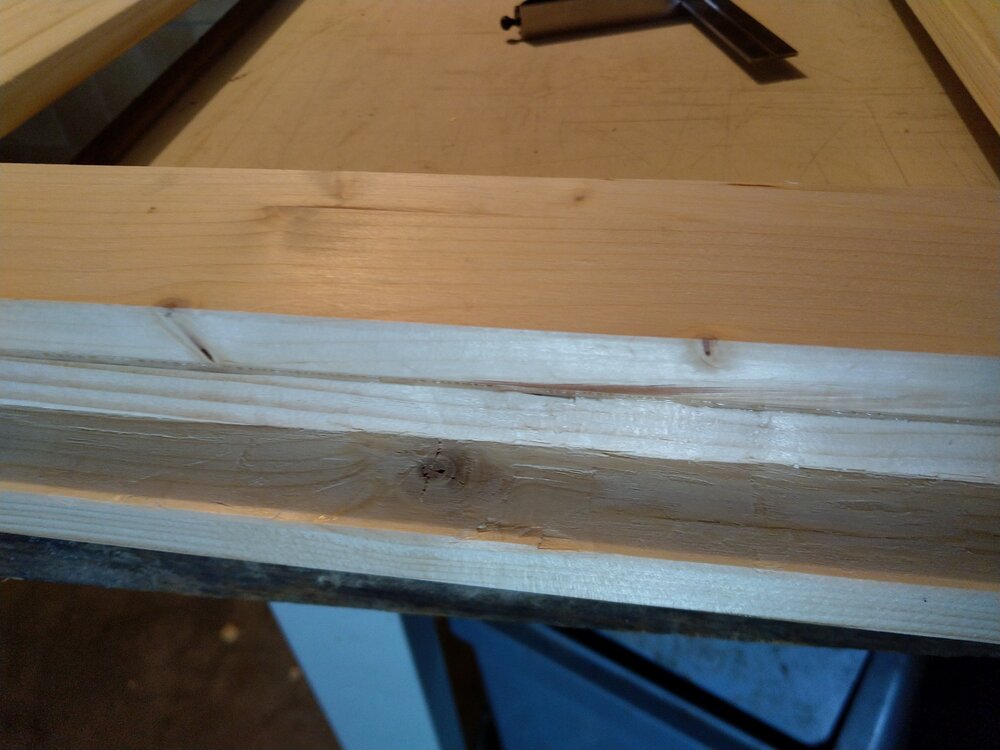
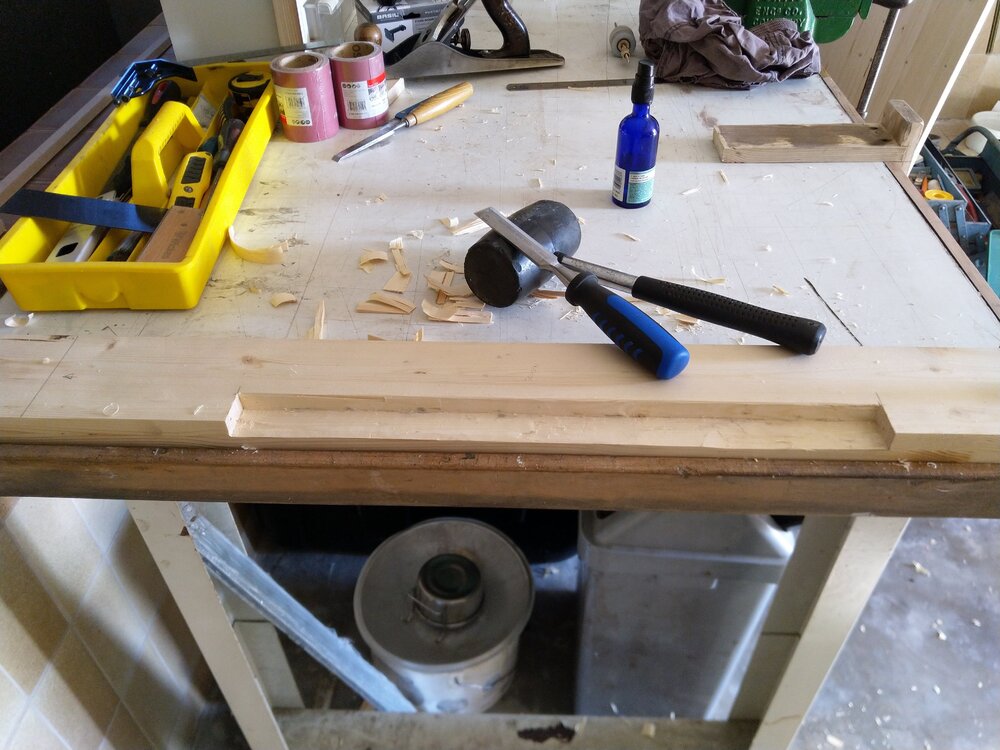
A quick mock up before gluing to see whether the screw will fit the hole it's going to go through. Finding out that the hole isn't big enough after it's glued up would be a pain. Gluing the runners in, doing my best to get them square. They aren't perfect, but close enough, they moved on the glue, so I need to practice that. I sort of forgot that the screw goes through a dirty great nut which is fixed inside the leg. So a little notch has to be cut to make it fit. That's housing dado no 4...


-
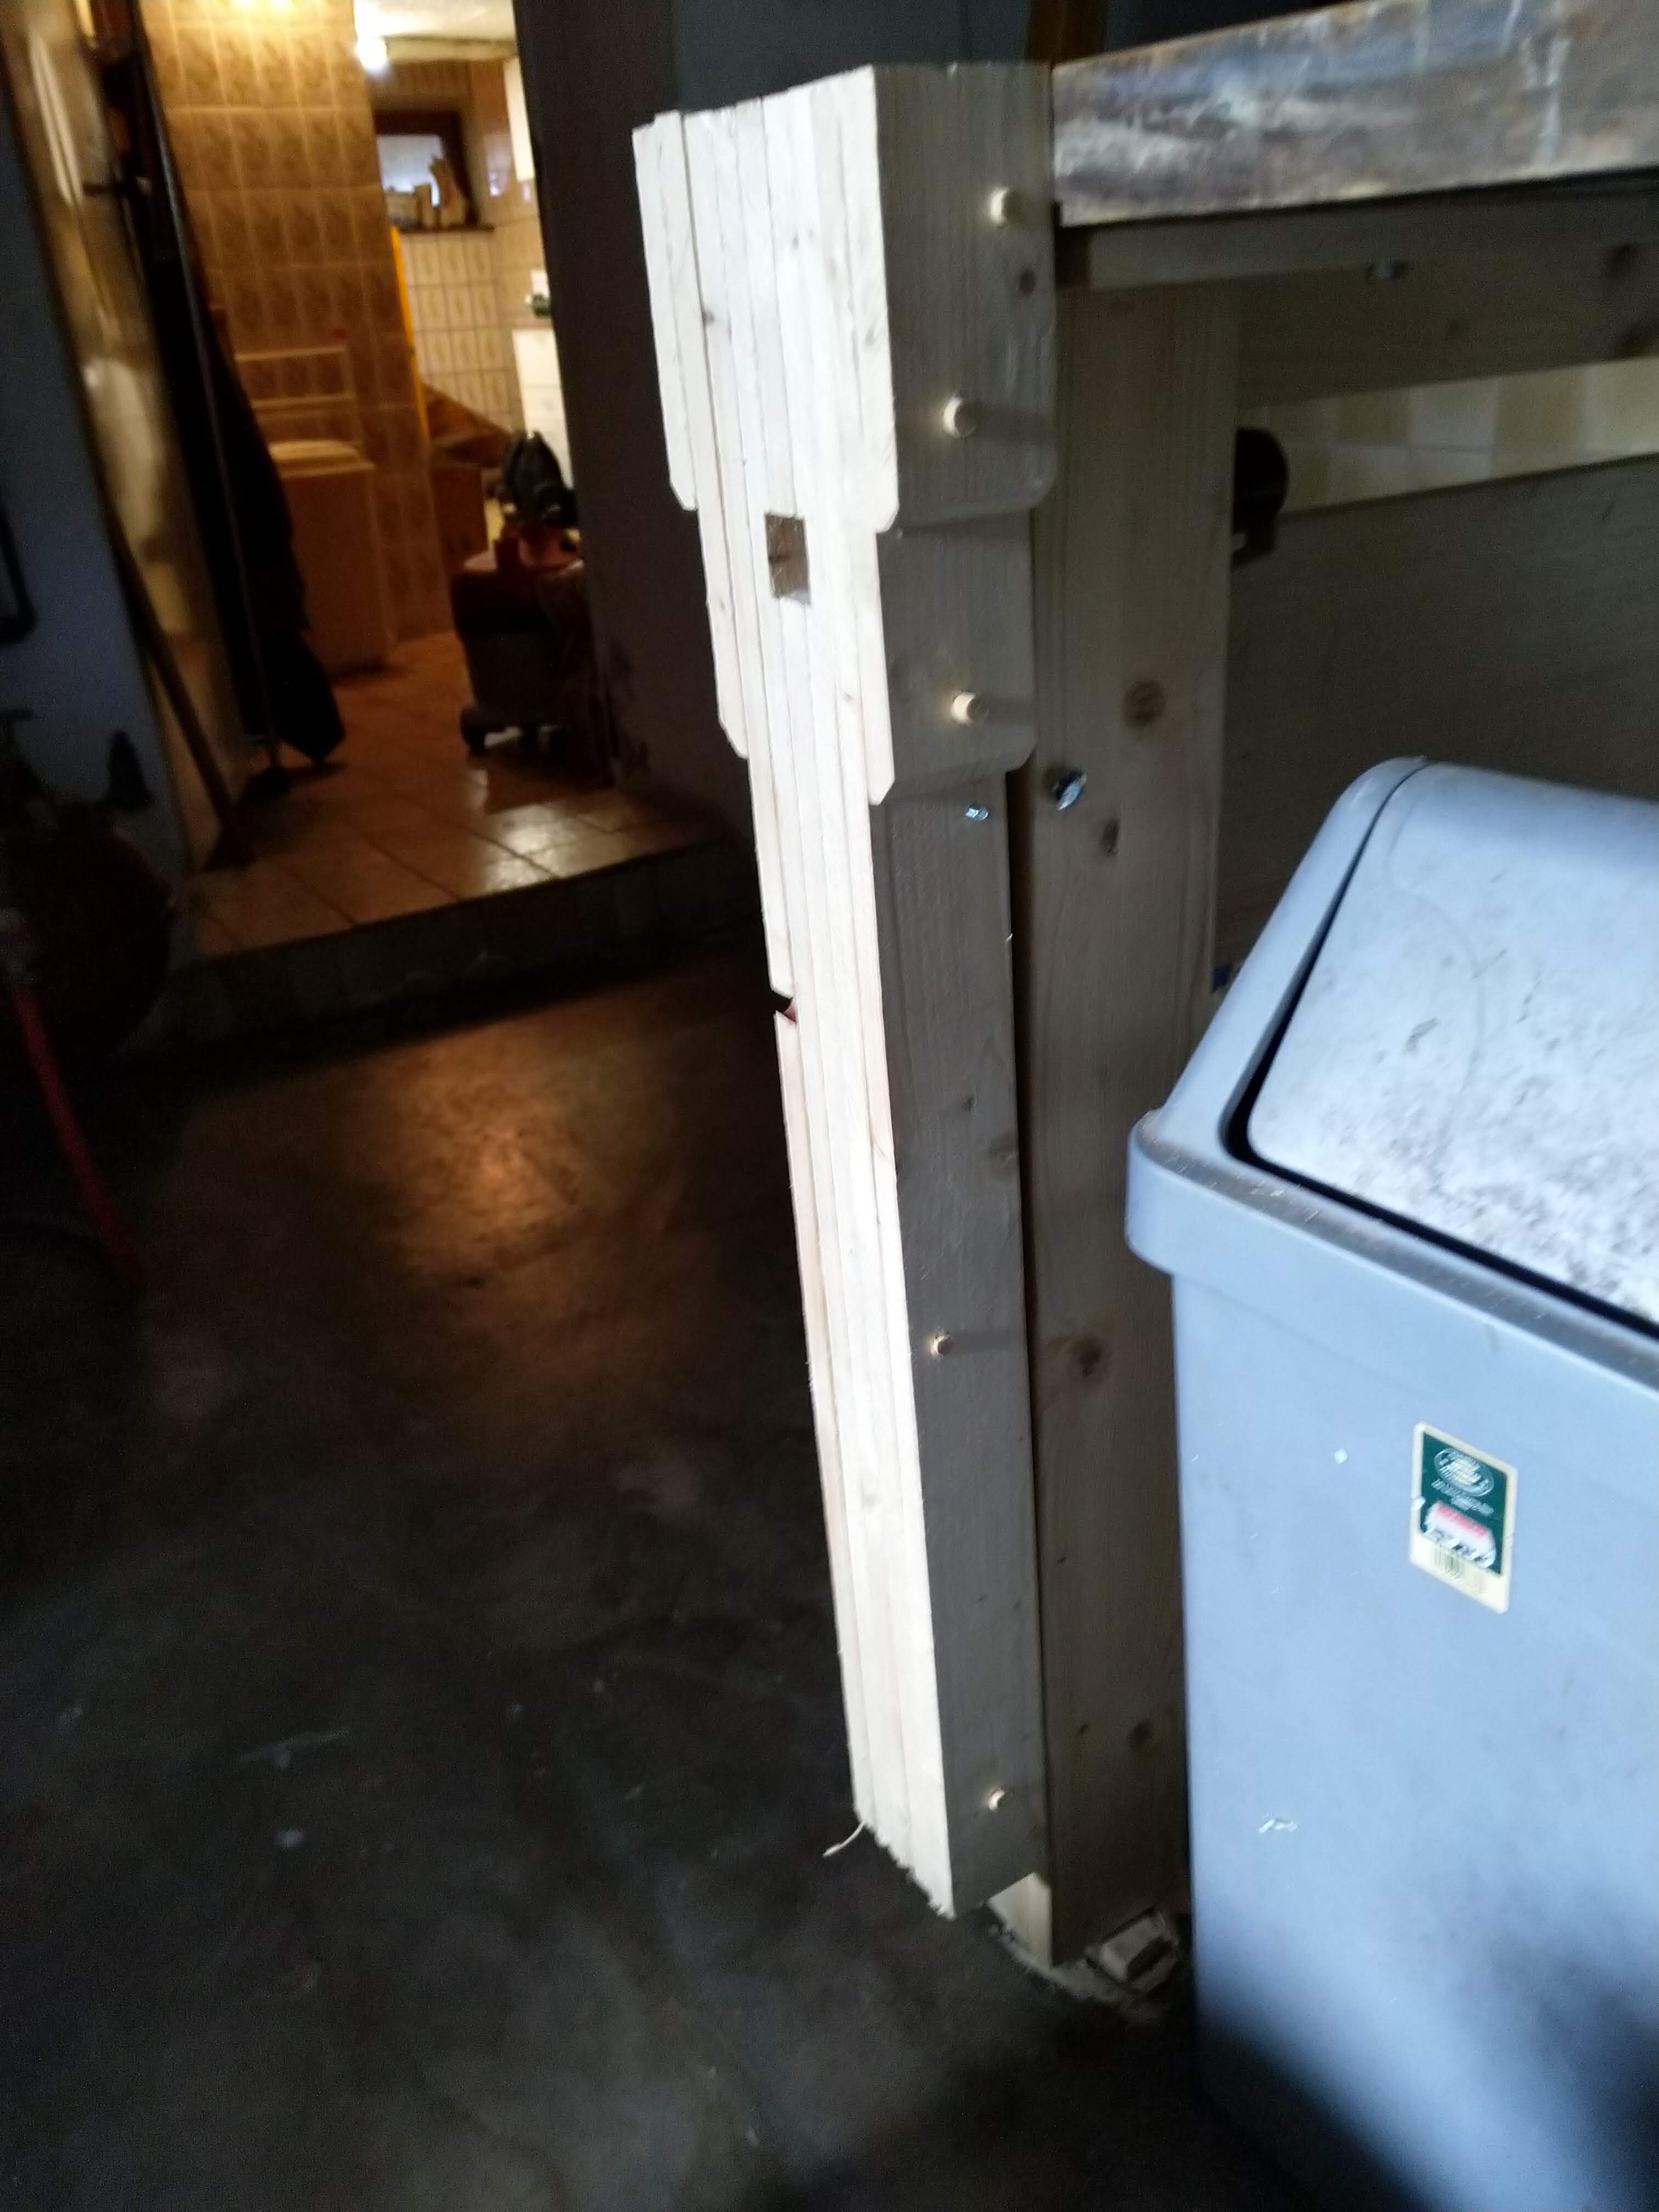
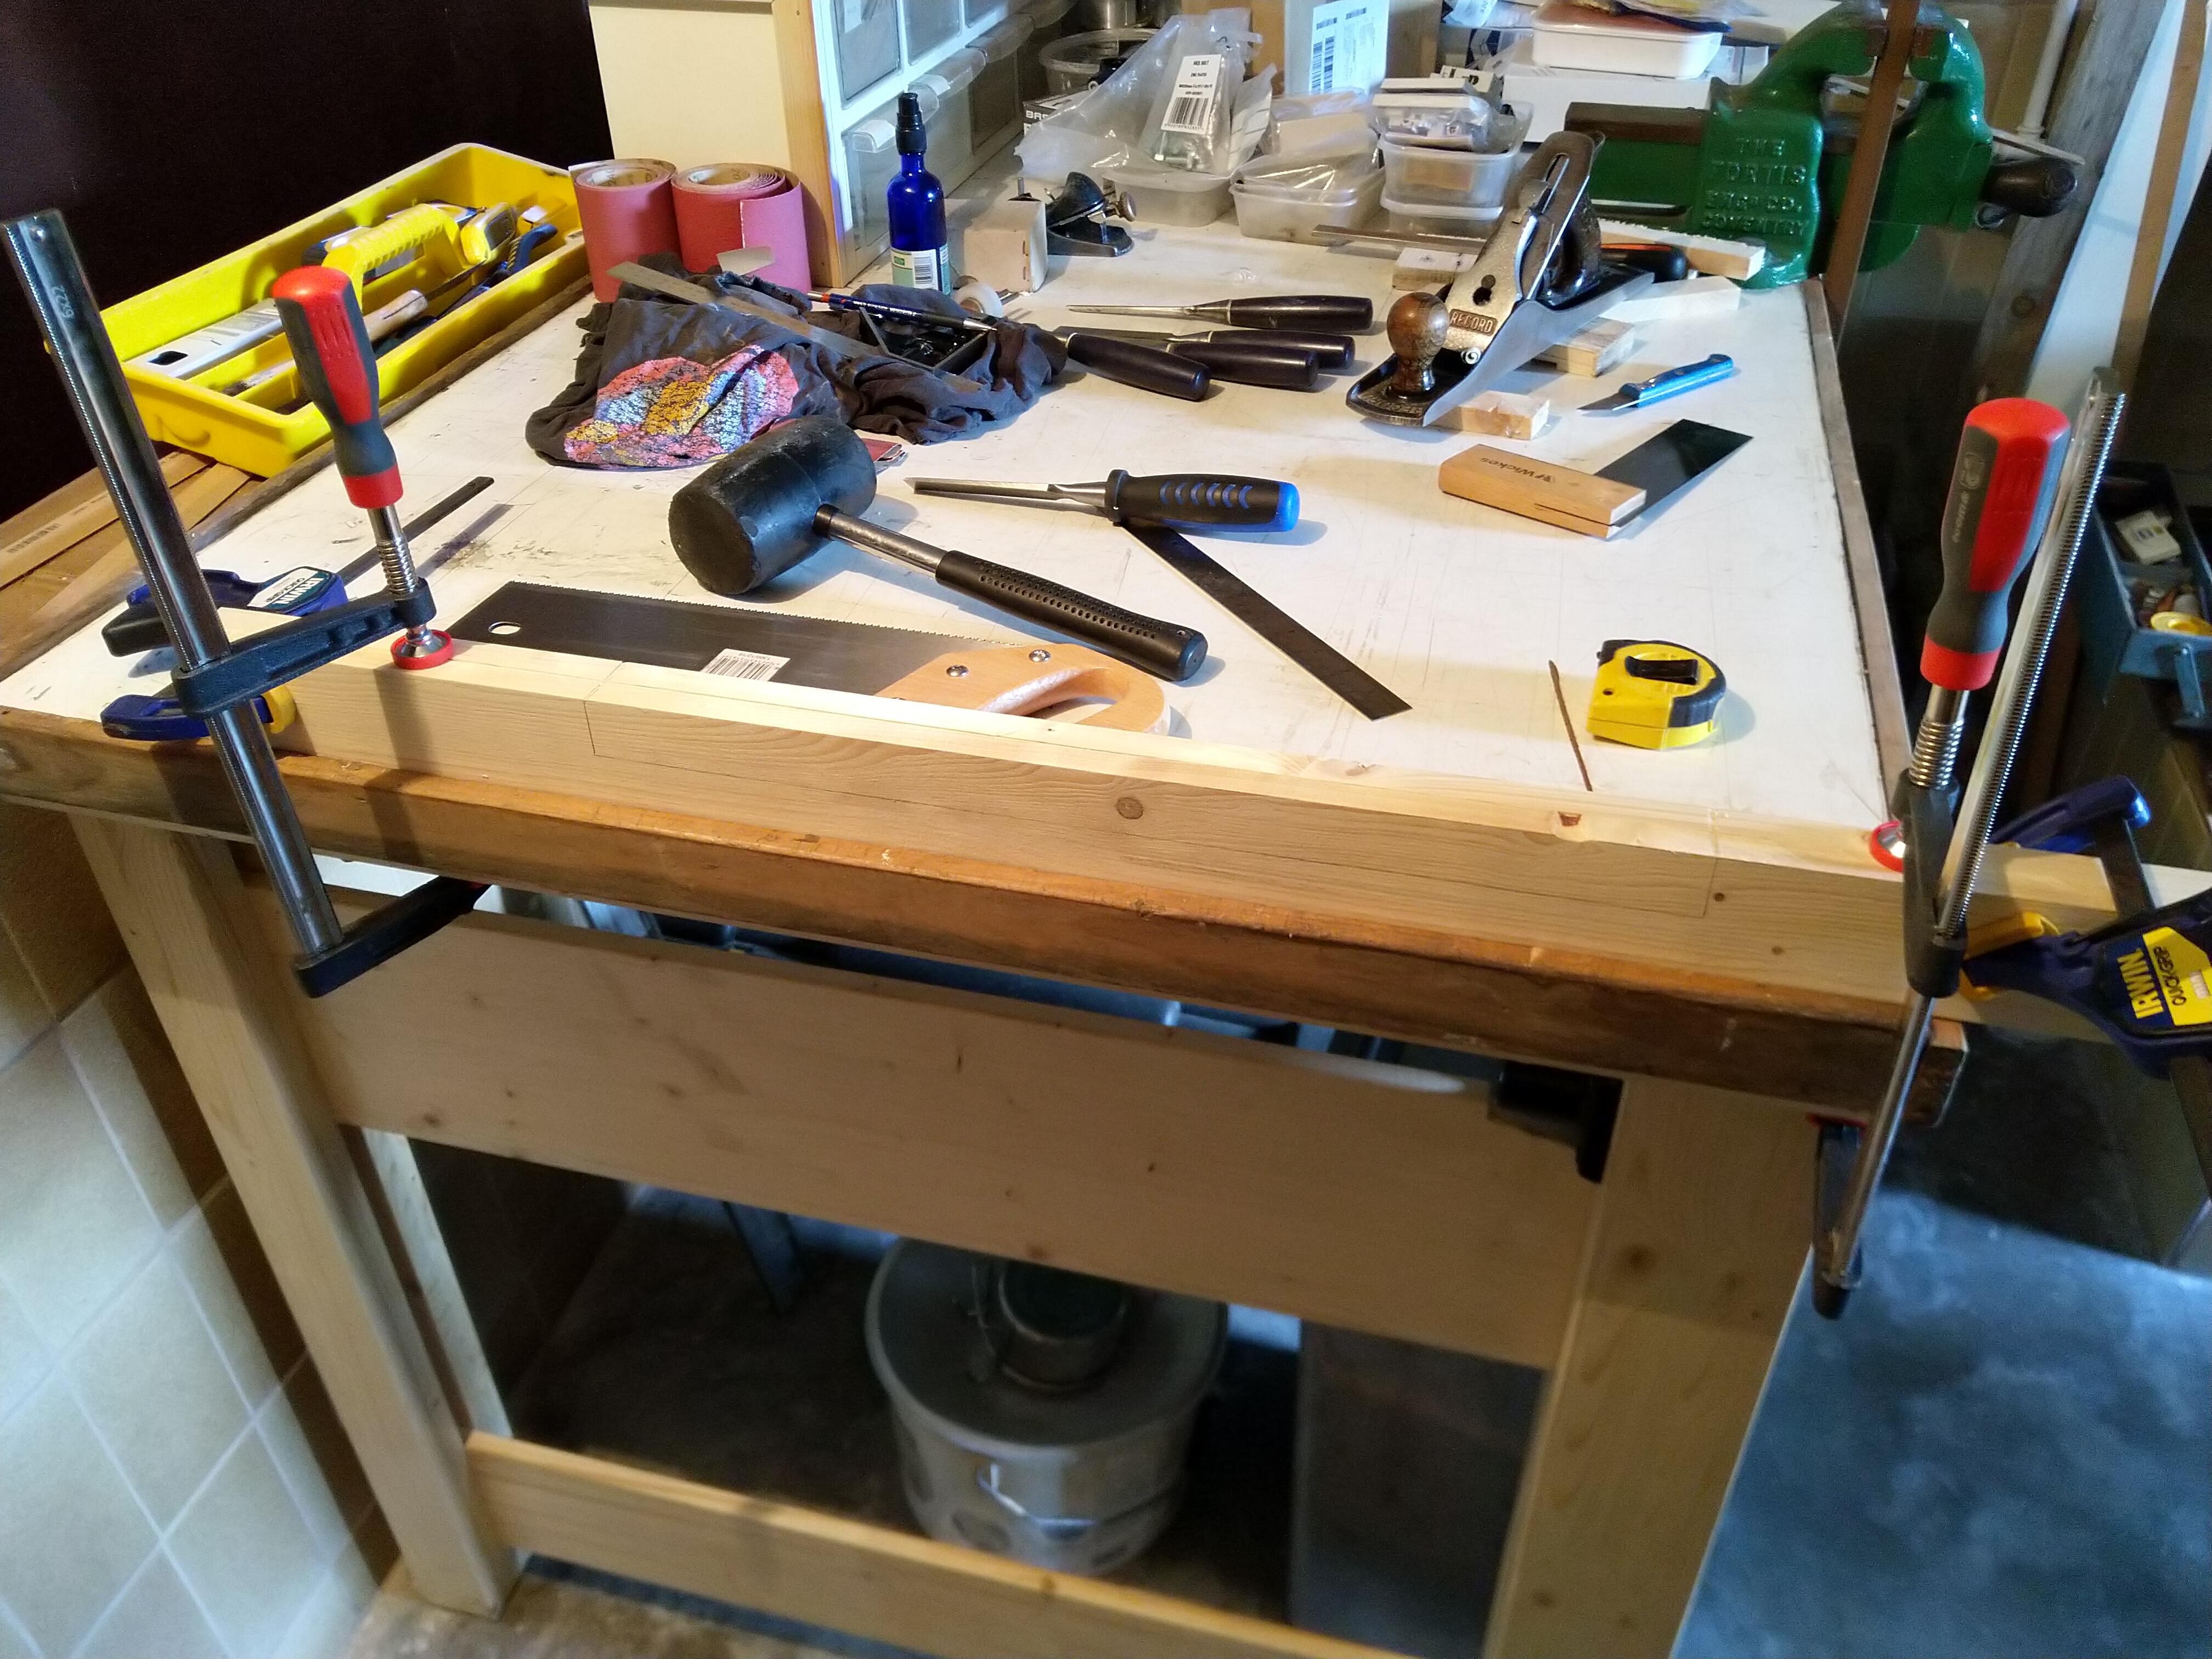
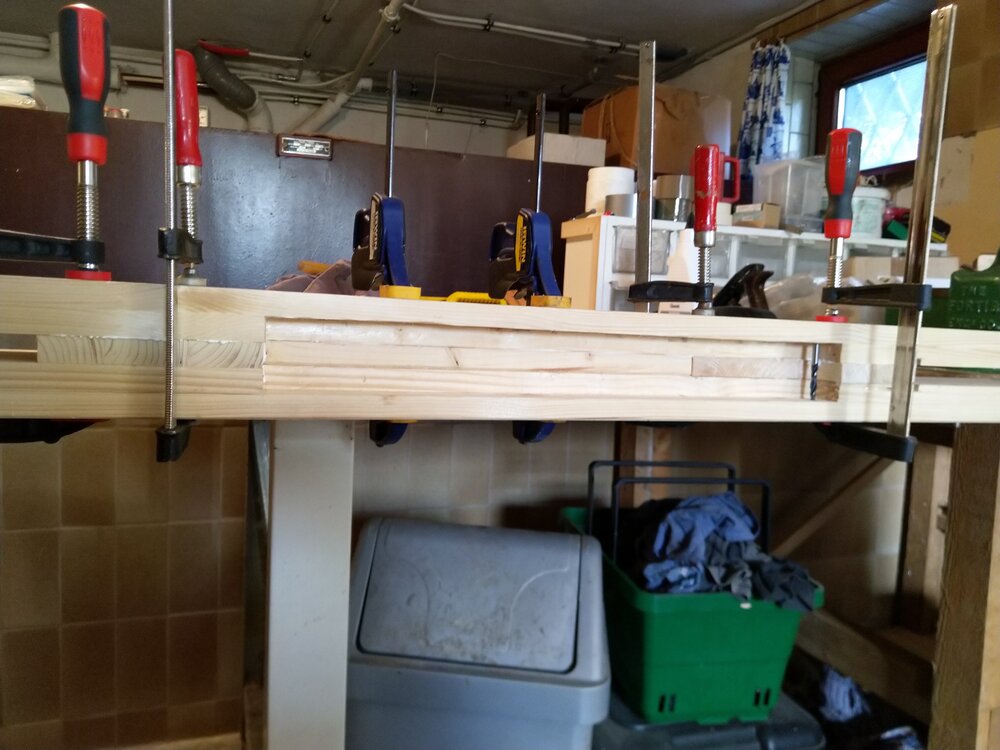
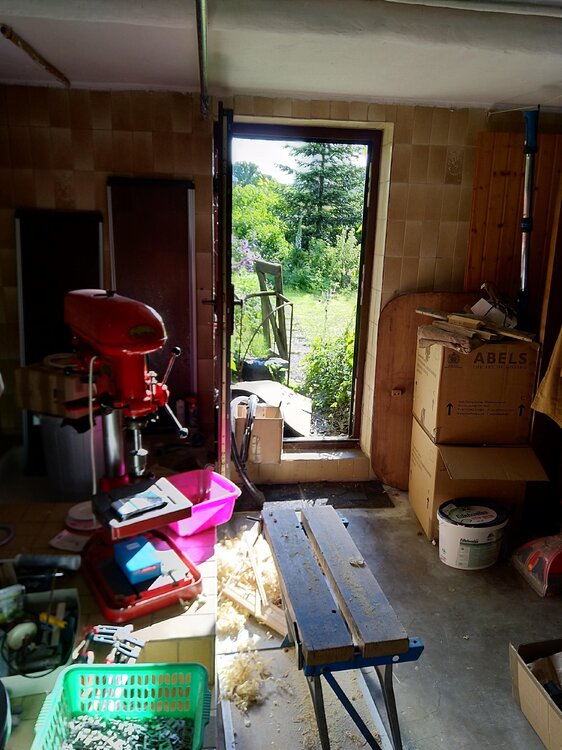
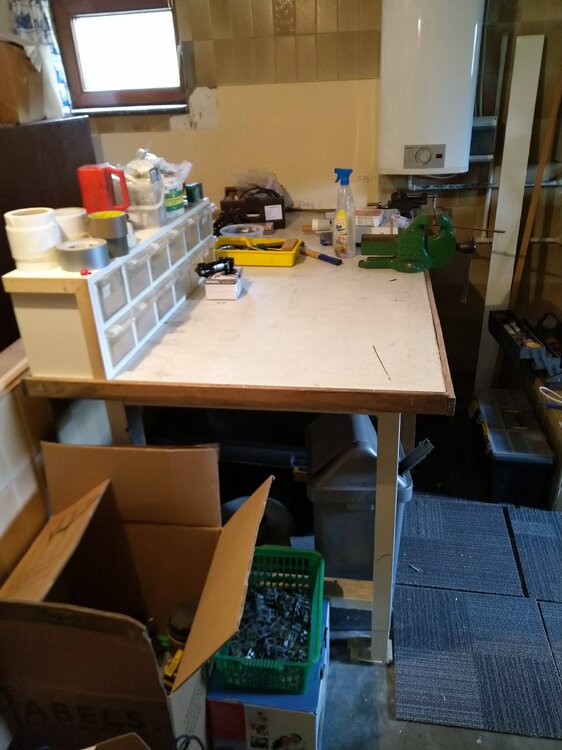
Back from lunch over the road with the in-laws. Buy the lead screw and handle that makes the whole thing work. I changed tactics on the mortise and it went much better. I'm still annoyed by the waterstone though. Gratuitous shot of the view from the bench incidentally showing off just how disorganised the "workshop" is! The mortise corners are finished. A benefit of making the leg this way is that I don't need to drill a 30mm hole through the leg for the scew, I can cut a little housing dado and then leave a gap in the middle laminate Detail of the housing dado. These are something like no 4 and 5 out of all the ones I've made in my entire life. You can tell which one was no 5. The dark mark is a knot, not a hole.


-
Start to cut the corner out for the mortise. Get nowhere fast, very frustrated and start whacking the behooses out of it. So much so that the sharpening stone vibrates off the bench and... Give up for the day and drink tea.

-
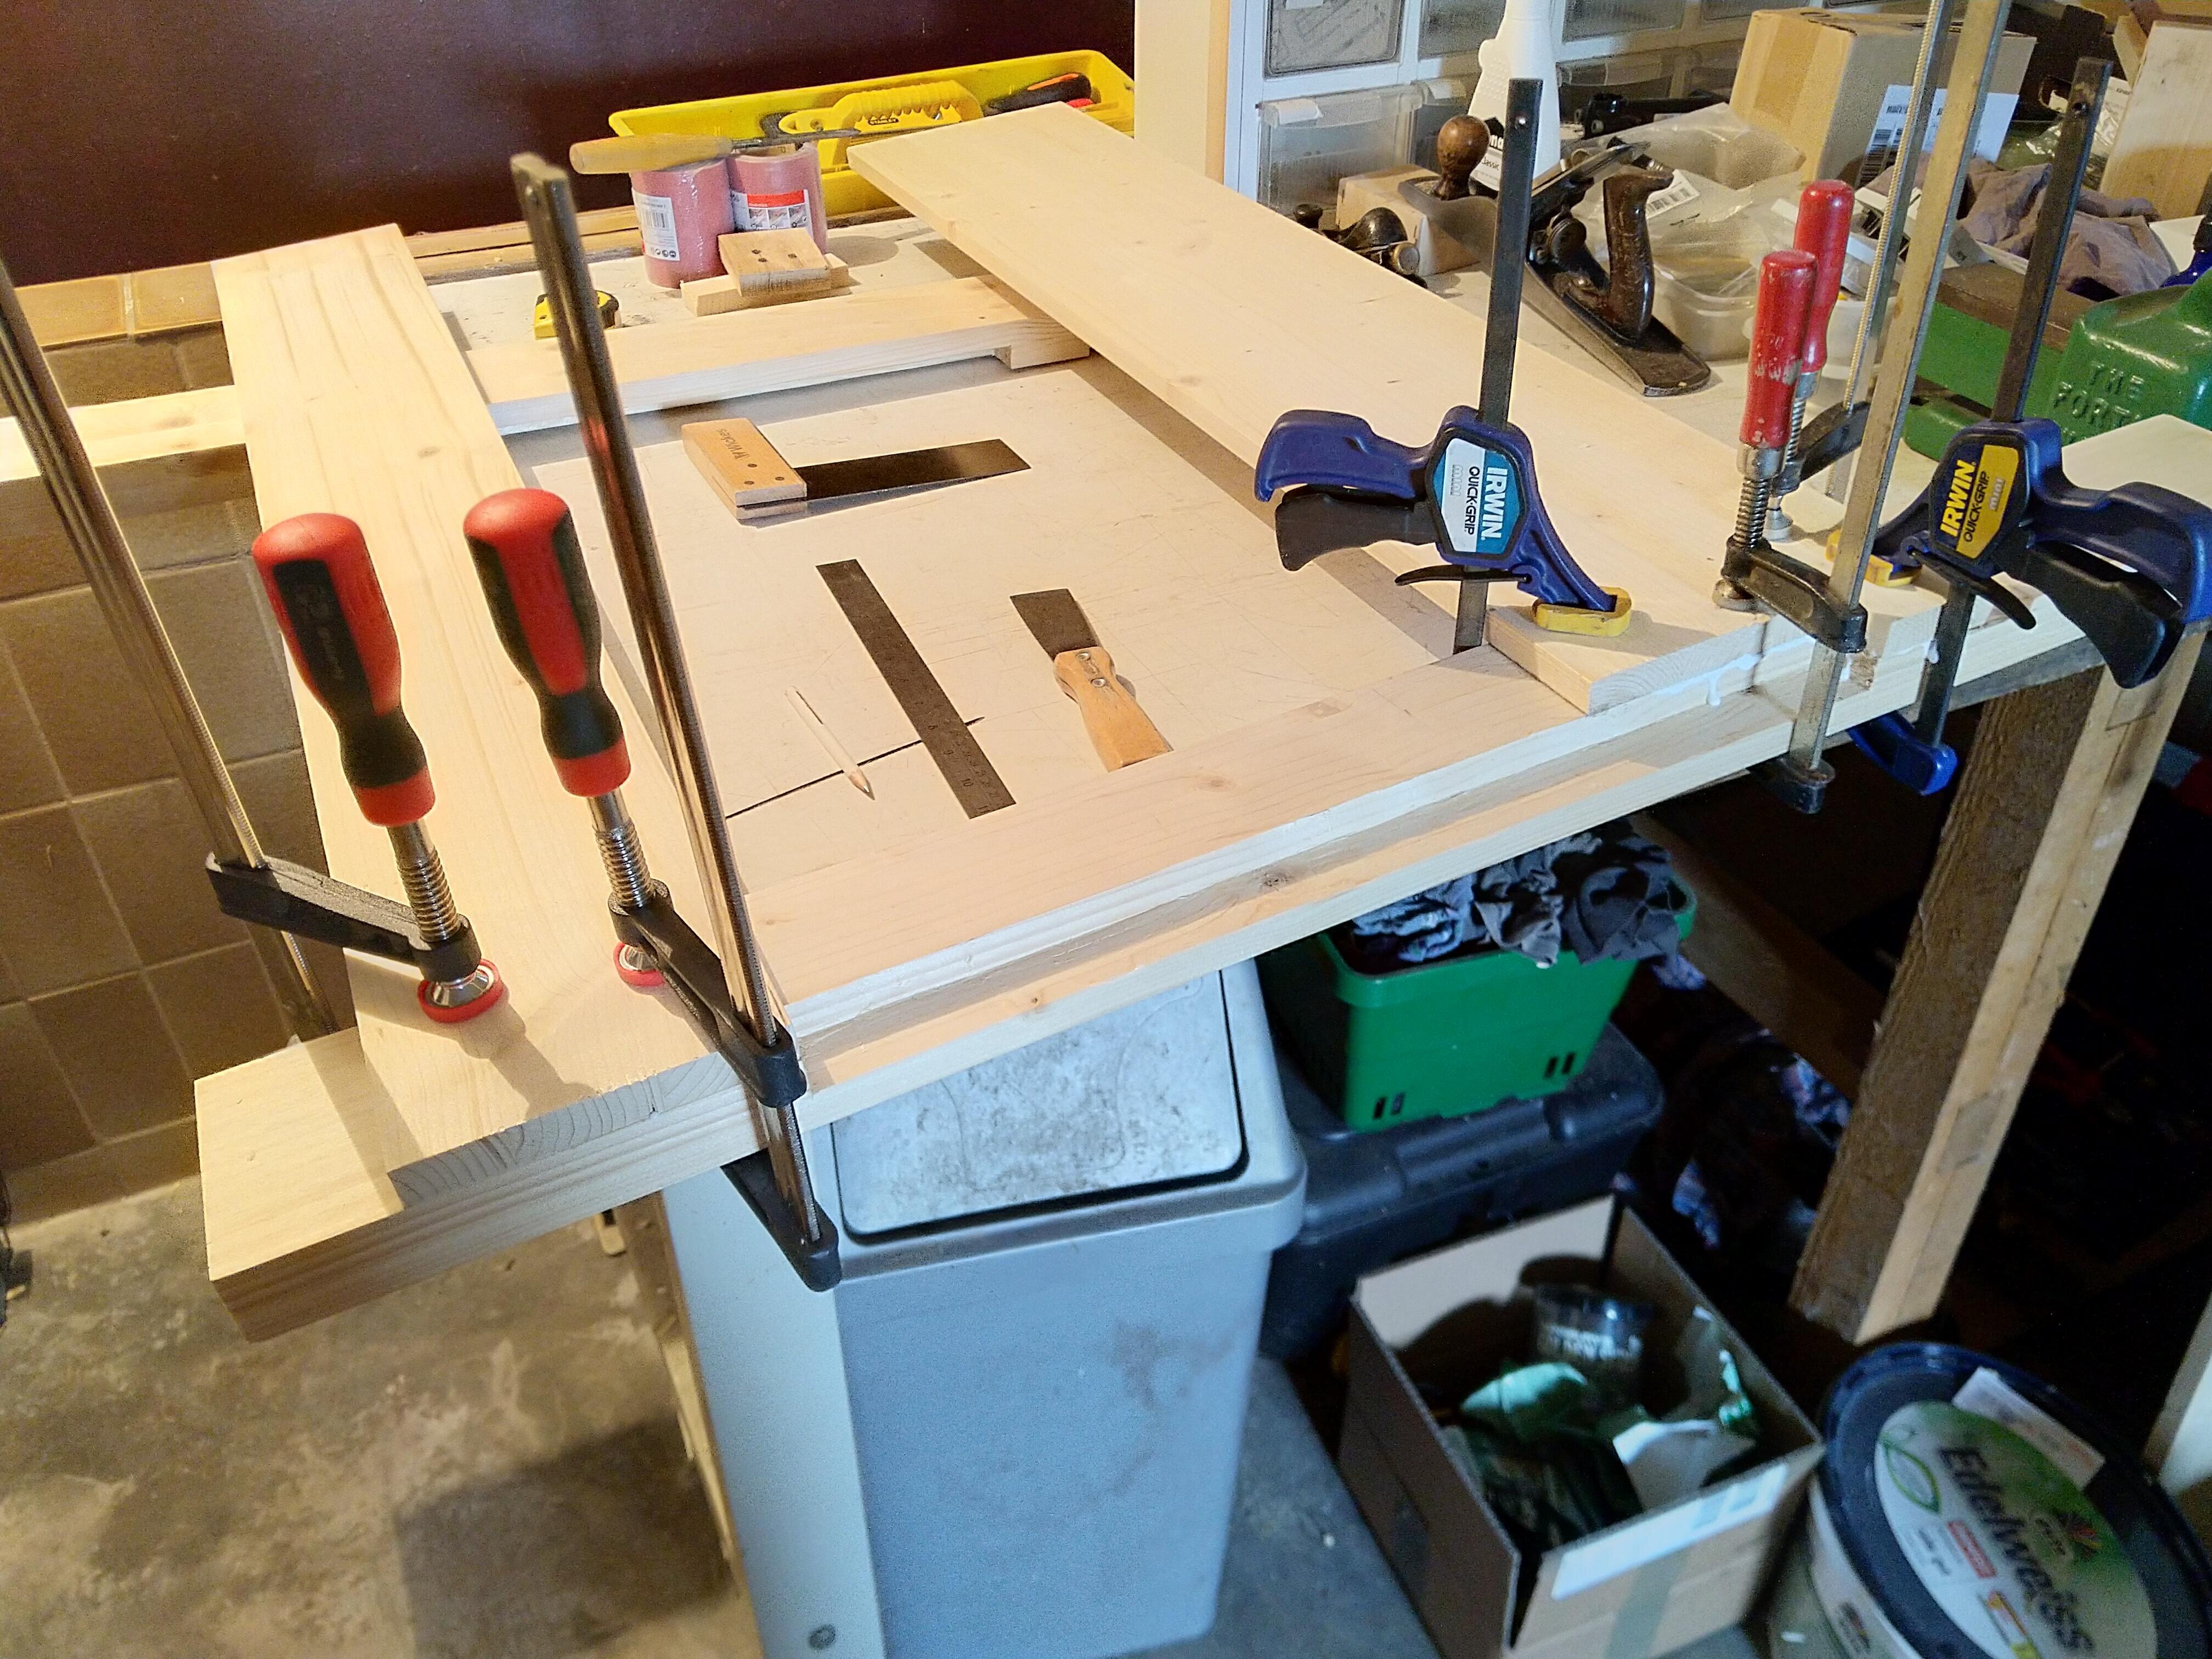
Pictures! I also subscribe to Paul Sellers, he made a traditional woodworkers bench out of plywood, so did Neil Pask as it happens. Paul did the joinery in the legs by laminating the legs up and leaving gaps where the runners went. I thought that looks reasonable and means that I don't have to learn to do mortise and tenon joints yet. BTW, my tool kit for this build is: Record no 5 and Stanley no 60 planes. No brand DIY shoppe 20mm chisel, hardpoint saw, tenon saw. Rubber mallet Starrett Combination square (my luxury big ticket item) Steel rule, marking knife and 0.5mm mechanical pencil Buy some 18mm pine blockboard. If you go to Toom they won't cut it any narrower than 100mm, so if you want it 70mm you've got to do it yourself. Cut and glue 4x 70mm into two chunks for the body of the legs. Plane them up when dry, stand back and admire. Buy some more 18mm blockboard. If you go to Hagebau, they will cut 60mm widths. Curses. These are 100mm for the front leg. I decided to make the front a bit chunkier. Glue up 4x 100mm bits to make the two parts of the front leg. Plane up and admire. Curse fluently in as many languases as you know when you realise you've made a mistake. The scissor mechanism runs in a blind mortise on the front of the leg. I meant to cut this out before I glued it up. Twerp. Cut as much of the end of the mortise as you can, 30mm down and halfway through the block.


-
Had to hang the washing out. Where was I? So, Neil Pask built a bench with a leg vice, and then he went back and added a thing which looked like a pair of scissors to it. WTF? thought I. So I had a little play on Google. The cross thing is so that you don't have the traditional peg board at the bottom for a) stopping the chop spinning round and b) keeping it parallel to the bench face. That sounds interesting and saves bending down to reset the peg, why not do that? More Google followed, it's traditionally called a St.Peter's cross, but St. P was crucified upside down, St. Andrew was done on an X. This caused some hilarity on BC, but we got there in the end. Benchcrafted make and sell leg vice scissor mechanisms, they're very nice bits of casting, but by Crom they're expensive. https://www.classichandtools.com/acatalog/BenchCrafted-Crisscross-Retro-BC-CCR.html#SID=1821 Another way of doing it is using the sliding peg board thing at the bottom but with a length of bicycle chain as a mechanism. http://ancorayachtservice.com/?page_id=196 So, on with planning. This was all designed literally on the back of an envelope.
-
So do I. Haven't you already read this unhinged mess on BC?
-
The original plan, and this bit of info has been lost from BC due to me asking for it to be deleted, was to mount an under bench Record type vice on the corner of the short edge where it meets the long. Obviously the square section metal leg needs to go if I'm going to do that. Cutting a hole in it to get the vice frame in weakens it significantly. The idea for it to go on the end was that when planing I didn't want to crack my funny bone on the engineers vice, that I can imagine would smart somewhat. That placement however does restrict the sensible length of timber that you can mount and, seeng that I'm right handed, would make any work going the other way tricky as I'd have to work across my body. The vice placement was move to the front edge on the corner. Experiments with scrap show that there's enough space not to have an elbow/vice collision. Of course, the leg is still metal, and still needs a hole in it. I'm no longer living in Dear Old Blighty, ZeTchermans don't do Record type vices, so the only way to get one is new from the UK, probably really nasty cheap castings these days made of cheese or from eBay. Any idea how heavy these things are and how much it costs to post lumps of cast iron internationally? No, me neither unti I started looking. It basically doubles the cost of the vice if bought from the UK. Whilst looking at the internetz and one of my YT subscriptions, Pask Makes if anyone cares, I came across the idea of a leg vice. Mmmm, thinks I. I'm replacing the leg anyway, why not do that? then I'm not spending the money on new or second hand vice hardware, just a lead screw and a bit more wood. Game on.
-
This is going to be a rehash of what's on BC up until today, new posts will be made when new stuff happens Plus it fills up GC and keeps @ped happy... So, I have an old Red Bull GP workshop bench that my dad aquired (with permission and help!) from a skip behind the factory. Apparently, the new season had a new factory sponsor so they replaced all of the benches etc. The guy my dad knew who worked there got a beech blockboard bench from the "scrap" 1m x 2m x 70mm. The same size as mine, but mine isn't block board. It's melamine faced something. They couldn't find matching legs for it, so I replaced one of them with a pair of square frames joined to make a 1m cube. I have an old engineers vice fitted over the middle leg. So far so as it was. I now want to get into doing more woodwork, picture frames, little boxes, ultimately a door or two () so I need a woodworking vice.

-
Boobs?
-
I'm going to give that a go, hopefully it'll break me out of my major scale box. Though, I only use three strings for it anyway, 5,7 4,5,7 4,6 or 5,7,9 5,7,9 6 for example. Or about two pentatonic shapes, I used to know all of those but I've forgotten them.